Quantcast
Channel: Cook like Priya
Viewing all 285 articles
Browse latest View live

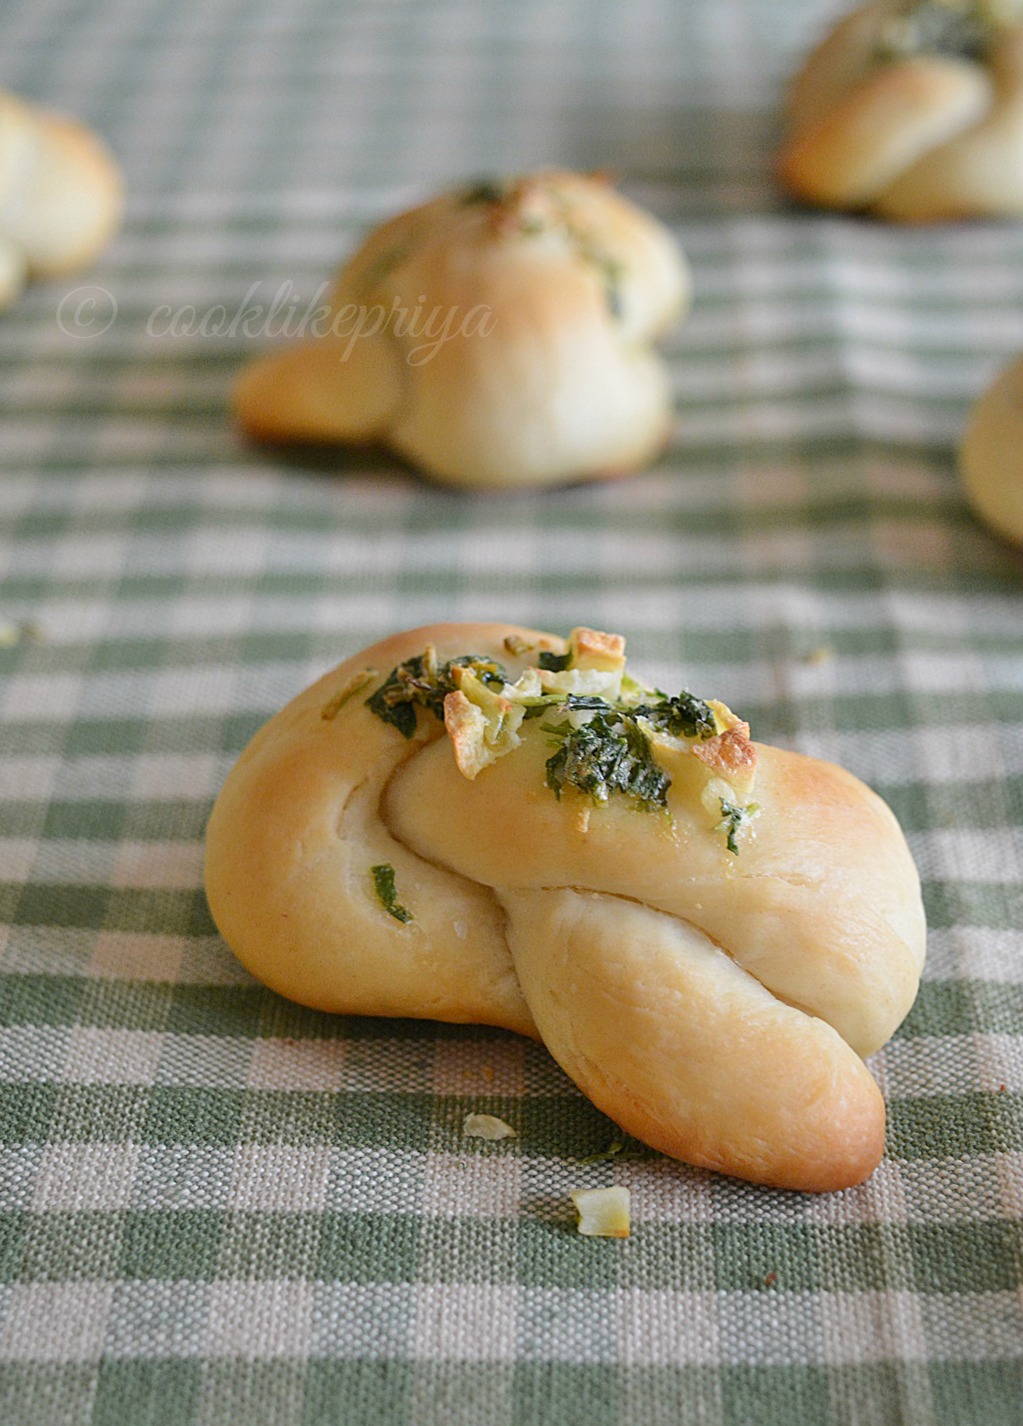
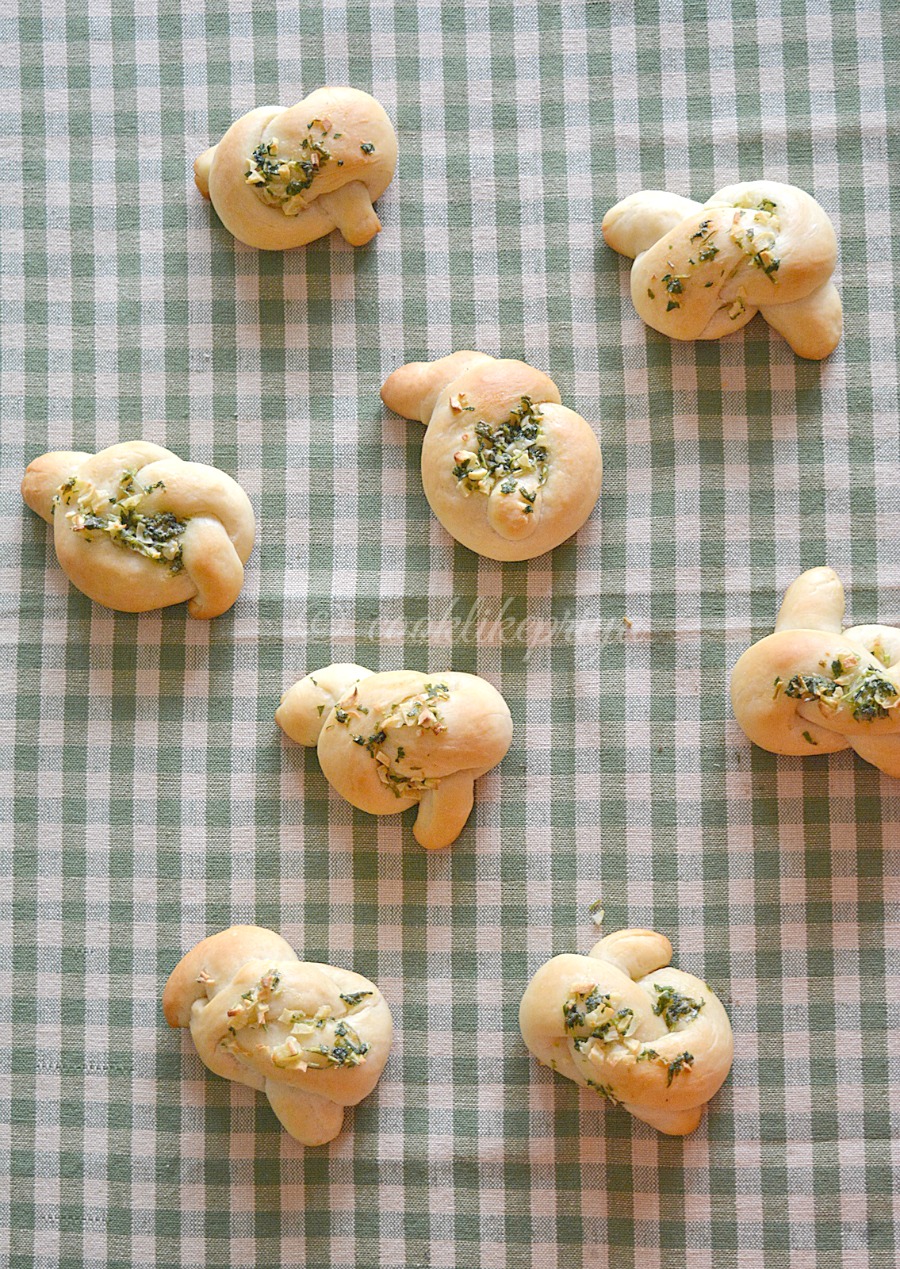
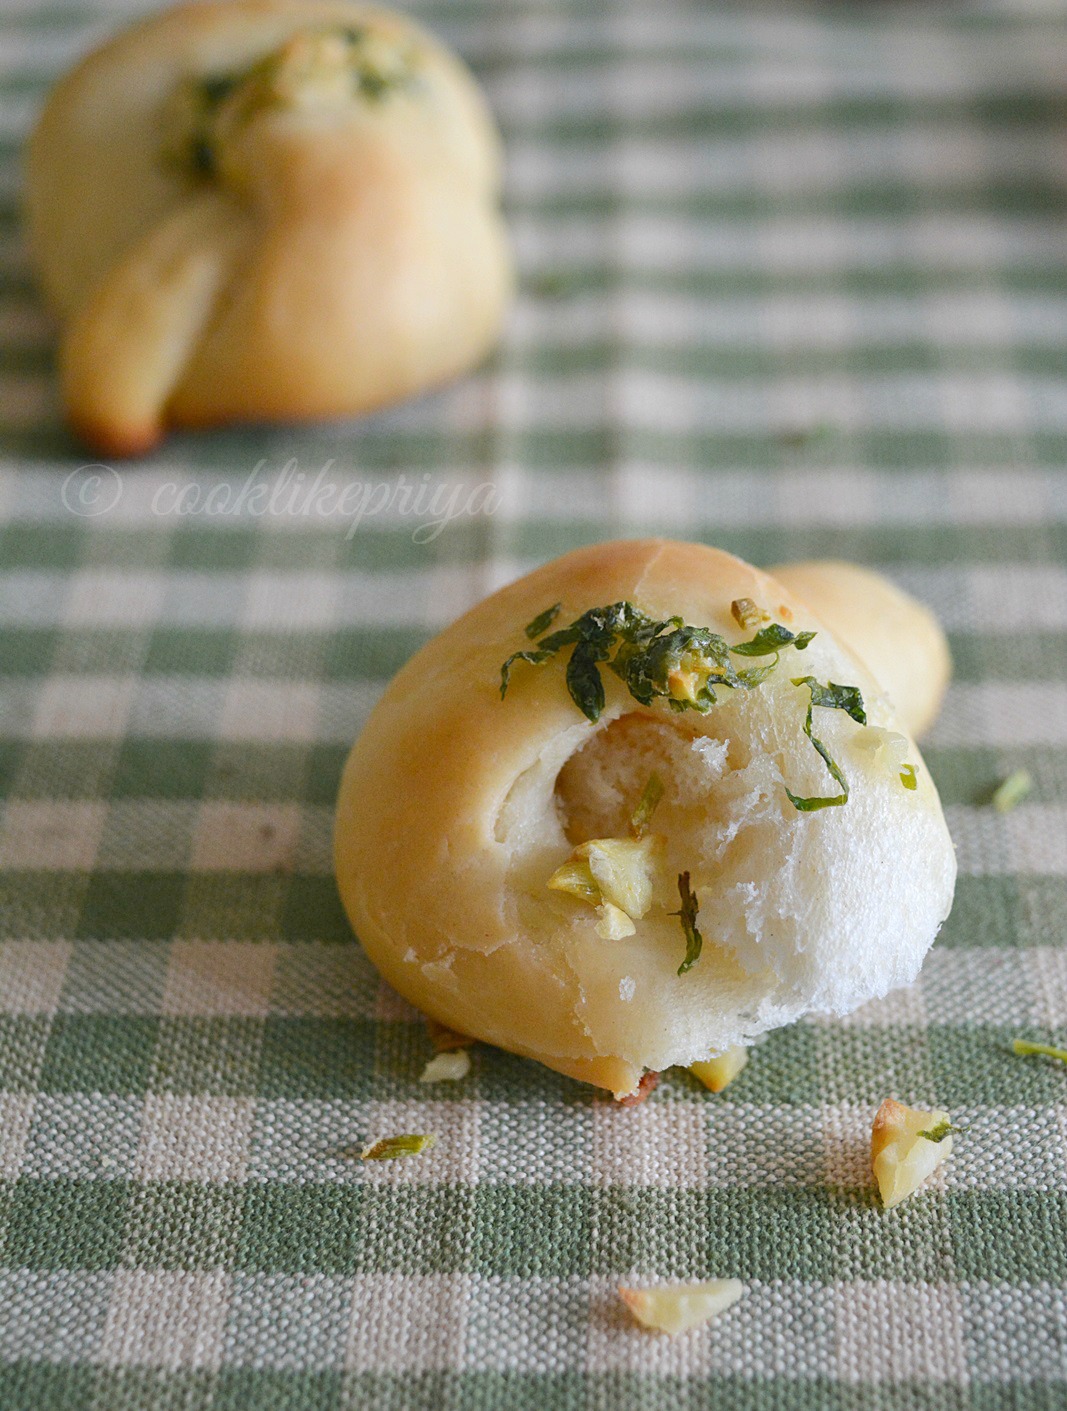
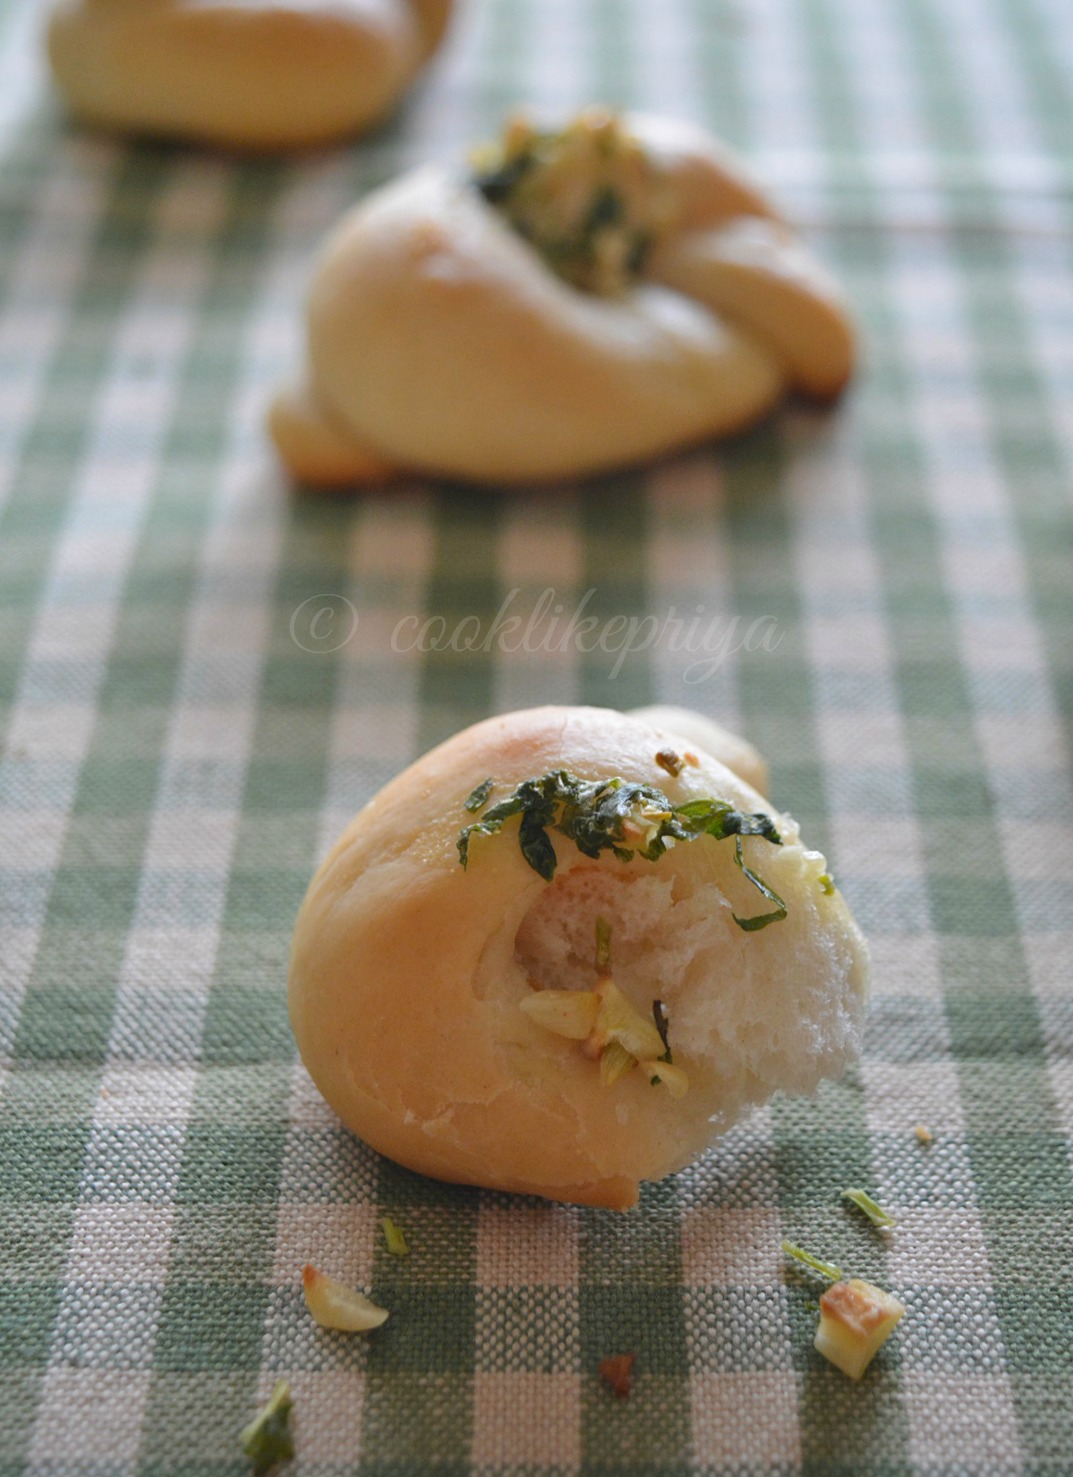
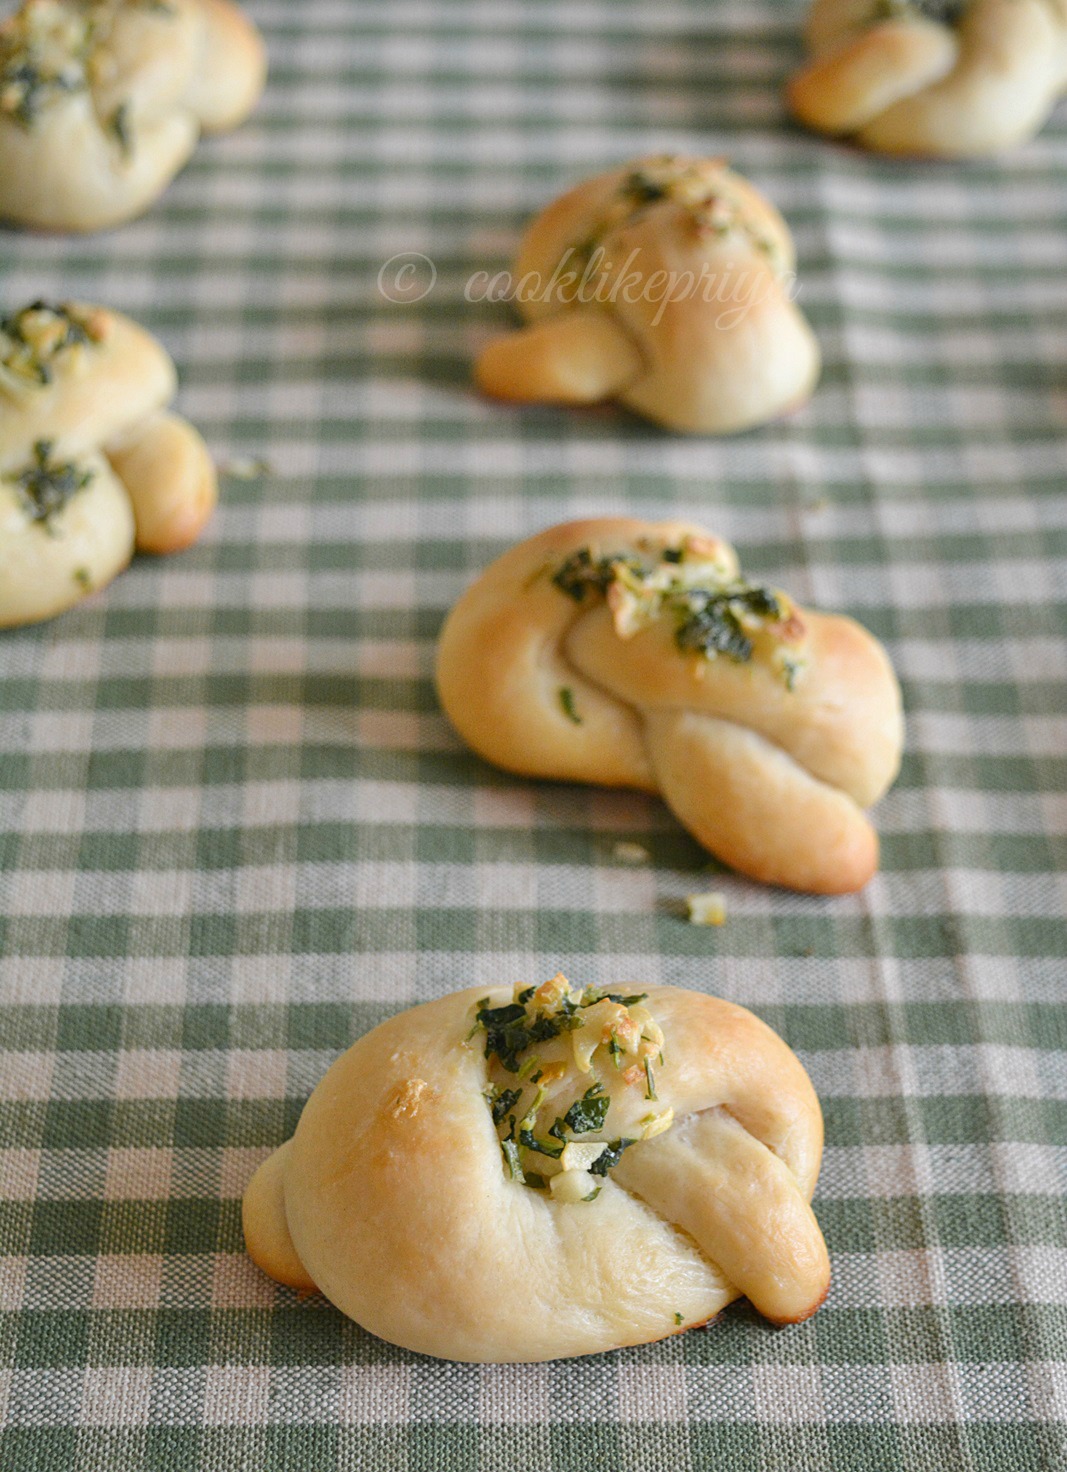
Easy Garlic Knots | Garlic Dinner Rolls | Eggless Bread Recipe

$
0
0
Garlic Knots Recipe
Garlic Knots Recipe 
Off late I have been baking a lot, call it stress, the cold weather or the blessing of a bigger oven, I am just loving the whole therapeutic effect of baking. I am actually loving the kneading part and i do everything with hand and there is a joy of making bread from scratch and using hands. Although I love to own one of those fancy KA ;-) but for now let me just rant my stuff with my hands and gluten dough. The other day when I posted a picture of these garlic knots on my facebook page I got a comment from someone says extra walking and extra calories, I mean being Indians we don't do bread daily but once in a while its ok. I get that it is calorie high but so are most Indian sweets, naans and don't forget those fried mixture that you sneek having with your coffee or those biscuits that are meant to be dunked with your coffee. Bring Indians we go love our gluten, carbs and our sweets don't we. So lets quit complaining have a piece of bread and go for your walk. Enough of my rant now and lets move on to the recipe.


Garlic Dinner Rolls
Garlic Dinner Rolls


Eggless Dinner Rolls Recipe


Garlic Dinner Rolls
Garlic Dinner Rolls
EASY GARLIC KNOTS | GARLIC BREAD | EGGLESS BREAD RECIPES

Recipe Source - adapted from here

Prep time - 10 mins, 1 hr for first rise & 30 mins for second rise
Bake time - 15 mins
Makes - 10-12 medium sized knots

Ingredients 


Warm water -3/4 cup

Fast active yeast - 2 tsp ( 1 satchet)
All purpose flour / maida - 1 and 3/4 cup
Salt - 1 tsp
Sugar  - 1 tsp
Olive oil - 1 tbsp 

Garlic Butter Coating


Garlic - 2 medium pods, chopped

Corriander & mint leaves - 2 tbsp finely chopped
Butter (unsalted) - 2- 3 tbsp


Method


1. In a mug add 3/4 cup water and microwave it for 10 seconds, entry the contents of the yeast sachet and sprinkle to the warm water along with the sugar, leave it for 5 minutes undisturbed.

2. After 5 mins you will find the mixture to me slightly foams mix well and set aside for 10 mins to foam up. 
3. In a large mixing bowl add in the flour, salt and olive oil, make a well in the center and add in the yeast mixture.
4. Combine the dough and mix well, drop into a floured work surface and knead the dough for a good 10-15 minutes using your hands until the dough is soft and pittable. 
5. Grease the mixing bowl with more olive oil and transfer the dough to the mixing bowl and drizzle more oil on top, cover with a cling film and leave it in a warm spot to double. 
6. I usually switch on the oven light & leave the dough to rise in the oven without the setting any temperature. But you can do it which ever method best suits you.
7. Once the dough doubles, transfer it to a work surface and knead for 5 minutes. Divide the dough into two parts and into 4-6 parts each and roll each part like a rope and tie a knot. 
8. Meanwhile prepare a baking tray by spraying some cooking spray and resting these knots on the tray give a good 2" space between the knots.
9. Once all the knots are done, spray some more cooking spray on them and cover with a damp cloth/ cling film and let them rest in a warm spot for the second rise.
10. Once they are risen, preheat the oven to 400F and remove the cling film and bake them for 12-15 minutes, removing them half way to pour the garlic butter mixture.
11. In a skillet add butter once it is melted add in the garlic and cook for 30 seconds add the chopped corriander and mint and switch off. 
12. Pour this over the half baked rolls and bake for 5 minutes. 
13. Once the rolls turn golden switch off the oven and remove the baking tray let it sit on a cooling rack for 10 minutes.

Serve warm and enjoy.
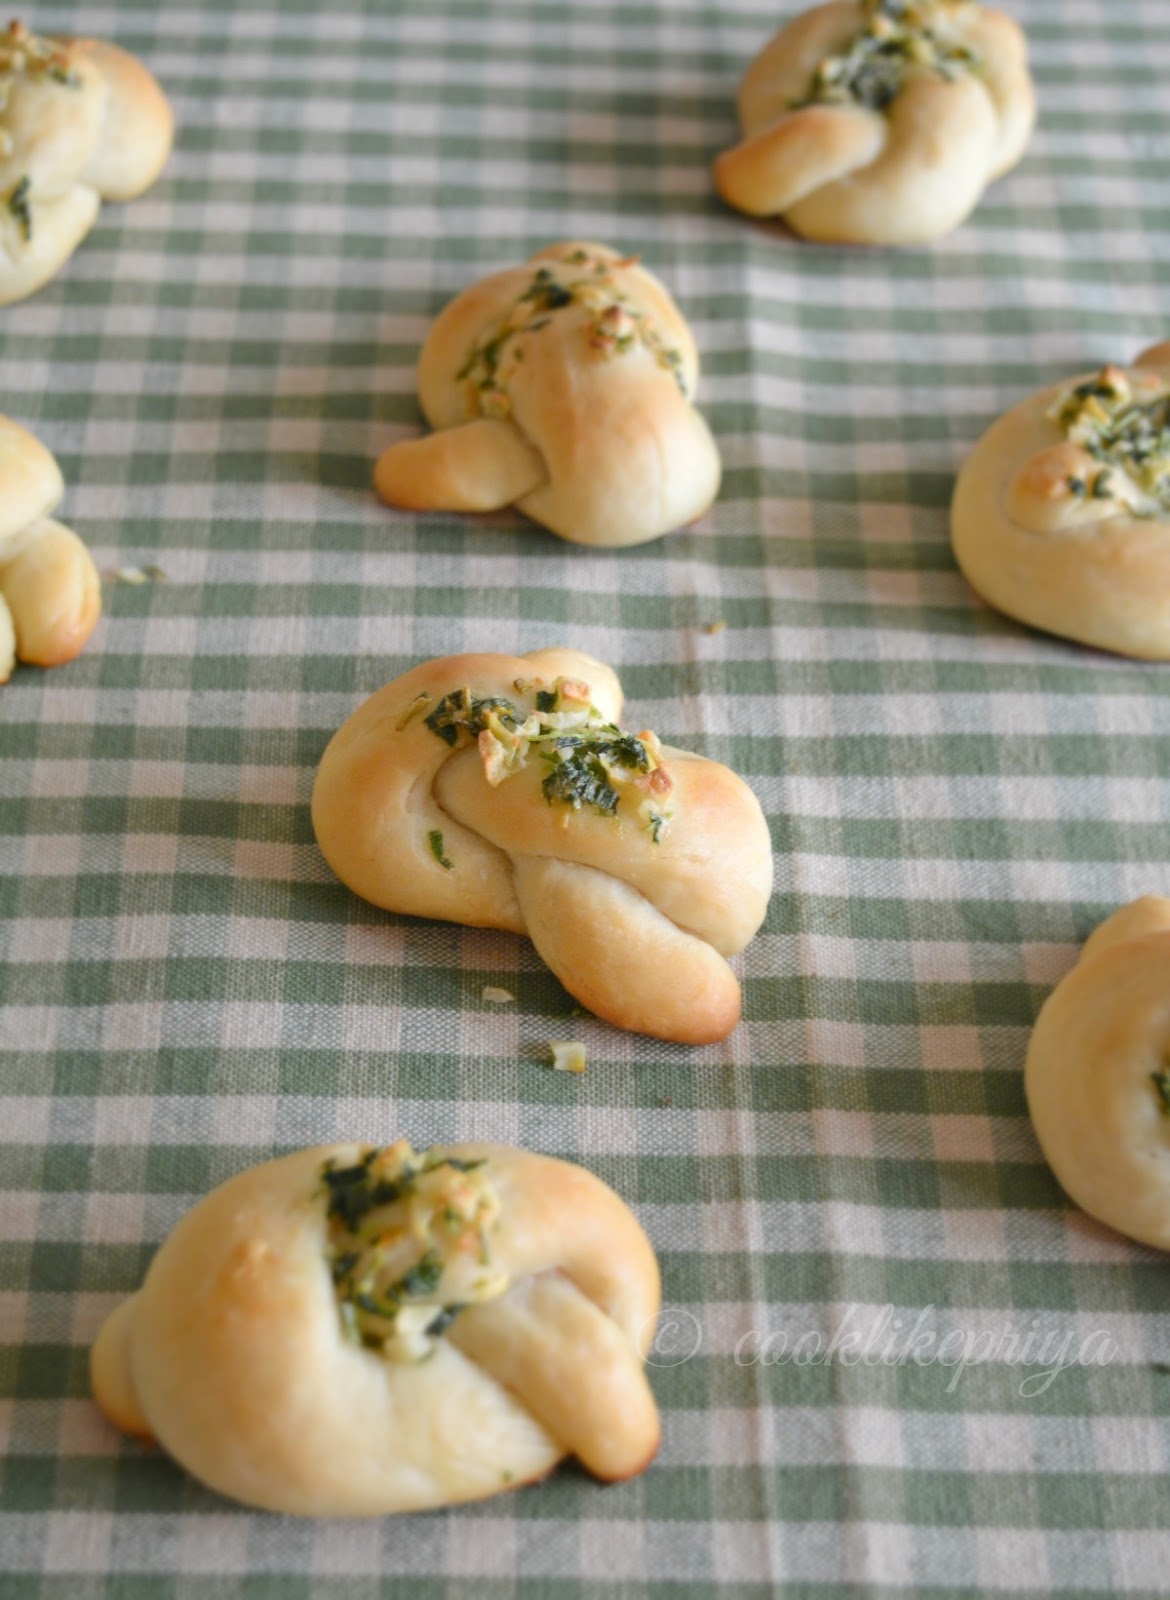


Eggless Bread Rolls Recipe


Garlic Dinner Rolls
Garlic Dinner Rolls


Eggless Garlic Knots Recipe
COOKS WISDOM

TIP 1


1. I used sugar while proofing the yeast a little change I made to the original recipe. Also I cooked the garlic in butter and added them mid way while the rolls cooked. The original recipe says to add butter garlic in the end after the rolls are baked.


TIP 2


2. To find warm spot to proof dough I usually turn the oven light on and leave the mixing bowl in the oven without the temperature until it doubles in volume. 


TIP 3


3. To proof yeast you need to warm water and sprinkle the yeast on the warm water make sure that it is not hot to tough but warm. You can test it but dipping your finger in the water and placing it on your wrist it must be warm and not burning.


TIP 4


4. I's prefer to slightly cook the garlic to avoid the raw taste. 


TIP 5


5. These garlic rolls can be stored in an air tight container on the counter top for upto 5 days, and can be warmed for 10 seconds in the microwave before serving or freeze them to be enjoyed later.


RELATED RECIPES

HOT CROSS BUNS
ZEBRA BREAD
BANANA DATE BREAD
FIG BREAD
CATERPILLAR WORM BREAD
CINNAMON ROLLS


Broccoli Masala Stir Fry | Broccoli Indian Recipe

$
0
0
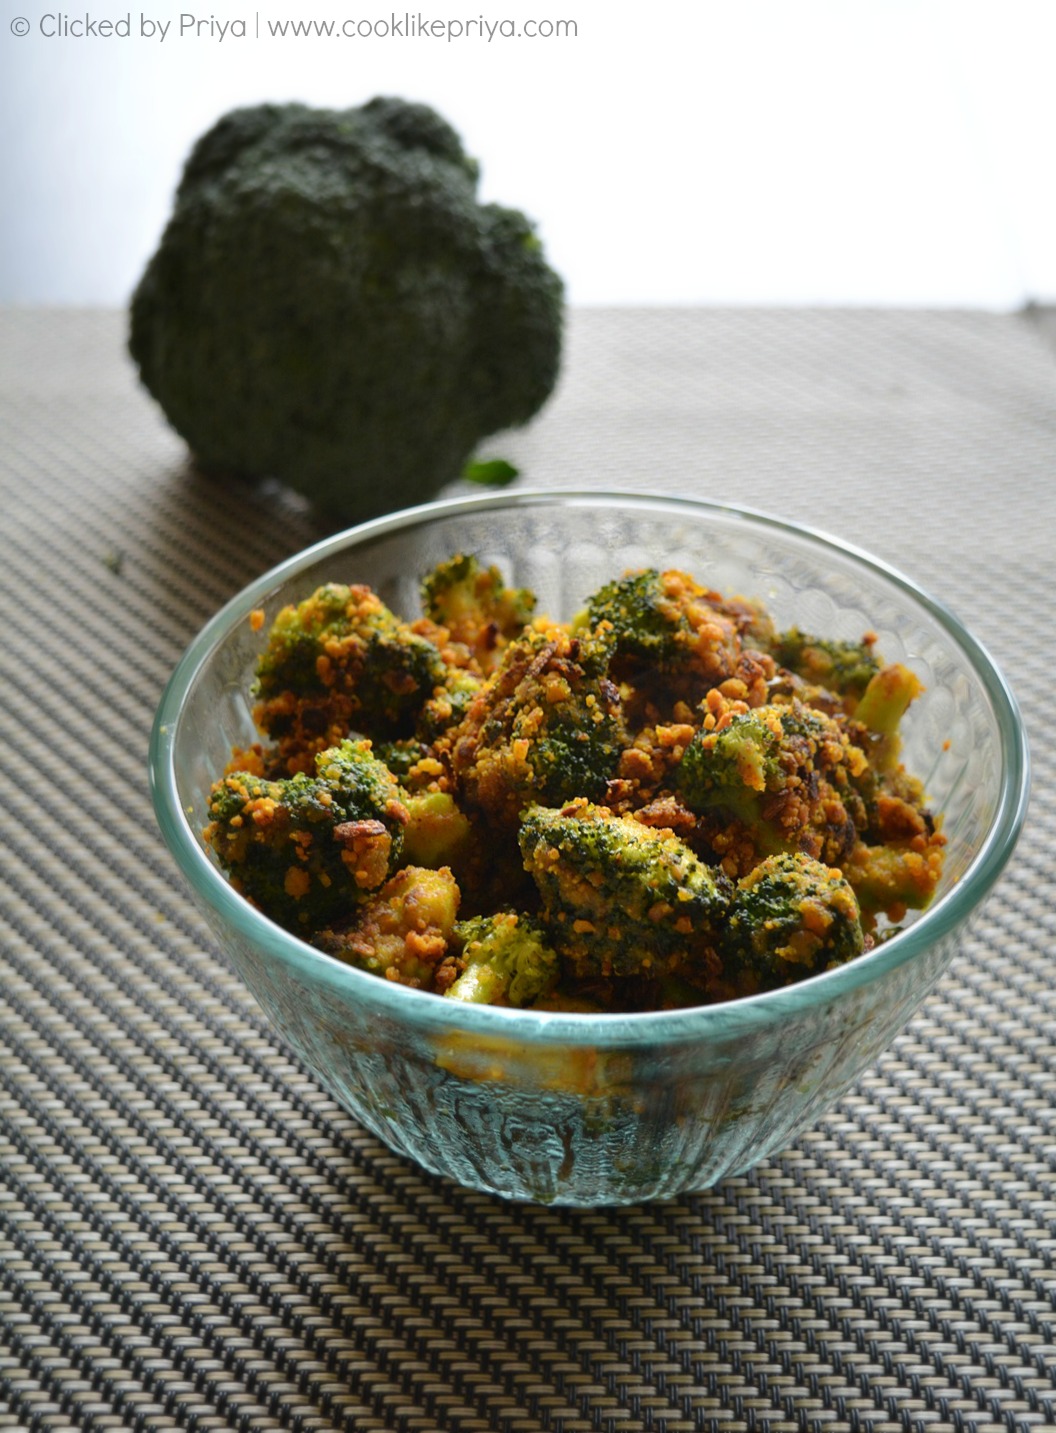
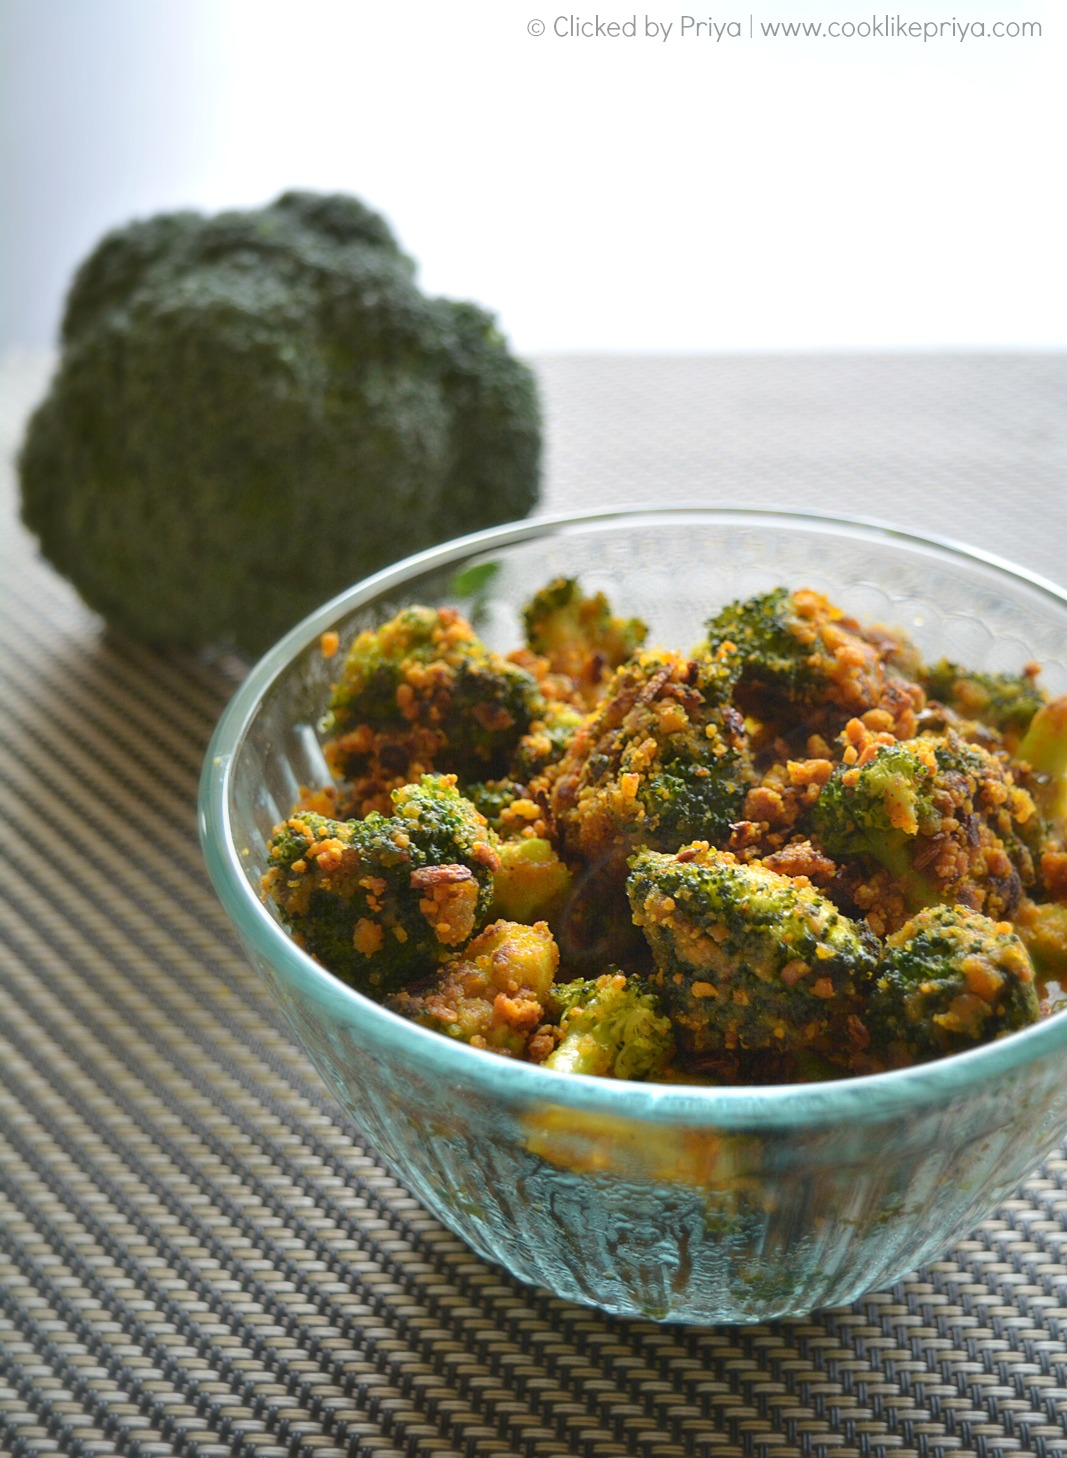
Broccoli Masala Stir Fry
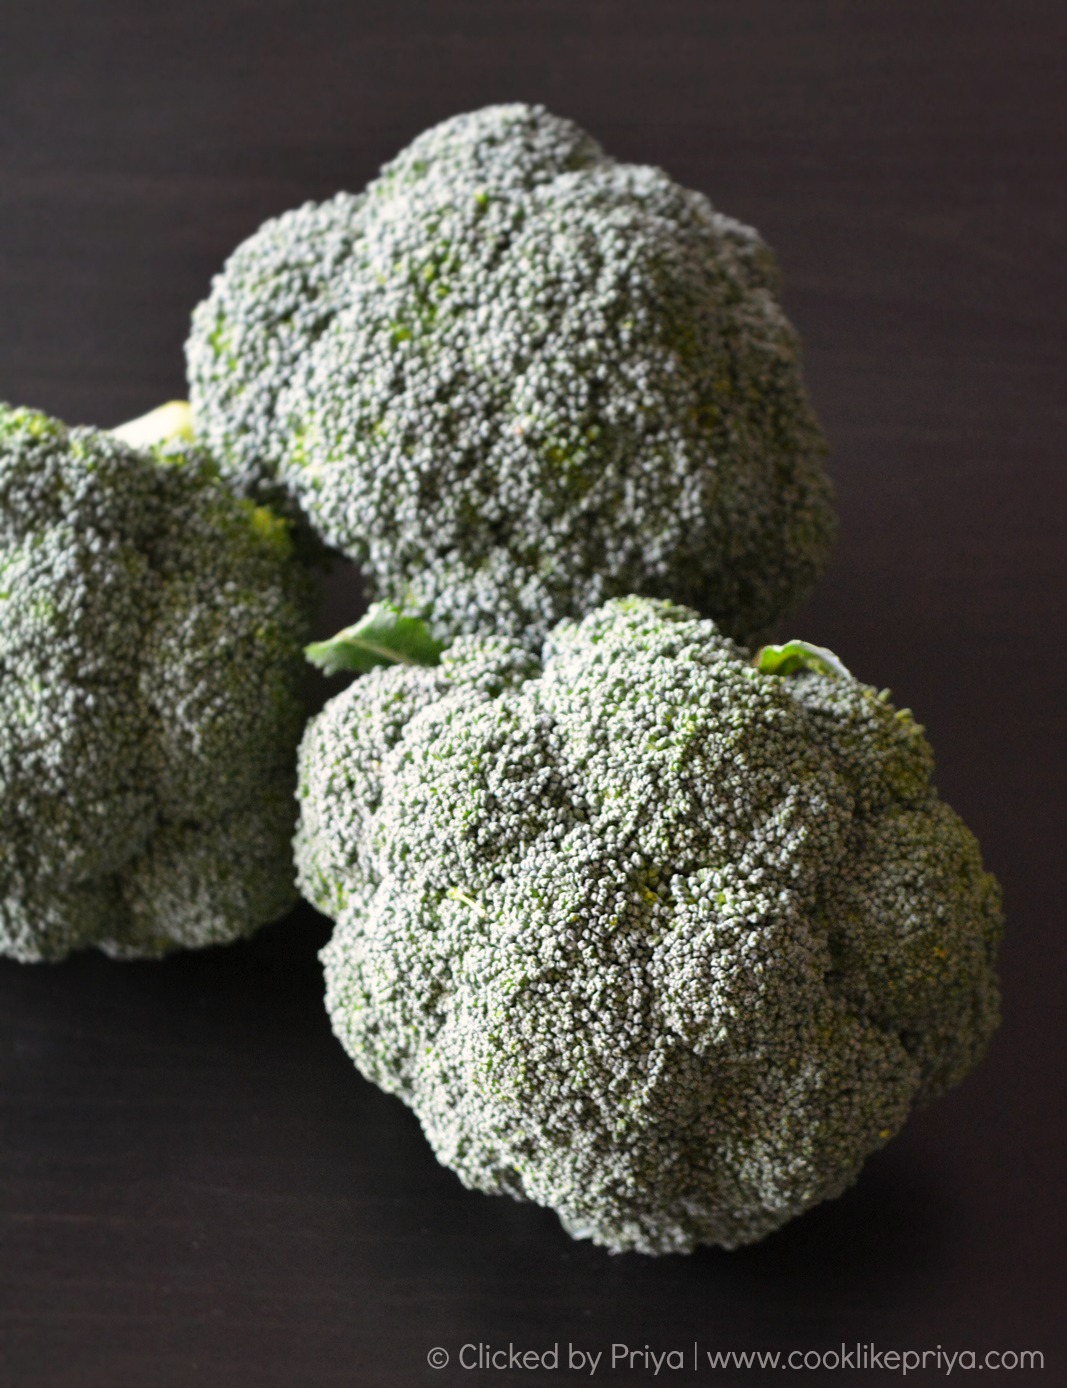
Broccoli is a wonderful super food and most times we shy away cooking broccoli in an Indian recipe. I was one such person who never wanted to cook broccoli but although I loved to cook with them for their nutrient value. Chasing all odds I picked up broccoli on my grocery shopping last week, I wanted to try a simple yet easy recipe to start with. I made this simple Broccoli masala stir fry that turned out to be so good and easy too. Usually broccoli is one vegetable that is tasteless and making a recipe with broccoli has to be something that is flavorful, and flavor from the other ingredients that will get absorbed in the vegetable. Broccoli masala is a dry stir fry dish that goes well as a side to rice and dal or as a side dish for chappathis.


Broccoli Indian Recipes


Broccoli Indian Recipe | Broccoli side dish recipe

BROCCOLI MASALA STIR FRY | BROCCOLI INDIAN RECIPES

Recipe Source - here
Prep time - 5 mins
Cook time - 20 mins
Serves - 2 generously
Serving suggestion - Rice, curry or chappathi

Ingredients

Broccoli florets - around 30 (250 gms)
Oil - 1 tbsp
Cumin seeds - 1 tsp
Minced garlic - 1 tbsp
Minced green chilli - 2 medium chopped fine
Onion - 1 medium finely chopped
Besan/ chickpea flour - 1/2 cup
Red chilli powder - 1/2 tsp
Turmeric powder - 1/3 tsp
Asefotedia/ hing - 1 pinch
Cumin powder - 1/2 tsp
Corriander powder - 1/2 tsp
Salt - to taste
Oil - 2 tsp
Lemon juice for drizzling

Method

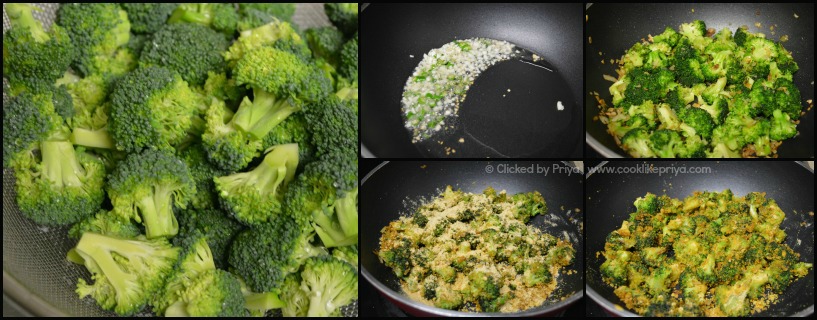
1. Wash the broccoli florets in cold water for 2 minutes drain them completely and pat dry using a kitchen towel to remove all traces of water.
2. In a wide pan heat oil, splutter the cumin seeds, minced garlic and green chilli, saute for 10 seconds, add in the chopped onions, saute until transparent.
3. Add in the broccoli florets and saute for few seconds, cover a lid and cook for 4 minutes in medium- low flame. 
4. Open the lid and give it a good mix add in the salt and mix well. cook covered for 3 more minutes.
5. Prepare the besan mix by combining besa, salt, asefotedia, cumin, red chilli ,turmeric powder, oil and mix well. 
6. Sprinkle this powder over the broccoli and cover to cook for 2 minutes.
7. Open the lid and sprinkle little water to make sure the besan gets coated on the broccoli evenly. Cover and cook for another minute.
8. Switch off and serve warm with rice and curry or chappathi.

How to make broccoli side dish


COOKS WISDOM

TIP 1

1. Make sure that the broccoli is well cleaned and completely dry before making this dish.

TIP 2

2. The original recipe uses lemon juice and mango powder, I have skipped both in this recipe.

TIP 3

3. Make sure that the onions and garlic are not browned but just cooked. Make sure that the flame is in medium-low though out the cooking of this dish.

TIP 4

4. You can spice up the dish by adding more or less green chilli/ red chilli powder. 


Eggless Pav Buns Recipe | Ladi Pav | Pav Bhaji

$
0
0


Ladi Pav | Pav Bhaji buns Recipe
Baking bread is not rocket science, anyone can bake bread at home as long as you friend yeast. Learning to use yeast is definitely a trick but with practice you will fall in love with freshly baked bread at home. i still remember I struggled with yeast and every time I try to proof yeast it would just not foam up and I used waste another set of yeast just to get all the more disappointed. But one of my friend she helped me and said use warm water and not hot water, all the while I used to kill yeast and it never foamed up. As I did my research I also learnt that yeast does not foam up if it is expired. If you are someone who never had luck with yeast trust me it is simple logic, warm up water in a microwave for 20 seconds, it must be warm to touch and try to add a drop of the water in your inner wrist it must be warm and not too hot. Just add sugar and yeast to the water and mix it once. Let it sit for 5 minutes and the yeast should proof if it does not proof then something wrong with the yeast check the expiry date if thats not the issue then the issue is with the water, repeat the process again. 


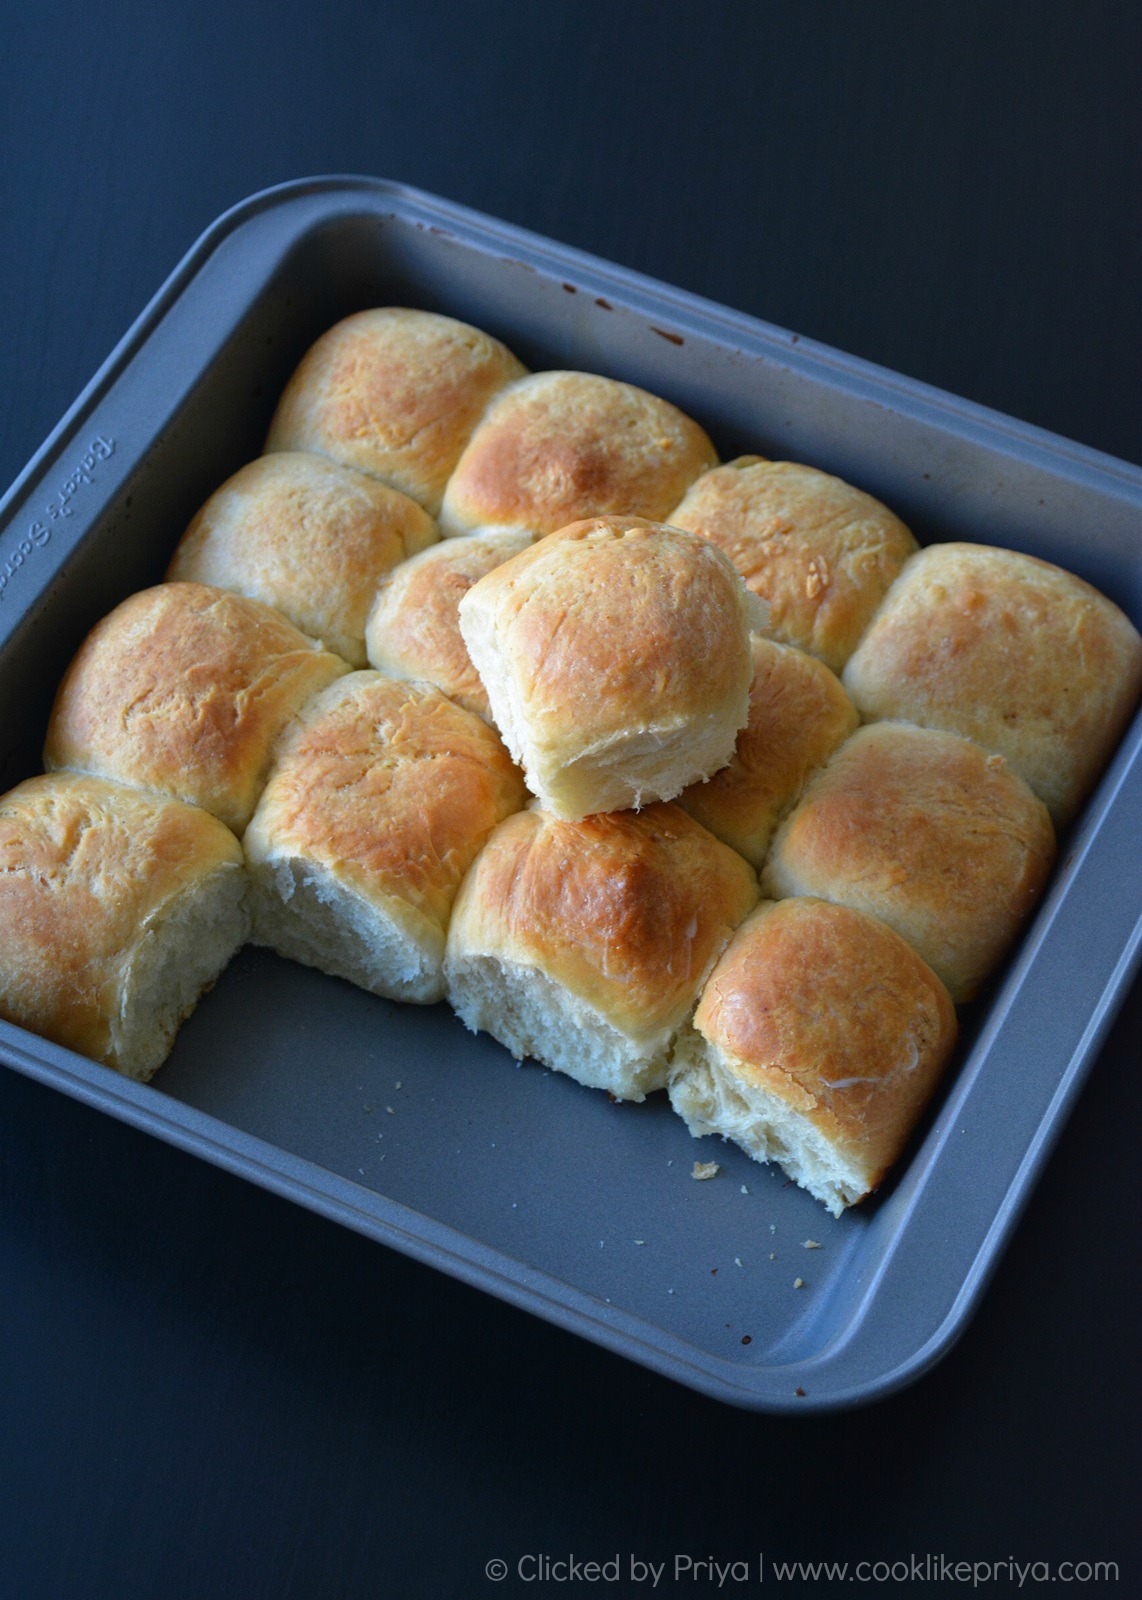
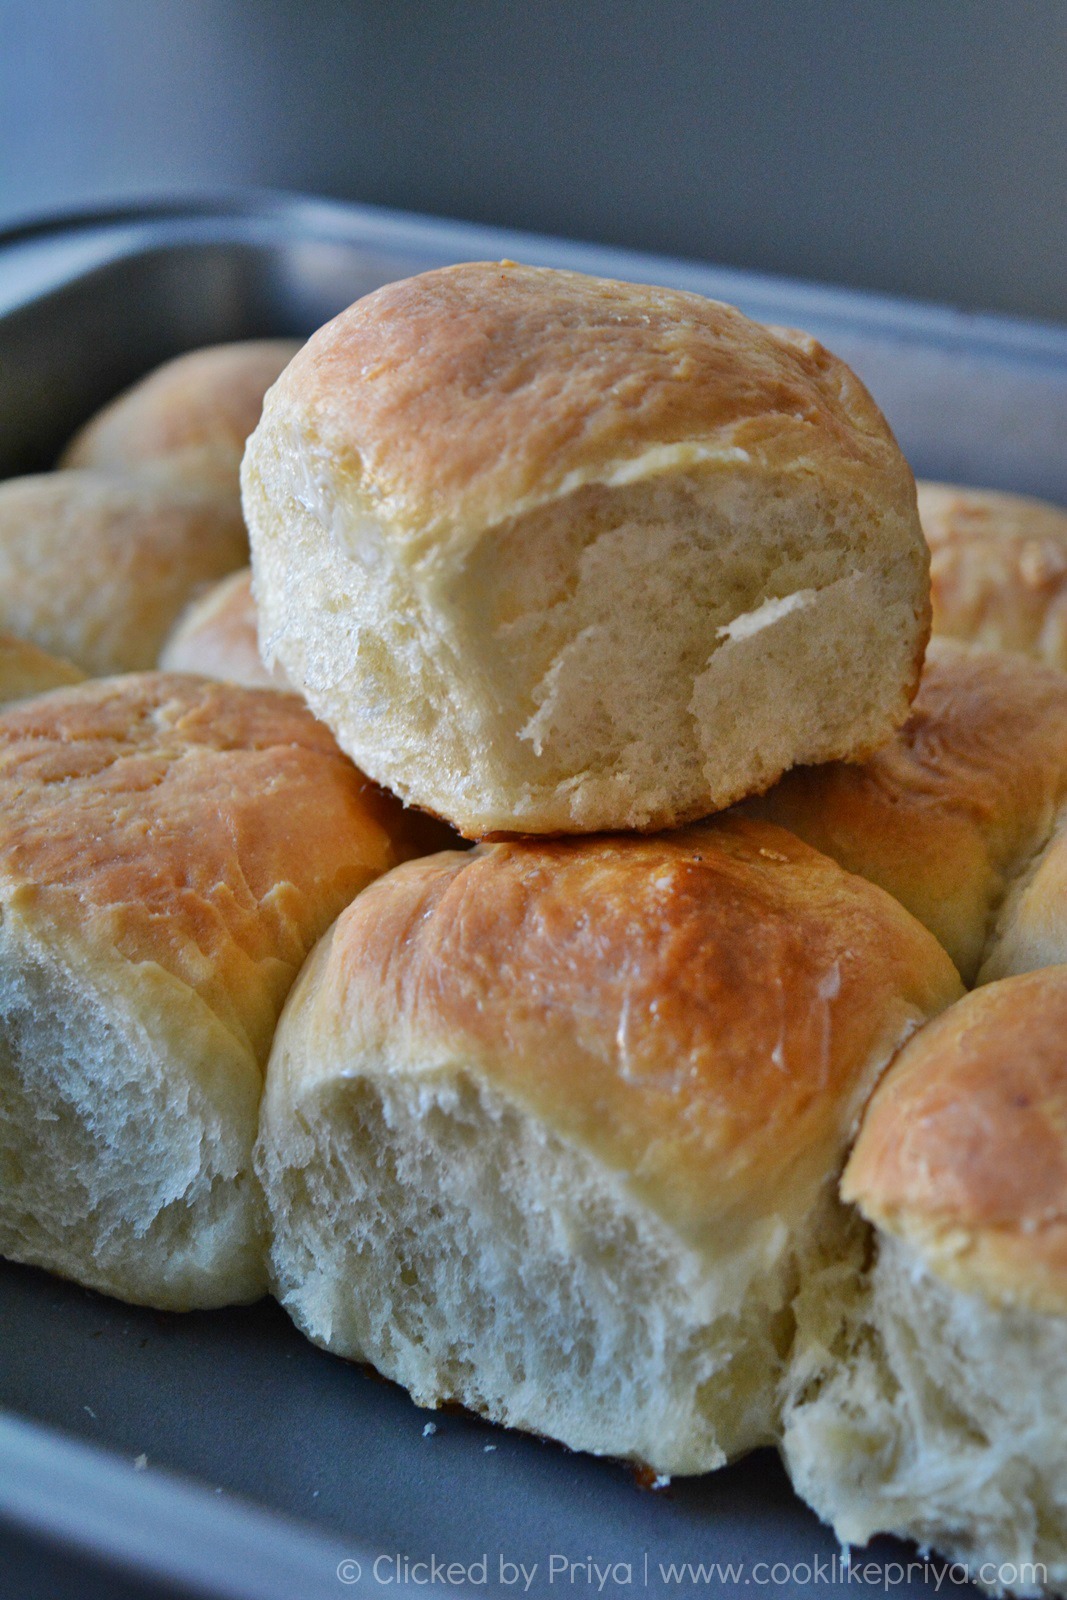
Easy Eggless Dinner Rolls Recipe


How to make pav buns at home


Soft pav buns recipe without eggs
PAV BUNS RECIPE | LADI PAV RECIPE | EGGLESS DINNER ROLLS

Recipe Source - Here
Prep time - 10 mins
Proof time - 1 + 1 hours
Bake time - 12 mins - 15 mins
Makes - 16 medium pav buns

Ingredients

Whole milk - 1 cup 
Active dry yeast - 1 satchet (2 and 1/2 tsp)
Sugar - 2 tbsp
Maida/ all purpose flour - 3 cups
Unsalted buttter softened - 3 tbsp
Salt - 1/2 tsp
Butter/ milk - 2 tbsp to brush the rolls

Method

1. Warm the milk in a microwave safe bowl for 20 seconds, add in the sugar and yeast and mix well set aside to proof for 5 minutes. After 5 minutes give a good mix and set aside for another 5 minutes.
2. Combine the flour, salt and butter in a mixing bowl and add in the yeast. Form a dough and cover set aside for 15 minutes.
3. Now transfer the dough to a work surface and knead for 15 minutes till the dough is soft and pitable, if its sticky just dusk some more flour. If its dry add some milk. 
4. Now make a ball of the dough and transfer to a greased mixing bowl, add more oil on the dough so that it does not form a crust, cover with cling film / a cloth to proof for an hour in a warm place. 
5. I usually keep the bowl in the oven with the light on (remember the oven must not be on). 
6. After an hour remove the mixing bowl and punch the dough knead for 2-3 minutes. Divide the dough into 16 parts or 8 parts, i made medium sized pav buns you can make them bigger too.
7. Line them in a greased 9 inch pan apart with 1" distance between the dough balls. 
8. Once all the dough is lined cover with cling film or cloth to proof again for 1 hour. I place them in the oven with light on.
9. Once the buns are fully proofed take out the tray, brush them with melted butter/ milk and preheat the oven to 375 F for 10 mins and bake in center of oven for 12-15 minutes.
10. Once done remove the baking tray from the oven and place on a cooling rack, let the buns coll down or serve while they are still warm. 

Enjoy soft homemade pav buns/ ladi pav / dinner rolls. 

Stay tuned for Pav Bhaji masala recipe  ;-)

Pav Bhaji Recipe
Pav Bhaji Recipe

COOKS WISDOM

TIP 1

1. To get perfectly foamy yeast mix, make sure to warm water in a microwave for 20 seconds and tip in the sugar and yeast, set aside to proof for 5 minutes. 

TIP 2

2. While using milk to proof yeast make sure that the milk has fat (full fat) the fat in the milk helps to activate yeast, you can also proof yeast with water.

TIP 3

3. If you eat eggs I suggest you to brush the buns with egg wash before baking them, this gives a lovely golden color to the rolls but you can always use butter / milk. 

TIP 4

4. These buns stay fresh for 3-4 days in room temperature. You can warm them everytime in the microwave for 10-20 seconds before serving.


RELATED RECIPES

Pav Bhaji Masala | Mumbai Style Pav Bhaji Recipe

$
0
0

Pav Bhaji Masala Recipe
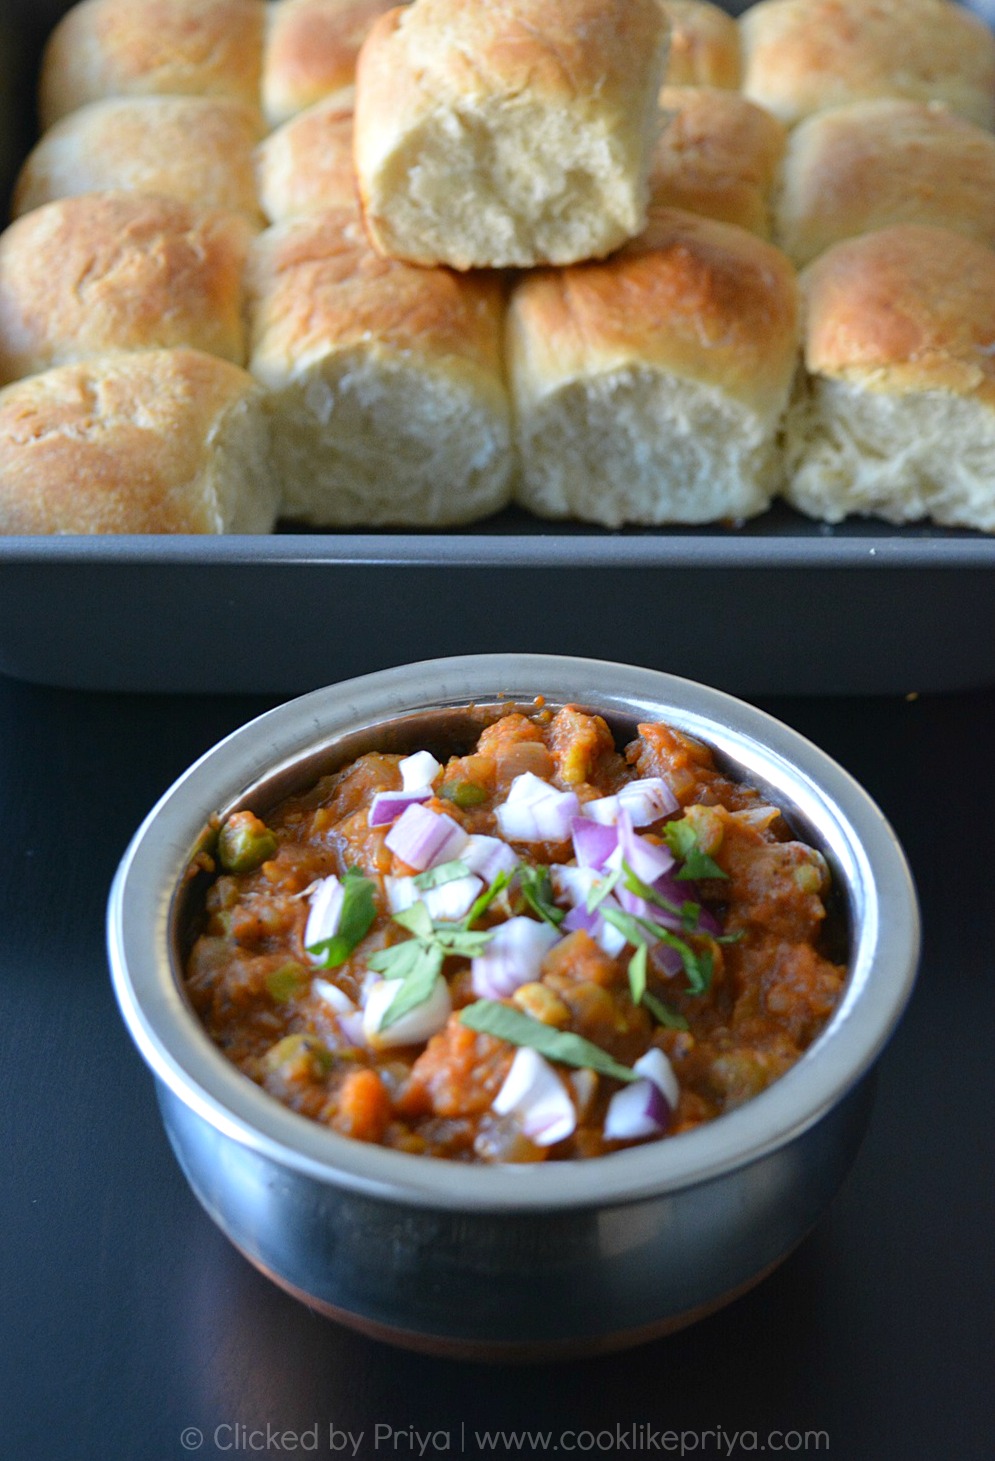
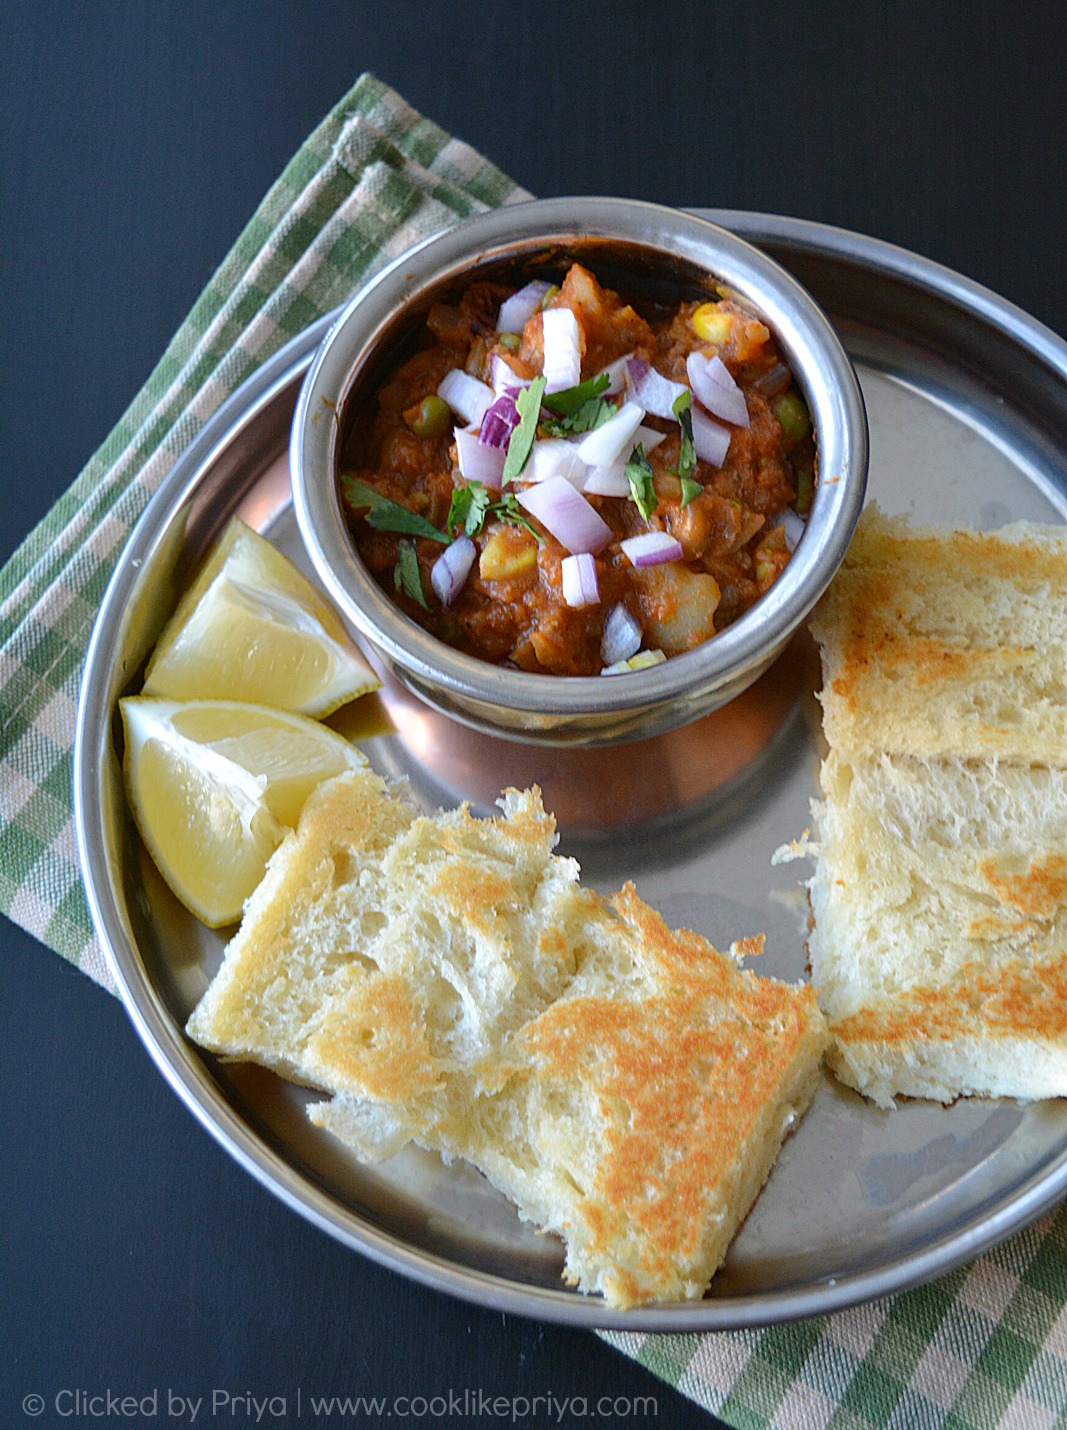
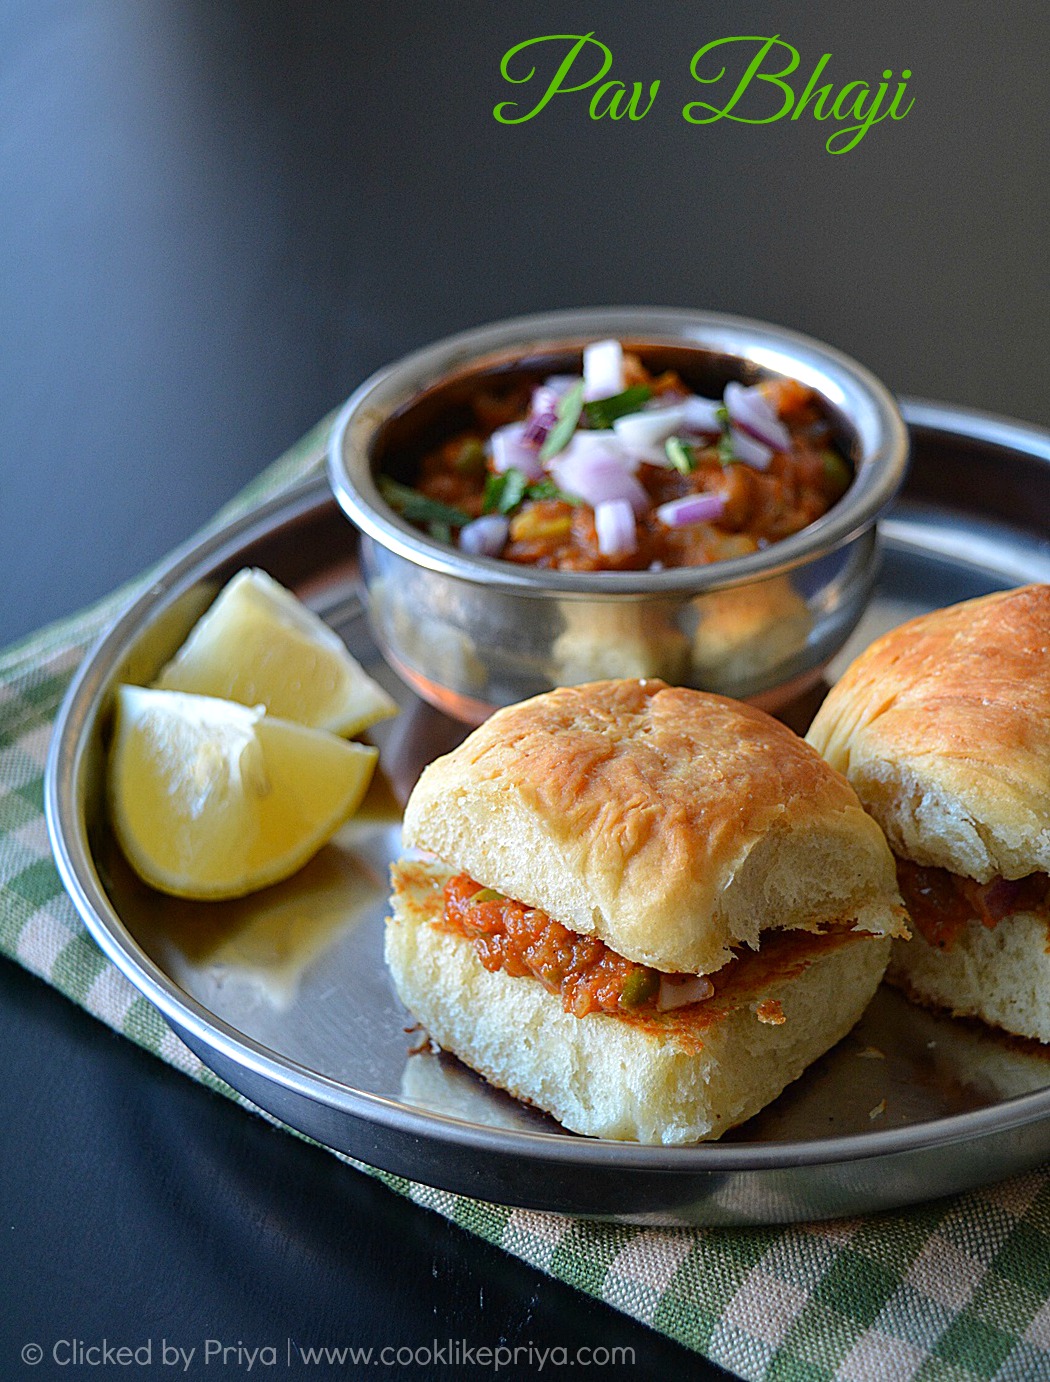
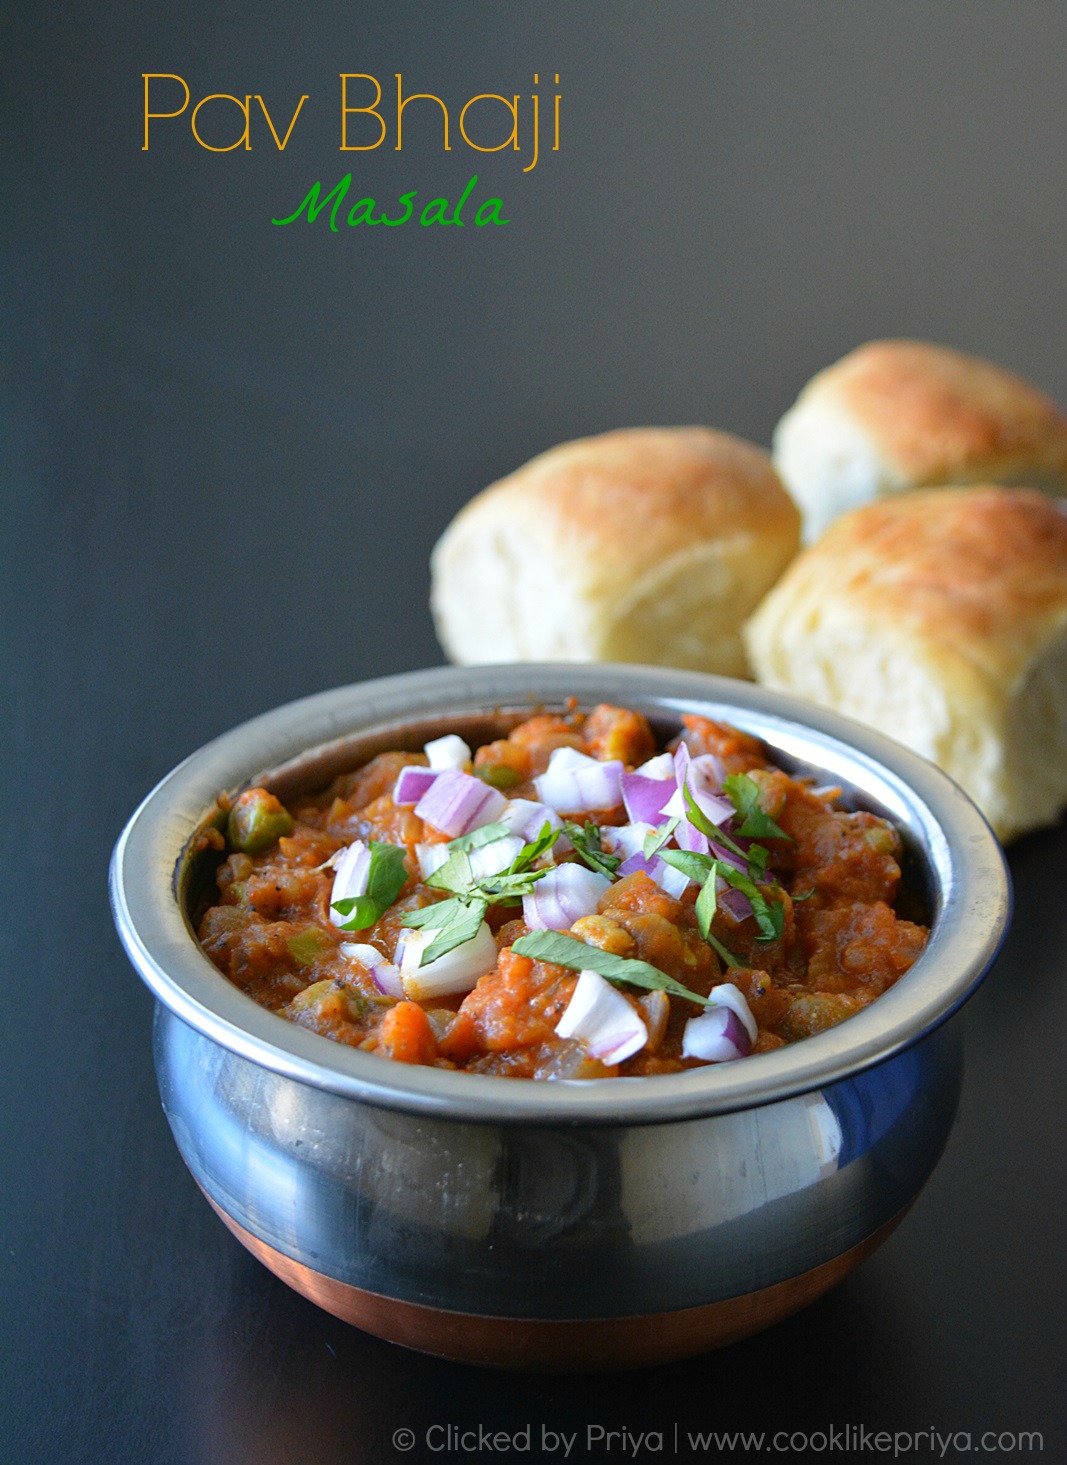
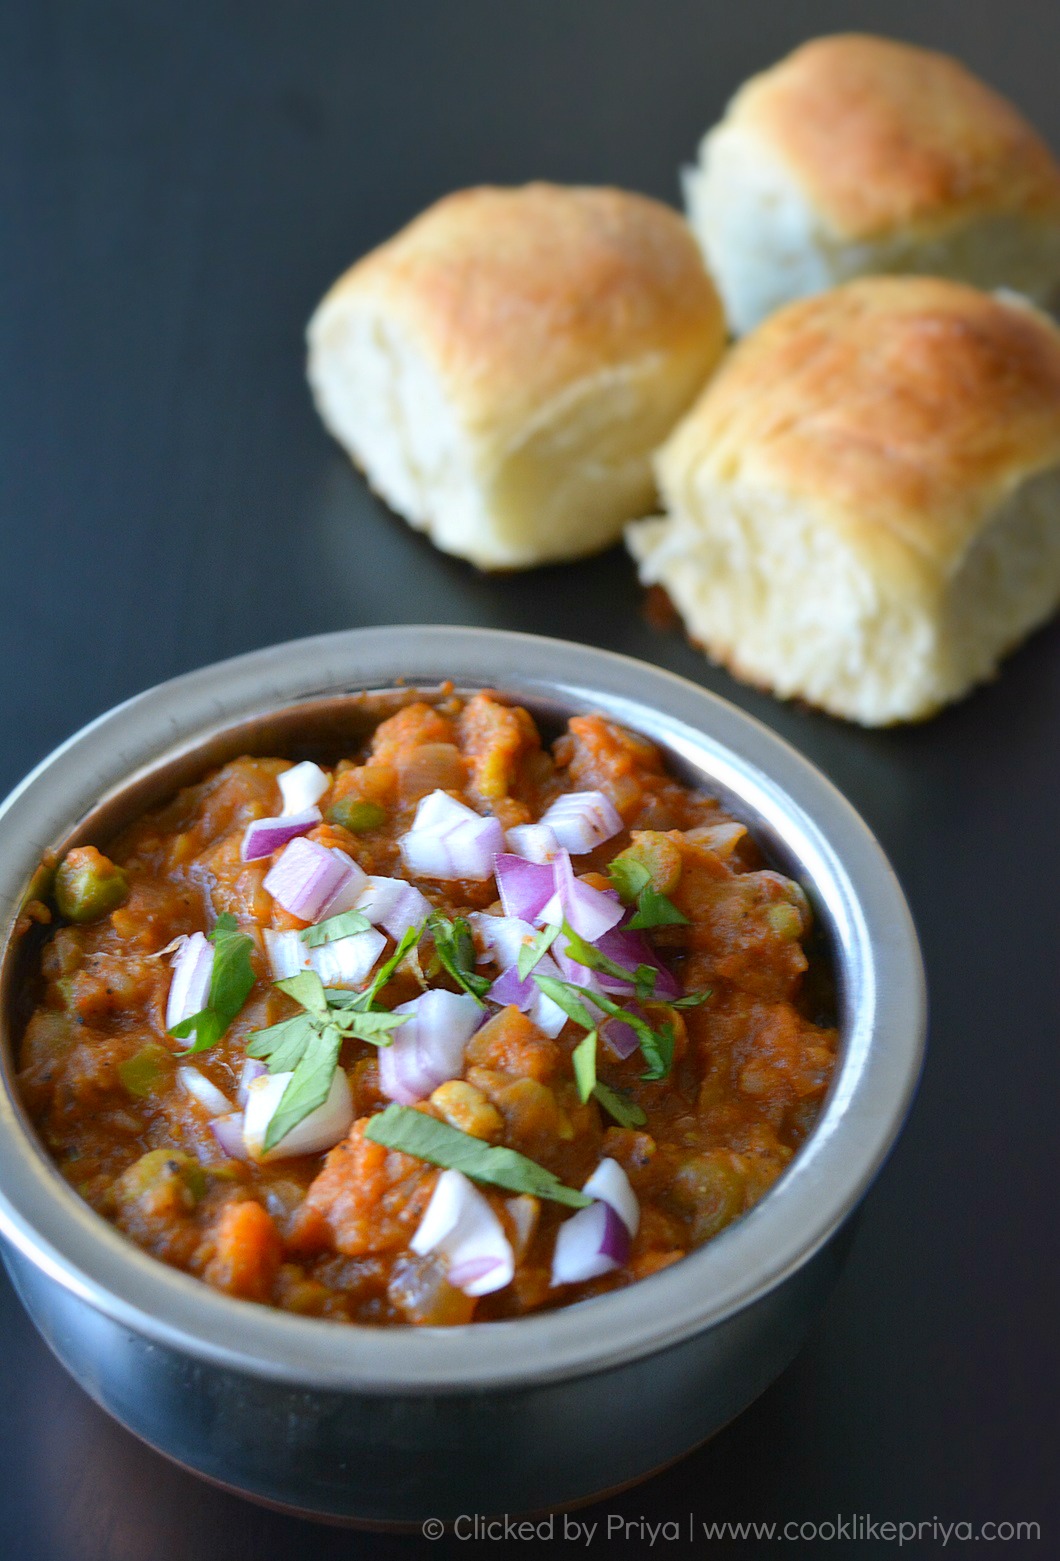
I adore chaat recipes, to me they fit into the best snack food category that is spicy, hot and filling. From Dhoklas, sev puri, pani poori, misal pav, ragda patties to pav bhaji I love them all. I still remember during college days how we used to plan to go to the chaat shops in a nearby mall for evening snack. One of the best excuses if you study in an evening college ;-). Although I love and miss chaat so much my husband on the other hand does not enjoy chaat, the other day I was so tempted to make pav bhaji and went ahead with my usual recipe, a no fail eggless pav buns recipe or dinner rolls that comes perfectly every time. The buns are soft and spongy and are quite light to touch but filling with a bowl of spicy pav bhaji masala. I tried to incorporate my own freshly ground pav masala. You can very well use store bought pav bhaji masala for a quicker version. 


Mumbai style Pav Bhaji Recipe

How to make Pav Bhaji masala
How to make Pav Bhaji masala 


Pav Bhaji masala recipe
Pav Bhaji masala recipe 

PAV BHAJI MASALA RECIPE | MUMBAI PAV BHAJI MASALA

Recipe - Own
Serves - 4 generously 
Prep time- 10 mins
Cook time - 20 mins
Serving suggestion - Soft Pav buns/ Ladi pav

Ingredients

To Pressure cook 

Potatoes - 2 large 
Cauliflower - 1/2 bunch around 15-18 florets
Carrot - 1 large, finely chopped
Beans - 15, finely chopped
Green peas - 1/2 cup

To roast & grind

Cinnamon stick - 1/2 inch piece
Cardamom - 2 green & 2 black
Cloves - 2 
Cumin / Jeera - 1 tsp
Fennel seeds - 1 tsp
Corrinder seeds - 2 tsp
Dry red chilli - 4 no
Peppercons - 5 no
Dry mango powder/ amchur powder - 1- 1 and 1/2 tsp
Kasthoori methi - 1 tsp

For the Curry

Oil - 1 tbsp
Butter - 2 tbsp
Cumin seeds - 1 tsp
Tomato - 2 large, boiled, peeled and mashed
Onion - 1 large finely chopped, reserve 4 tbsp to garnish
Ginger garlic paste - 1 tsp
Capsicum - from 1/2 large capsicum chopped (optional, I skipped it)
Lemon juice - 1 tbsp
Corriander leaves - 2 tbsp chopped

Method

1. In a dry pan add in the cinnamon, cardamom, cloves, cumin, corriander seeds, peppercons, dry red chilli and saute for 40 seconds in low flame. Transfer to a plate to cool down.
2. Using a mixer powder these cooled ingredients along with kasthuri methi and dry mango powder into a fine powder. 
3. You can sieve the powder to make it more fine, you will get around 2 tbsp of pav bhajji masala, set aside.
4. In a pressure cooker add the vegetables - potatoes, peas, cauliflower, carrot & beans. Add one cup water and 1/2 tsp of salt pressure cook for 3-4 hissels. Switch off once the pressure releases,open the lid and mash the veggies using a wooden laddle. Set aside.
5. In a wide pan heat butter 2 tbsp and oil, splutter the cumin seeds, tip in the onions and saute until transparent (make sure not to brown them), now add in the freshly ground ginfer garlic paste and saute for 2 minutes until the raw smell goes.
6. Now add in the boiled, peeled and mashed tomatoes and cook covered for 2 minutes until the tomato cooked well.
7. Add in the boiled and mashed veggies along with the water and the freshly ground pav bhaji masala, mix well and cook covered for 3 minutes.
8. Now add in 1 tbsp of butter and using the wooden ladle mash further to get a thick curry. 
9. Simmer for 2-3 minutes until the oil separates and garnish with corriander leaves.
10. Just before serving drizzle little lemon juice and chopped raw onions and serve along with soft pav buns.

Pav Bhaji Masala
Pav Bhaji Masala

Pav Bhaji Masala
Pav Bhaji Masala
COOKS WISDOM

TIP 1

1. You could alternately use store bough pav bhaji masala, add 1and 1/2 tbsp of pav bhaji masala for the proportions mentioned.

TIP 2

2. This pav bhaji masala is not too spicy you can add some red chili powder or green chillis for more spiciness.

TIP 3

3. I have not used capsicum, its your personal preference to use.

TIP 4

4. Make sure that you use a wooden ladle to mash the vegetables while the curry is simmering, it adds loads of flavor.

TIP 5

5. You would also directly tip in the kashtoori methi and amchur powder to the curry. 


RELATED RECIPES

PAV BUNS
KHAMAN DHOKLA
MISAL PAV
ROASTED MAKHANA
MEDHU VADAI
SAMBAR VADAI
THAYIR VADAI
SPICY DIAMOND CUTS
KARA PANIYARAM
PANEER CIGAR ROLLS
RAW BANANA BAJJI
BAKED SAMOSA
BANANA KUZHI PANIYARAM

Eggless Oats Coconut Fruit & Nuts Bar | Rolled oats almond cranberry bars

$
0
0
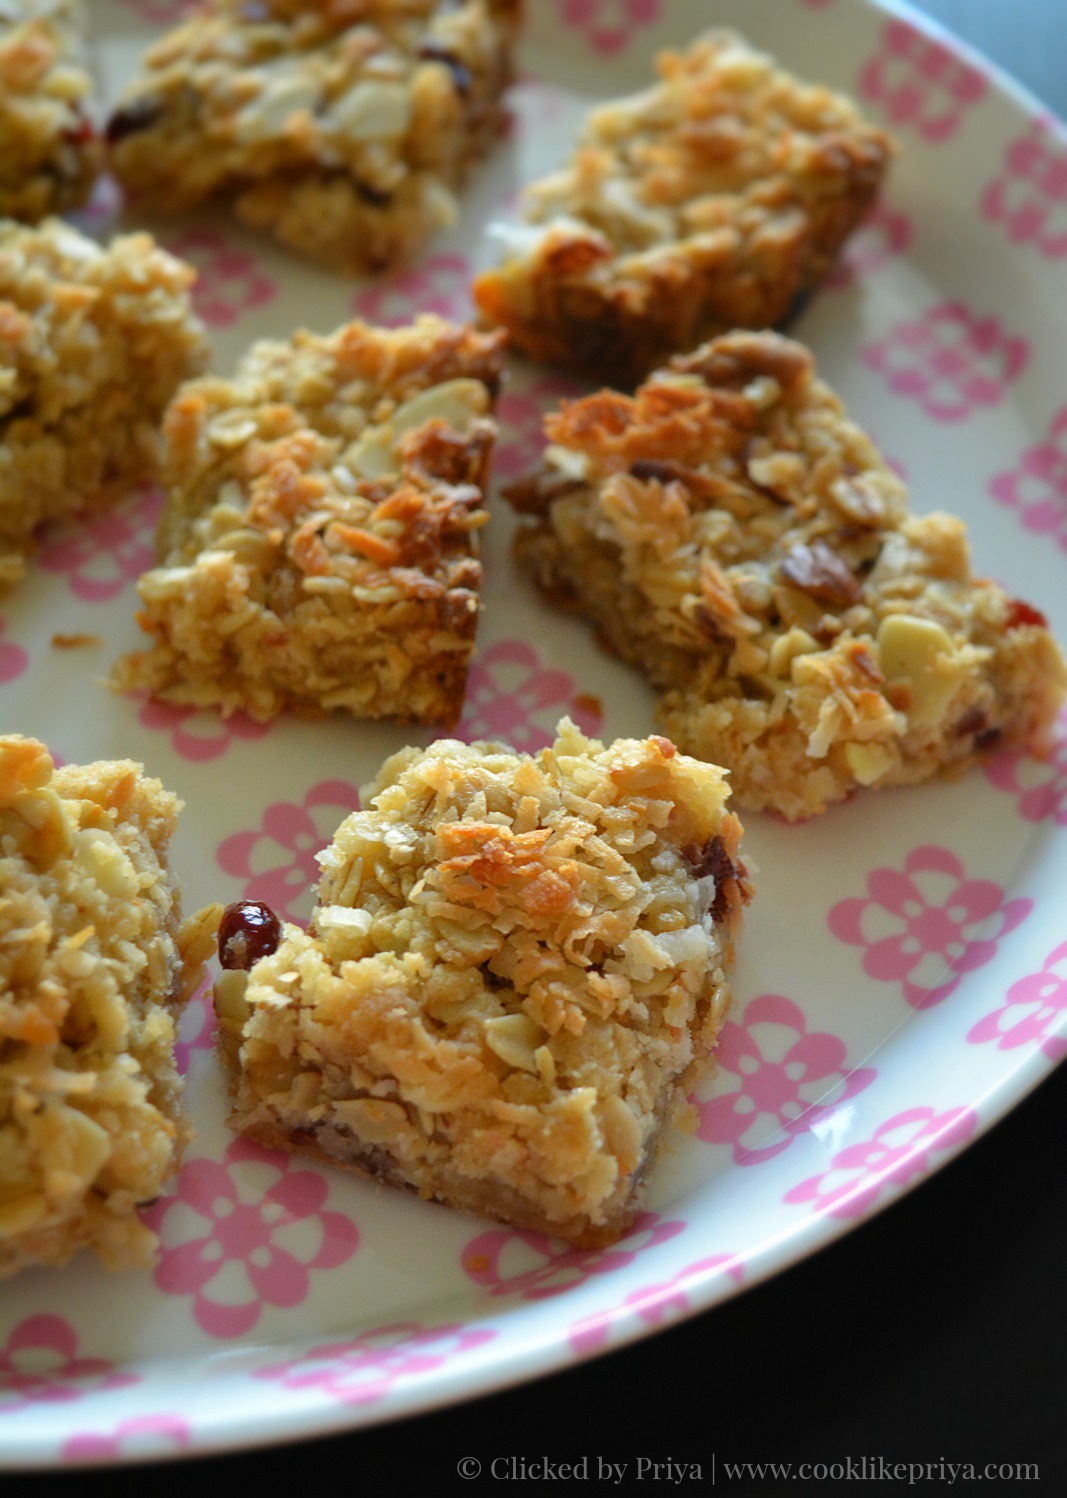
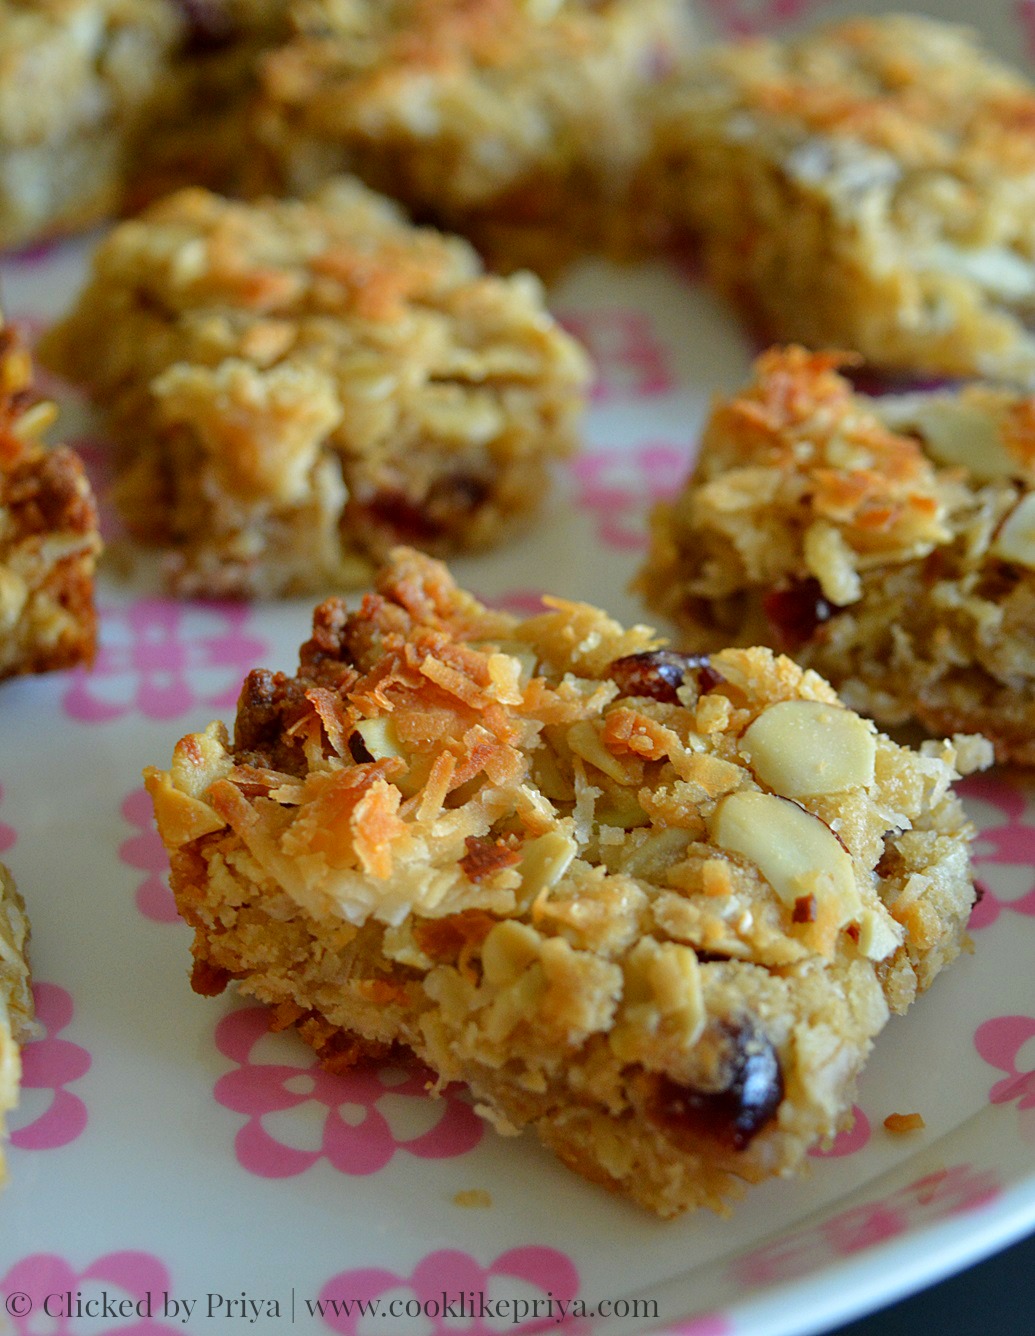
Eggless Oats Coconut Fruit & Nuts Bar
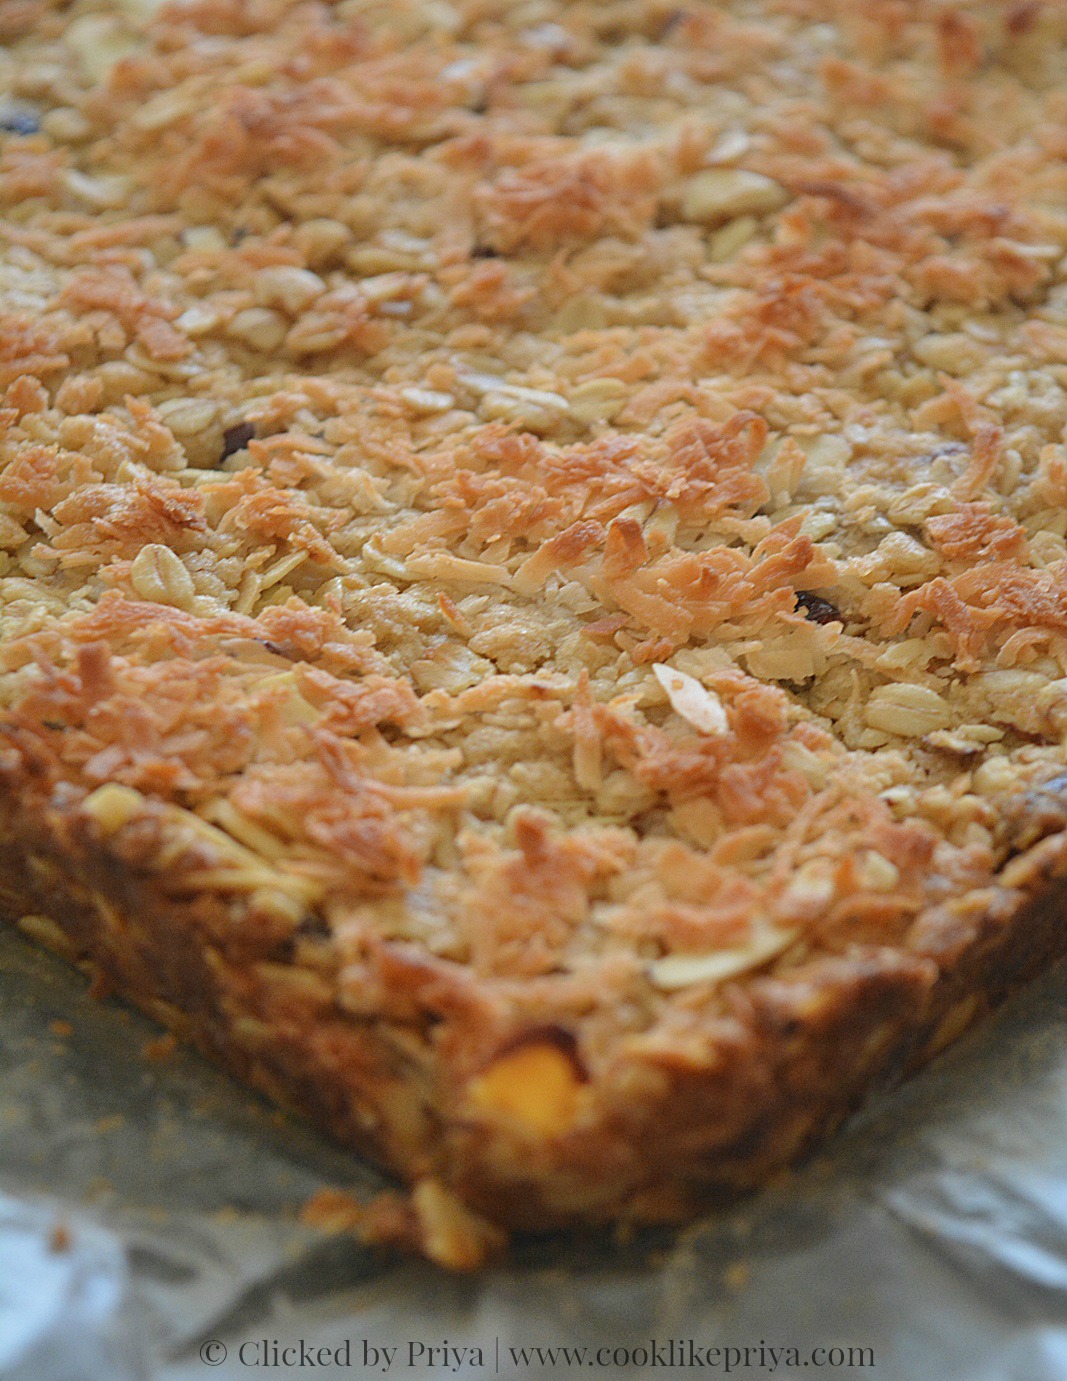
I always love experimenting in the kitchen, I have never found a good granola bar in all honesty. All the store bought ones are either sweet, sticky or have ingredients that I don't fancy. So what do I do? tried my hands in making healthy homemade granola bars. Crunchy on the outside and moist and soft on the inside, a perfect way to cure the sweet tooth and enjoy a light bite. Pack these as a snack for your kids and family they will enjoy those sweet moments of break and thank me later ;-). Since Christmas is coming why not make these for your friends and family, since its egg free vegetarians would love them too. Also you can make them vegan by skipping the butter and adding some vegan butter or coconut oil. 

Here's a list of readers favorite Christmas recipes from last year ;-) a blast from the past!


Rolled Oats almond cranberry bars


EGGLESS OATS COCONUT FRUIT & NUT BAR RECIPE

Ingredients

Rolled oats - 1 cup
Dry sweetened coconut flakes - 3/4 cup
Brown sugar - 1/2 cup
Wheat flour - 1 cup
All purpose flour - 1/2 cup
Silvered almonds - 1/2 cup
Chopped cranberries - 1/4 cup
Vanilla - 1 tsp
Melted butter (unsalted) - 1 and 1/2 stick (1 cup)
Salt - 1/4 tsp

Method

1. In a bowl combine all the ingredients except 1/2 cup coconut flakes and mix well so that all the ingredients are well mixed.
2. Pre-heat oven to 375 F for 10 minutes, line a baking tray with parchment paper and spread the mix by pressing it to the pan making an even layer. 
3. Sprinkle the coconut flakes and flatten it on the pan using your fingers/ back of a spoon.
4. Bake for 20-25 minutes until the top browns, once done remove the pan from the oven and let the baked granola sit in the pan for 10 minutes on a cooling rack.
5.Remove the granola along with the parchment and using a knife slice them into bars or chunks.

Enjoy delicious homemade granola bars along with a cuppa or as a quick snack. 


COOKS WISDOM

TIP 1

1. You can add your preferred nuts and raisins to the recipe. Its such a forgiving recipe but don't miss the coconut as it adds such a beautiful flavor to these bars.

TIP 2

2. The texture of these granola bars is crunchy on the outside and lightly soft on the inside.

TIP 3

3. You can make a jam center to these granola bars by layering granola -> jam -> granola, if you are adding jam make sure to reduce the sugar in the granola mix.

TIP 4

4. You can make this vegan by addng vegan butter or earth balance or extra virgin coconut oil instead of butter in the recipe.


RELATED RECIPES

OATS BREAKFAST BARS
OATMEAL COOKIES
MASALA OATS
APPLE OATS
MASALA OATS WITH GREENS & LENTIL
FRUIT & NUT BISCOTTI
MIXED OATS LADDU
CHOCOLATE OATS YOGURT

Kale Chips Indian Style | How to make Kale chips

$
0
0


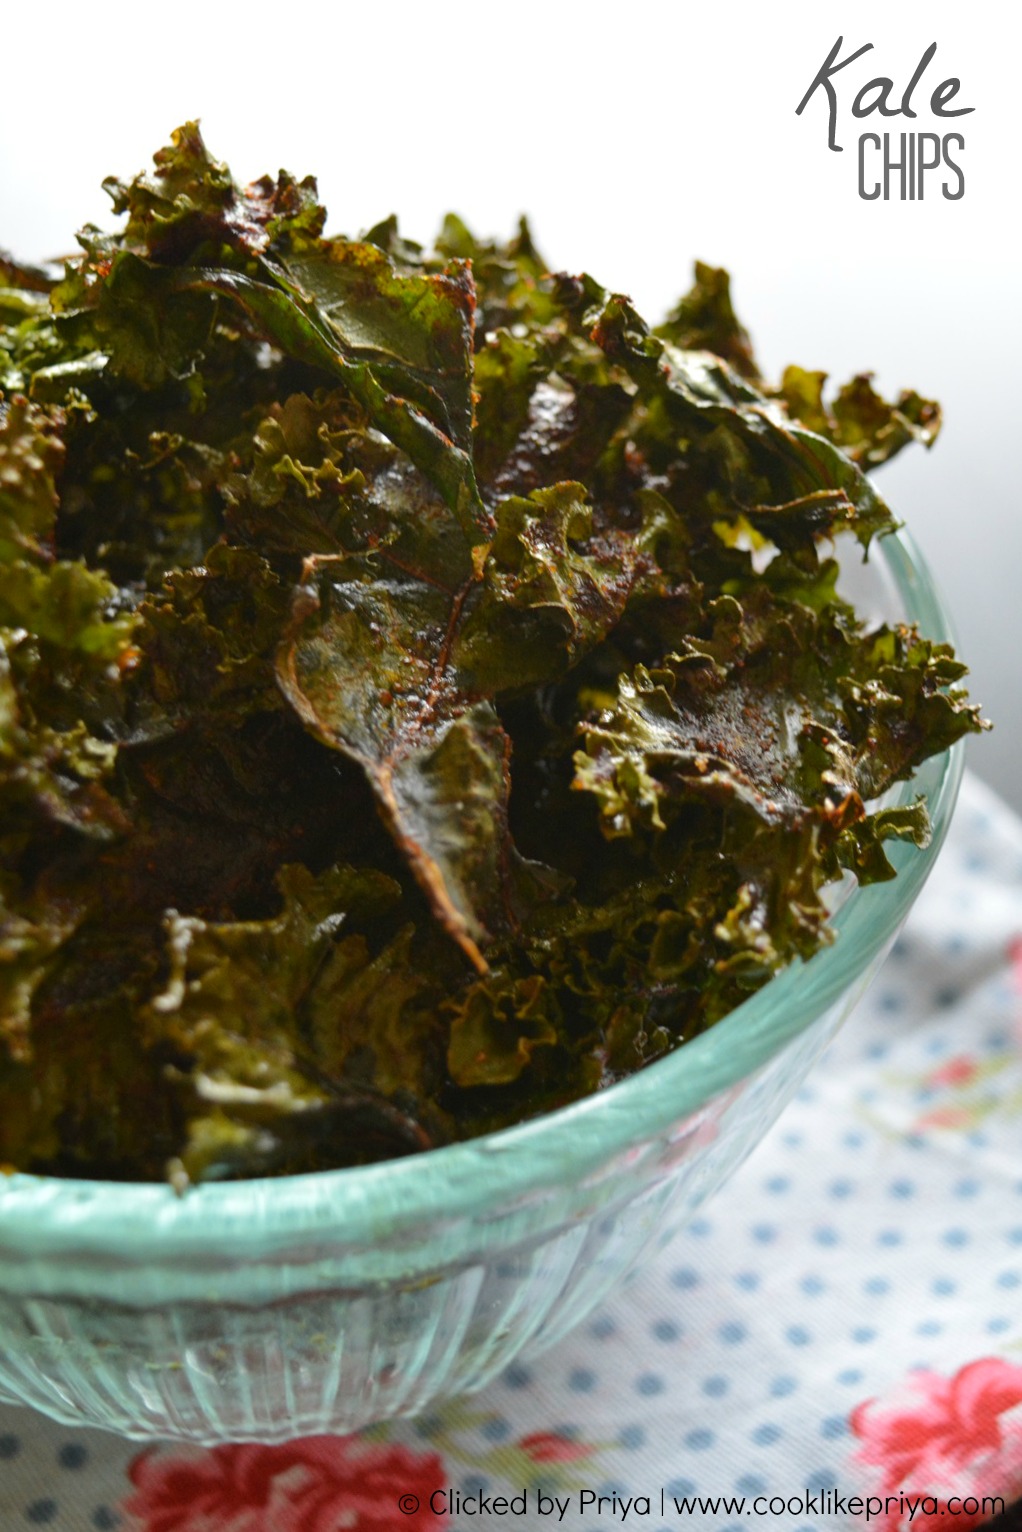
Kale Chips Indian Style
If you have not tried Kale, I recommend you to try them and if you find them locally do pick a bunch and make them as chips ;-) trust me you will love it and you can thank me later. Kale is one of the super foods doing the buzz all over the internet and among healthy eaters. I was waiting to grab hold of these greens and try them at home. So for starters I did these Kale chips and they were gone in 5 minutes I mean the entire batch. My husband had no clue what they were and kept munching them, these kale chips are so crisp and light. With much enthusiasm I tried to add a huge bunch of kale into my green smoothie and I did regret of running through a huge batch. The drink turned up a little not like what I expected and I had to add one banana and pineapple to juice it to a decent smoothie. If you ask me is kale chips the healthiest way of eating kale, I would say 50-50 but it is definitely healthy compared to potato chips. Since Kale is protein dense and vitamin loaded they tend to give a wash out effect to the stomach and you will end up feeling good. Would I eat Kale again of course I will :-)


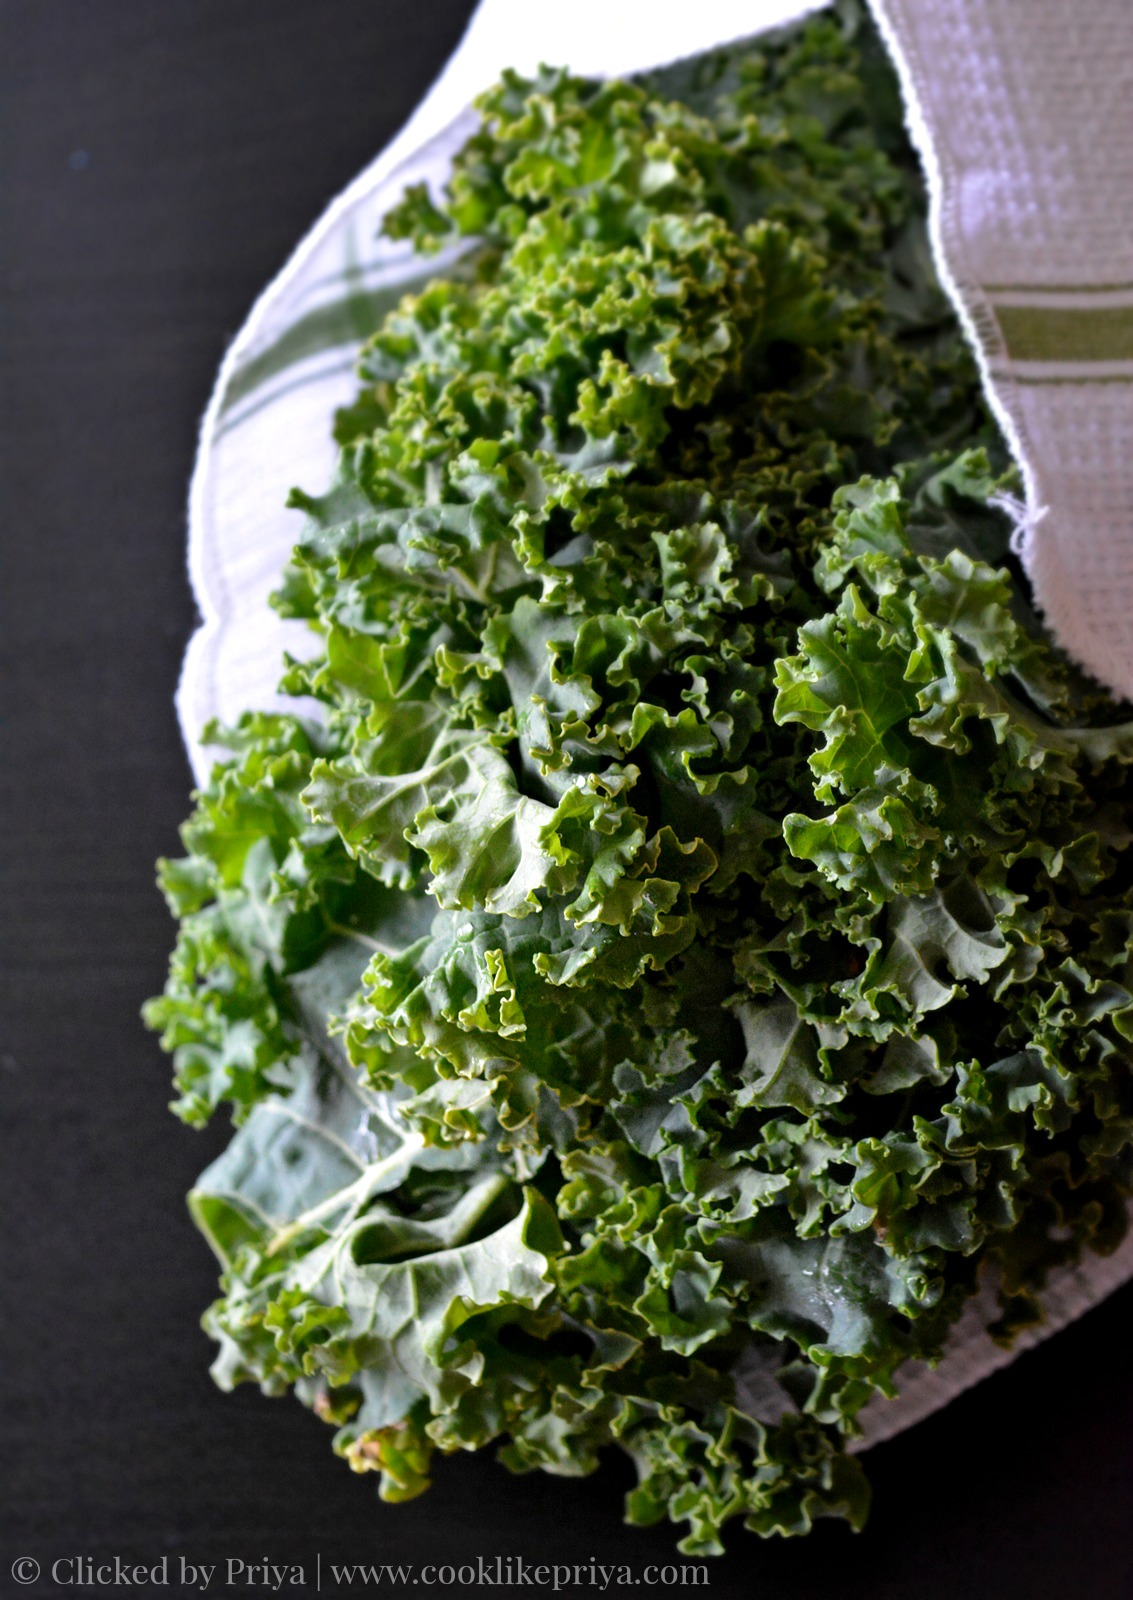
Fresh Kale Leaves
Fresh Kale Leaves

Kale Leaves before and after baking


How to make Kale Chips

HOW TO MAKE KALE CHIPS | INDIAN STYLE KALE CHIPS RECIPE

Recipe - Own
Makes - 250 gms of chips
Prep time - 5 mins
Bake time - 8-10 mins
Storage - well on a counter top or in an air tight container

Ingredients

Fresh Kale - 250 gms, 4-5 medium strands
Olive oil - 2 tsp
Garlic Salt - to taste
Red chili powder - 1/2 tsp

Method

1. Clean the kale leaves in cold running water and pat fry the water using a kitchen towel and let them rest on the counter top for 5 minutes to drain all traces of water.
2. Now pull out the leaves like how you would pull out curry leaves from the stem. 
3. Tear the leaves further to bite sized pieces and throw them into a bowl.
4. Pre-heat oven to 400F for 10 minutes and add olive oil, salt and red chilli to the kale leaves and mix well until all the leaves are well coated with oil and spice.
5. Place the leaves on the baking tray giving space between them and bake for 8-10 minutes until the leaves start changing colour, you can also turn the leaves half way through baking.
6. Once done remove the tray from the oven and let them cool completely, enjoy fresh homemade kale chips.


COOKS WISDOM

TIP 1

1. You can skip the spices and make them plain too.

TIP 2

2. You can add pinch of chaat masala or turmeric or cumin for a even more flavour. You can also use coconut oil instead of olive oil.


Eggless Candycane Cookies | Christmas 2014 Recipes

$
0
0


Candy Cane Sugar cookies
Its the best time of the year - Christmas and hardly few days more and I have been counting fingers    :-) with our relocation and the time of the year I mean I am all excited for whats ahead. So thankful for this phase in my life where I can sit and think about how far we have come. This happy place seems to be so energizing in a way. Can't than God enough for everything, counting my blessings make me realize how much I am fortunate and how much I am blessed beyond understanding. Thanking God for He is my anchor and my friend. But that said I have been running recipes in my mind to cook for Christmas and baking sure takes all the attention. I have always loved Candycanes and most recipes for candycane cookies call for eggs so I wanted to get my hands dirty to make a candycane cookie recipe that is eggfree. I saw many recipes online and on pinterest where the candycane cookies have a pink tint and I really wonder why. Follow the recipe to the dot and let me know how it turned out. 


I found this beautiful wordings on the meaning of candycane and Christmas. And how it all makes sense is totally beautiful. 


Eggless Candy Cane Sugar cookies


Eggless Cookie Recipe - Candycane Cookie Recipe


Eggless Cookie Recipe - Candycane Cookie Recipe
EGGLESS CANDYCANE COOKIES | CHRISTMAS 2014 RECIPES

Recipe Source - adapted from here

Prep time - 10 mins + 20 mins to freeze dough
Bake time - 8-10 mins
Makes - 12-15 candycane cookies

Ingredients


Unsalted butter - 1 stick or 1/2 cup in room temperature

Powdered sugar - 1 cup 
Vanilla - 1 tsp
Almond extract - 1 tsp
Maida/ all purpose flour - 1 and 1/2 cup
Baking powder - 2 tsp
Milk - 3 tbsp
Salt - 1/3 tsp
Red gel food color - as required

Method


1. In a small mixing bowl mix the flour, salt and baking powder set aside. 

2. In a large bowl cream together butter and slowly add in the powdered sugar and mix well, add in the vanilla and almond flavoring and mix well. 
3. Add the milk and give it a good mix, add in the flour and form a dough make sure you do not overmix.
4. Pop this into a refrigerator for 20 mins/ freezer and then divide the dough into two add red food color into one half of the dough. 
5. Make sure to add both dough in separate bowls and color one, mix the food color into the dough using your hands or an electric whisk. 
6. Freeze the dough for 10 minutes and then work on it. Divide both color dough into equal parts and roll them into a rope of equal sizes and twist them to form a cane shape.
7. Pre-heat oven to 350 F for 10 minutes and line a baking pan with parchment and set aside. 
8. Place the cookies in the baking sheet with 1 inch space between cookies and bake in center of oven for 8-10 minutes until u see the sides and edges changing colour.
9. Once done remove the baking tray from the oven and let it cool on a cooling rack for 10 minutes undisturbed.
10. Remove the cookies and enjoy them or gift them as goodies. 

Eggless Cookie Recipe - Candycane Cookie Recipe


COOKS WISDOM

TIP 1

1. Make sure to add enough red color once the cookies are baked they look a little lesser red. I used gel red food color. While handling food color take care not to stain your hands or counter top. Use a wooden spoon and always add the dough to a bowl before coloring. 

TIP 2

2. Always use a good quality butter as the cookies get their flavor and richness from them. Make sure to add your favorite flavoring like almond/ peppermint. 

TIP 3

3. Freezing the dough helps in handing them better.


RELATED RECIPES

Eggless Sugar Cookies | Christmas Recipes 2014

$
0
0
Eggless Sugar Cookies Recipe
I love homemade gifts, they taste great, add a personal touch and also make people feel special. One other great aspect is knowing the ingredients you put in them. That said as days are running its time to start prep for the celebrations and why not pack edible gifts as a thank you gift for your guests. Or if you are attending a party at your friends place then pack these to gift them. Trust me they will love it and appreciate it beyond words. I had got these cute message cutters from a review I had done a while ago for Gourmet Co, you can check the post here. You can pick similar cookie cutters in any online or baking supply stores. If you are not the type who does not have patience to do royal icing or fondant or don't have time incase you are looking at a large batch then these cutters are the answer. 


Ever wondered why Christmas is known for gift giving? although the real meaning of giving and reason for Christmas is the Birth of Christ more often everyone tends to forget the real meaning for Christmas these days. Jesus is the reason for the season. 


The BIBLE clearly says that "For God so loved the world that He gave His only begotten son that whomsoever believeth in Him shall not perish but have eternal life" John 3:16

( image credit to original source)


Lets remember that God's act of giving should be remembered in all our acts of giving and receiving. Lets be kind and generous to give to others and also give to the ones who have no one to give them gifts. Do an act of kindness to spread God's love this season, remember even a small act of kindness God will never forgot and reward you for your good deeds. Lets be like our Father in Heaven to give with a willing heart and give without limits for He is our creator. Let there be Christ in Christmas. Let Him be yours today so that He can be with you forever. 


( image credit to original source)


Eggless Sugar Cookies Recipe


EGGLESS SUGAR COOKIES RECIPE | CHRISTMAS RECIPES 2014

Recipe Source - here
Prep time - 10 mins, freeze time 15-30 mins
Bake time - 8-10 mins
Makes - 2 dozen cookies

Ingredients

Unsalted butter - 1 stick or 1/2 cup in room temperature

Powdered sugar - 1 cup 
Vanilla - 1 tsp
Almond extract - 1 tsp
Maida/ all purpose flour - 1 and 1/2 cup
Baking powder - 2 tsp
Milk - 3 tbsp
Salt - 1/3 tsp

Method


1. In a small mixing bowl mix the flour, salt and baking powder set aside. 

2. In a large bowl cream together butter and slowly add in the powdered sugar and mix well, add in the vanilla and almond flavoring and mix well. 
3. Add the milk and give it a good mix, add in the flour and form a dough make sure you do not overmix.
4. Pop this into a refrigerator for 20 mins/ freezer.
5. Divide dough into 4 parts and flatten then using a rolling pin around 1/2 inch thickenss.
6. Pre-heat oven to 350 F for 10 minutes and line a baking pan with parchment and set aside. Using the cookies cutter cut the dough into shapes. 

7. Repeat this process until all the dough has been used up. You might have to do in batches or have extra baking pans to bake them one after the other.
8. Place the cookies in the baking sheet with 1 inch space between cookies and bake in center of oven for 8-10 minutes until u see the sides and edges changing colour.
9. Once done remove the baking tray from the oven and let it cool on a cooling rack for 10 minutes undisturbed.
10. Remove the cookies and enjoy them or gift them as goodies. 


Easy cookie recipe for Christmas
COOKS WISDOM

TIP 1

1. Make sure that the dough is nice and chill to work on them. Do not knead the dough the warmth in your hands will let them turn to room temperature faster.

TIP 2

2. You can color the cookies with edible food coloring for more attractive cookies but I loved them plain. 

TIP 3

3. You can use any kind of flavoring for these cookies i personally prefer using vanilla and almond together.

TIP 4

4. The cookie dough can be freezed to do later. Also the baked cookies store well in room temperature for upto a week in an air tight container. 


for CHRISTMAS RECIPE LIST click here


RELATED RECIPES


Sprinkle Shortbread Cookies | Christmas Recipes 2014

$
0
0
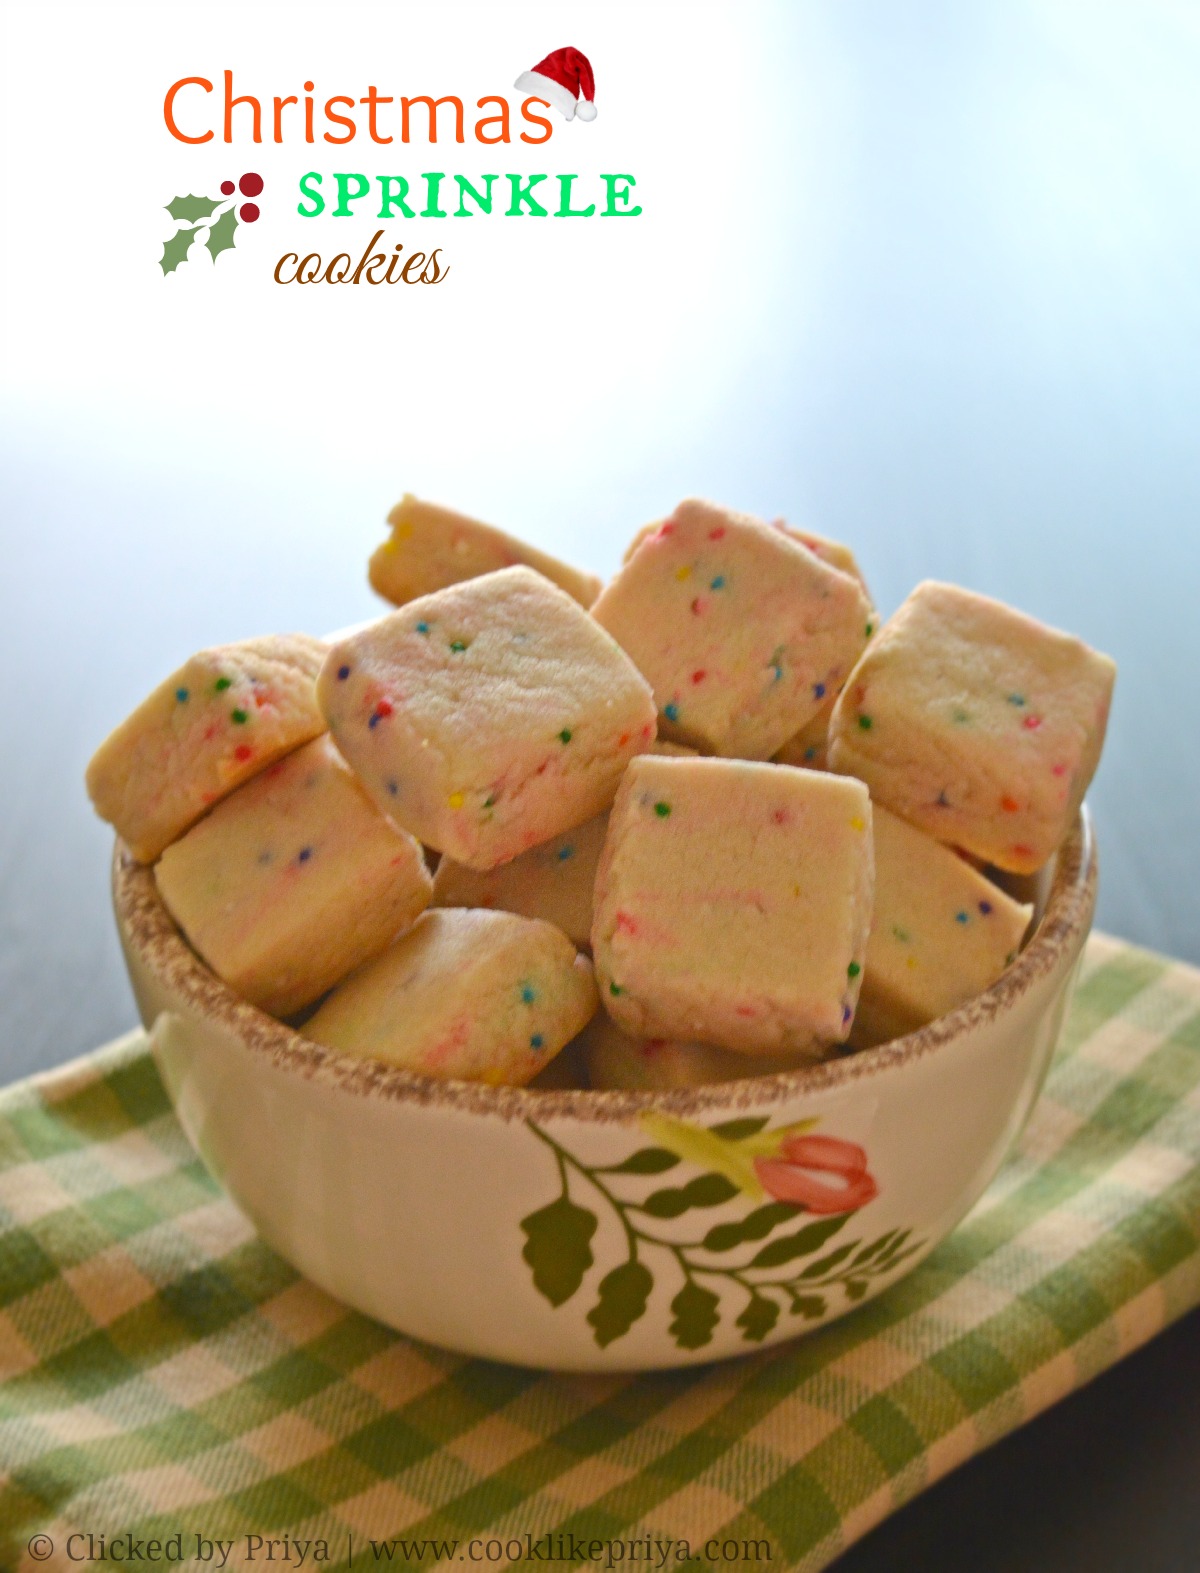
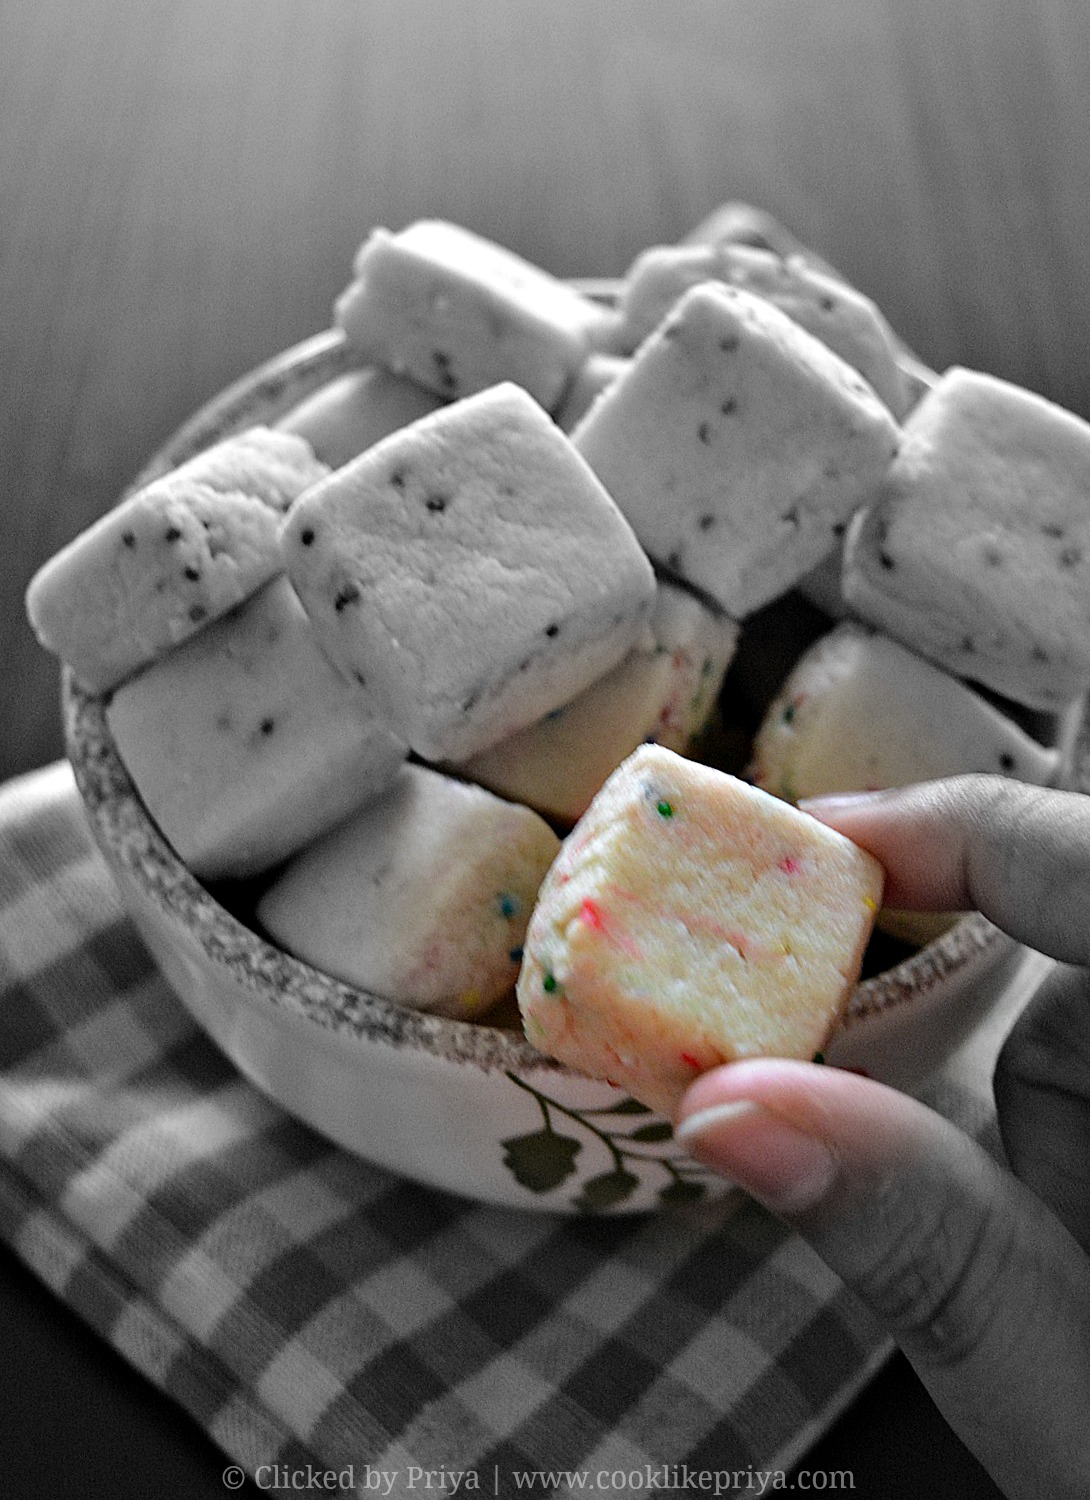
Sprinkle Shortbread Cookie Recipe
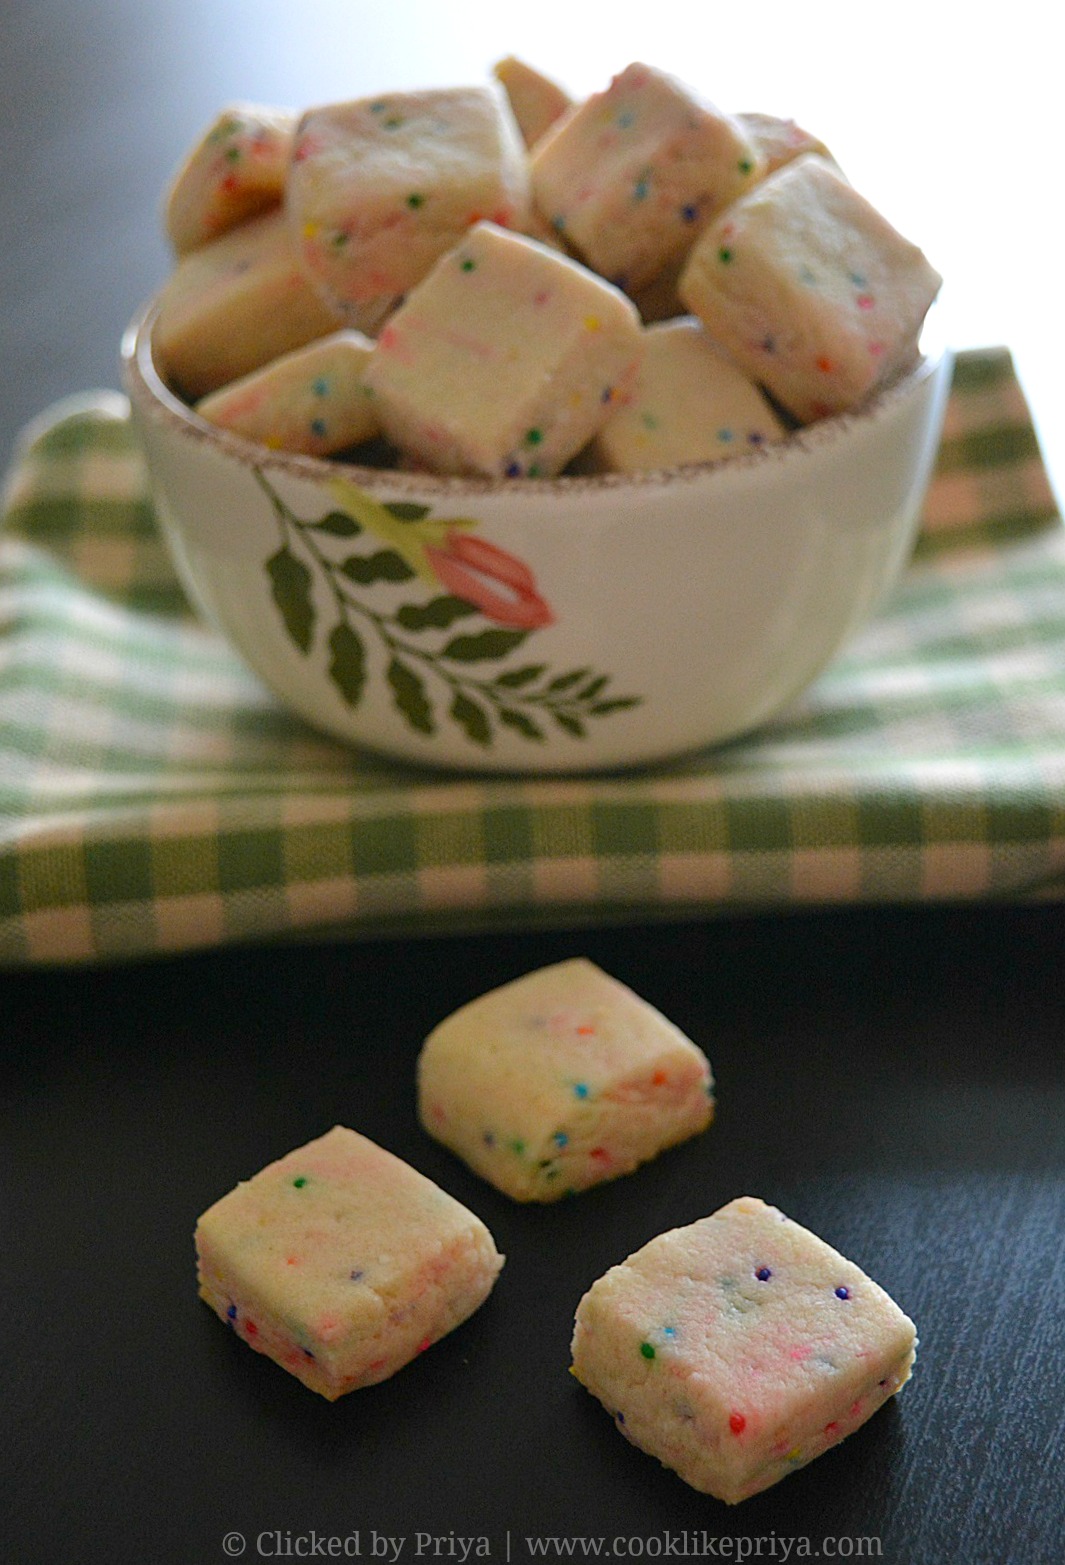
This Year I am baking a huge batch of assorted cookies for friends and family.  I will sharing more Christmas cookie recipes on my blog, hopefully by Christmas day. I was doing too much baking that I got tired to share recipes on my blog. I have always wanted to try these shortbread cookies, they are popular on Pinterest, but for some reason I kept postponing to bake them. Last week when I saw my friend +Sangeetha M  bake these cute cookies I thought its time to bake them ;-). Bite size Christmas shortbread cookies sounds interesting right? and this definitely is such an easy recipe too. If you have any kind of sprinkles just go ahead and make these. They are soft buttery and so attractive that you don't want to miss baking them for christmas. I could not find christmas colors like red and green sprinklers so I went ahead and used mixed colors and they look so attractive nevertheless. For more Christmas Recipes click here.


Easy Eggless Christmas Cookie Recipe


TRUE MEANING OF A CHRISTMAS TREE

Glittering Christmas trees with bows and bells and ornaments, don't we all love them? Its all these glitters that make Christmas magical and people all over the world love Christmas for the beauty of such things. Just this weekend I was asked by a friend of mine what is the reason to keep a Christmas tree? is there a relation to it with Christmas. Hmm this question make a give a quick answer to be honest. Not something that I searched online or came up from an article. I always thought that the Christmas tree symbolizes the tree that Jesus hung, that sacrifice that is still evergreen. She seemed convinced with my answer and nodded but it made me just want to understand why a Christmas tree for Christmas? 
I did look onilne for an answer by it takes about a tradition in Germany and how they kept a tree garlanded with food and nuts and fruit with lights for Christmas that go spread all over the world and everyone started to follow this tradition. Most times we all go along with the cattle and never try to understand and reason things that we do. Its not just in festivals and in our daily life we do tend to just do things because thats the way it is done. I found something interesting in my quest for the answer see the picture below and you will know it does make sense.


Let this Christmas be one that centers God the evergreen one in our lives and let him take the special place the distinct star on top of our trees and our lives. Lets make this a Merry 'Christ' mas. 

Easy Eggless Christmas Cookie Recipe
SPRINKLE SHORTBREAD BITE COOKIE RECIPE 

Recipe - adapted from SpicyTreats 
Prep time - 15 mins
Bake time - 18 mins
Makes - 2 dozen or more cookies
Storage - keeps well in airtight container for upto a week

Ingredients

All purpose flour - 2 & 1/2 cups
Powdered sugar - 1 cup
Cold butter good quality unsalted butter- 2 sticks or 1 cup
Colored sprinkles - 4 tbsp
Vanilla extract - 1 tsp
Cold milk - 1/2 tbsp

Method

1. In a bowl cute the butter into small pieces mix in  the sugar and combine to form a crumbled mixture. To this add in the vanilla and flour and mix well until the flour in evenly mixed into the butter.
2. Add in the milk to form a dough and tip in the sprinklers mix well into the dough and refrigerate for 10 minutes until the dough is cold.
3. Remove from the refrigerator and place between parchment paper and roll the dough into a log. Chill the dough for 5-10 minutes.
4. Using a sharp knife cube the dough into small mini bite sized pieces (they will expand while baking). 
5. Pre-heat the oven to 325 F for 10 minutes.
6. Line a baking tray with parchment and line the cookies giving 1/2 inch space between them, bake in center of oven for 18-20 minutes until the bottom is slightly browned.
7. Repeat the same process until all the cookies are baked.
8. Once done remove from oven and let the cookies cool on the baking tin on a cooling rack for 10 minutes undisturbed.
9. Store in an air tight container for unto a week. 

Eggless Christmas Cookie Recipe
COOKS WISDOM

TIP 1

1. The original recipe calls for a food processor since I used my mixing bowl I included little milk for binding but its totally optional in case you are using a food processor.

TIP 2

2. I added little more sugar than the regular recipe. Usually shortbread cookies have more butter flavor and less sugar if you want it with less sugar then reduce powdered sugar by 2 tbsp.

TIP 3

3. Do not knead the dough too much while adding in the sprinkles this will result in gluten being formed in the dough and the sprinkles releasing color. 

TIP 4

4. You can flavor the cookies with lemon/ orange zest or flavoring or even almond flavoring. 


                 for CHRISTMAS RECIPE LIST click here


RELATED RECIPES

CHRISTMAS MESSAGE COOKIES
CANDYCANE COOKIE {EGGLESS}OLD FASHIONED SUGAR COOKIES 
PINWHEEL COOKIES/ VANILLA CHOCOLATE COOKIES
CHOCOLATE SNOWBALLS

CHOCOLATE & NUT FUDGE
SPICED SUGAR COOKIES {EGGLESS}
WHOLEWHEAT JAM CENTRED COOKIES
CHOCOLATE CRINKLES
CANDIED ALMONDS
CHOCOLATE RUM TRUFFLES
FRUIT & NUT COOKIES, ICE BOX COOKIES {EGGLESS}
WREATH COOKIES

Masala Paal | Spiced Turmeric Milk Recipe

$
0
0
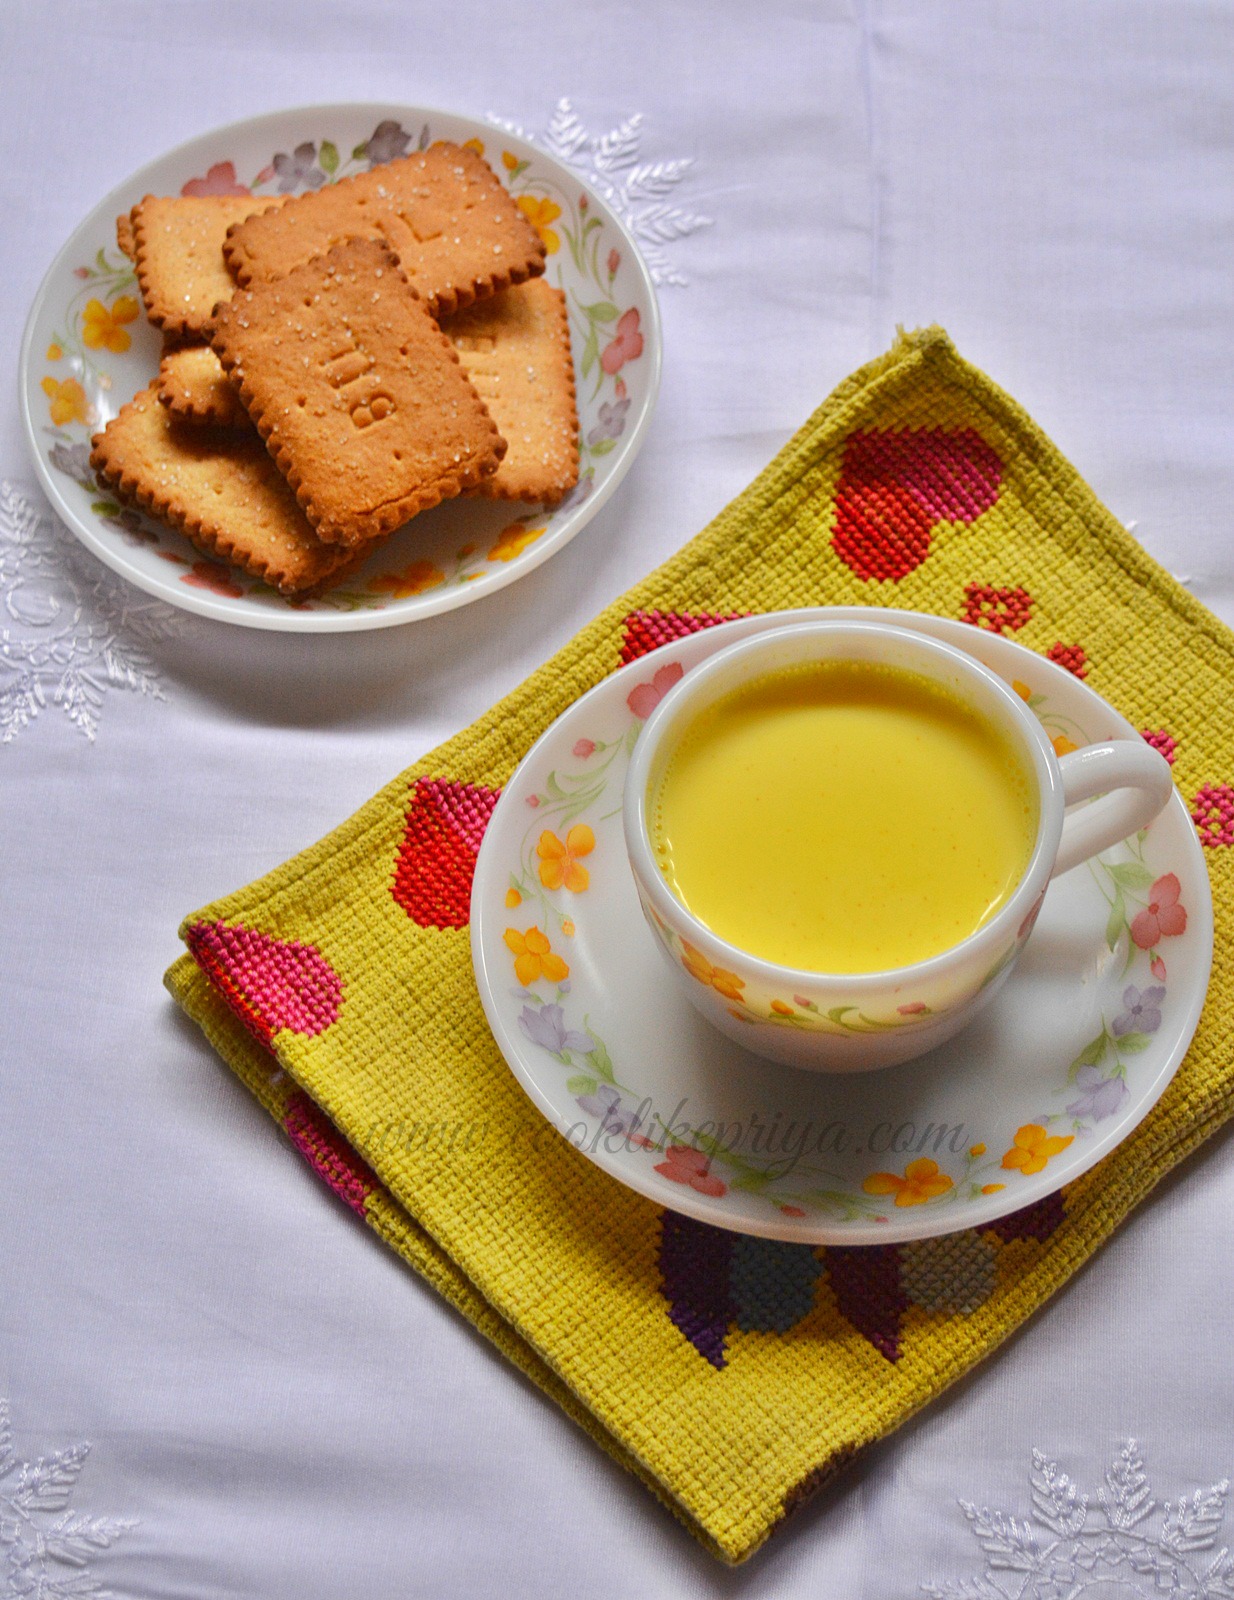
Masala Paal / Masala Milk Recipe
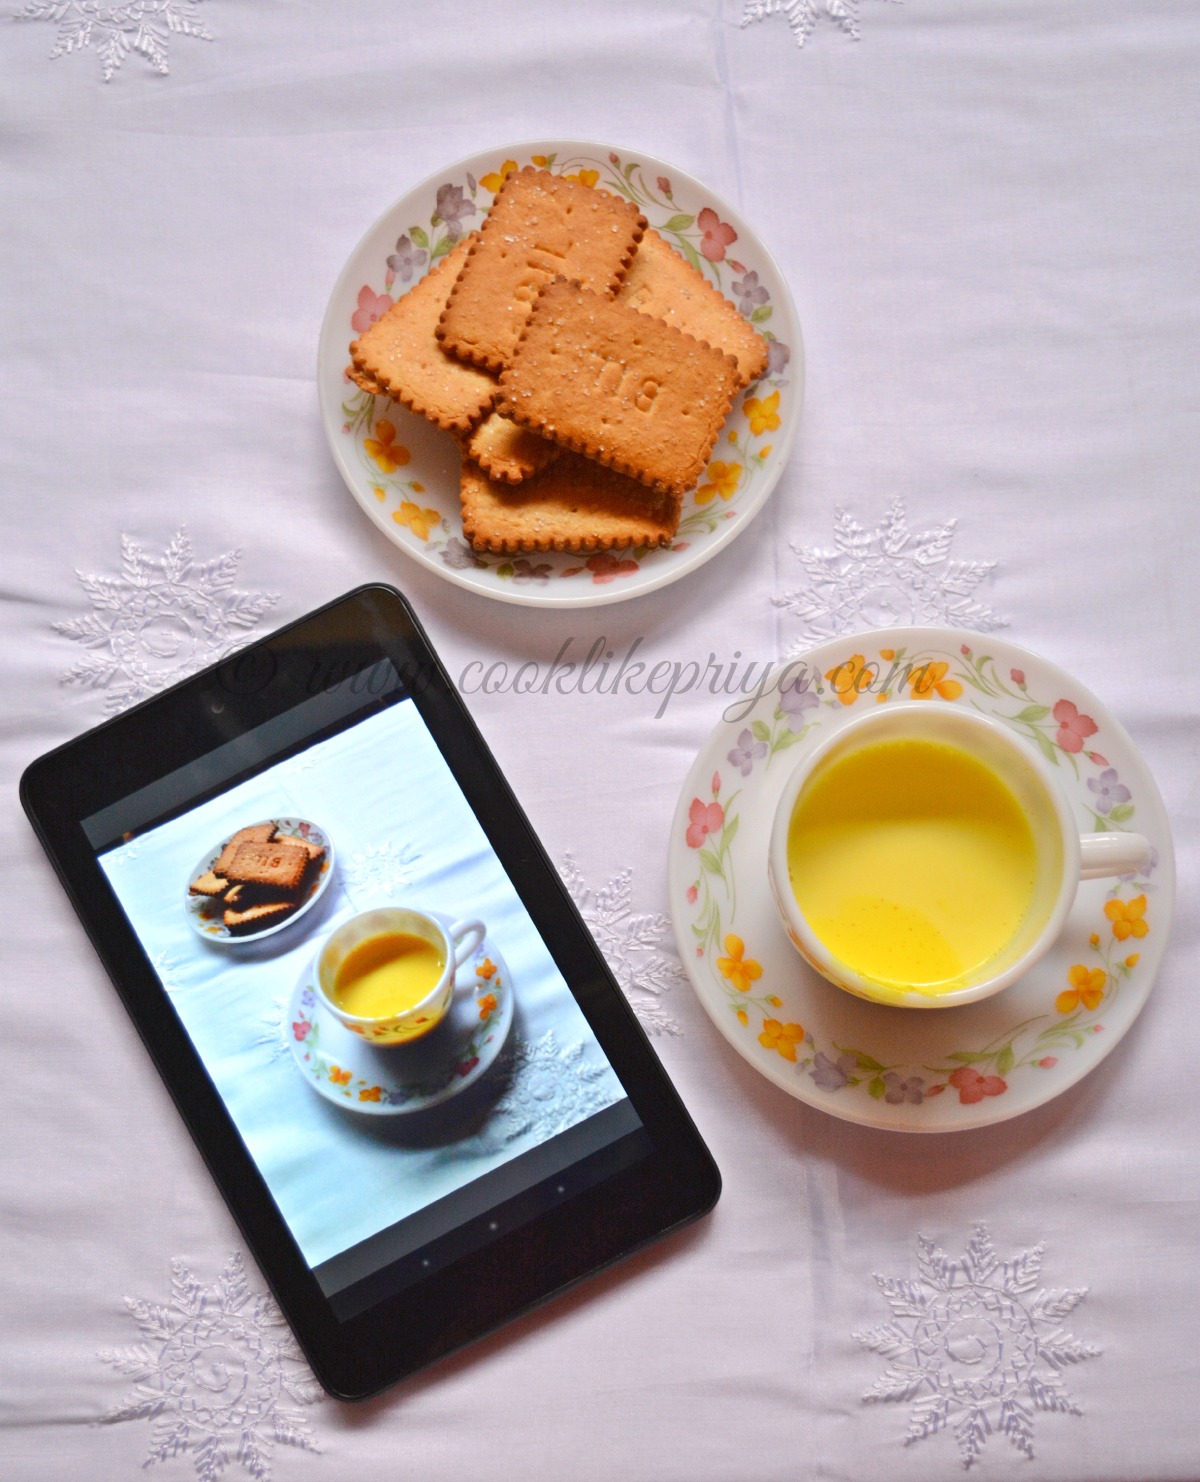
The wet raining weather and chilled climate calls for some warm comfort drink to kick start the day/ evening. I was craving for some Masala Paal (Masala Milk) and Nice biscuits. The weather makes things so comforting that all I wanted to do is roll under my sheets and this warm soothing drink just awakened my senses. And I just remembered that I was supposed to share my experiences with the Dell Venue 7 Tab. And today I will be sharing my browsing experience with this amazing 7" companion. 


Spiced Turmeric Milk Recipe

Dell Venue Tab 7 - Food Blogger Review
MASALA PAAL | SPICED MASALA MILK RECIPE

Recipe - Own
Prep time - 5 mins
Serves - 2 generously

Ingredients

Milk - 1 and 1/2 cup (use full fat)
Turmeric powder - 2 pinches
Cardamom powder/ cardamom pods - 1 tsp/ 4 pods
Cloves - 4 no
Cinnamon - 1" stick
Sugar / palm candy - as required
Nuts (pista/almonds/ cashew) - few chopped or powdered
Saffron - 3 strands

Method

In a saucepan bring the milk to boil and reduce for 5 minutes, Once it thickens add all the ingredients and let it boil further for 5 minutes. Switch off and strain the milk serve warm along with some snacks:). 

COOKS WISDOM

TIP 1

1. I love making masala paal in full fat milk but you can always use 3% milk too. It gives a lovely richness to the drink.

TIP 2

2. I did not use any nuts but adding them will give a great taste.

TIP 3

3. Do not add too much turmeric powder, a little goes a long way. Also you could add little masala chai powder for a lovely aroma and skip the use of whole spices. Dry ginger powder also gives an amazing flavor to the drink. 

TIP 4

4. For cough and cold use a little pepper ( a pinch) for 2 cups milk. It gives a soothing effect to cough cold and congestion. 

Masala Milk Recipe
Masala Milk Recipe

Dell Venue Tab 7 Review
DELL VENUE TAB 7 REVIEW

If you had been following my bog closely you must have seen my earlier review posts of the Dell Venue tab 7. Its been couple of months now with the tablet and I find myself using it a lot more these days. I find the tablet more handy than a laptop. Its light in weight, easy to carry with one hand and totally great to use when I am on bed lying down. What I do with the tablet all day is what I wanted to cover in this post. As I sip my cup of masala paal I will be sharing my experience with Dell. 

I usually click pictures for my blog with my DSLR, I prep the post with pictures and titles and save them on draft and later using my Dell tab I start typing the post and posting recipes. I also publish comments and check stats on my blogger dashboard and blog hop. 
I find Dell very user friendly similar to my nexus 7 and I guess its because of the user friendly OS. Although we do own a 10" ipad its really huge and cannot be held in one hand so find myself going to the Dell Venue tab more often.

In terms of browsing and reading I find the Dell more convenient and easy. I even gave the tablet to my mom to use and she almost easily got the whole hang of using it in less than 5 minutes. Mind you she is quite used to her ipad and she didn't have any qualms using Dell Venue

Dell's dual core Intel Atom processor lets me download many apps few of my favorite apps being - Sweet n Spicy, Whats app, Facebook, Facebook pages (CooklikePriya), Insagram, Pinterest, Twitter,Bible, YouTube, Instacollage, Flipkart, Groupon and so on. I am not a huge game fan, so you will hardly see any fame apps in my Dell Venue. The 16 GB memory space gives me ample space to download apps and store pictures, videos. 

Cook like Priya - Dell Venue Tab 7 Review (Product Review)
Cook like Priya - Dell Venue Tab 7 (Product Review)
Dell Venue 7 horizontal view lets me view my website in full screen without having to shorten the menus tab. I also use this to get a hang of how fast my website loads on an android device. Also I check the layout and design of my website which you guys know I keep changing fonts, header, designs and it helps.


Conclusions & Ratings (5 being the highest)

Browsing - 4/5
Speed - 4/5
Powerbackup - 3/5
User experience - 4/5
Storage - 5/5

My overall ratings - 4/5 

To view my other review posts on Dell click the links below

Dell Review 1
Dell Review 2
Dell Review 3


RELATED RECIPES

GINGER TEA
CARDAMOM TEA
SUKKU KAPPI
CARDAMOM MILK

Majestic Chicken | Andhra Style Majestic Chicken Recipe

$
0
0

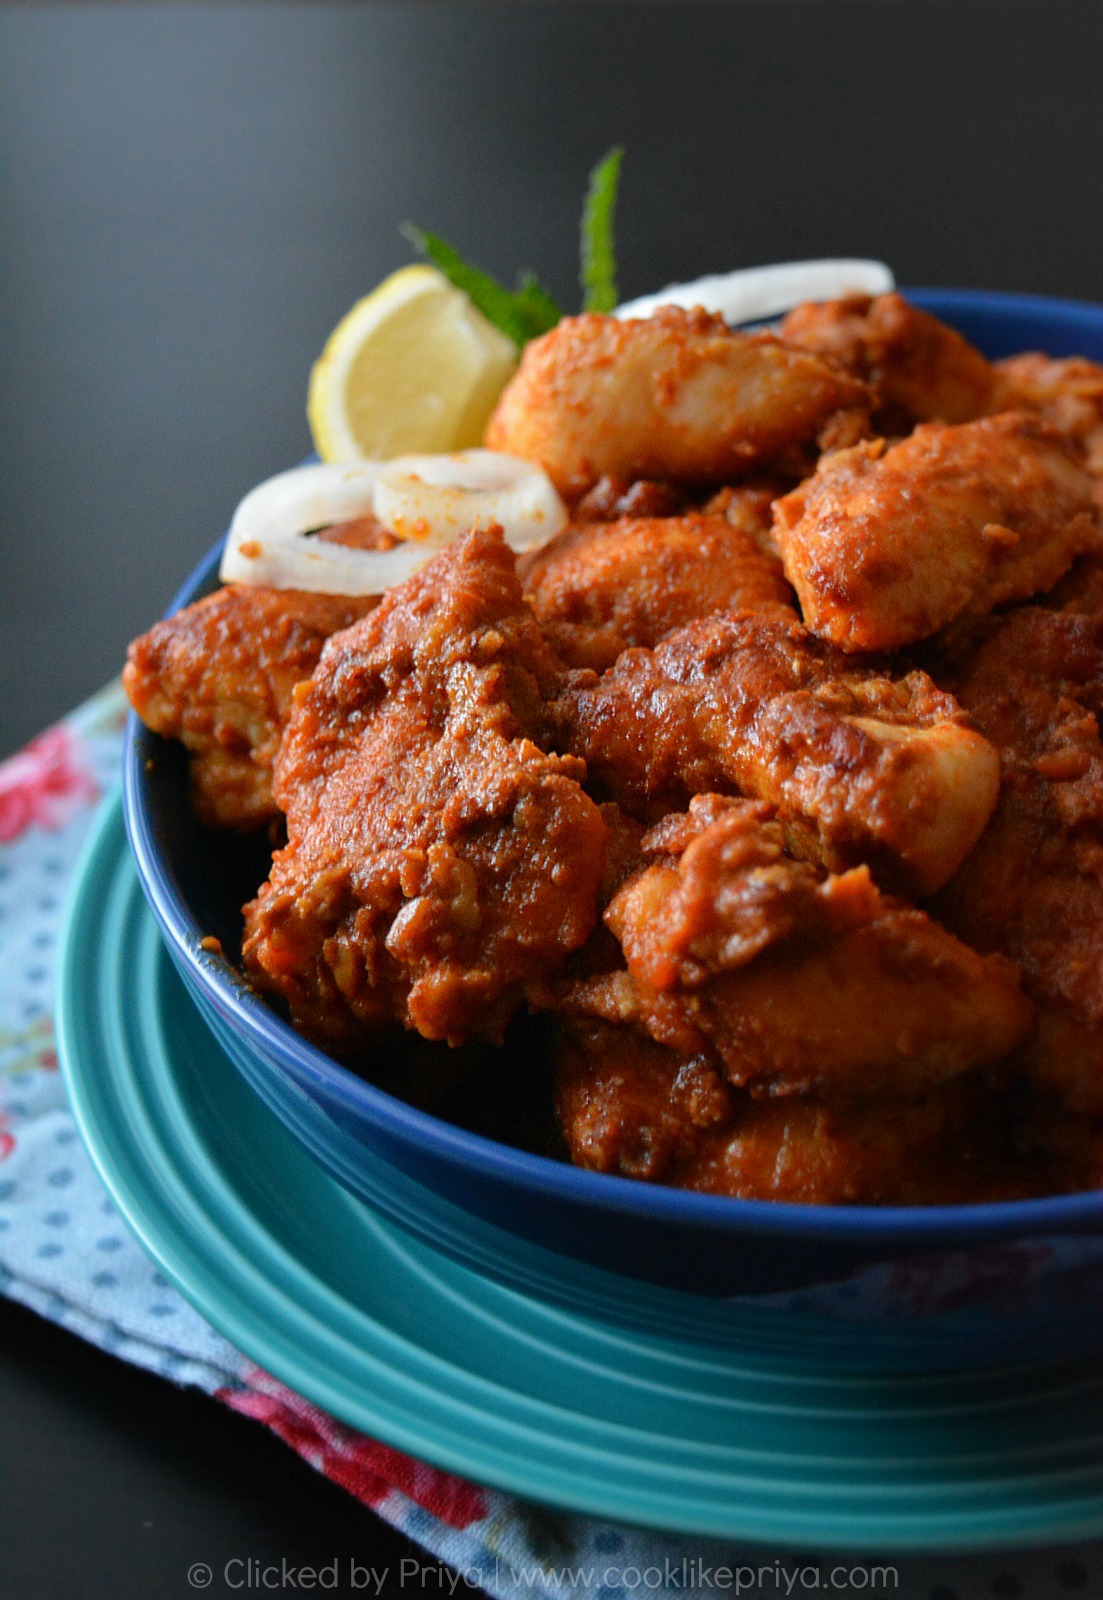
Majestic Chicken Recipe
Its the first day of the year and I have been on a complete holiday mood. Some good times with family and a long roadtrip what other better way to spend the holidays? I have not blogged in a while and it seems so hard to get back to a routine although I would love to. Lets hope the new year brings some new changes with me and the blog. I pray and wish that the new year turns to be happy, hearty and healthy for all my dear readers. 

Wishing you a happy new year 2015

Majestic Chicken is a popular dish in Andhra Pradesh, you will find this recipe featuring in most menu cards. Although I have heard a lot about this recipe I never got a chance to try this dish. So the first time I made this recipe it was too good and I cannot remember how many times I have tried this recipe at home. My husband and I love Chicken Majestic so much, we also love any Indo Chinese recipes like One pot Chicken, Chicken Fried Rice,  Chicken Spaghetti, Fish Manchurian, Grilled Chicken, Garlic Chicken and so on.

Andhra Style Majestic Chicken Recipe
MAJESTIC CHICKEN RECIPE | ANDHRA STYLE MAJESTIC CHICKEN

Recipe Source - adapted from here
Prep time - 3-5 hrs
Cook time - 20 mins
Serves - 3-4 generously

Ingredients 

Chicken - 150 gms (i used thigh pieces sliced into chunks)
Buttermilk - 1/4 cup
Egg - 1 large
Cornflour - 2 and 1/2 tsp
Ginger garlic paste - 2 tsp
Green chillis - 3-4 medium chopped
Corriander powder - 2 tsp
Cumin powder - 1 tsp
Kashmiri red chilli powder - 1/2 tsp
Turmeric powder - 1/4 tsp
Soya sauce - 2 tsp
Curry leaves - 1 spring
Mint leaves - 4 tbsp chopped
Yogurt - 4 tbsp
Minced garlic - 1 tbsp
Oil - to shallow fry & make the dish - 4 tbsp
Salt - to taste

Method

1. Wash the chicken pieces in running water 3-4 times and drain all the excess water. Transfer the chicken to a bowl, add buttermilk and salt marinate it for 4 hours and keep in the refrigerator. 
2. Remove the marinated chicken from the refrigerator and keep it in room temperature for 30 mins. 
3. Add the egg, ginger garlic paste and cornflour and mix this into the chicken and let it sit for 20 minutes.
4. When ready to cook heat oil in a pan and shallow fry the chicken pieces cook until they turn golden around 3-4 minutes turning sides. Repeat the same until all the chicken pieces are well fried. 
5. To prepare the base of the dish, add chopped garlic to the same pan with the leftover oil, after just 3-4 seconds add the curry leaves, green chilli and saute until the leaves wilt.
6. Add the corriander, turmeric, kashmiri red chilli and cumin powder saute well. Add in the soya sauce mix well saute for a 20 seconds and then add in the beaten yoghurt mix well and add in the fried chicken pieces. Mix well until all the chicken pieces are well coated with the masala base.
7. Garnish with mint leaves, give it a good mix. Serve out of the pan as a starter or as a side. 

COOKS WISDOM

TIP 1

1. Make sure chicken is well marinated, the buttermilk marination helps the chicken to turn really tender and juicy.

TIP 2

2. You can adjust the spices and make it more spicy but I find it just perfect not too spicy but medium and well seasoned.

TIP 3

3. You can also garnish with spring onions if you do not have mint leaves.

TIP 4

4. Original recipe does not call for kashmiri red chilli but I had added it since my soya sauce is light one.


RELATED RECIPES

One pot Chicken
Chicken Fried Rice
Chicken Spaghetti
Fish Manchurian
Grilled Chicken
Garlic Chicken

Cranberry Spiced Cookies {Eggless} | Easy Cranberry Cookies

$
0
0

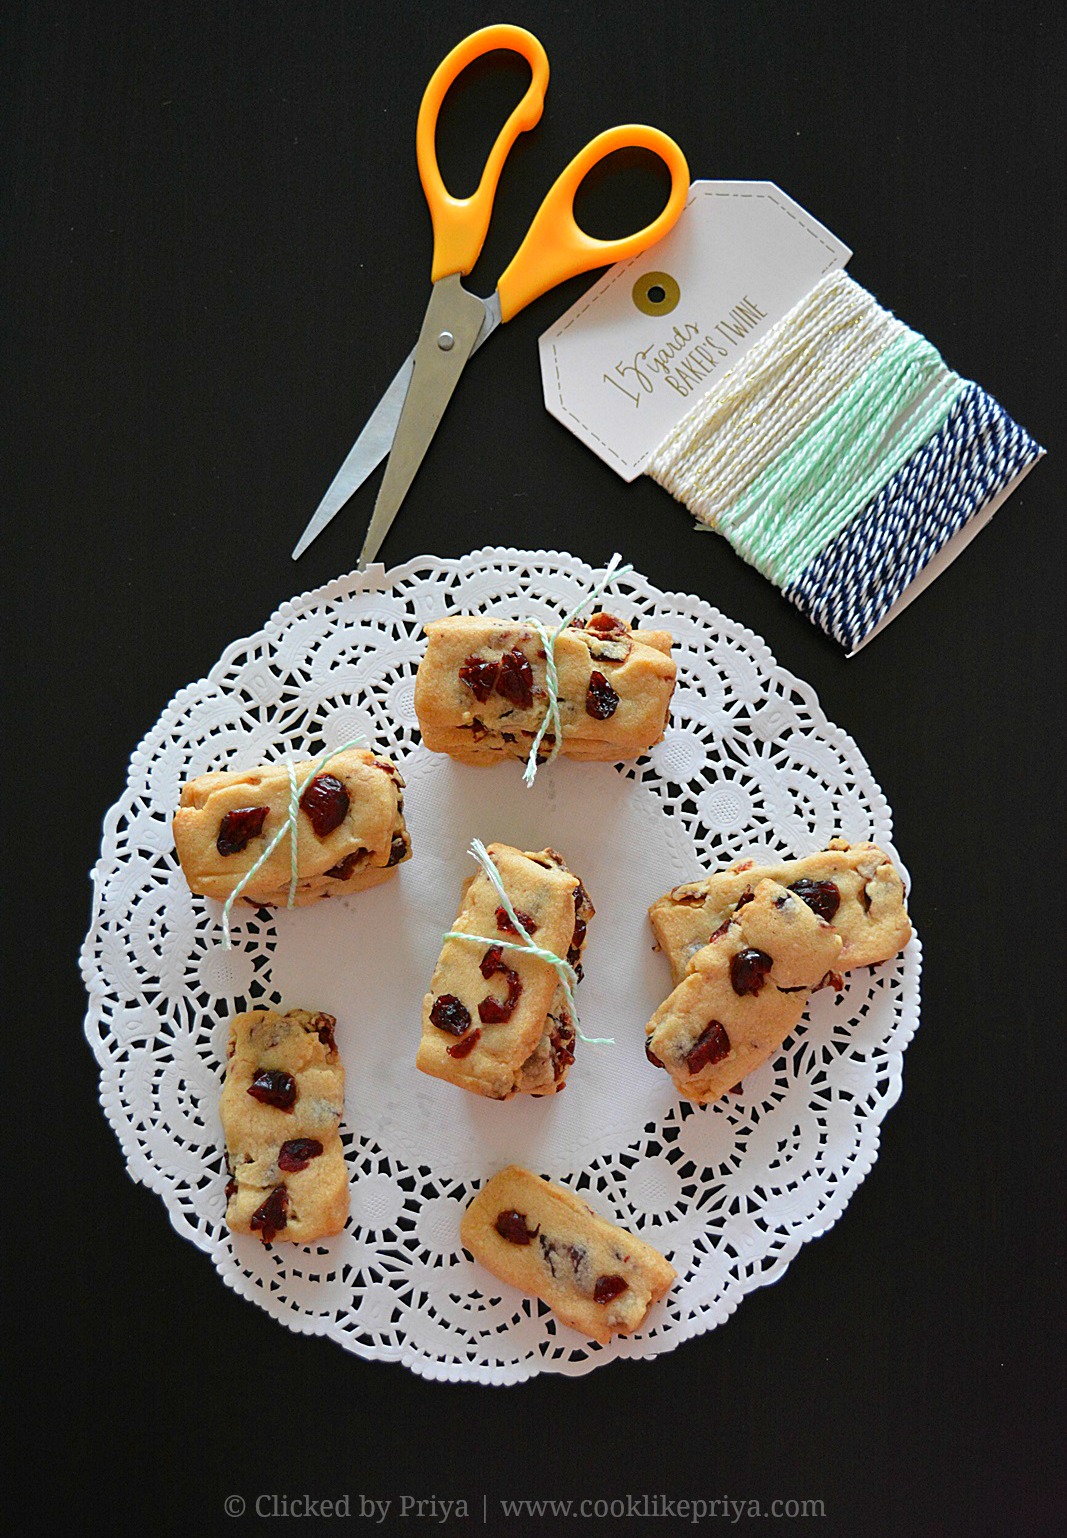
Eggless Cranberry Cookies

I love cookies and ones that are simple to put together. With all the Christmas cheer and some family time I had planned to bake these spiced Cranberry cookies as part of the Christmas goodies last year. I know I am so late at posting this recipe but better late than never. These cookies are neither crunchy nor soft but just perfect with the flavors of cinnamon, nutmeg and cranberry, it seems like this is a magic combination. You can even add chocolate chips to this recipe or nuts and flavor them the way you like. They store really well and last upto 10-12 days in an air tight container. 

Spiced Cranberry Cookies | Eggless Cookie Recipe

CRANBERRY SPICED COOKIES {EGGLESS} RECIPE

Recipe Source - adapted from here
Makes - 15-20 medium sized cookies
Prep time - 10 mins
Bake time - 10 mins
Storage - upto 10-12 days in an air tight container


Ingredients

3/4'th cup unsalted butter in room temperature
1/2 cup powdered sugar
1 and 1/4 cup all propose flour
1/2 cup dried cranberry chopped
1/4 tsp cinnamon powder
1/3 tsp nutmeg powder


Method

1. Pre-heat oven to 325F and line a baking tray with parchment. Cream butter and sugar until light and fluffy.
2. Mix flour along with the spices little at a time until well combined. Add the cranberries and mix into the dough, do not over work the dough. 
3. Using a rolling pin flatten the dough and cut into rectangles, you could also shape them into balls and flatten them.
4. Line in the cookie tray with 1" space between the cookies and bake for 10 minutes.
5. Once done remove from the oven and let the cookies cool down in the tray on a wire rack for 10 minutes.
6. Store them in air tight containers for upto 10-12 days.


Spiced Cranberry Cookies | Eggless Cookie Recipe


COOKS WISDOM

TIP 1

1 Since my cookies were small I baked them for 10 minutes, you can increase the time if you plan to make them a little bigger for about 12 mins.

TIP 2

2. Flavor the cookies with almond extract or orange extract or top them with toasted almonds.


MORE COOKIE RECIPES


Eggless Mug Cake Recipe | Vanilla Mug cake

$
0
0

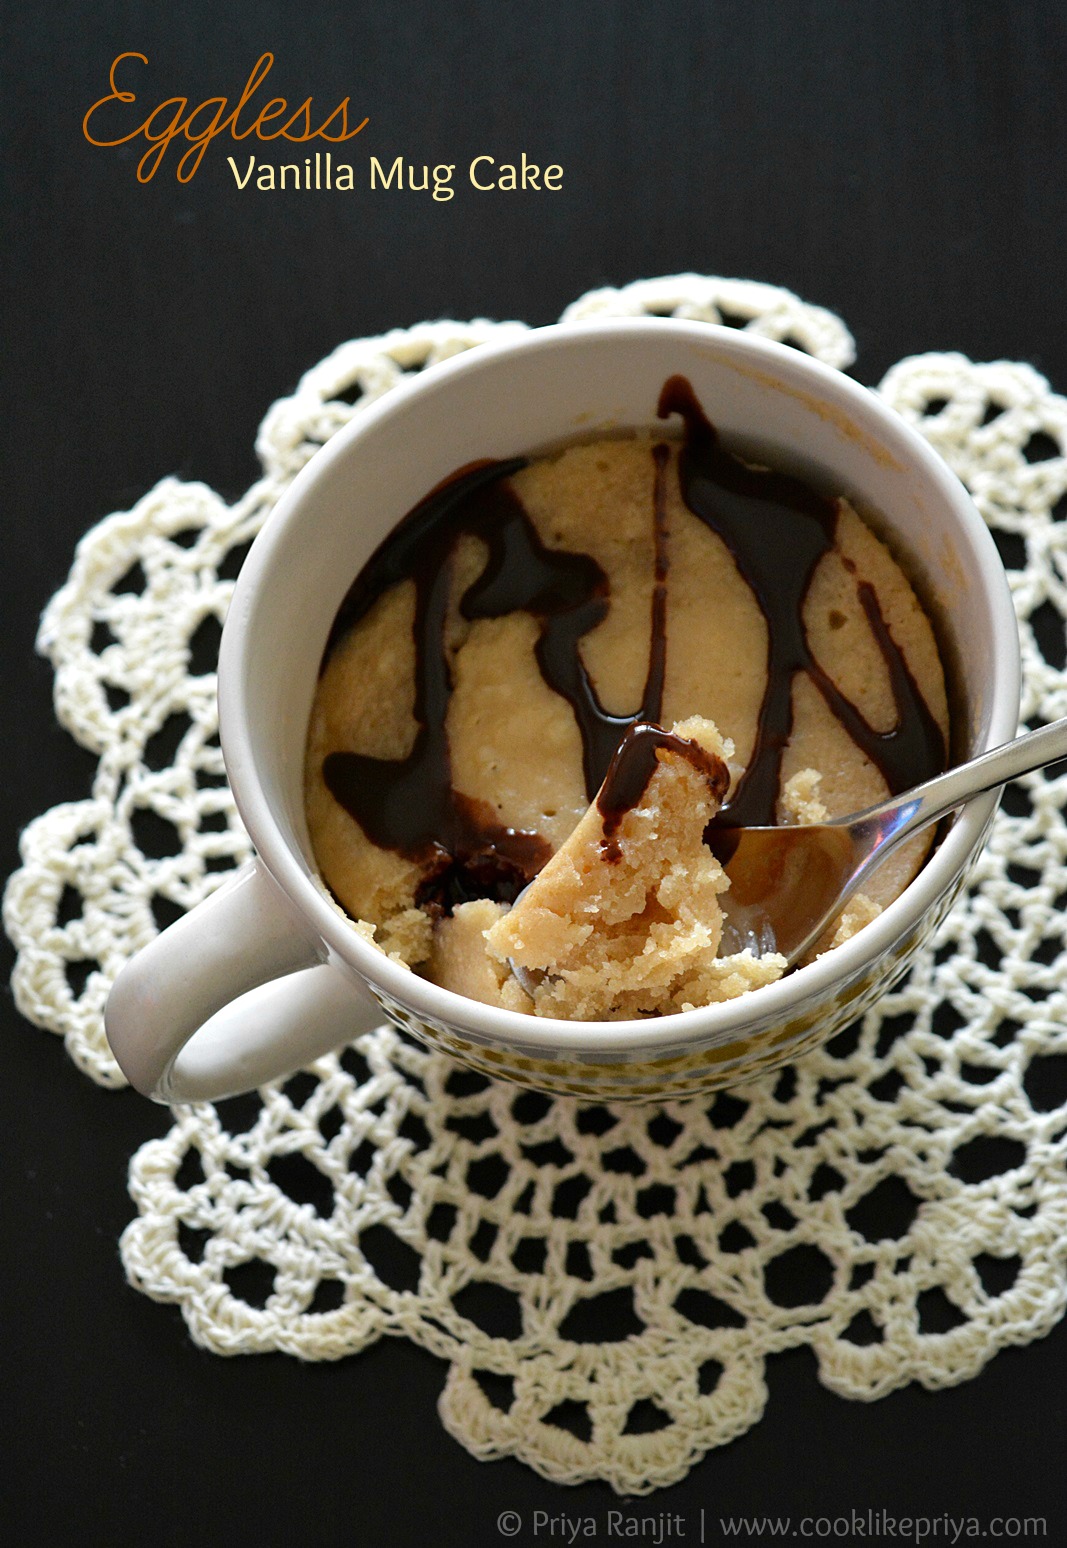
Eggless Mug cake recipe
Eggless Mug cake is one recipe that I keep making for a really long time. I really wonder why it took me such a long time to post this recipe on my blog. I have not blogged in a while and many of you have been asking me what happened. I was just busy with things at home and took a short break. But I promise to post recipes often. 

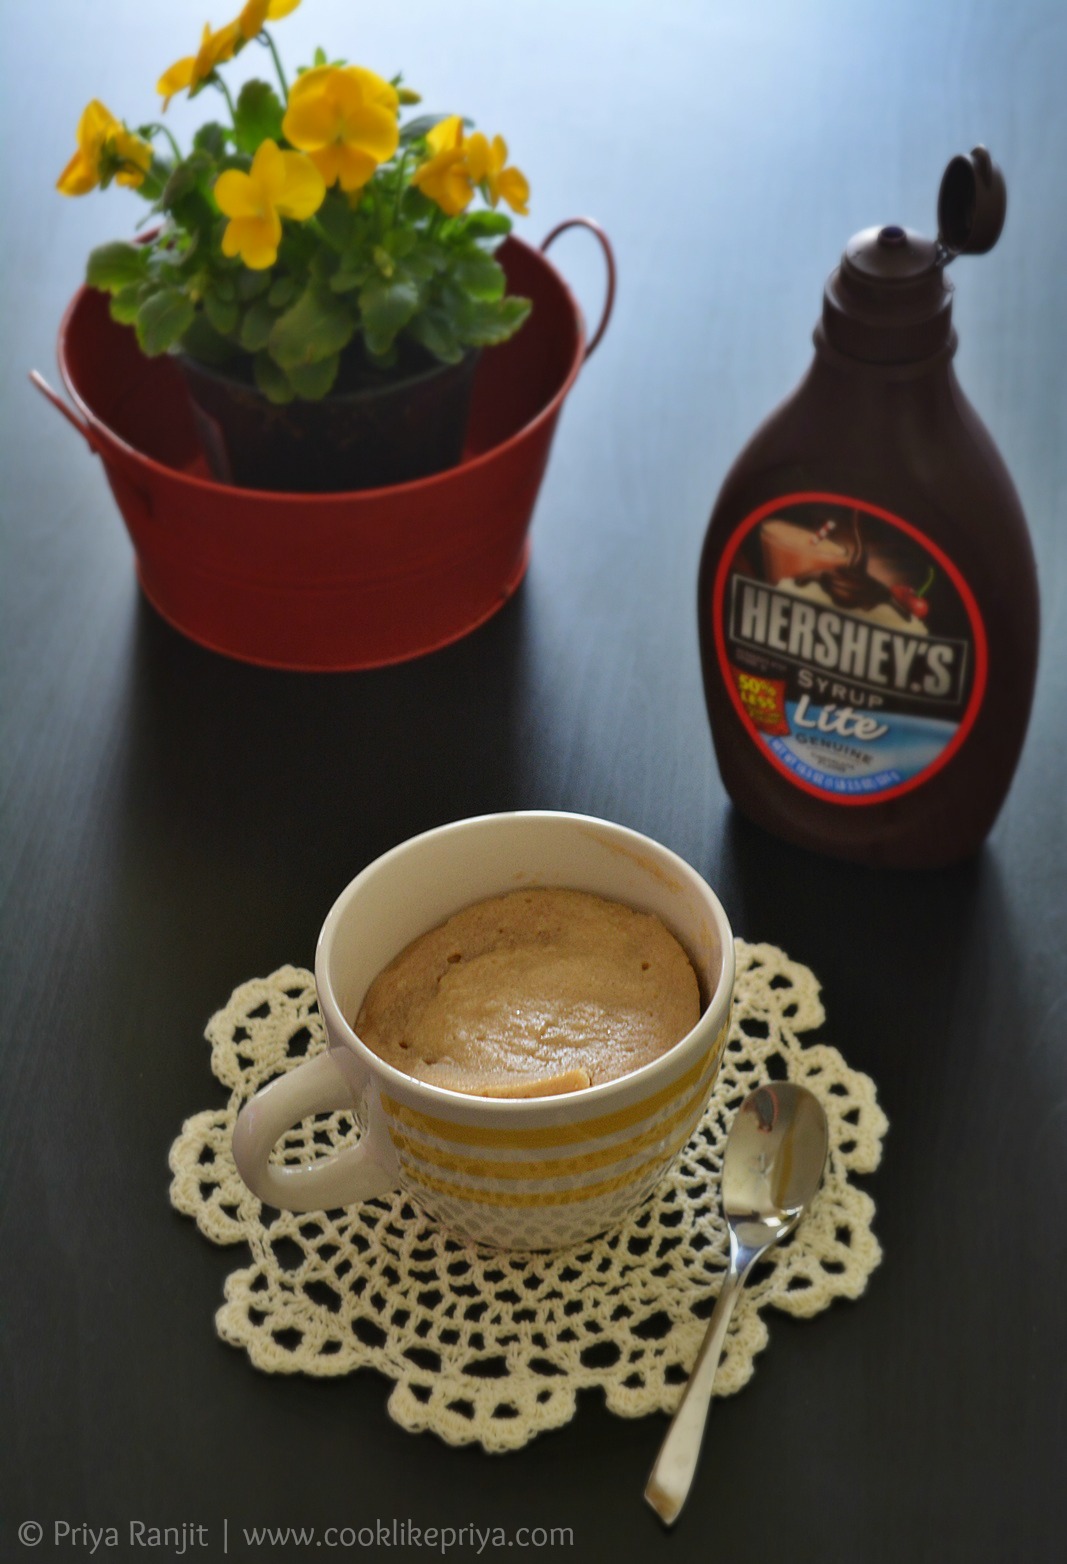
This 2 minute mug cake is eggless, quick to do and the softest. The cake is so soft, moist and delicious. This is one cake that is so quick to put together and with ingredients that are easily available in your pantry. I also have a chocolate mug cake recipe (Eggless) which I will post one of these days. 


2 minute mug cake recipe


Vanilla microwave mug cake recipe
EGGLESS MUG CAKE RECIPE | 2 MINUTE MICROWAVE CAKE

Recipe Source - here
Prep time - 2 mins
Cook time - 2 mins (microwave)
Serves - 1

Ingredients

All purpose flour / maida - 1/4 cup + 2 tbsp
Granulated sugar - 2 tbsp
Baking powder - 1/4 tsp
Salt - 1/8 tsp
Milk - 1/4 cup + 2 tbsp
Unsalted butter melted - 2 tbsp
Vanilla extract - 1/2 tsp

Method

1. In  a bowl combine all the ingredients and give it a good mix.
2. Pour the batter into a microwave sage mug and bake for 1 minute and then again for another minute.
3. Serve warm with chocolate syrup. 
Vanilla microwave mug cake recipe
COOKS WISDOM

TIP 1

1. Make sure that the recipe is followed to the dot for the perfect mug cake.

TIP 2

2. You could add chocolate chips or nuts to the cake batter.

TIP 3

3. The mug cake comes out perfect in 2 minutes but each microwave setting is different to be on the safer side bake for 1 minute and give a break to check if the cake is done.


MORE EGGLESS & BUTTERLESS BAKES

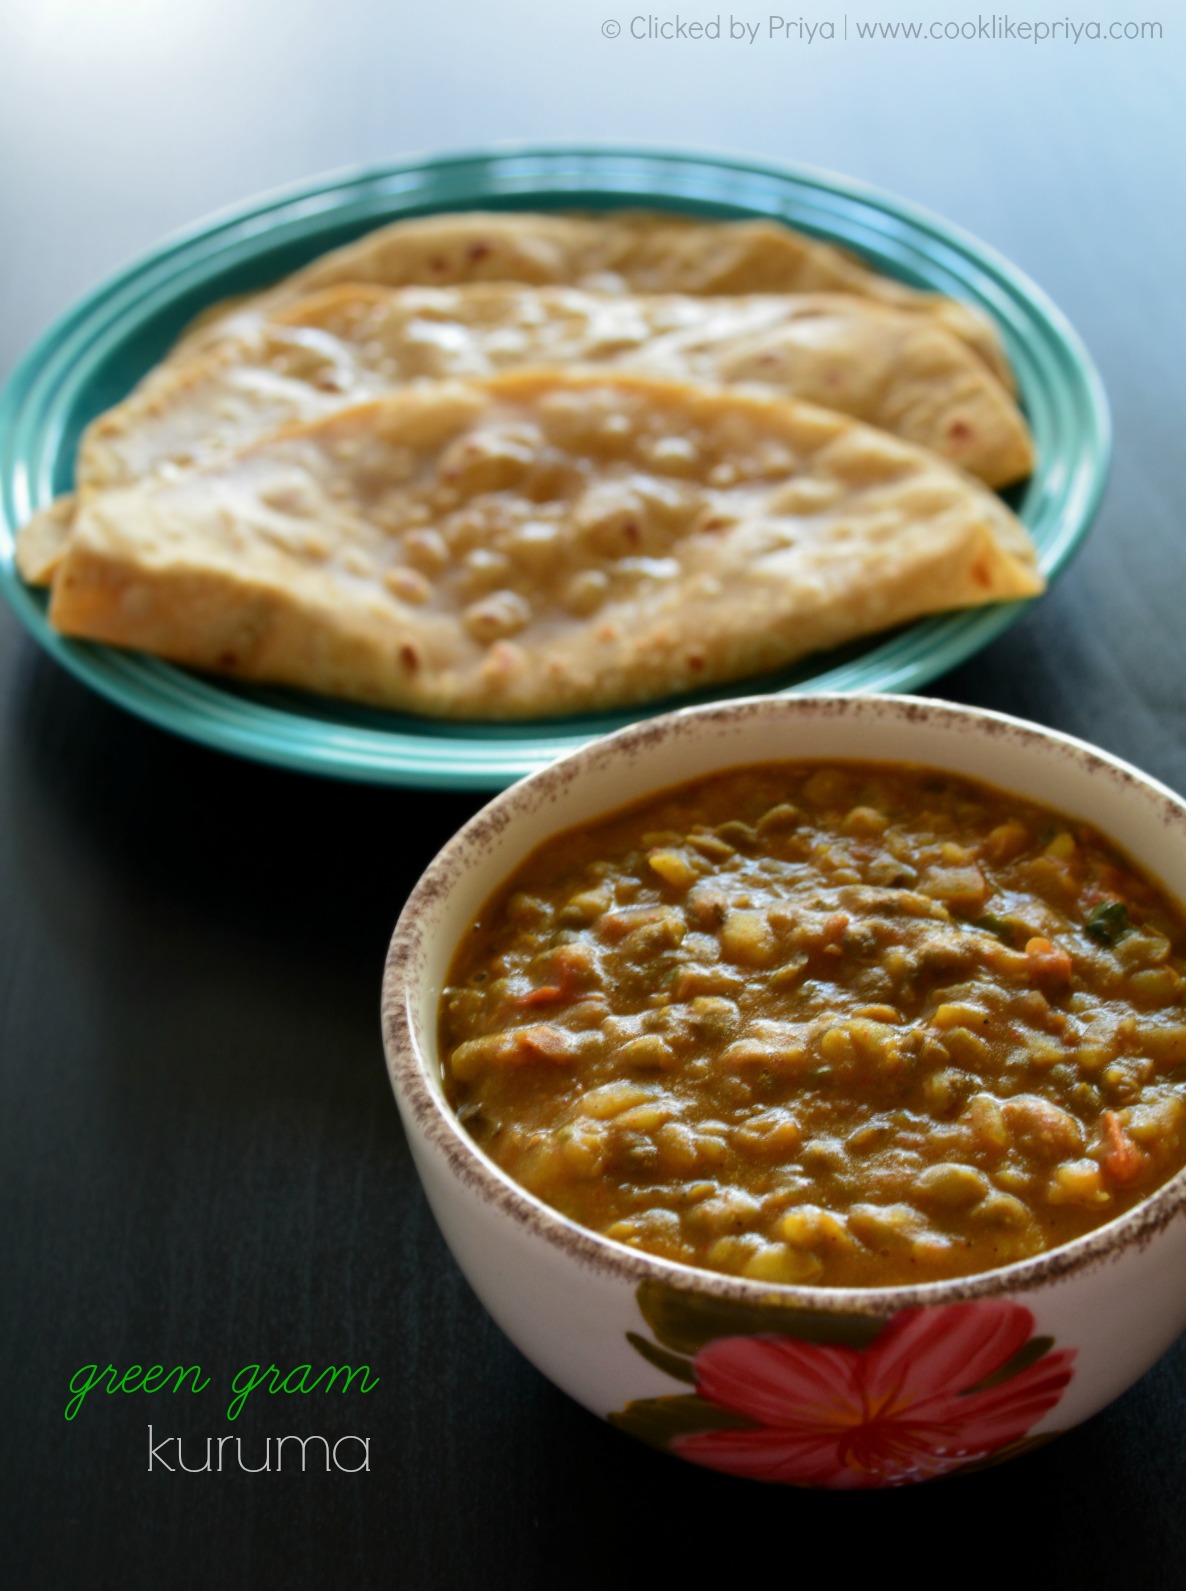
Green Gram coconut curry chapathi sidedish | Pachai Payaru Kuruma

$
0
0
Green Gram coconut milk curry
I really ought to say I miss blogging, writing a post, clicking pictures, it so happens that I have no motivation to blog these days, its been weeks since I post a recipe here. I know many of you wondered and even asked me what happened, I think I am lacking inspiration to blog although cooking inspiration is still alive. I do try to make 3 meals everyday, but I don't plate up and blog. I hope to get back soon and I just though better late than never so I took out my camera and started clicking pictures today. Here is a fresh post and fresh start (hopefully). 

Green gram or pachai payaru is a protein rich food, its also nicknamed the protein food for vegetarians. I usually cook green gram every fortnight as a lunch curry for chapathis. Everyone at home loves this delicious and simple curry and it so had to be blogged about. I also know that green gram is said to lower blood pressure and fill up your tummy. I have earlier shared recipes with green moong - Pacha Payaru Masiyal, Green gram mango salad, Green gram dosa, Chickpeas & green gram salad - . Lets move on to today's recipe. 


Pachai Payaru Kuruma - Chapathi side dish recipe
GREEN GRAM COCONUT CURRY | PACHAI PAYARU KURUMA

Recipe Source - Own
Prep time - 10 mins
Cook time - 15 mins
Serves - 2-3 

Ingredients

Green gram 1/2 cup - soaked in water overnight
Onion - 1 medium
Tomato - 1 medium
Oil - 1 tbsp
Bay leaf - 1
Cinnamon - 1/2 inch stick
Cardamom - 1 
Clove - 1
Fennel seeds - 1 tsp
Ginger garlic paste - 2 tsp
Turmeric - 1/4 tsp
Cumin - 1 tsp
Corriander - 1 tsp
Red chilli powder - 1/2 tsp
Garam masala powder - 1/4 tsp
Coconut milk (thin/ thick) - 1/4 cup
Salt - to taste
Corriander leaves - to garnish

Method

1. In a bowl soak green gram overnight (approx 8-10 hrs), Pressure cook until partially soft, I usually pressure cook it for 5 hisses. Switch off, let the pressure settle.
2. In a kadai/ pan heat oil, add bay leaf, cinnamon, cardamom, clove and fennel seeds, once the aroma releases tip in the onions and saute for 2 minutes until golden.
3. Add the ginger garlic paste and give it a good mix cook until the raw smell goes away around 2 minutes.
4. Add in the tomato and salt cook until mushy. Now add the spice powders - turmeric, cumin, corriander and red chilli. Mix well and cook for 30 seconds.
5. Add the cooked green gram with little of the water from the pressure cooked gram.
6. Cover with a lid and let this cook in medium flame for around 3-4 minutes.
7. Add the coconut milk and garam masala and mix well, let the curry simmer for 3 minutes undisturbed.
8. Check for spice level switch off and garnish with corriander leaves.

Serve as a side to chappathi or rice.


COOKS WISDOM

TIP 1

1. make sure that the green gram is partially soft this makes the curry tasty. 

TIP 2

2. You could also add tomato puree to make the curry more dense.

TIP 3

3. Use homemade coconut milk for amazing flavor.


RELATED RECIPES

Pacha Payaru Masiyal
Green gram mango salad
Green gram dosa
Chickpeas & green gram salad

Butterless Tres Leches Cake as we turn 4 | Tres Leches Celebration Cake

$
0
0

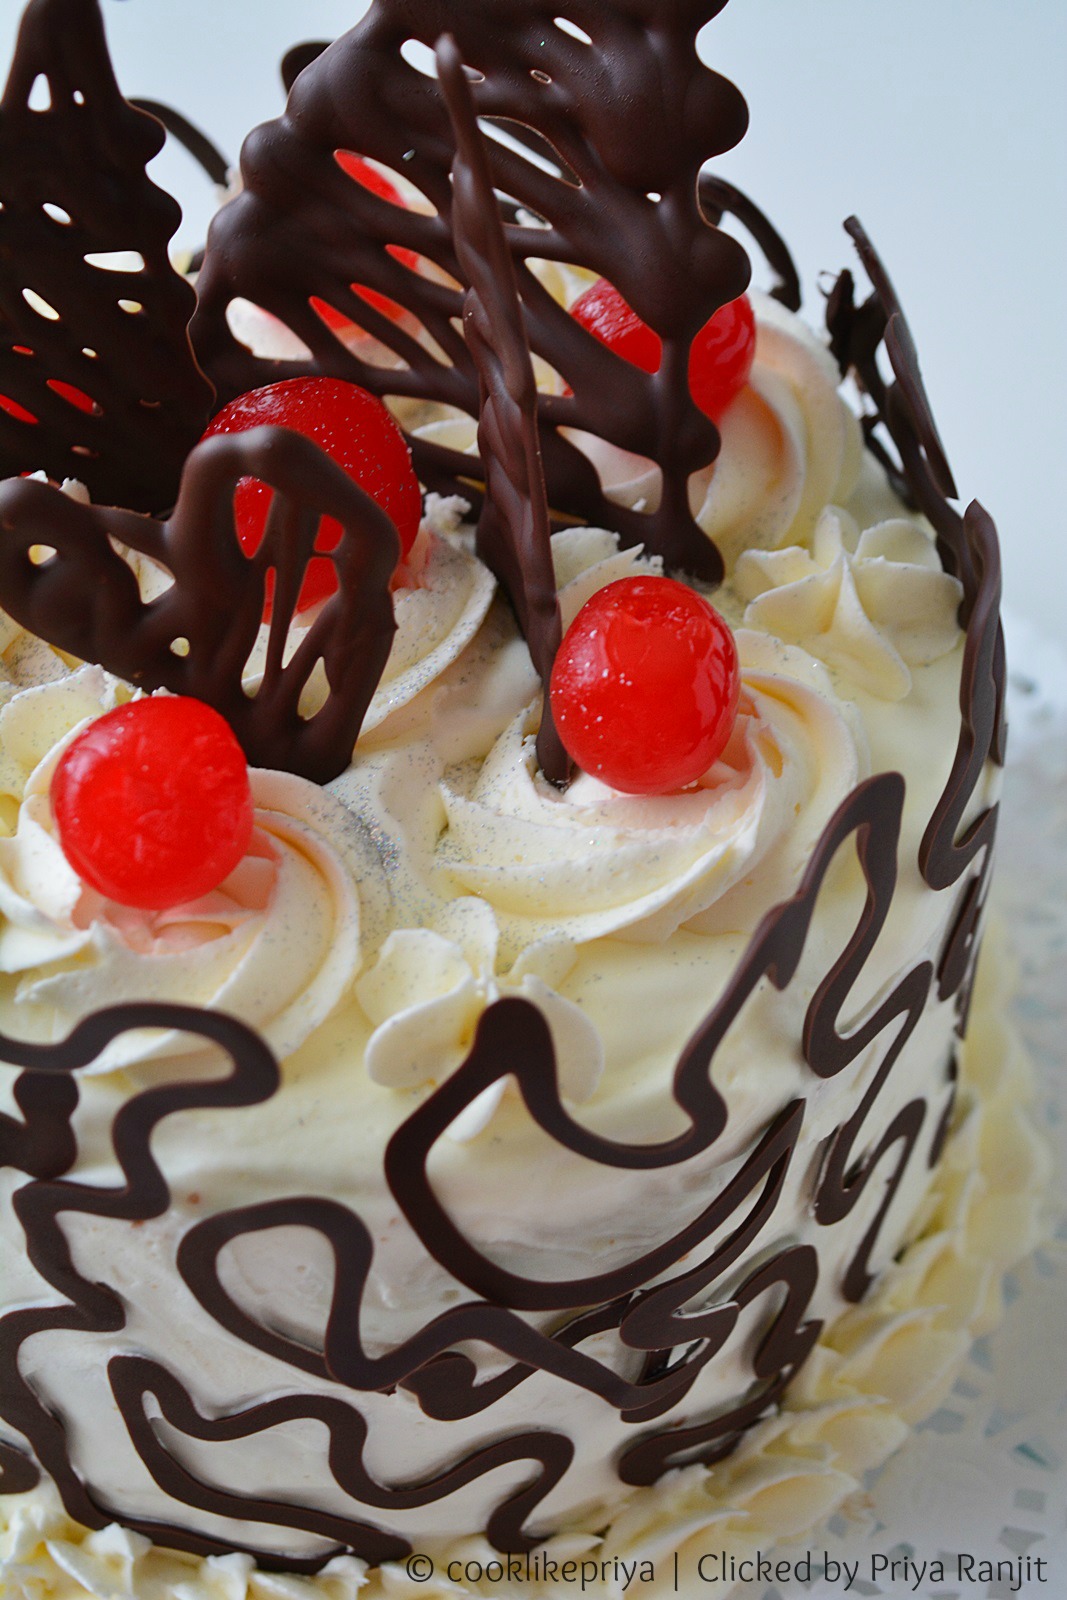
Butterless Tres Leches Cake Recipe
4 years it is :-). So thankful to God for bringing us together to grow together, and through it all we strive to be better each day and through each joy and through each struggle. We may not be perfect and never strive to be perfect as a couple but each day we strive to be a better person for us. Over the years I have learnt to cherish, understand, love and make him happy. 

So this year I was bit different in planning for a cake, I started late (not my usual self i know) but I was sure of what I wanted the minute I decided the cake. I have seen this cake many a times but never tasted it but I have seen many rave about this cake so much that I just wanted to have it. I made a decadent Tres leches cake ( 3 milk cake) I wonder who created this recipe is it Mexican or Latin American however this is one to die for cake (not literally) but in a sense it is too hard to resist. Mind u loads of eggs and milk and no butter so if you are making this for a crowd better to make sure that none are lactose intolerant. Usually tres leches cake is made as a sheet cake and generous 3 milk is poured over the cake and soaked up before being topped with whipped cream and maraschino cherries. The fatless sponge it an excellent and best recipe I have ever tried, its so good that you can almost adapt it for any sponge cake or base as a layered cake. Leave it to your imagination that just a good recipe and you can do so many variations with this sponge, its is so good. Have I said enough? ;-) but trust me no matter what there has to a tres leches in your life and you will come back to thank me :-). We happily cut the cake and forgot to add candles :p and the cake vanished as we wanted to pass on few pieces to friends and I forgot to get a decent pic of the sliced cake :-/ but I know you won't punish me :-) so here comes the recipe to the bestest tres leches I say....


Tres leches Celebration cake recipe


Tres leches celebration cake recipe


Best Tres leches cake recipe
BEST TRES LECHES CAKE RECIPE

Recipe Source - adapted from here
Prep time - 15 mins
Bake time - 25 mins
Makes - 3 layer 6" cake (as pictured) or 2 layer 8" cake
Serves - 8 people

FATLESS SPONGE CAKE RECIPE

Ingredients

Eggs - 3 large (white & yolk separated)
Granulated sugar - 1 cup
Vanilla extract - 2 tsp 
All purpose flour - 1 cup
Baking powder - 1 tsp
Milk - 1/2 cup ( I used 2%)

Method

1. Grease a 6" cake pan or 8" cake pan with spray (or butter) and dust with flour roll the baking tin to spread the flour evenly and tap of the excess. Pre-heat oven at 350 F for 10 minutes.
2. Separate the egg whites and yolk into two bowls. In another bowl combine the flour and baking powder and mix well for the baking powder to have spread evenly.
3. Beat the egg whites until soft peaks in medium speed for 3-4 minutes. Gradually add sugar little by little and beat until stiff peaks form for 3-4 minutes. 
4. Now add one yolk at a time and beat for a minute for a minute or so. Add in the vanilla and combine.
5. Alternately add in the flour and milk and beat until combined after each addition. 
6. Quickly tip the cake batter in the baking tin ( do not delay as you want the airy batter), bake in center of oven for 25 mins until a skewer inserted in center of the cake comes clean.
7. Once done remove the cake from the oven and with the tin let it sit on the cooling rack for 15 minutes.
8. Once the cake in cooled down invert the pan and release the cake to cool further until it gets to room temperature.


3 MILK SYRUP RECIPE

Ingredients

Condensed milk - 1/2 tin
Evaporated milk - 1/2 tin
Milk / cream - 1/2 tin ( I used the same condensed milk tin, u can use milk or cream based on how rich u want the syrup to be)

Method

Mix all 3 ingredients into a bowl and using a spoon mix them together. 


SOAKING THE SYRUP ONTO THE SPONGE CAKE

Method

1. Cut the cake into layers using a serrated knife into 3 layers or how many ever layers you'd like, I make a 3 layer 6" tall cake.
2. Place each layer in a separate plate and using a spoon pour in the mixture into each sponge. Do not over do else you would not be able to handle the sides to layer the cake.
3. Freeze the layers for the syrup to be absorbed by the sponge. I freeze for an hour. 


WHIPPED CREAM FROSTING

Ingredients 

Heavy whipping cream - 1 cup
Granulated sugar - 3-4 tbsp (depending how sweet you would like it to be)
Vanilla extract - 1 tsp

Method

1. Prior to making the whipped cream freeze the mixing bowl, beater and make sure that the cream is also refrigerated for at least 30 minutes. 
2. When you are ready start beating the cream in minimum speed and gradually increase and while doing so slowly add the sugar tbsp at a time and the vanilla.
3.  after 3-4 minutes of whipping you will find the cream changing texture (thickening) keep a careful watch and stop at a point when you see wrippes on the cream while you move the beater. Stop
4. You can now use the whipped cream to frost the cake.


ASSEMBLY 

Method

1. Place the bottom layer of the sponge and brush with more of the milk mixture, now top with a generous dollop of whipped cream.
2. Place the second layer and repeat the first step, do the same for the third layer too.
3. Now frost the cake sides and top with the first layer of cream and freeze the cake for 15 minutes.
4. Later frost with the second layer of cream and freeze again to set for 15 minutes.


CHOCOLATE LAYERS 

Things u need

Dark baking chocolate - 8 oz or 200 gms
Double boiler - 1 bowl and a saucepan
Parchment paper - measure the side of the cake with the height too, I used the baking tin to do this.
Icing cone

Method

1. Chop the dark chocolate and place in a bowl, bring water to a boil in a saucepan and place the bowl on top. 
2. Wait for the chocolate to melt around 1-2 minutes.
3. Remove the bowl from the saucepan and let it cool until easy to handle.
4. Tip the melted chocolate into a piping bag and pipe random designs on the measured parchment. 
5. Let the parchment sit on the counter top for ten minutes. 
6. Remember to make sure that the cake is cold, I put the frosted cake in the freezer for 20 minutes. 
7. Later on the cold cake and while the chocolate is still half set wrap around the cake and freeze again for 10 minutes with the parchment around until fully set.
8. Once the chocolate wrap is set, peel the parchment carefully from the chocolate wrap. You Can make swirls with buttercream and top with some maraschino cherries. Continue to keep the cake in refrigerator till you plan to cut it. 


Casual click just before the cake cutting ;-)


Casual click - sorry for the bad lighting this is the only picture I have of the sliced cake

COOKS WISDOM

TIP 1

1.While doing chocolate curls make sure to use tempered chocolate the kind used for baking or chocolate making. Use dark chocolate for bold curls.

TIP 2

2. Consider the temperature and climate while doing this cake, If Its too humid make sure to freeze the cake/ refrigerate it while assembling. The sponge will not get hard to firm when you do this.

TIP 3

3. This sponge cake recipe is so versatile and can be used to make any kind of layer cakes, or for cakes that require a sweet syrup.

TIP 4

4. The original recipe calls for whole milk for the sponge but I used 2% milk and skipped cream in the milk syrup and used 2% milk yet the cake tasted so good and perfect in sweetness. 

TIP 5

5. Traditionally alcohol is used in the syrup base, but you can use artificial extracts too. I just used plain vanilla. 


OTHER CELEBRATION CAKES 


Masala Pori | Kara Pori | Spicy Murmura | Easy Indian snacks

$
0
0
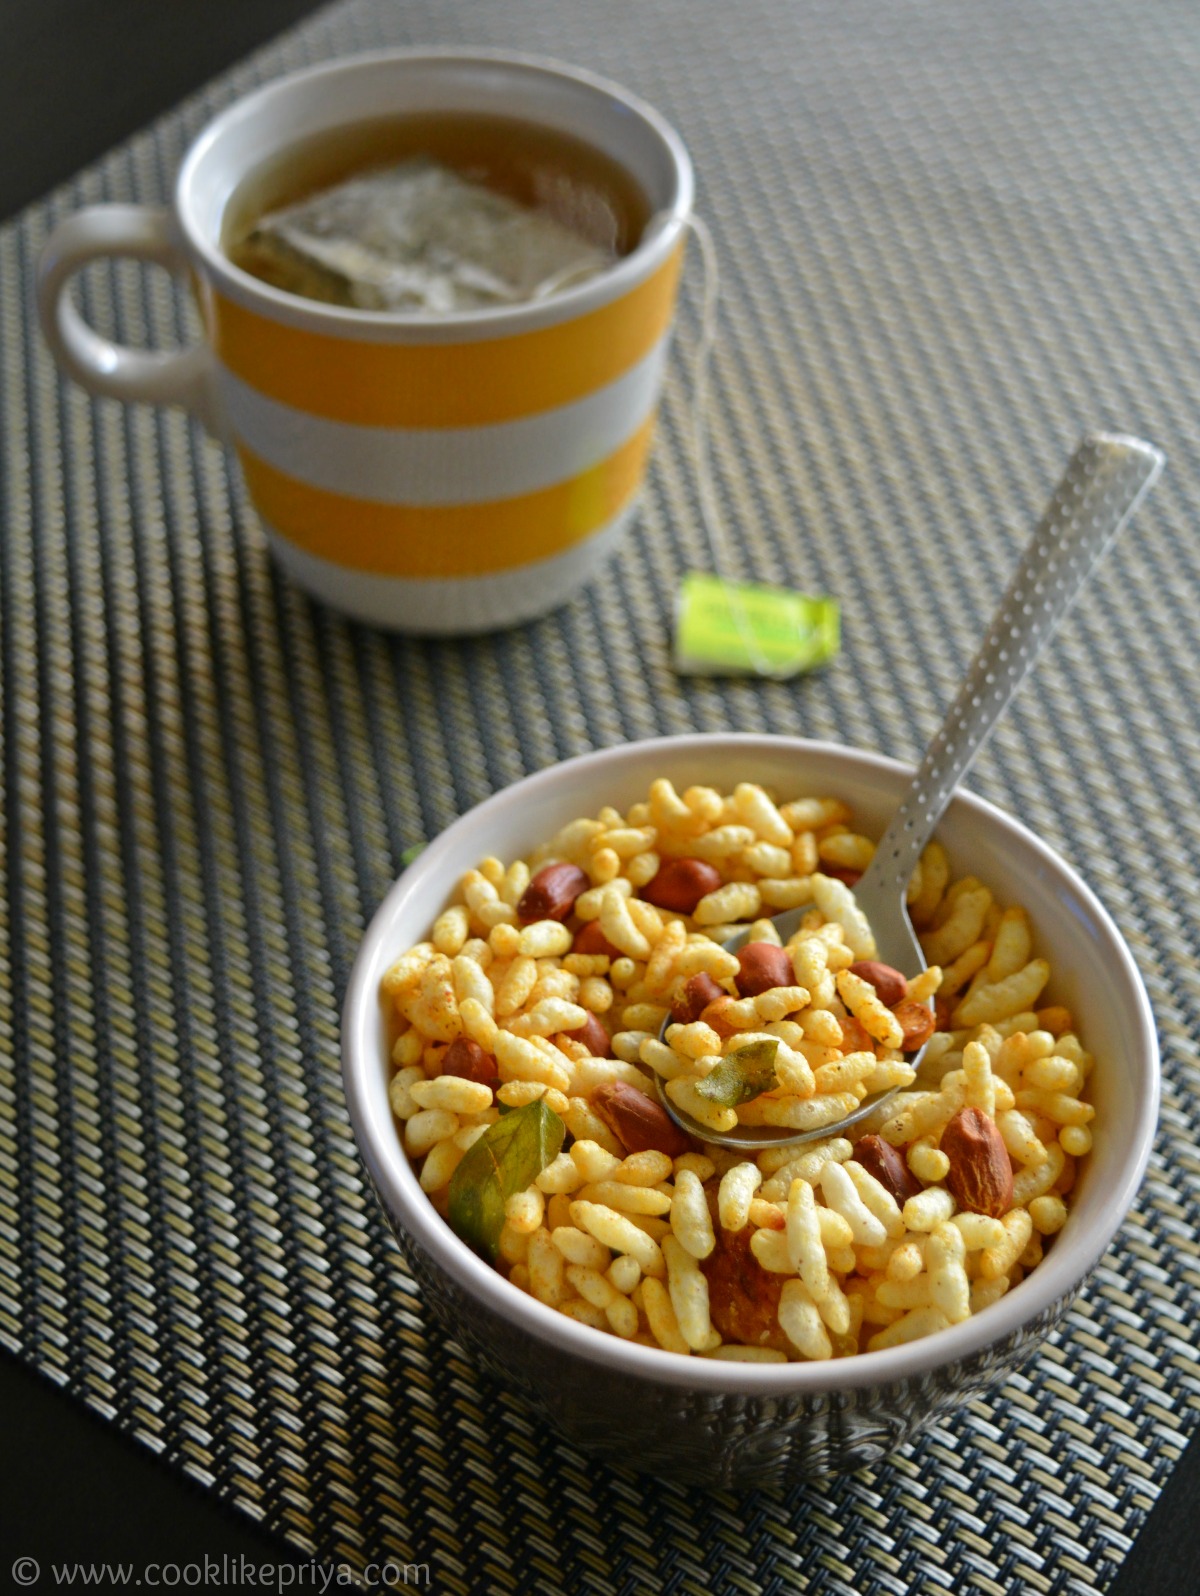
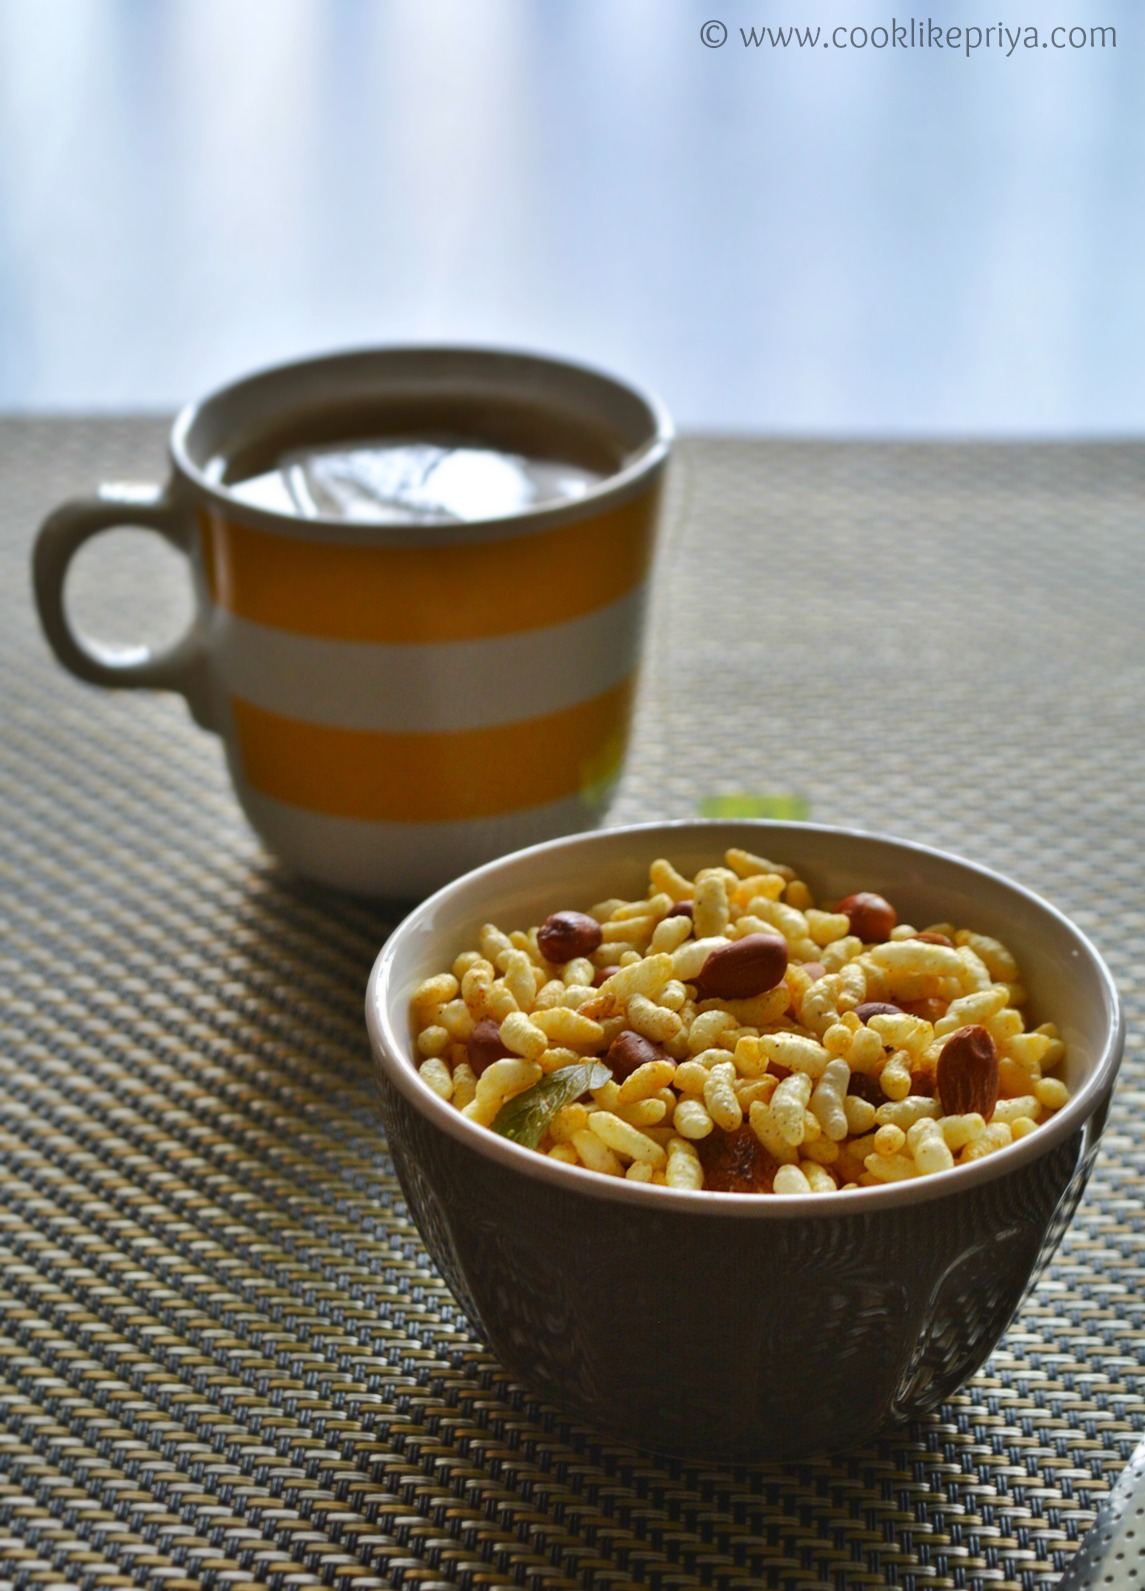
Spicy Masala Pori Recipe
We all love snacks and if its Indian ad spicy no one can say no. I love to have something to much along with my cardamom tea. But most Indian snacks are deep fried and sometimes we look for something light. This masala pori or spicy murmura is so easy to do, crunchy and light. You can make a big batch of it and save it. You can add nuts and seeds to this for a good crunch. I have added garlic for a fragrant flavor, you can skip it if you don't use garlic in cooking.  Pori is basically puffed rice, usually sold plain or found in mixtures. 


Kara Pori | Spicy Murmura Recipe
MASALA PORI | KARA PORI | SPICY MURMURA

Prep time - 3 minutes

Cook time - 5 mins
Serving suggestion  - as a snack along with coffee/ tea

Ingredients


Puffed rice / pori - 4 cups

Garlic pods - 5 smashed with skins on
Groundnuts - 1/2 cup
Roasted fried gram - 1/3 cup
Curry leaves - 8 leaves
Hing/ asefotidea - 1 pinch
Turmeric powder - 1/3 tsp
Red chilli powder - 1/2 tsp
Salt - to taste
Oil - 1 tbsp

Method


1. Heat oil in a pan, add the groundnuts and roast for 3-4 minutes until they firm up, add in the fried gram and garlic, roast for 2 minutes until the fried gram changes color.

2. Now add the curry leaves and switch off the stove add in the spices - turmeric, red chilli powder, hing and salt. 
3. Add the puffed rice and mix well until all the puffed rice is well coated with spices.
4. Once the mixture cools down store in an air tight container.


Easy Indian snack recipe | Oil free Indian snack recipe


COOKS WISDOM


TIP 1


1. Make sure to roast the groundnuts and fried gram dal until they urn color and make sure you roast them in low- medium flame. This helps in even cooking.


TIP 2


2. Make sure to add the spice powders only after switching off the stove else the spices will get burnt.


TIP 3


3. You can add any kind of nuts like cashew almonds or pista to this mixture. You can skip oil and add ghee.


RELATED RECIPES

Masala Roasted Makhana (Lotus seeds)
Chickpeas & green moong salad
Baked Apple Chips
Guacamole Sandwich
Tomato & strawberry salsa

Masala corn on the cob

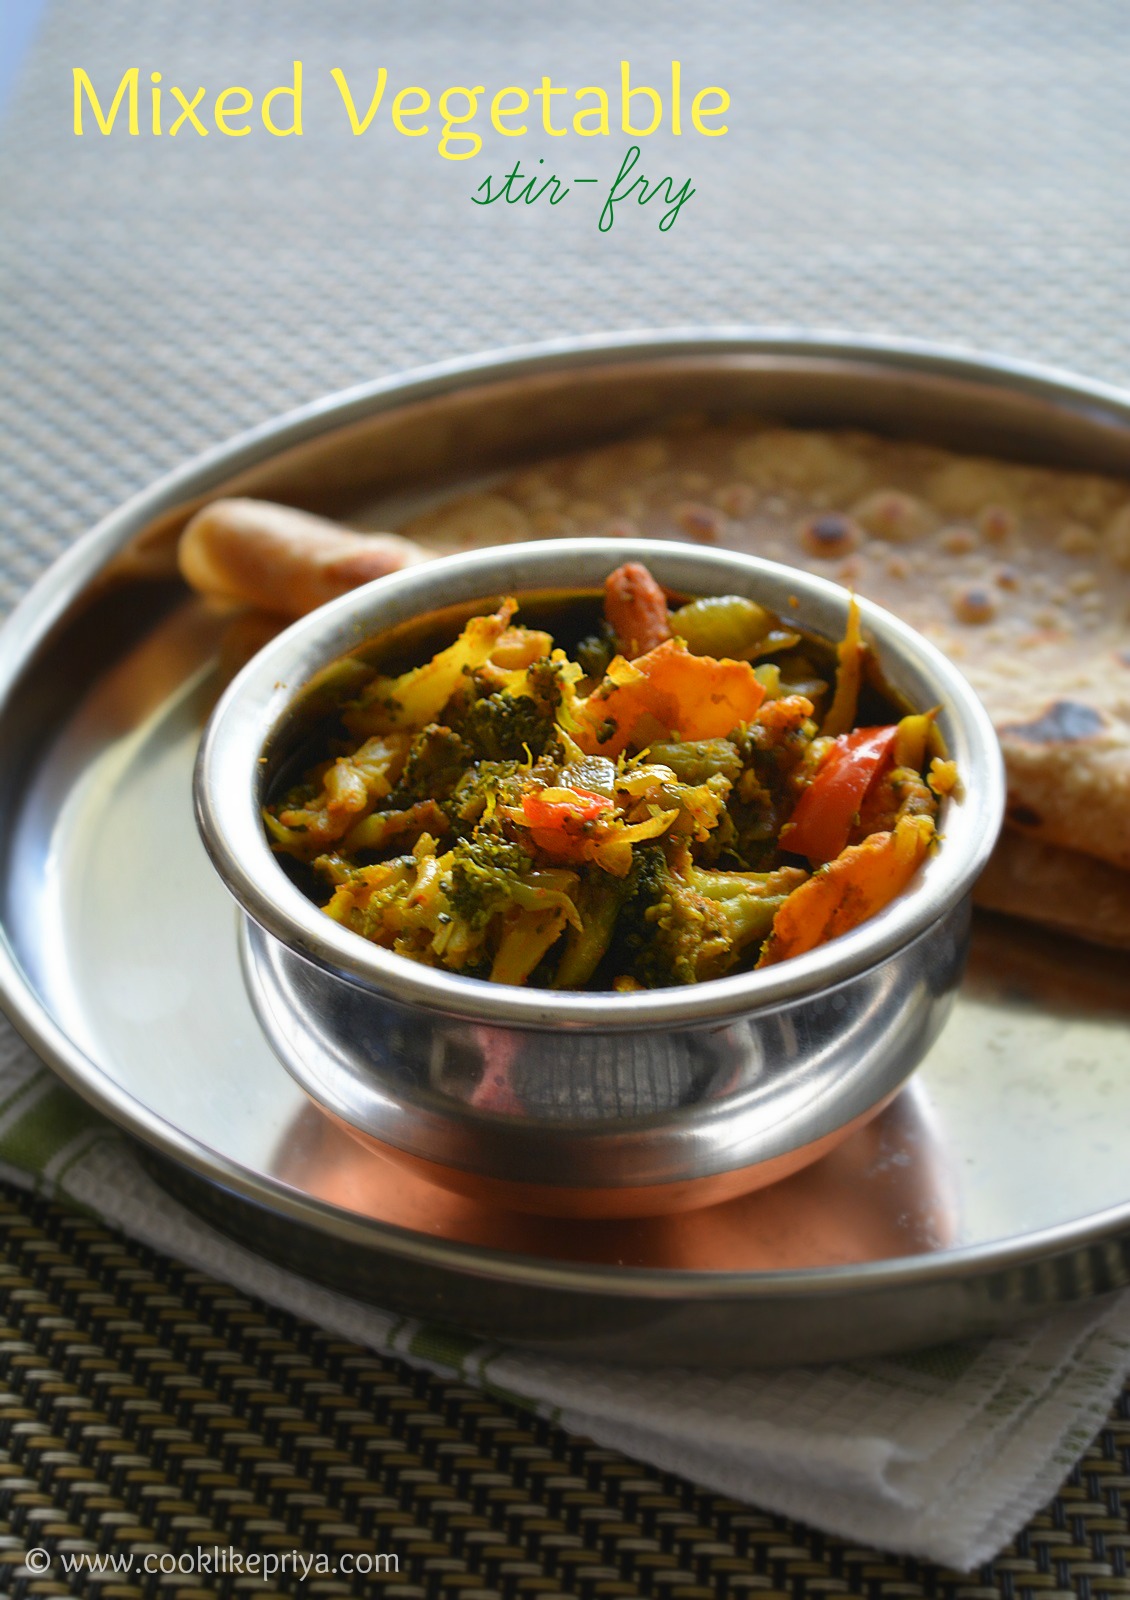
Mixed Vegetable Subji for chapathi | Masala Veggies side dish

$
0
0

Mixed Vegetable Subji | Chapathi side dish recipe
My husband and I have chapathis for lunch almost 3-4 days a week and making a subji (side) to go with chapathi everyday is challenging. The challenge is because my husband does not want lentils or grains as side dish and all I am left to do is vegetable kurma, egg curry or non vegetarian sides. But with the boredom of making the usual staples one day I tried a simple mixed vegetable side that had a good variety of veggies like broccoli, yellow and red carrots, cauliflower, green and red capsicum the result was a delicious side packed with flavors. If you love costco like I do, I get this huge bag of organic mixed veggies in the frozen section. I have repeated this recipe for almost 50 times and my husband never complains eating it ;-). 


Easy mixed vegetable side dish for chapathi
Easy mixed vegetable side dish for chapathi 
MIXED VEGETABLE SUBJI RECIPE

Recipe source - own 
Prep time - 5 mins
Cook time - 15 minutes

Ingredients

Mixed vegetables - 4 cups (cauliflower, broccoli, baby carrots, capsicum)
Onion -  1 medium minced
Garlic pods - 2 minced
Oil - 1 tbsp
Red chilli powder - 1/4 tsp
Cumin powder - 1/2 tsp
Turmeric powder - 1/3 tsp
Salt- to taste (use garlic salt for flavor)

Method

1. In a wide pan heat oil, add the minced garlic and onions saute for 3 minutes until the onions are well cooked.
2. Tip in the veggies, add salt and cook covered for 5 minutes until the veggies are nice and soft. (I used frozen veggies, if u are using fresh then sprinkle little water for the veggies to cook)
3. Add in the spice powders - red chilli, turmeric, cumin and mash the veggies at random using the spoon . Cook covered for 2-3 minutes until the flavors blend well.
4. Switch off serve warm along with roti/ chapathis. 


COOKS WISDOM

TIP 1

1. adding garlic salt gives lovely flavor to this mixed vegetable side dish. You can add more heat/ spiciness by adding slit green chilli.

TIP 2

2. I used pre-cut frozen veggies from costco, you can use fresh veggies. Make sure to sprinkle water on the veggies and cook them covered.


RELATED RECIPES

Green gram coconut curry
Chickpeas & green gram salad

Eggless Butterless Chocolate Loaf Cake | Egg-free Butter-free Chocolate Cake Recipe

$
0
0
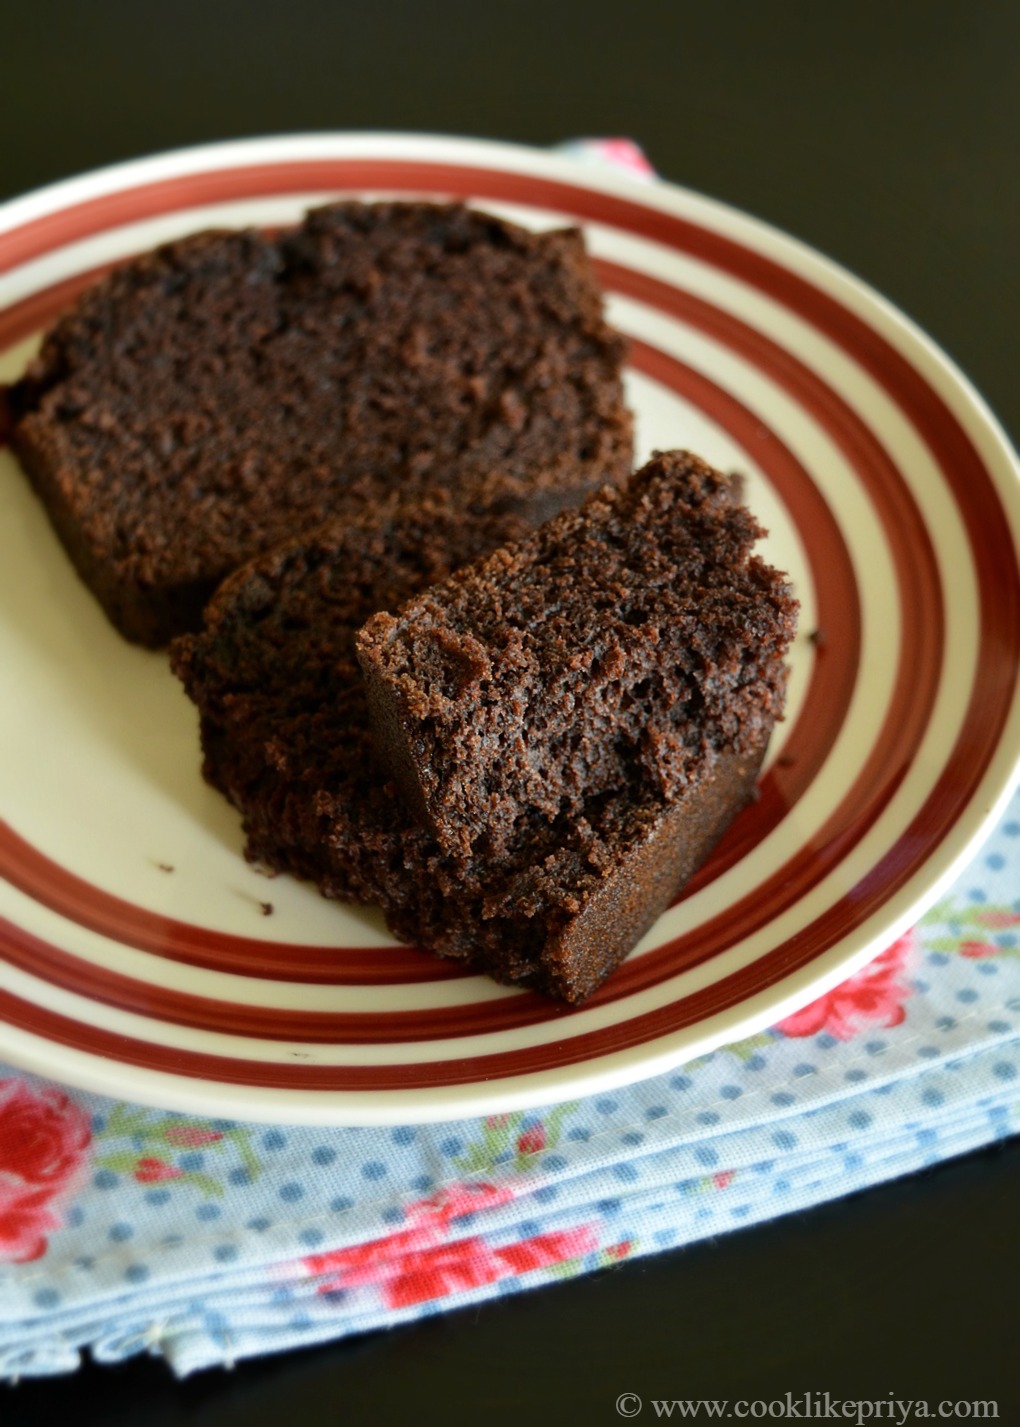
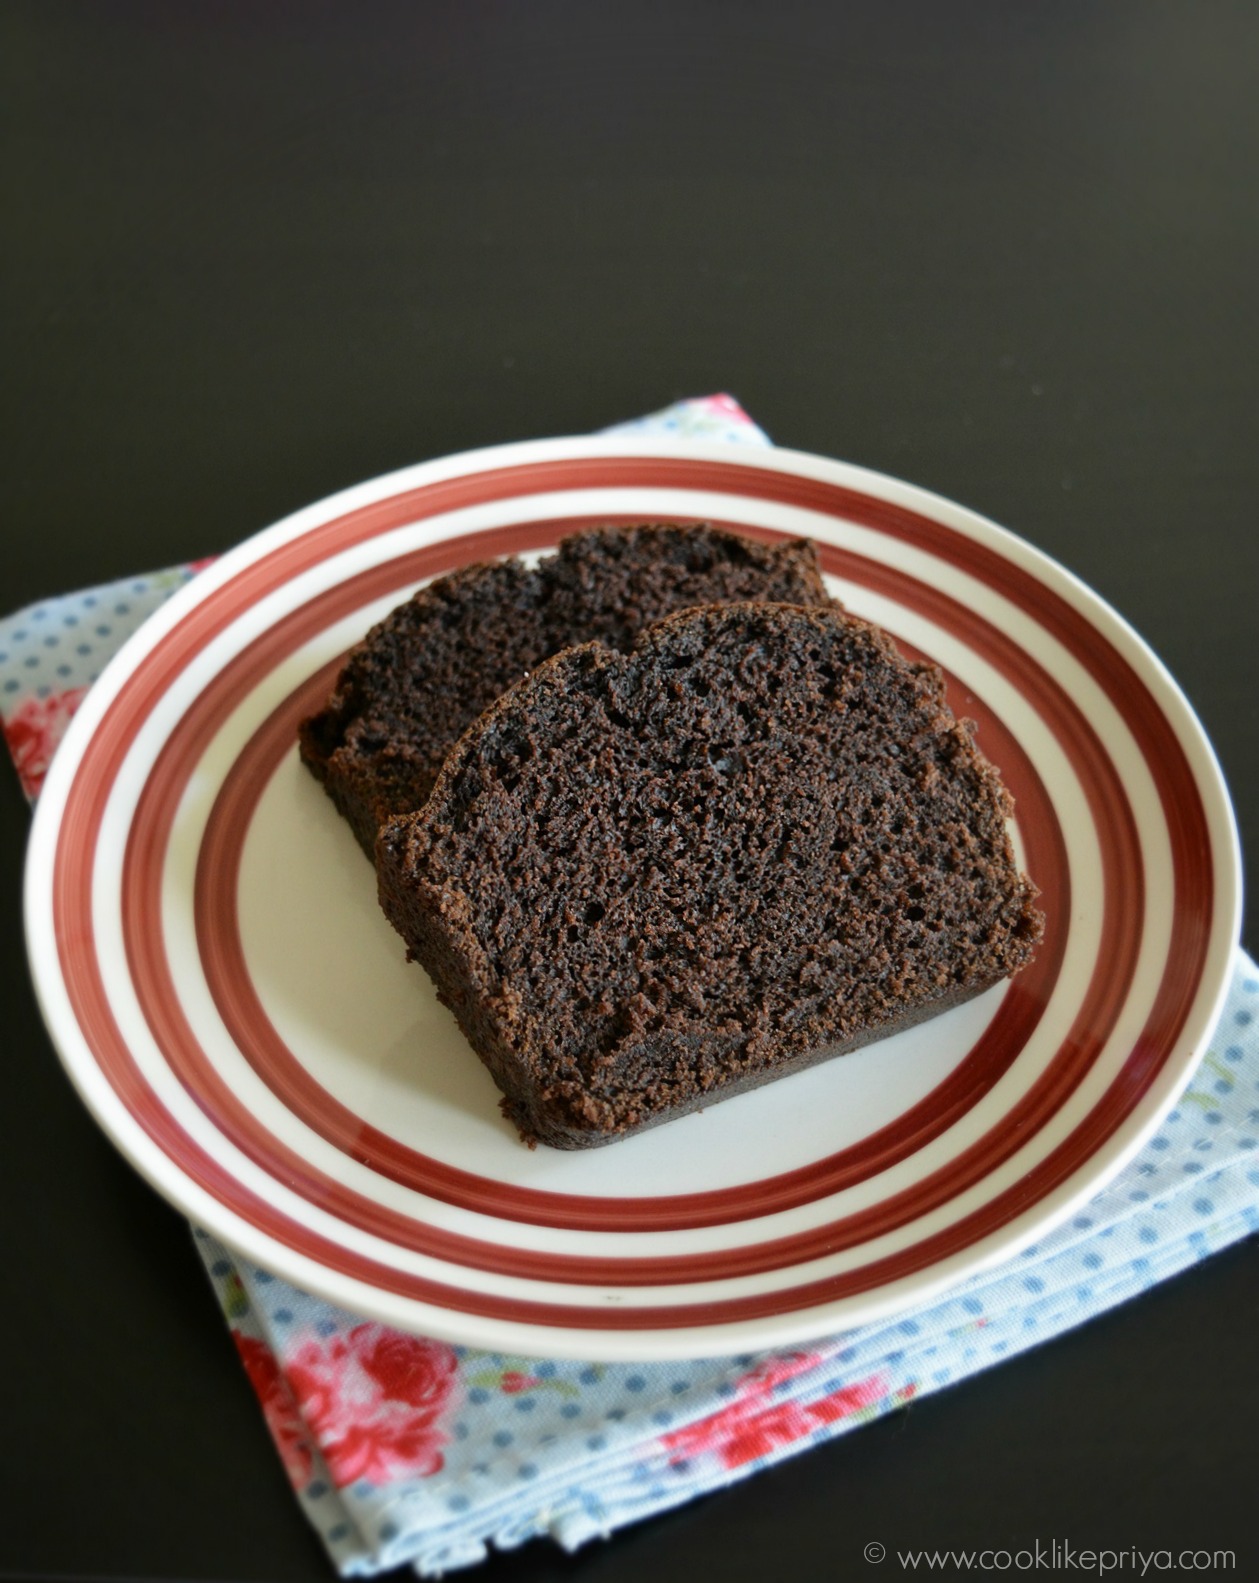
Eggless Butterless Chocolate Cake
Chocolate cake, who doesn't love it? trust me I just don't need an excuse to make a chocolate cake. After these years of baking, I did try many recipes and this particular chocolate loaf cake (eggless & butterless) is one of the best by far. So I had to share this recipe, I cut the cake and shared it with my friends and they loved it and they said they wanted the recipe :-) so here goes the recipe for this deliciously moist and yummy chocolate cake. I made the cake in a loaf pan you can do it however you wish, a chocolate ganache frosting would do wonders to this cake ;-) but you don't need too much decoration for this cake. Adding chopped walnuts or pecans or almonds would be great too. The cake is mild in sweetness, I used organic sugar and this cake is great if you serve it with a scoop of ice cream and chocolate sauce on top with some chopped nuts. 


Egg-free Butter-free Chocolate Loaf cake


EGGLESS BUTTERLESS CHOCOLATE LOAD CAKE | BEST EVER CHOCOLATE CAKE

Recipe Source - adapted from here
Prep time - 10 mins
Bake time - 45-50 mins
Serves - 8-10

Ingredients

All purpose flour - 1 and 1/2 cup
Cocoa powder (unsweetened) - 3 tbsp (I used hersheys extra dark cocoa)
Baking soda - 1 tsp
Kosher salt - 1/2 tsp (kosher salt is mild in saltiness)
Vegetable oil - 6 tbsp
Vanilla - 1 tsp
Vinegar - 1 tbsp
Cold Milk - 1 cup 
Granulated sugar - 1 cup

Method

1. Pre-heat oven to 350 F/ 180 C for 10 mins, Grease a cake loaf pan 9" set aside.
2. In a small bowl mix in the flour, baking soda, cocoa powder and salt.
3. In a larger bowl add in the milk, vinegar, oil, vanilla mix well until combined and add in the sugar, mix until the sugar is dissolved.
4. Now add the flour mixture in 4-5 batches and combine in gentle stirs until no trace of flour is seen.
5. Tip in the cake batter and bake in center of oven for 45-50 mins until a skewer inserted in center comes clean. 
6. Once done switch of the oven and remove the cake pan, Let the cake cool down in a cooling rack for 20 minutes, flip the cake and let it cool down even further for 10 minutes.
7. Cut into 1/2 inch slices and enjoy :-)
8. Store remaining cake in a air-tight container for 3-4 days if they last that long.

Easy Chocolate Loaf cake

COOKS WISDOM

TIP 1

1. I have recently started to use kosher salt in all my baking recipes, I find it gives a great flavor to the bakes. Its mild in saltiness than regular iodised salt. So if you are using regular salt half it. 

TIP 2

2. The original recipe calls for water but I have used 2% milk for richness, you can use water if you want.

TIP 3

3. Feel free to use nuts, chocolate chips in the recipe if you like. 

TIP 4

4. In case you plan to make this into a layer cake, I would suggest for a chocolate ganache frosting, this cake will be perfect to cut into layers. 


RELATED RECIPES

Dark chocolate cake with chocolate cream cheese frosting
Eggless chocolate cake with chocolate ganache
Eggless butterless chocolate cake
Eggless chocolate vanilla cake
Chocolate oats yogurt
Almond chocolate cake
Chocolate Kheer
Chocolate semolina pudding
Eggless chocolate pudding 
Chocolate Lassi

Homemade No Knead Bread Recipe | Vegan wheat Bread Recipe

$
0
0

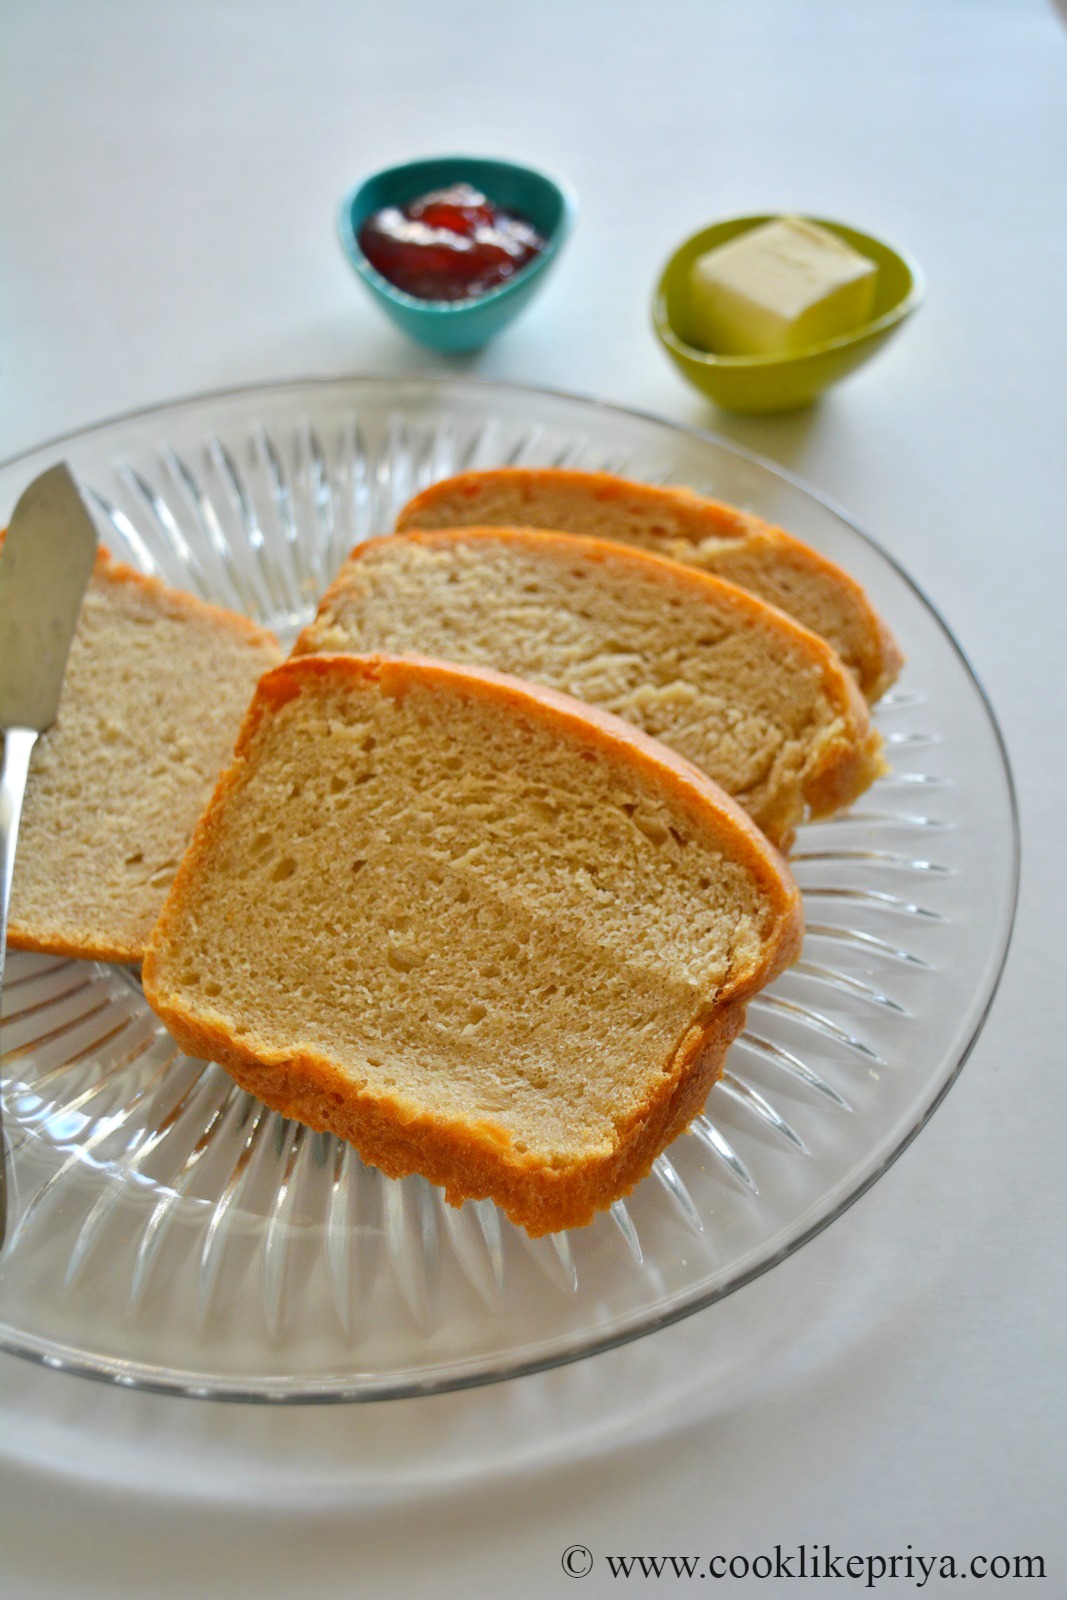
No Knead Homemade bread recipe
Bread making is such a joy and I am enjoy making them fresh at home every week. I have a couple of bread recipes that I would be sharing with you every week. I though I will start with an easy no knead no yeast proof method of bread. This recipe is so easy u just mix all the ingredients, leave it in a warm place to proof (overnight) and in the morning u flatten it with a rolling pin, roll it and place in a loaf tin to proof and then bake. Absolutely no kneading at all is the key to this recipe. Isn't it so simple? I have used 50% wholewheat flour (atta) and 50% plain flour (maida). I will later post a 100% wholewheat bread recipe. I found this lovely recipe from Priya aks blog and I must say its one the easiest bread recipes ever. Simple to do and the end result is such fresh soft aromatic bread in your table. My husband loved it so much and had 4 slices for dinner today :-).


Easy wheat bread or wholewheat bread recipe

Easy wheat bread or wholewheat bread recipe

Vegan wheat bread recipe

HOMEMADE NO KNEAD BREAD RECIPE | EASY SOFT BREAD RECIPE

Recipe Source - Priya's easy & tasty
Prep time - 8 mins
Proofing time - first proof overnight, second proof 1-2 hours
Bake time - 40 mins
Serves - 12-15 slices depending on thickness

Ingredients

All purpose flour/ maida - 2 cups
Wholewheat flour / atta - 2 cups
Sugar - 3 tbsp ( I used organic)
Salt - 2 tsp (I used kosher)
Instant yeast - 3/4 tsp
Cold water - 2 cup + 1 tbsp
Oil - 3 tbsp

Method

1. In a mixing bowl combine all the ingredients - salt, sugar, all purpose flour, wheat flour, yeast, oil and cold water, mix everything together with hands (do not knead). 
2. When it all comes together spread some oil on top of the dough. Cover with a cling wrap and keep it in a warm place to proof overnight.
3. The next day punch and deflate the dough, flour the work surface into rectangle  and flatten the dough using a rolling pin. 
4. Roll the dough and place into a greased loaf tin and spread some oil over the loaf. Cover with cling film and let it proof in a warm place for an hour or two.
5. Once the dough is proofed, remove the cling wrap and spread some oil/ butter/ egg wash and score the dough with a knife, pre-heat an over to 375 F for 15 mins and bake in center of oven for 40 -45 minutes until done.
6. Once the bread is baked, remove the loaf from the oven and let it sit on a cooling rack to come to room temperature (20-25 minutes). Cut into slices and enjoy them.
7. The remaining slices can be stored in a air-tight container for upto a week if it lasts long ;-)

Soft homemade bread
Soft homemade bread
COOKS WISDOM

TIP 1

1. I used kosher salt, the saltiness is mild, you can reduce if you are using regular salt.

TIP 2

2. You can decorate the load with rolled oats flakes. 

TIP 3

3. I usually proof the dough in a closed microwave or oven


RELATED RECIPES

Cinnamon Rolls {Eggless & low fat}

Easter Bird's Nest Cake | Eggless Carrot cake with cream cheese frosting

$
0
0
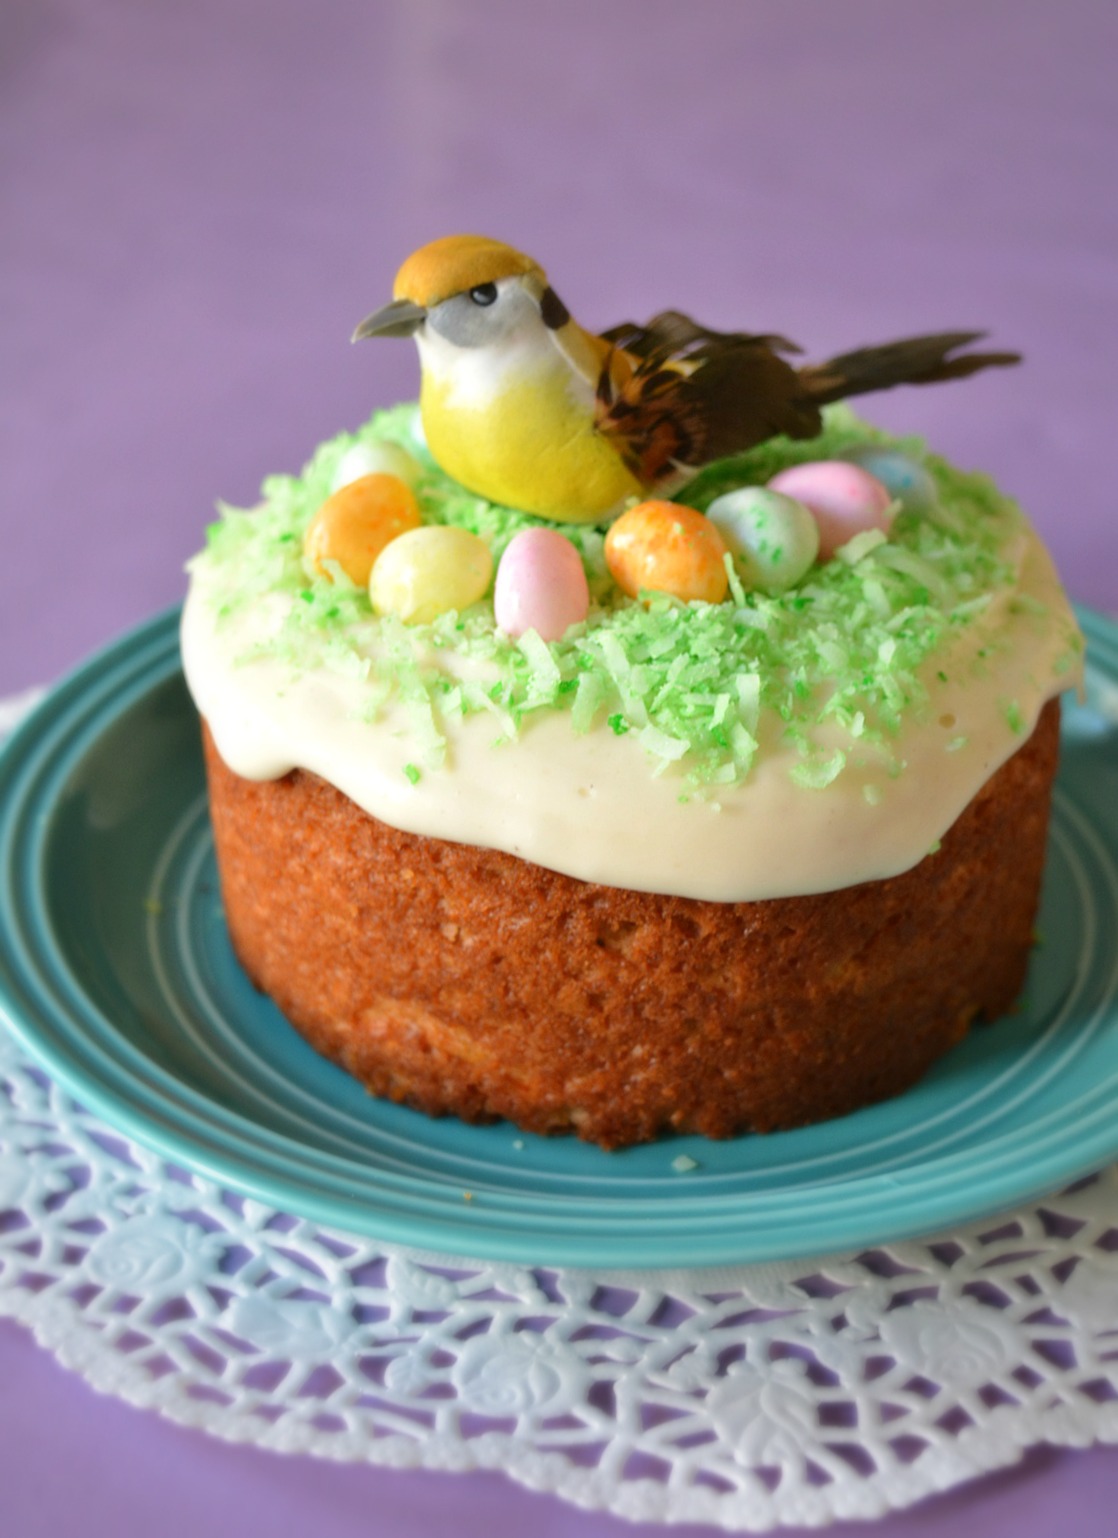
Easter Bird's Nest Cake - Eggless Carrot cake recipe
Its Easter Sunday, what a joyous day to celebrate the resurrection of our Lord Jesus Christ. Easter over the years has been celebrated all over the world by millions remembering the sacrifice of Christ, the price He paid on the cross and His marvelous resurrection. Its a moment to remember the man who died for the sins of everyone in this world, who took the punishment on himself so that we can be justified and set free from all our sins. 

The Bible says in John 15:13 ~ "Greater love has no one than this, to lay down one's life for one's friends". 
What a beautiful and wonderful Savior is He that He would lay down His life for each one of us. 

HAPPY EASTER

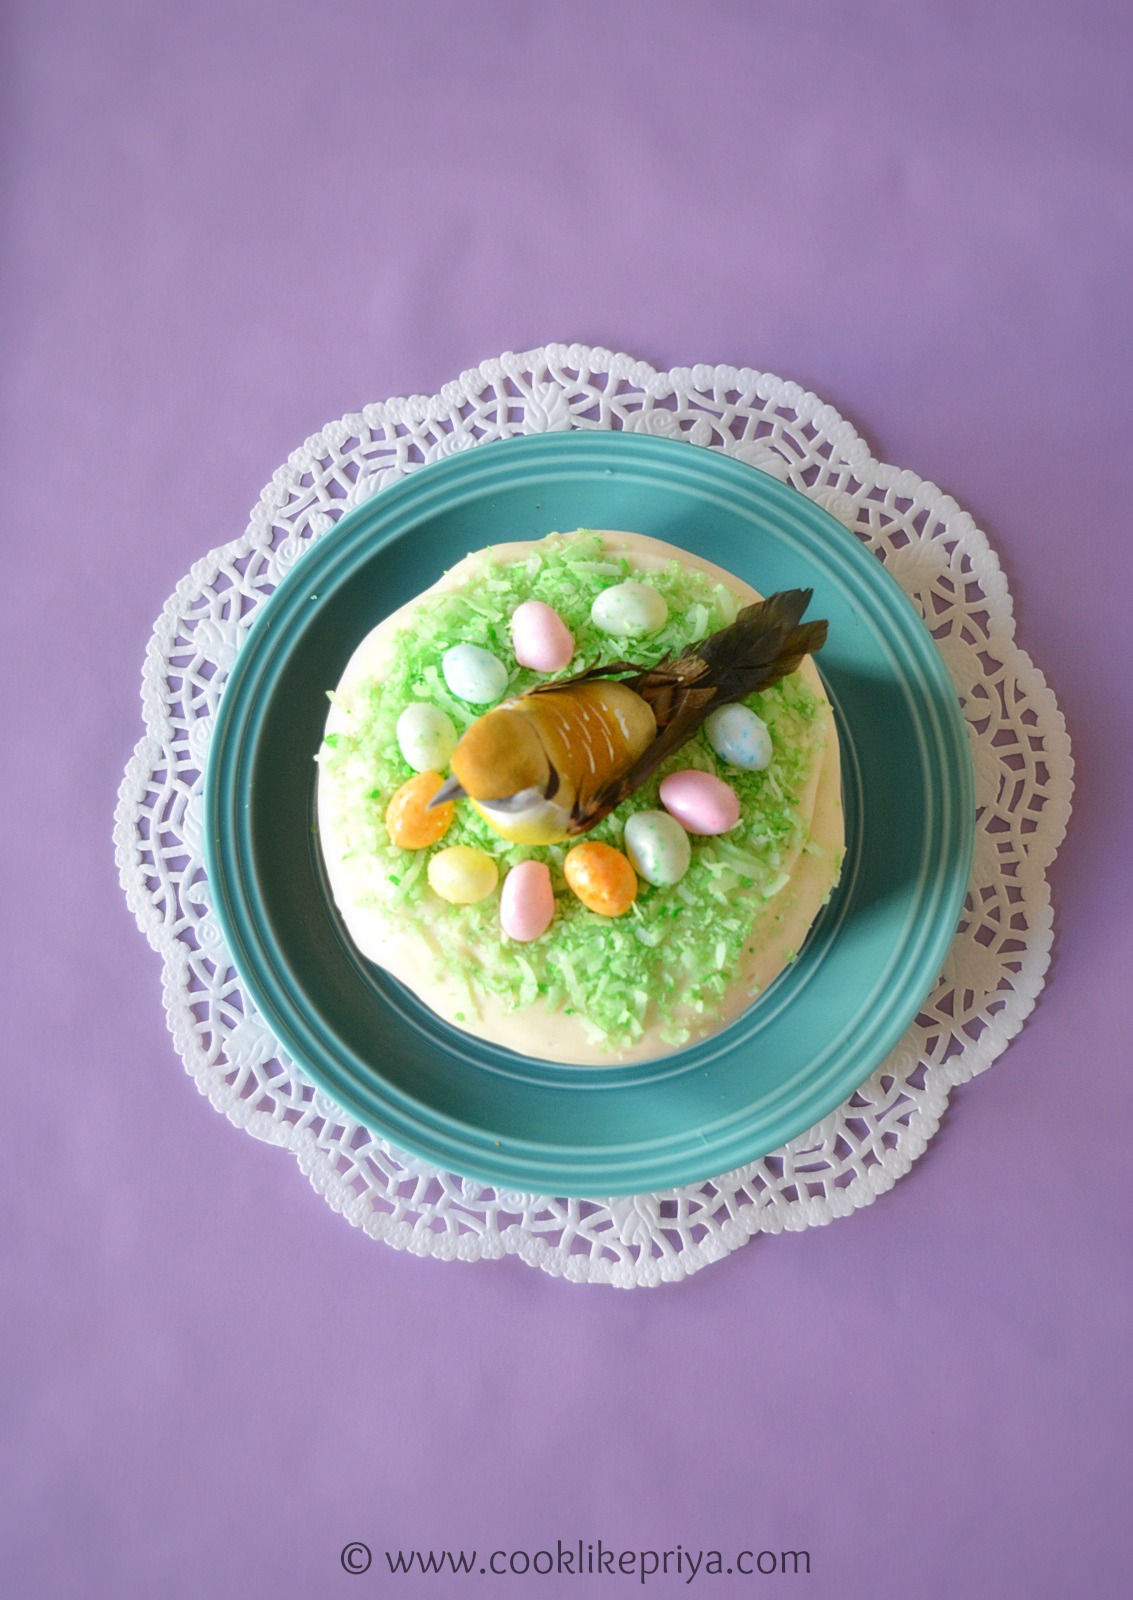
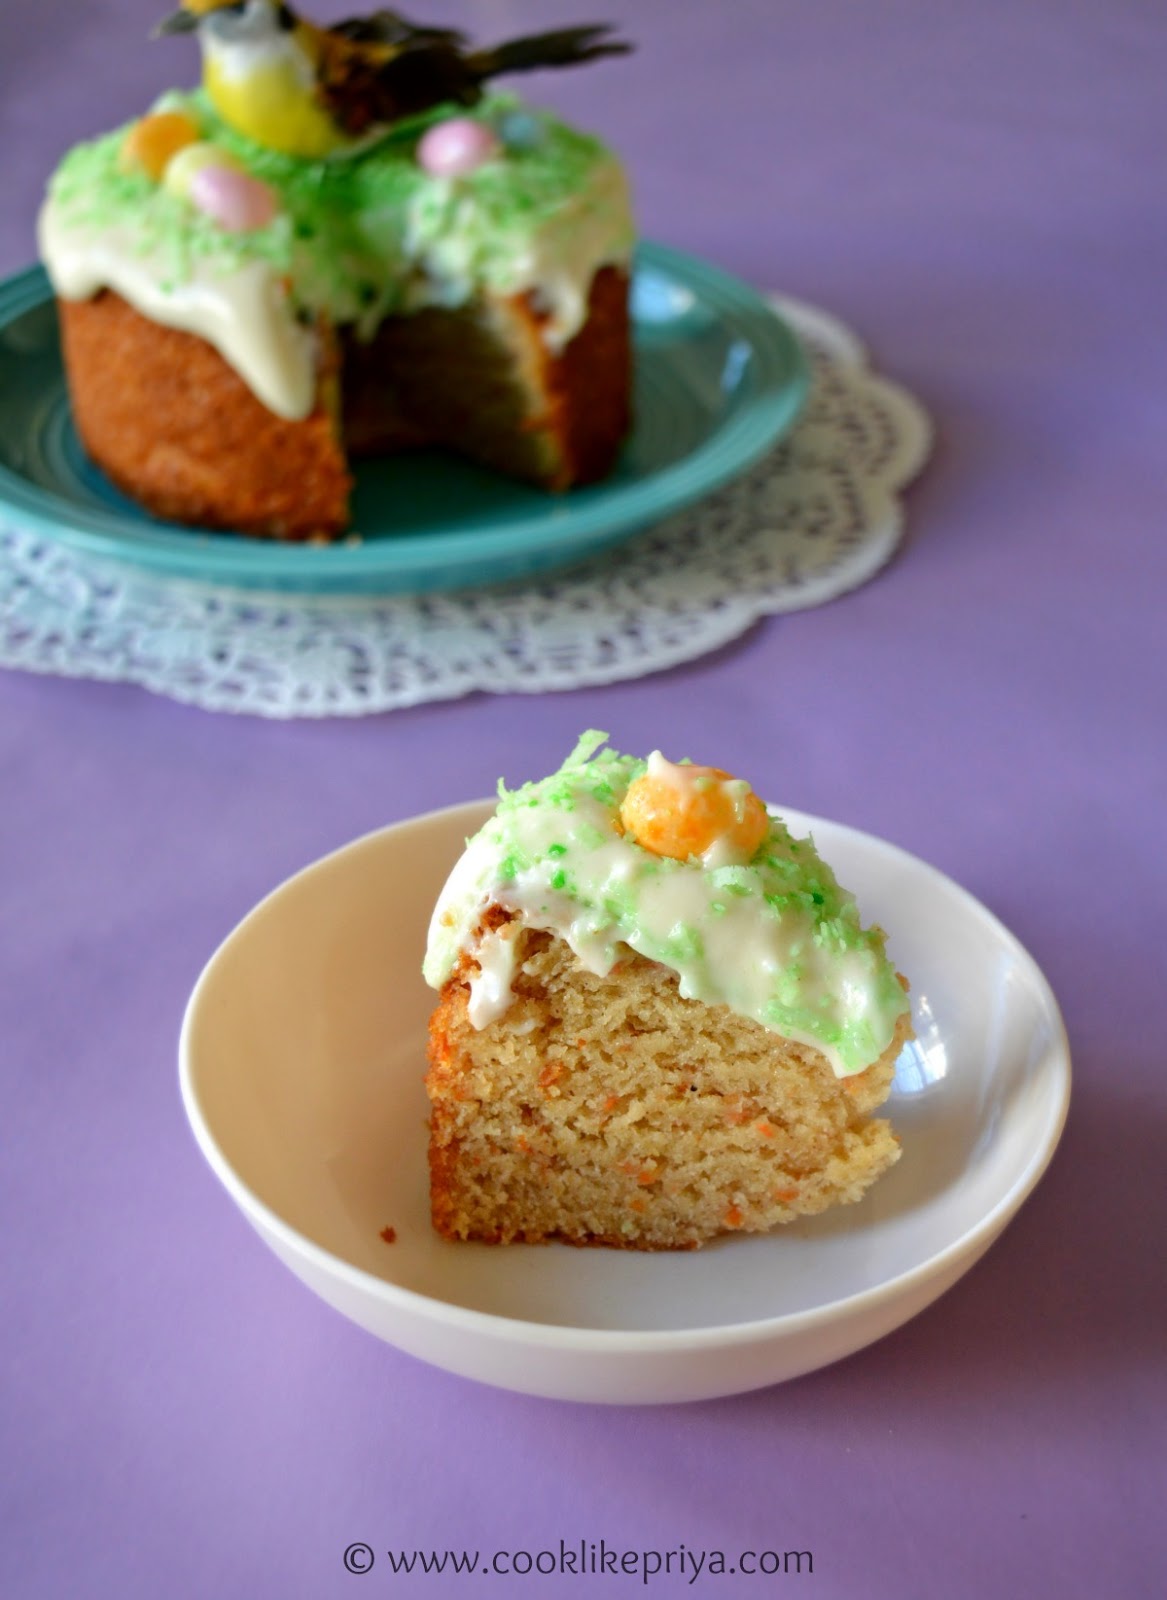
Easter is also known for bunnies and eggs, many people organize events for kids like egg hunting and sharing treats and so on. The whole theme was to involve kids and make the easter message more understandable for them. Bunnies representing joyfulness and eggs for new life. Usually I made a good spread of food for my family but this year I had no plans since we had decided to eat out and hence I wanted to satisfy the cook in me and ended up making this eggless carrot cake with cream cheese frosting and themed it like a bird's nest. I wanted to combine carrots, eggs and bird all in one cake. Its such an easy to make cake, whether its easter or not you can make this cake in no time and enjoy. 


Egg free carrot cake recipe with cream cheese frosting

Birds nest carrot cake recipe for Easter

Butterless Eggless Carrot cake recipe
EGGLESS CARROT CAKE WITH CREAM CHEESE FROSTING

For the sponge

Recipe Source - adapted from here
Prep time - 10 mins
Bake time - 25-30 mins
Serves - 4-6 pieces

Ingredients

All purpose flour/ maida (unbleached) - 1 cup
Baking powder - 1/2 tsp
Baking soda - 1/2 tsp
Salt - 1/4 tsp
Cinnamon powder - 1/2 tsp
Nutmeg powder - 2 pinches (don't add more its very strong taste)
Curd / yogurt - 3/4 cup ( in room temperature)
Granulated Sugar - 1/2 cup ( I used organic & powdered it)
Oil - 1/4 cup
Milk - 2.5 tbsp
Grated carrots - 3/4 cup

Method

1. Pre-heat oven to 180 C/ 350 F and grease a 4" cake pan with butter & flour or cooking spray set aside. Grade carrot and set aside.
2.In a large bowl combine sugar, oil, curd, milk, vanilla and mix together using a handheld whisk to come together. Make sure the sugar is fully dissolved.
3. In a small bowl combine the flour, cinnamon, nutmeg, baking powder, baking soda and salt, mix to combine.
4. Add the flour mixture to the curd mixture and mix little by little until the traces of flour is not seen in the cake batter. Make sure there are no lumps. 
5. Add in the shredded carrot and fold until its evenly distributed in the batter.
6. Tip the batter to the greased cake pan and bake in center of oven for 25-30 minutes, start checking the cake after 25 minutes by inserting a toothpick in the center of the cake. It must come clean if there is traces of batter make sure to bake for few more minutes.
7. Once down switch off the oven and remove the cake pan from the oven and rest on a cooling rack for 15 minutes.
8. Remove the cake from the pan and let it sit in the cooling rack until it comes to room temperature.
9. You an also freeze the cake for 15-20 minutes before frosting.


For the Frosting

VANILLA BEAN CREAM CHEESE FROSTING 

Cream cheese - 1/2 cup (slightly chilled)
Unsalted butter - 4 tbsp (room temperature)
Powdered sugar - 1/2 cup (Adjust according to sweetness)
Vanilla bean paste - 1-2 tsp

Method

In a bowl whisk the butter and cream cheese until creamy, now add in the powdered sugar and vanilla paste combine well. Freeze for 15 minutes before frosting.


For assembly

Jelly bean eggs - handful
Desiccated coconut - 1/4 cup
Green food color - few drops
Bird - to decorate (i got it from dollar shop)

Method

Take the desiccated coconut in a bowl and add the food color mix the color into the desiccated coconut and set aside. Once the cake is cool, add the frosting, sprinkle the coconut flakes, add the bird and the eggs and chill the cake for 15 minutes to set. Cut into pieces and enjoy.

Moist carrot cake recipe
Moist carrot cake recipe 

Low fat carrot cake recipe
COOKS WISDOM

TIP 1

1. I did not use nuts in the carrot cake, but feel free to add chopped walnuts or pecans, they do so well with carrot cake.

TIP 2

2. You can flavor the cream cheese with strawberry, almond or caramel flavors, but I used vanilla bean for a subtle richness. 

TIP 3

3. I used canola oil to make this cake, you can use vegetable oil or olive oil too.

TIP 4

4. I added only 3/4 cup of shredded carrot you can add 1 cup of shredded carrots. 


RELATED RECIPES

HOT CROSS BUNS
CHOCOLATE COFFEE CAKE
HOT CROSS MUFFINS
CARROT MILKSHAKE
CARROT BUTTERMILK
CARROT ORANGE COOLER
CARROT HALWA
CARROT KHEER

Viewing all 285 articles
Browse latest View live