Quantcast
Channel: Cook like Priya
Viewing all 285 articles
Browse latest View live

Veg Momos Recipe | Schezwan Vegetable Momo

$
0
0
Veg momos recipe
Veg momos recipe
Soft spicy steamed momos, can there the someone who cannot like them? I crave momos just like cakes, cookies and ice cream. I pull my husband to the momo shops and simply devour them with every bite. Few months back a bunch of us met up for lunch and we ordered for veg momos and I was totally disappointed with the restaurant that served dry chewy momos that only had the taste of raw cabbage. I was so disheartened and complained to the restaurant manager and walked away not forgetting what happened. So the other day I was reminded of momos and wanted to make them from scratch and it turned out too good. Try this recipe and you will tell me the same. Schezwan sauce is used to spice up these momos and I did make the filling with loads of finely chopped vegetables. And as always have tips for making the easiest filling without spending much time on chopping vegetables.


Schezwan vegetable momo
Schezwan vegetable momo 
VEG MOMOS RECIPE | SCHEZWAN VEGETABLE MOMO RECIPE

Recipe Source - Own
Makes - 10-12 momos (medium sized)
Prep time - 5 mins rest time - 20 mins
Cook time - 8-10 mins
Serving suggestion - Along with hot sauce/ chilli chutney

Ingredients

For the warp

Maida/ all purpose flour - 1 cup
Salt - 2 pinches
Water - as required to make a stiff dough

For the filling

Oil - 1 tbsp
Cabbage chopped - 1/4 cup
Onions chopped fine - 1/2 cup
Carrots chopped - 1/4 cup
Beans chopped - 1/4 cup
Capsicum chopped - 1/4 cup
Spring onions - 1/3 cup finely minced
Schezwan sauce - 2 tbsp
Soy sauce - 2 tsp
Salt - as required (used ajenomoto if u prefer)

Method

1. Prepare the dough by adding flour and salt to a bowl and mix well. Use your hands to form a dough by adding water little by little by just mixing it gently and without pressure. (If you knead heard it will cause the dough to form gluten).
2. Cover the dough with a damp cloth and set aside for 15-20 mins.
3. Prepare the filling - take a skillet and heat oil to it add the minced garlic and saute them for 20 seconds until it released aroma, do not brown them. 
4. To this add the minced onions and saute for 3 minutes until well cooked. In the meantime in a mixer add the vegetables in 2 batches and coarsely grind them for 10 seconds.
5. Add these vegetables to the onions and sauté until the vegetables and well cooked, it takes 3 minutes.
6. Add the sauces - soy and schezwan and salt at this stage, taste to check for spiciness and salt.
7. Sprinkle the minced spring onions and set aside to cool.
8. Check the dough and divide into small balls and set aside.
9. Using a rolling pin flatten the dough into small discs, you can use more flour for dusting.
10. Store the flattened discs in a plate and cover with a damp cloth. 
11. To prepare the momos, fill the discs with 1 tbsp of filling and form cone and wedge shapes by folding the wraps.
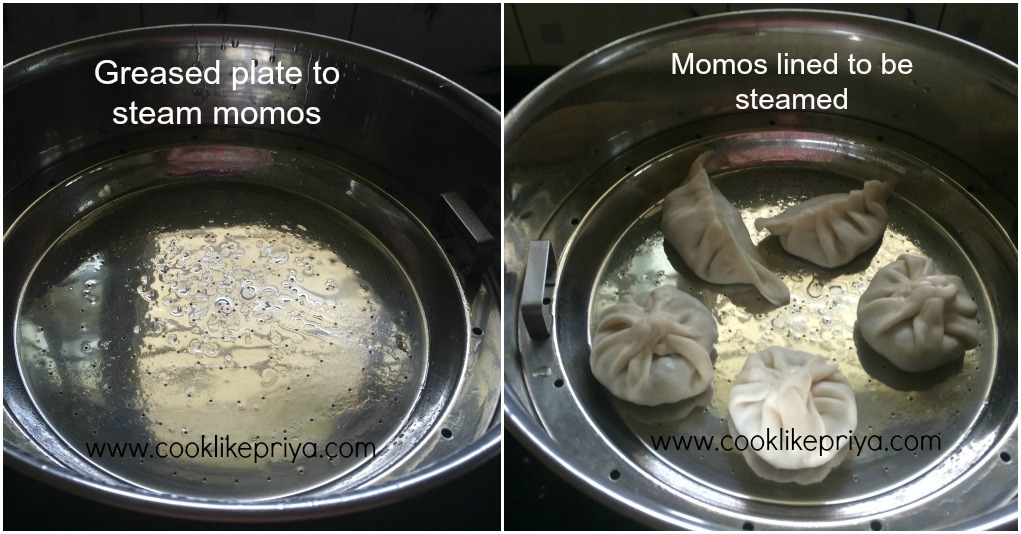
12. Once all the momos are prepared. Grease well a steaming plate with oil. I used my idiyappam plate and idly cooker for making momos. 
13. Add water to the vessel and place the greased plate on it and let the water boil for 5 minutes when it is nice and hot. Place the momos on the plate and cover the lid.
14. Steam cook for 8-10 mins until the wraps turn transparent.
15. Once done remove the lid and take the momos using a folk.

Serve hot with hot sauce / chilli chutney and enjoy.
How to make momos at home


Spicy veg momos recipe
COOKS WISDOM

TIP 1

1. To ease yourself from chopping all the veggies fine, just grind them for 10 seconds in a mixer. This speeds the whole cooking process. Feel free to use your favourite veggies, I used carrots, beans, spring onions, cabbage.

TIP 2

2. Do not knead the dough, if you add more pressure gluten will get formed in the dough.

TIP 3

3. Always cover the dough with a damp cloth while preparing the momos and even during resting the dough. 

TIP 4

4. I used spicy schezwan sauce, you can use green chillis too to spice the filling.

TIP 5

5. Soy sauce and schezwan sauce already have salt in them so used salt sparingly and carefully.

TIP 6

6. The same recipe can be used to make chicken momos or fish momos just add cooked shredded chicken/ fish along with the vegetables.

TIP 7

7. Always make the warps thin so that they cook faster and not turn chewy. More filling the better.

RELATED RECIPES

BAKED SAMOSA
ROASTED MAKANA
ROASTED CORN ON THE COB
PANEER CUTLET
PANEER CIGARS
POTATO WEDGES
FISH CUTLET
KHEEMA CUTLET
CHICKEN 65
GOBI 65
DHOKLA
Kerala Chicken Stew for Appam | Nadan Kozhi Stew Recipe

$
0
0
Kerala Chicken Stew for Appam
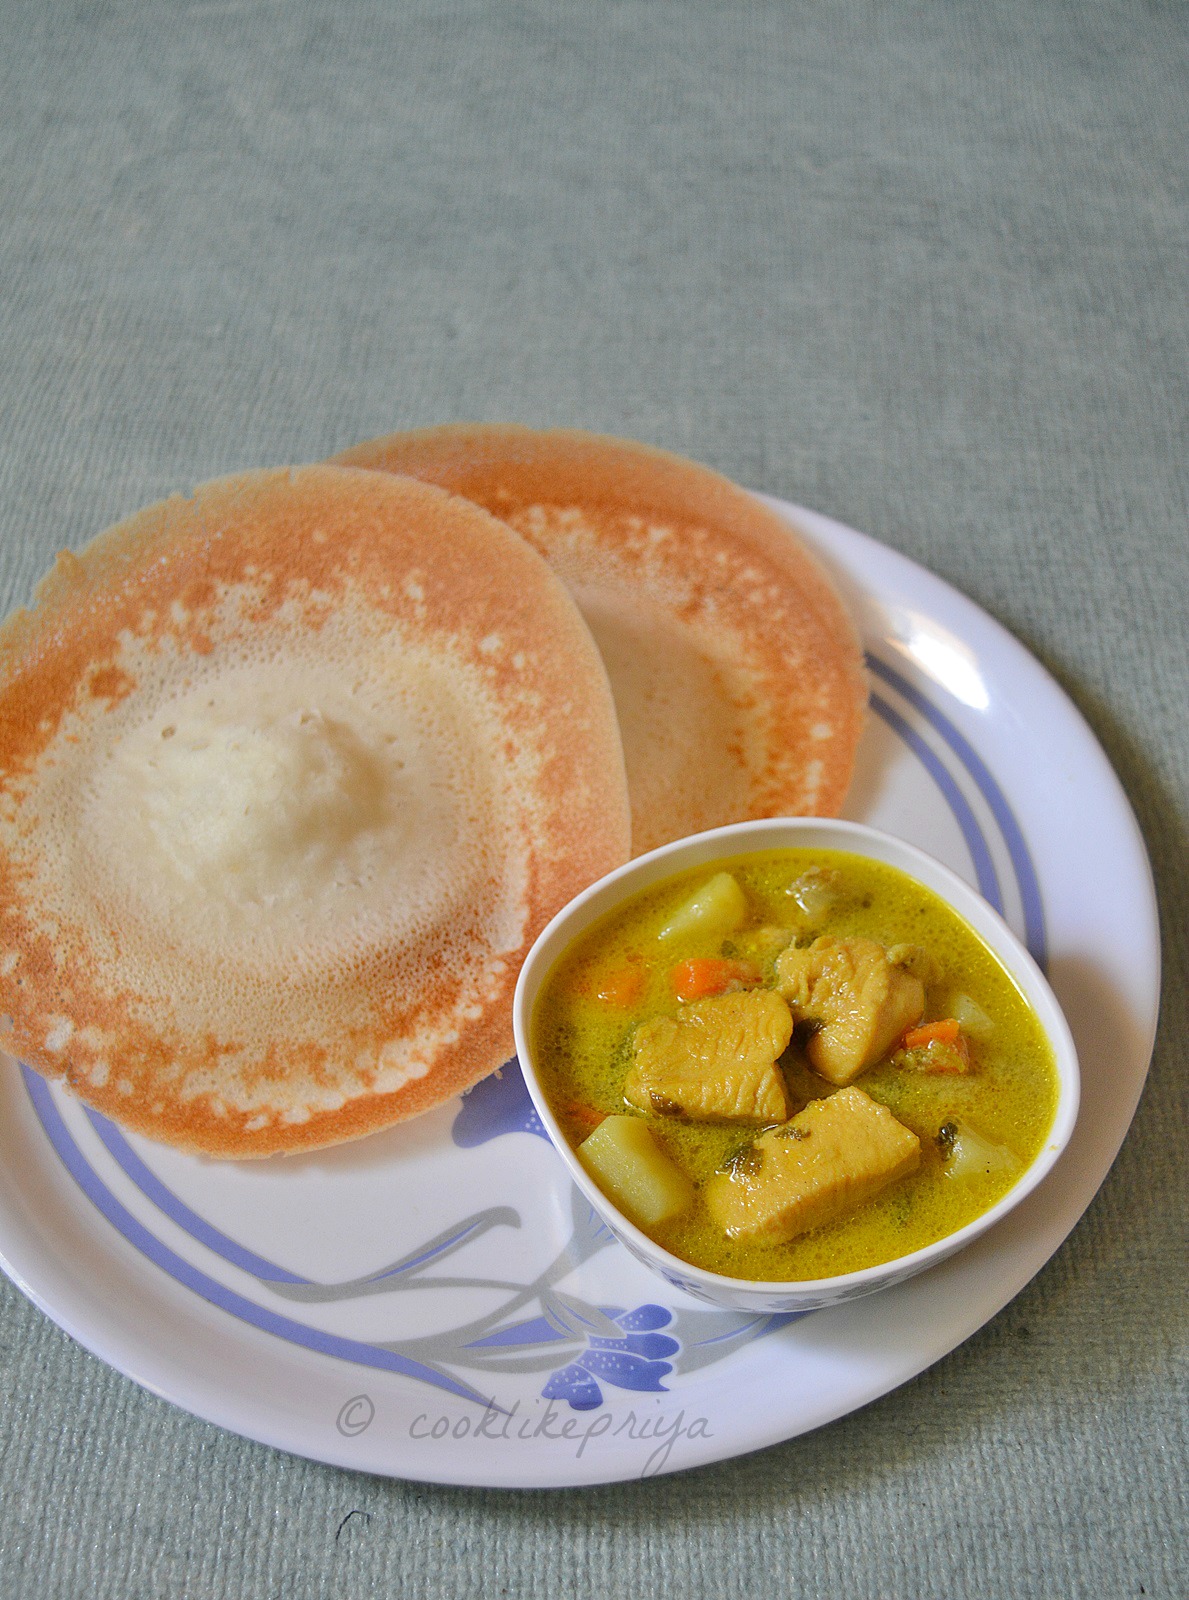
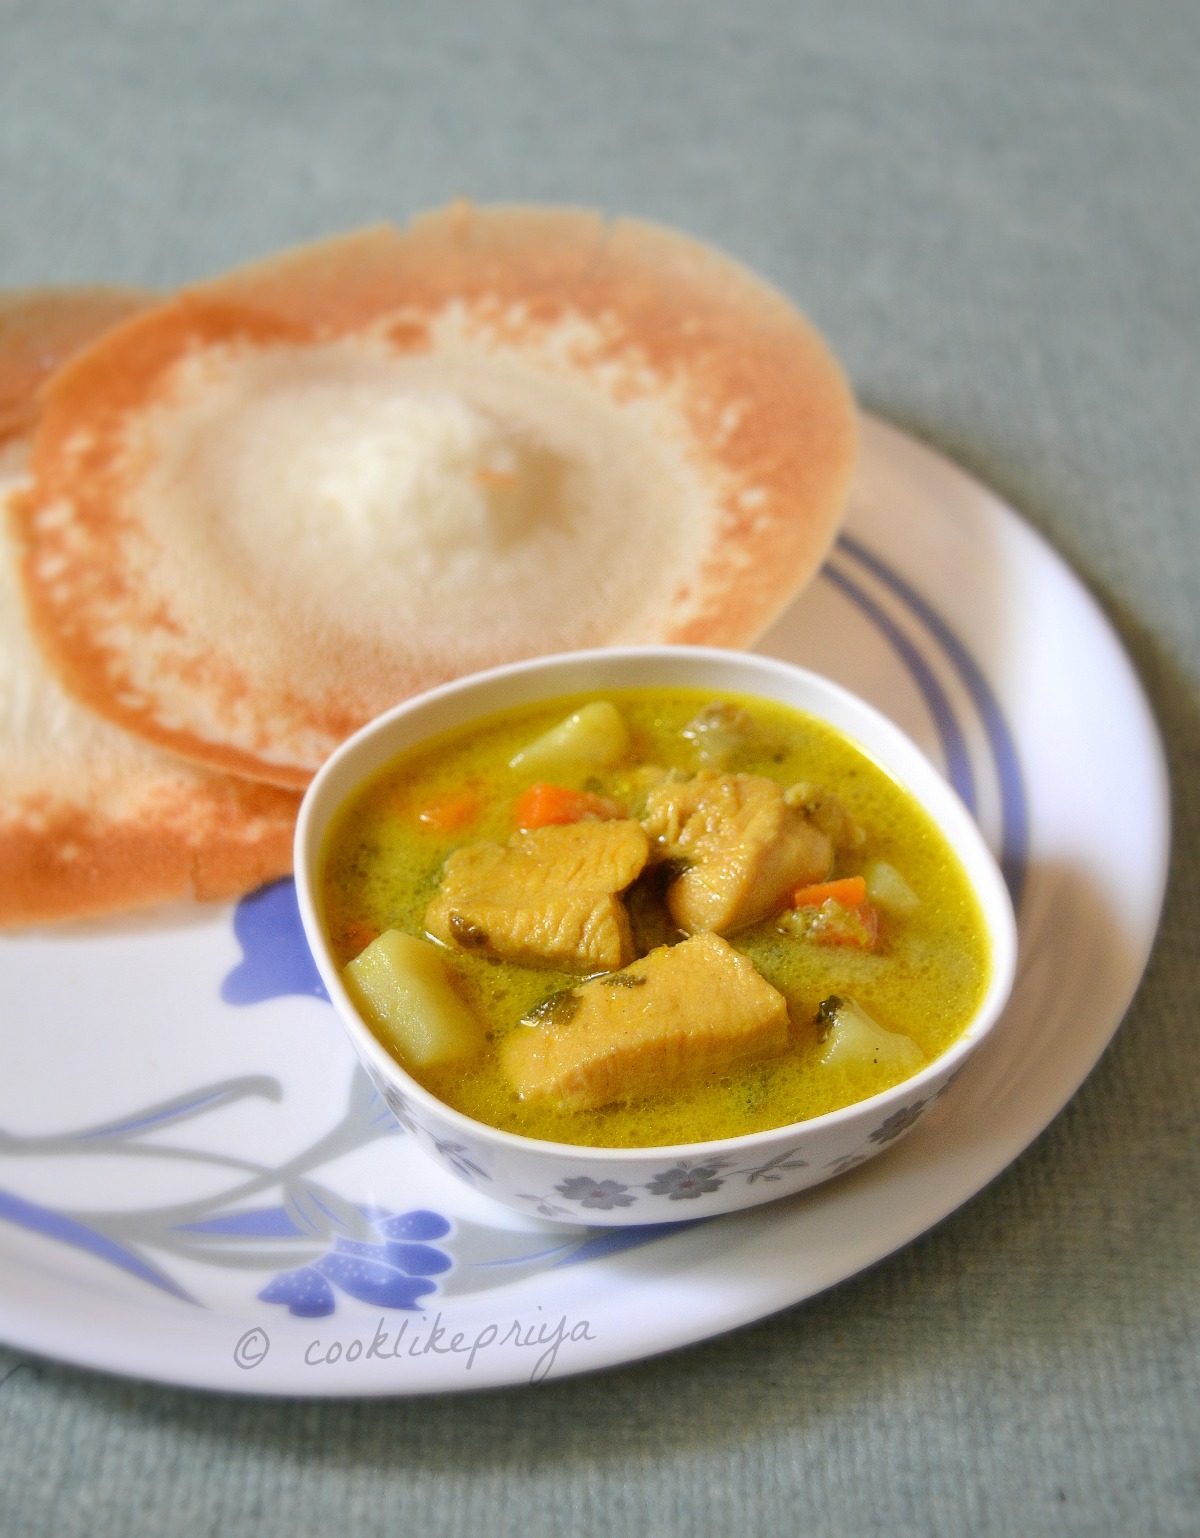
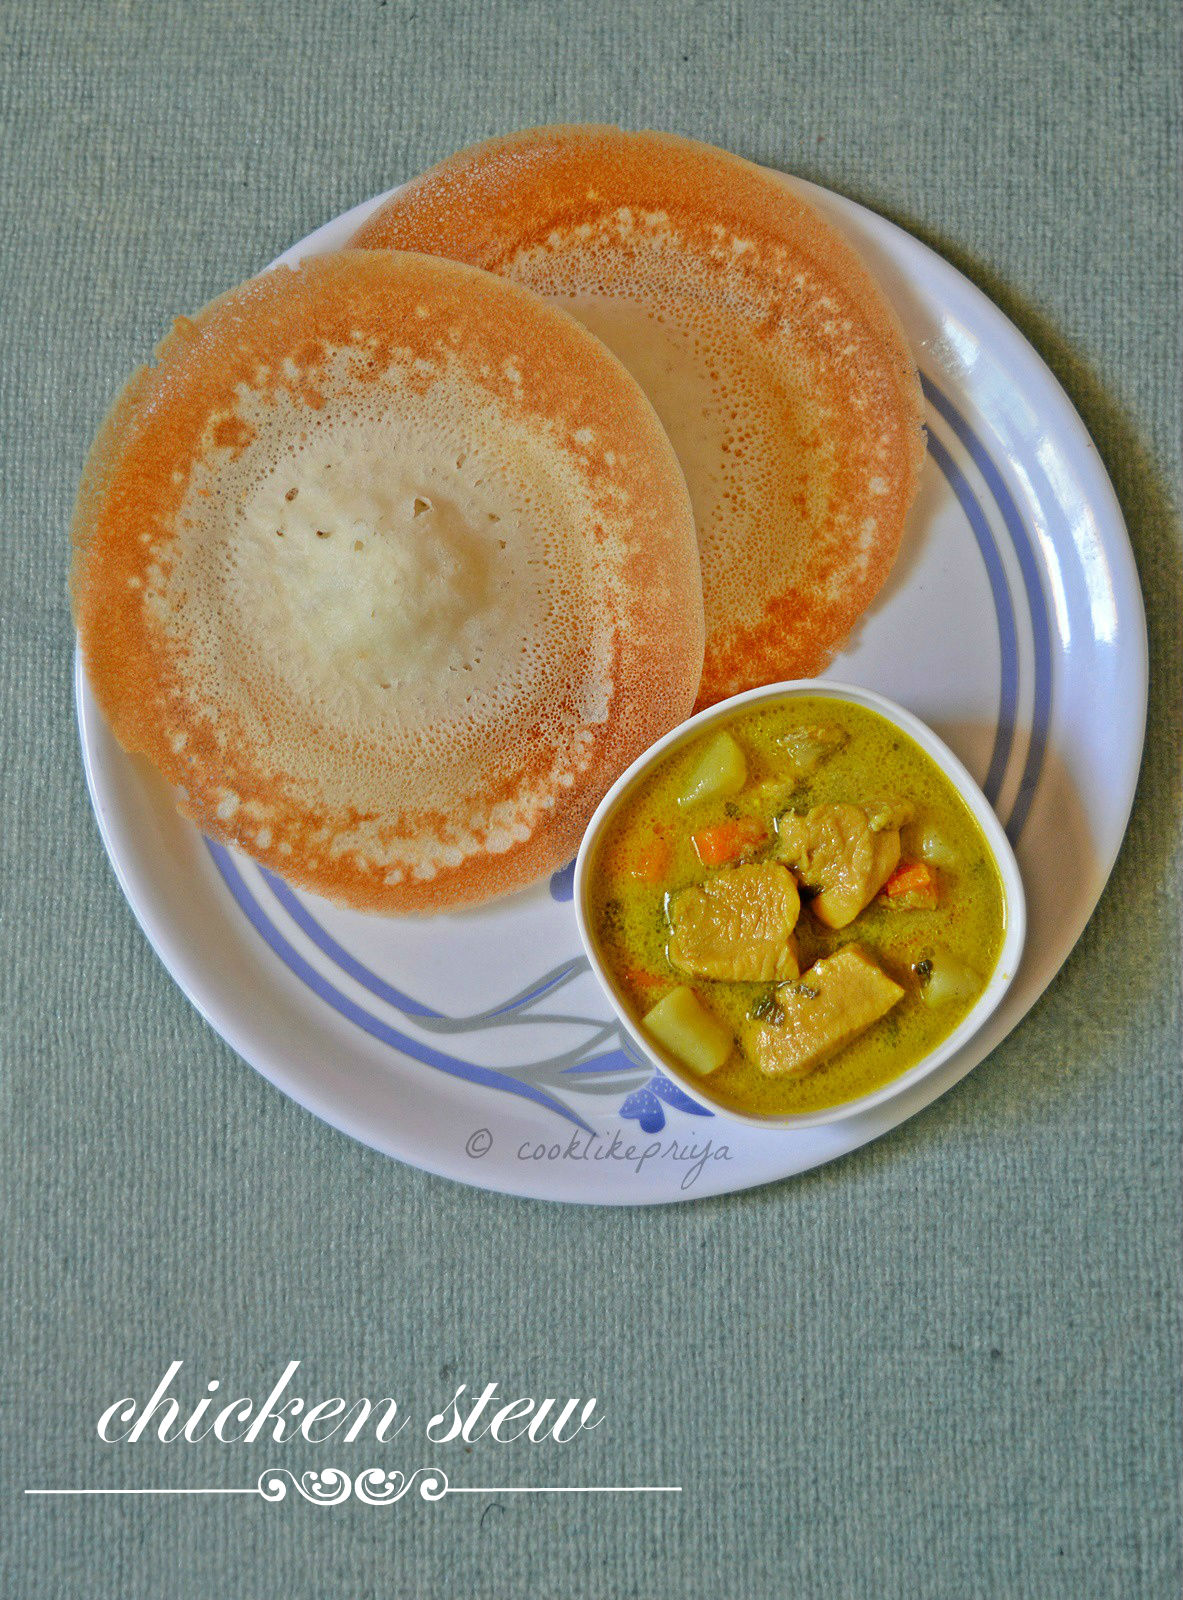
Last week when I posted the Vegetable stew recipe on my blog, I got a request for Chicken stew recipe and since my husband's birthday was nearing I wanted to make Chicken stew and appam for his breakfast. I love mallu food and I have already posted many delicious mallu recipes on my blog like the aviyal, mango fish curry, ragi puttu with kadala curry, appam and so on. There are many more kerala recipe that are our family favourite but yet to be blogged. When Amma was a newly wed she had a lovely mallu chechi who thought her many kerala recipes that Amma graciously passed on to me. Although we love our Tamil food can never say no to Kerala recipes for their flavour and coconut indulgence. I am sure each household has their own recipe for a chicken stew this one is my own version. It totally depends on how rich or mild you want this curry to be. My version is mild and not rich but is perfect with appams/ idiyappams. My husband was one happy man to enjoy this breakfast combo on his birthday :-) who ever said a way to a man's heart is through his stomach was so right ;-).


Nadan Kozhi Stew with vegetables

Kerala Christian Chicken Stew

KERALA CHICKEN STEW FOR APPAM RECIPE
Recipe Source - Own
Serves - 4-5 generously
Prep time - 10 mins
Cook time - 15-20 mins

Ingredients

Chicken with bones (skinless)- 10-15 small pieces or 500 gms
Onions - 1 large, thinly sliced
Potato - 1 medium cubed
Carrots - 3 medium cubed
Beans/ peas - 1/2 cup 
Thick coconut milk - 1 cup ( 1 cup shredded coconut + 1/2 cup water)
Cashew paste - 1 tbsp
Green chilli - 4-5 (adjust as per heat tolerance)
Turmeric powder - 1 generous pinch
Pepper powder - 1/3 tsp
Garam masala - 1/3 tsp
Salt - to taste
Pudina/ mint leaves - 10 leaves finely chopped

For tempering

Oil/ ghee/ butter - 1 tbsp
Cinnamon - 1"stick
Bay leaf - 1
Cardamom - 4
Cloves - 4
Fennel seeds - 1/2 tsp
Onions - 1 large thinly sliced

Method

1. In a pressure cooker add the chicken, turmeric, salt, onions (1/2), carrots, peas, potato, beans, green chilli, coconut milk and 1/4 cup water. Pressure cook for 3 whistles. Switch off and let the pressure gradually settle.
2. In a kadai/ pan heat oil and add the whole spices - bay leaf, cinnamon, cloves, cardamom, fennel seeds and let it release its aroma. Add the onions and fry them until golden.
3. To this add the cooked chicken and coconut milk and the cashew paste. Cook in medium flame until the raw smell of cashew goes away.
4. Reduce flame to low and cook covered for 5 minutes until oil separates. Add the garam masala, pepper powder and check for salt.
5. Garnish with mint leaves and switch off.
6. Serve warm along with appam.

Chicken coconut milk curry for appam/ idiyappam
Chicken coconut milk curry for appam/ idiyappam 

COOKS WISDOM

TIP 1

1. You can use ghee/ coconut oil/ refined oil/ butter for this curry. 

TIP 2

2. Adding chicken with bones gives a lovely flavour to the curry. Add your favourite vegetables to make the curry look colourful. 

TIP 3

3. I used cashew paste for thickness and  richness to this curry. 

TIP 4

4. Stews get their spiciness from the green chillis so do not skip them. 

TIP 5

5. To make this chicken stew I have used a pressure cooker it makes cooking faster. If you don't own a pressure cooker follow the same procedure to make it in a skillet/ kadai.

RELATED RECIPES

  KERALA VEG STEW
   APPAM (no yeast recipe)
   IDLY / DOSA
   POORI MASALA
   PUTTU & KADALA CURRY

10 Delicious Payasam Varieties | Kheer Recipes | Easy Indian Dessert

$
0
0


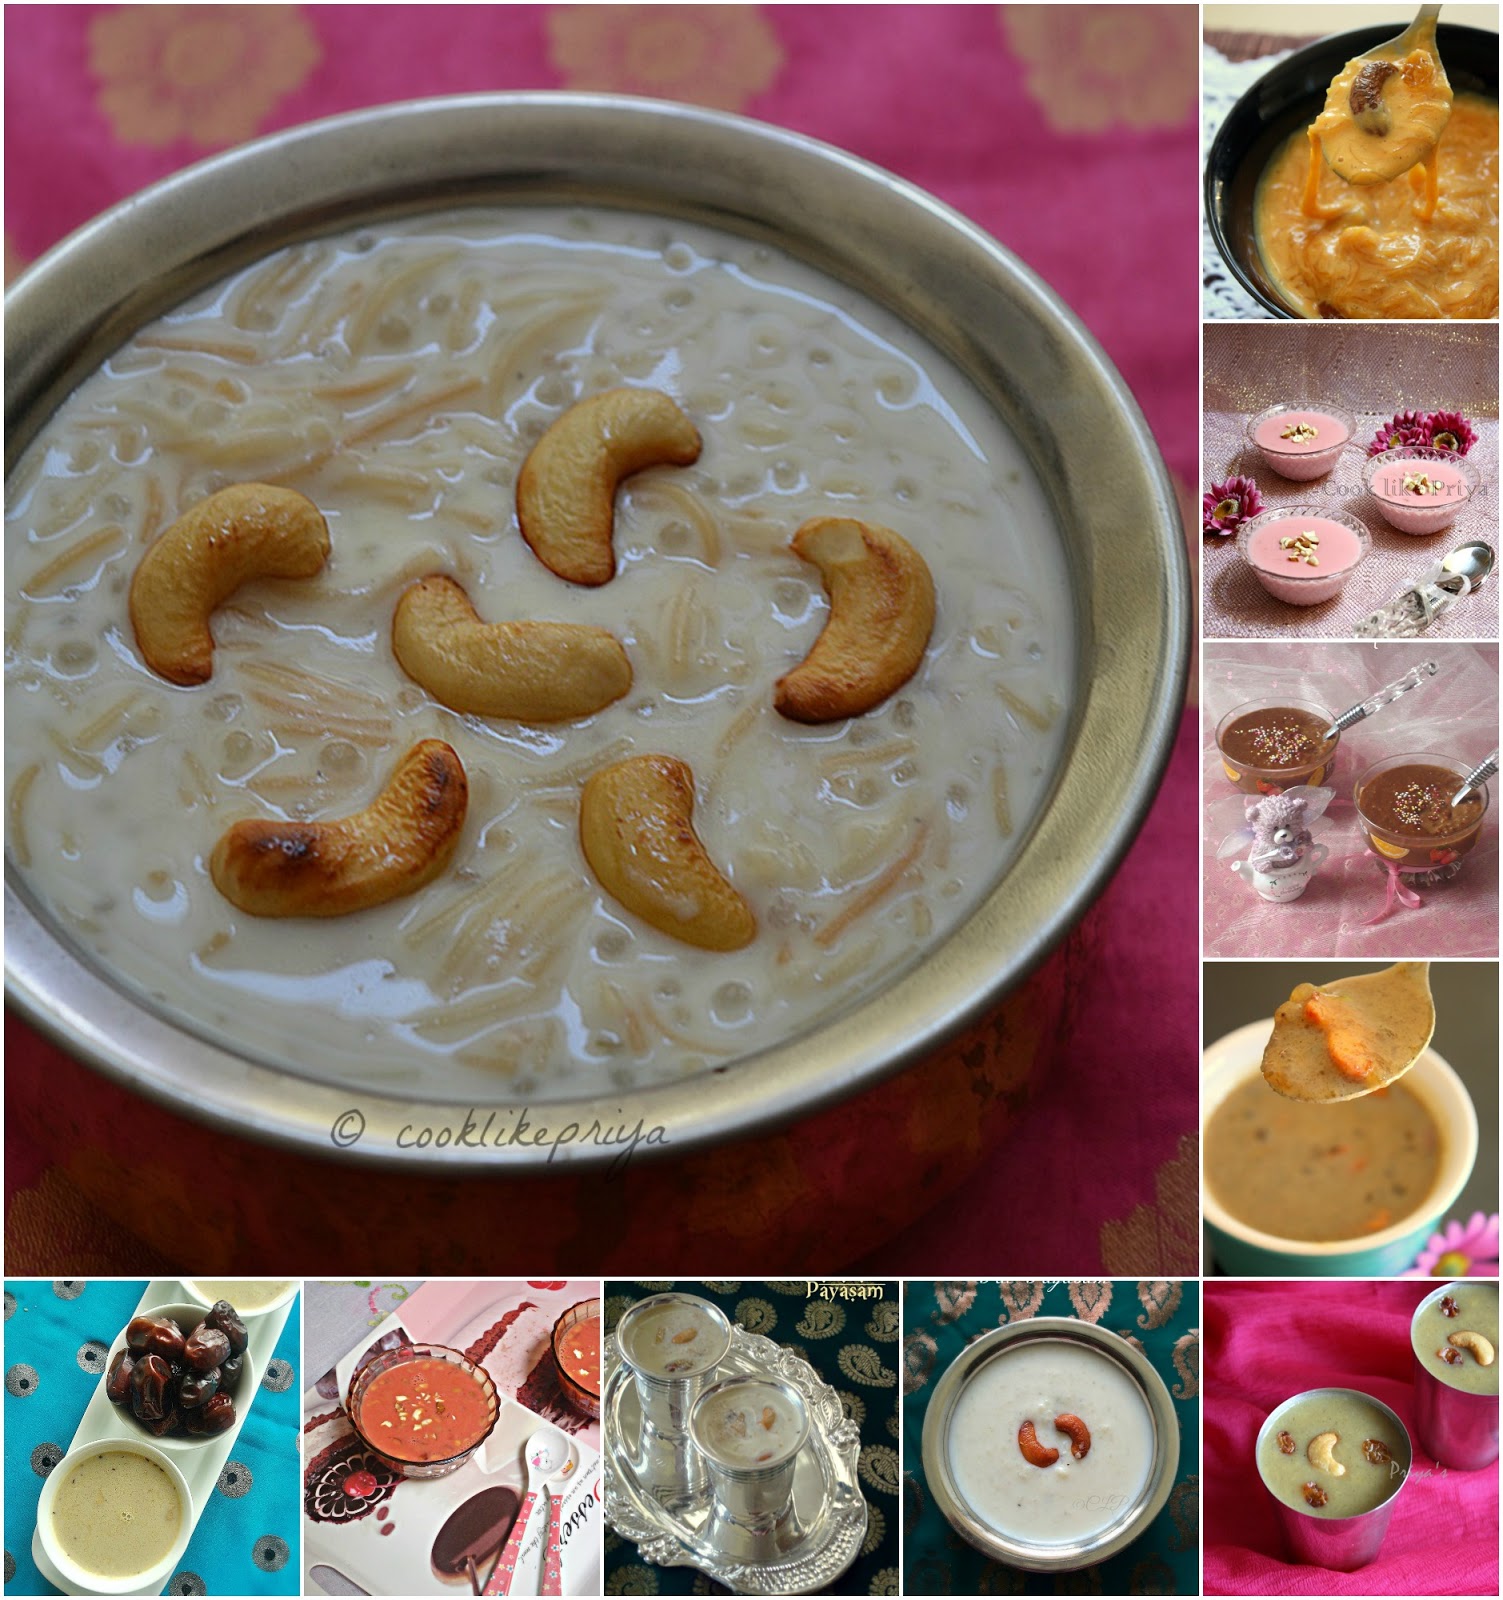
Payasam/ Kheer Recipes

The most quickest and easiest Indian dessert would be Payasam/ kheer, mostly milk based sweetened with sugar/ jaggery and garnished with nuts and raisins. There cannot be a festive occasion complete without a delicious spread of great tasting food and with a payasam/ kheer recipe to complete the lovely meal. Here is a list of my favourite payasams from my blog all in one single post. 


To view the payasam/ kheer recipe click on the respective pictures.


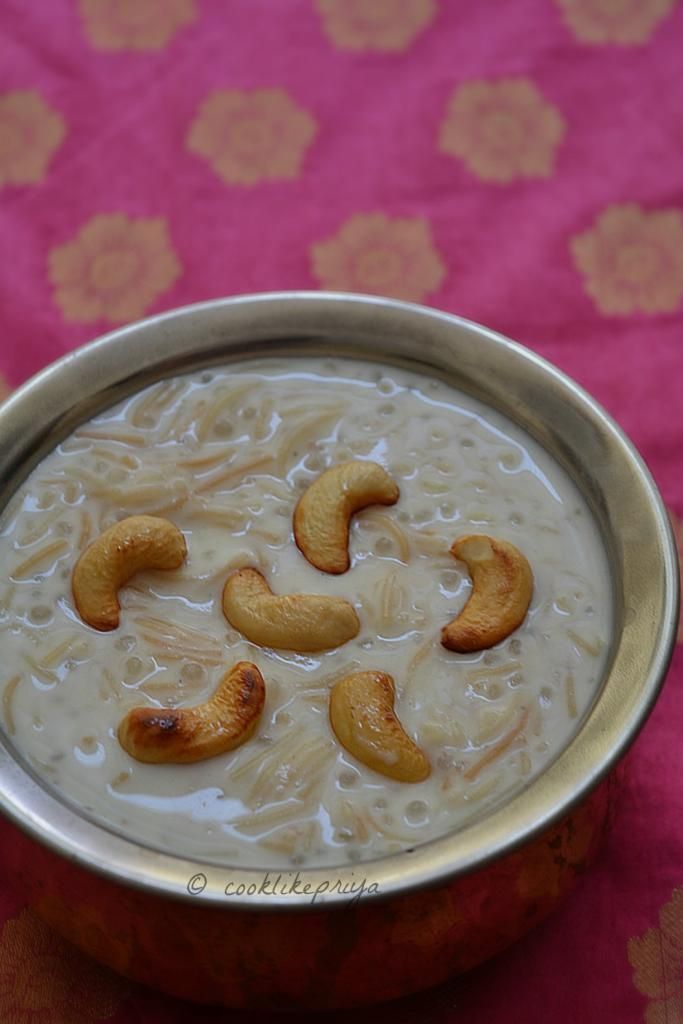
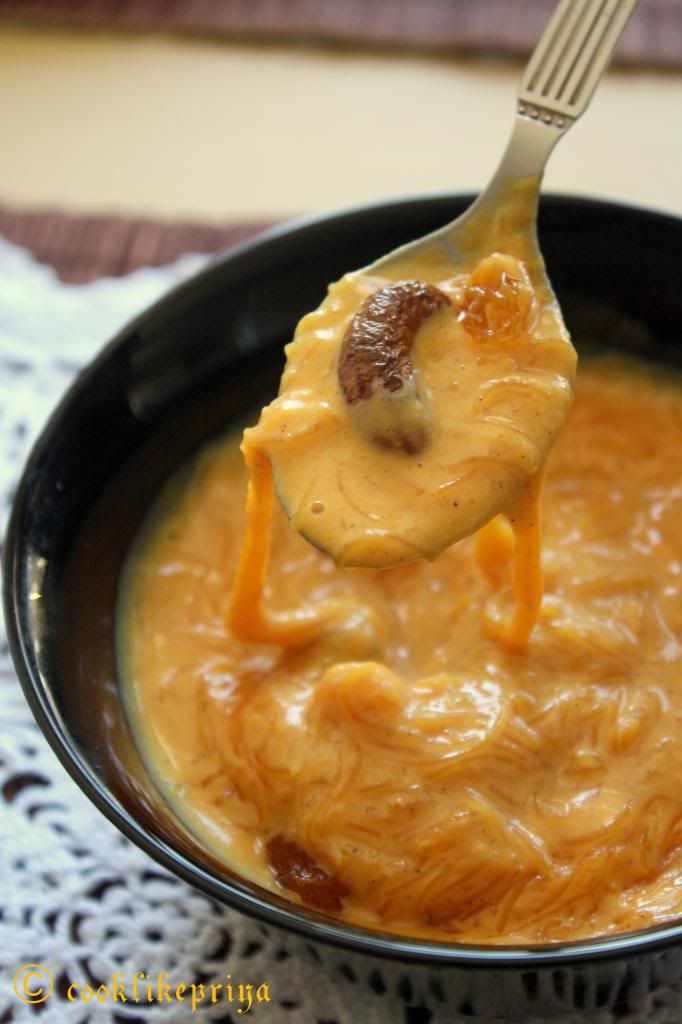
Paal Semiya Javvarusi Payasam
Paruppu Payasam
Paruppu Payasam


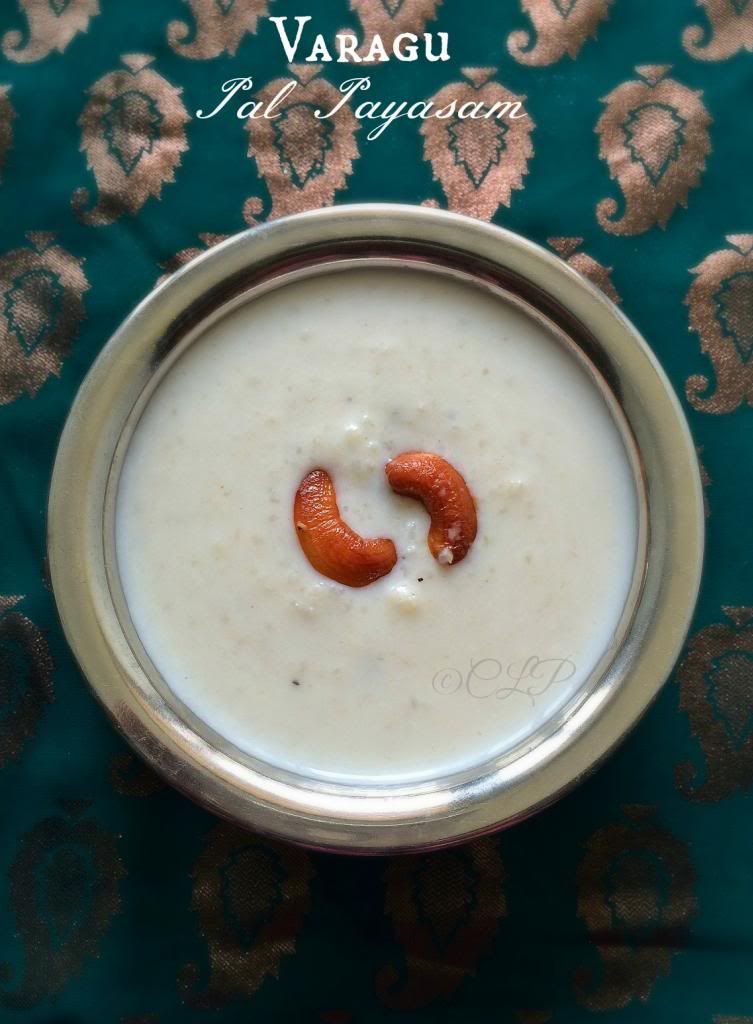
Varagu Paal Payasam
Varagu Paal Payasam

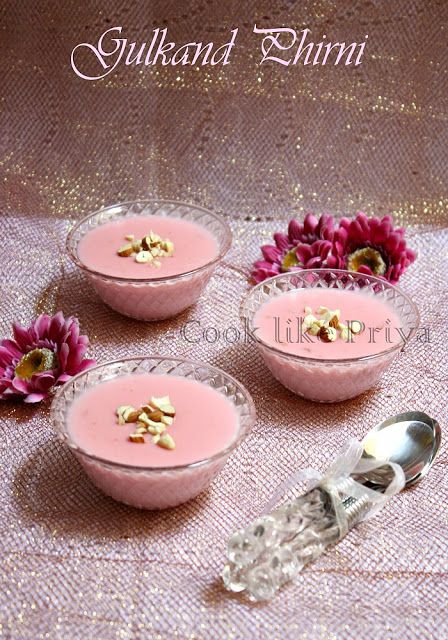
Gulkand Kheer
Gulkand Kheer

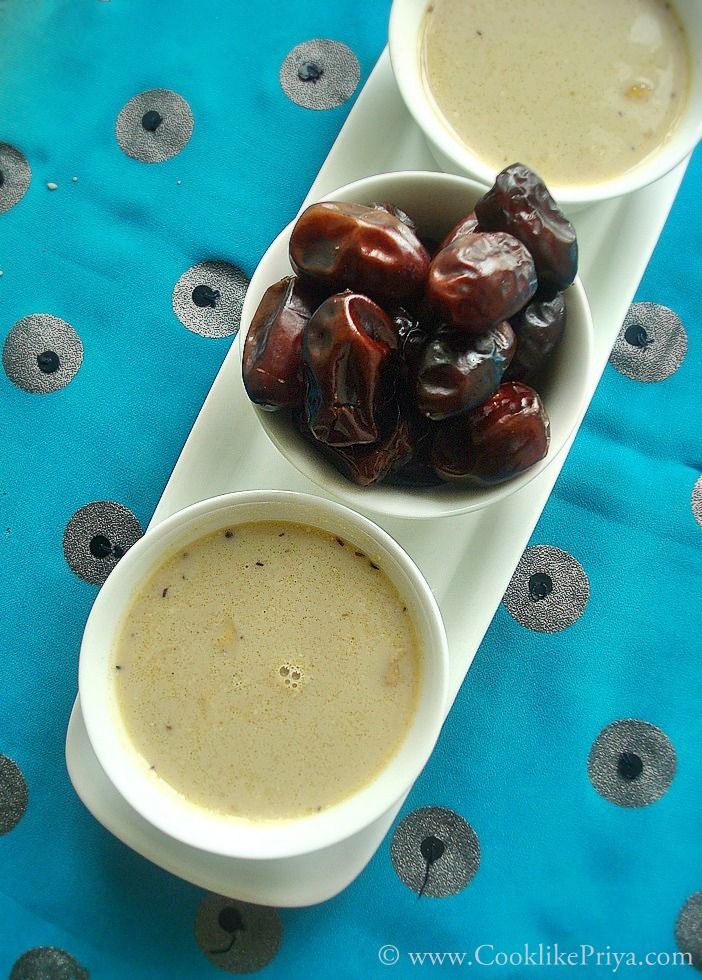
Dates Kheer
Dates Kheer


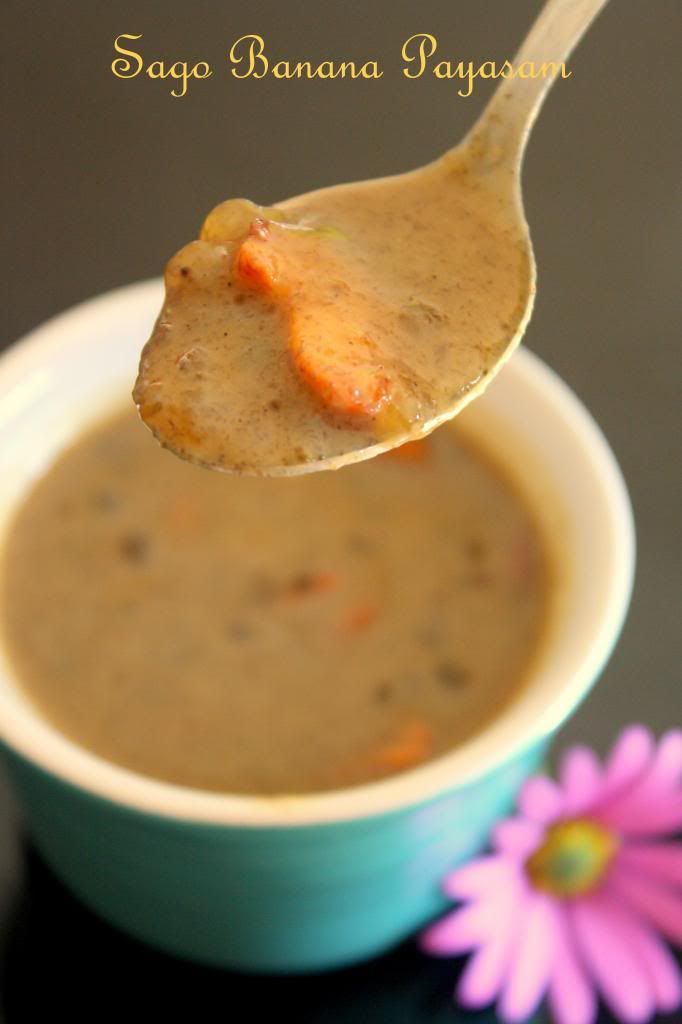
Sago Banana Payasam
Sago Banana Payasam

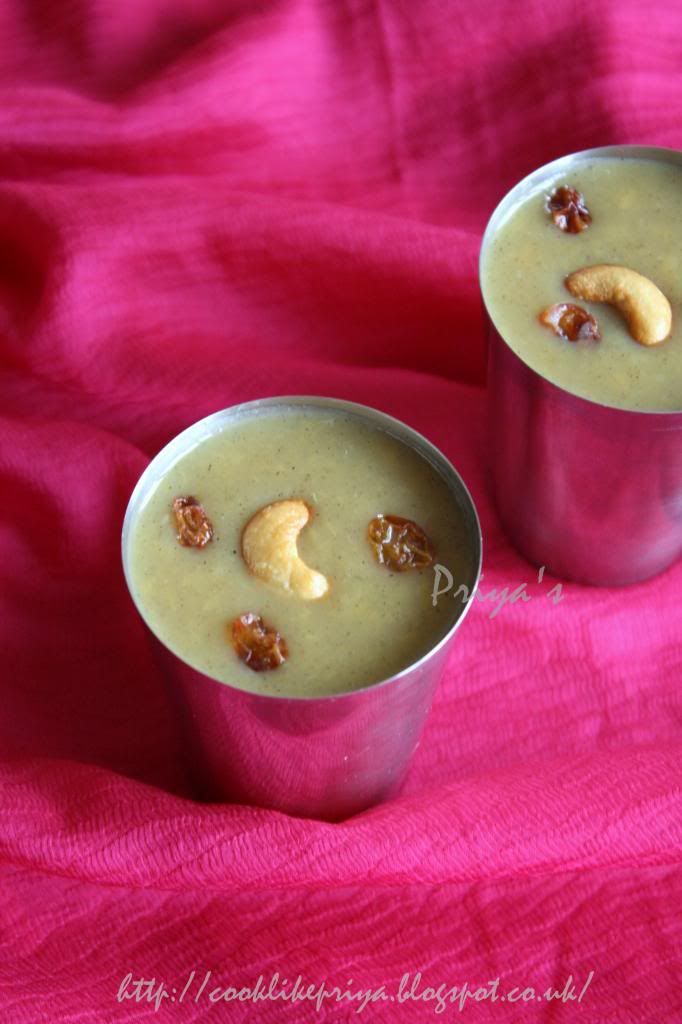
Wheat rava payasam
Wheat rava payasam

Carrot Payasam
Carrot Payasam

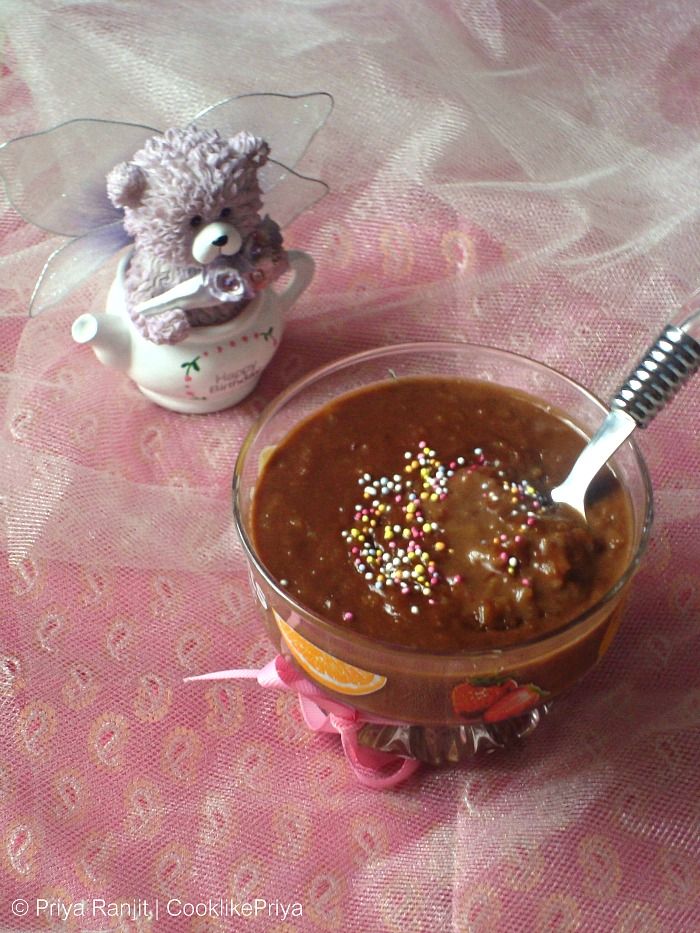
Chocolate Rice Kheer

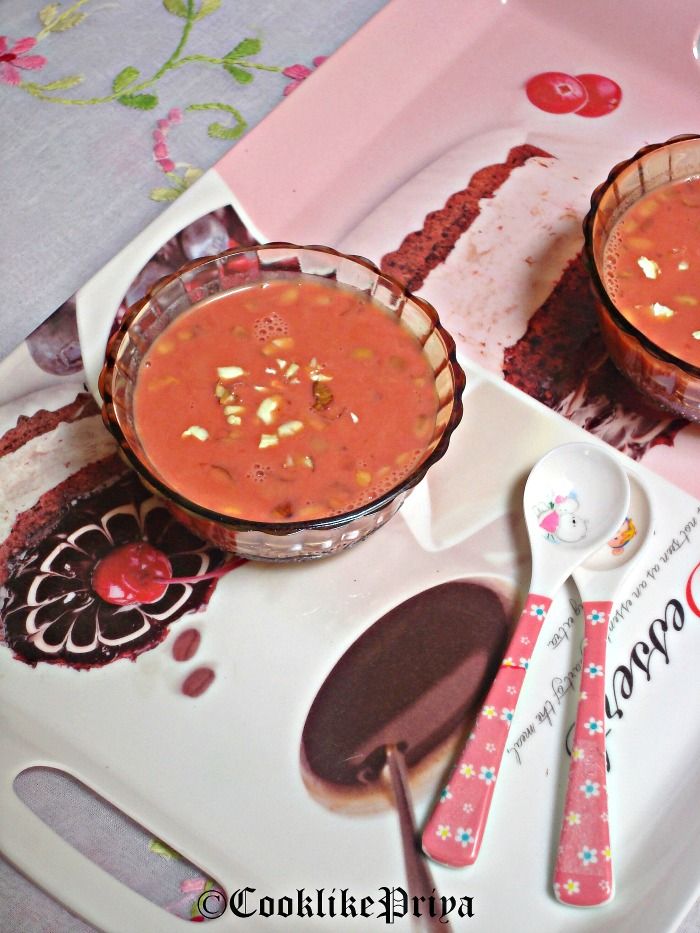
Beetroot Payasam
Beetroot Payasam


Kothavarangai Paruppu Usili | Cluster Beans Stir Fry

$
0
0
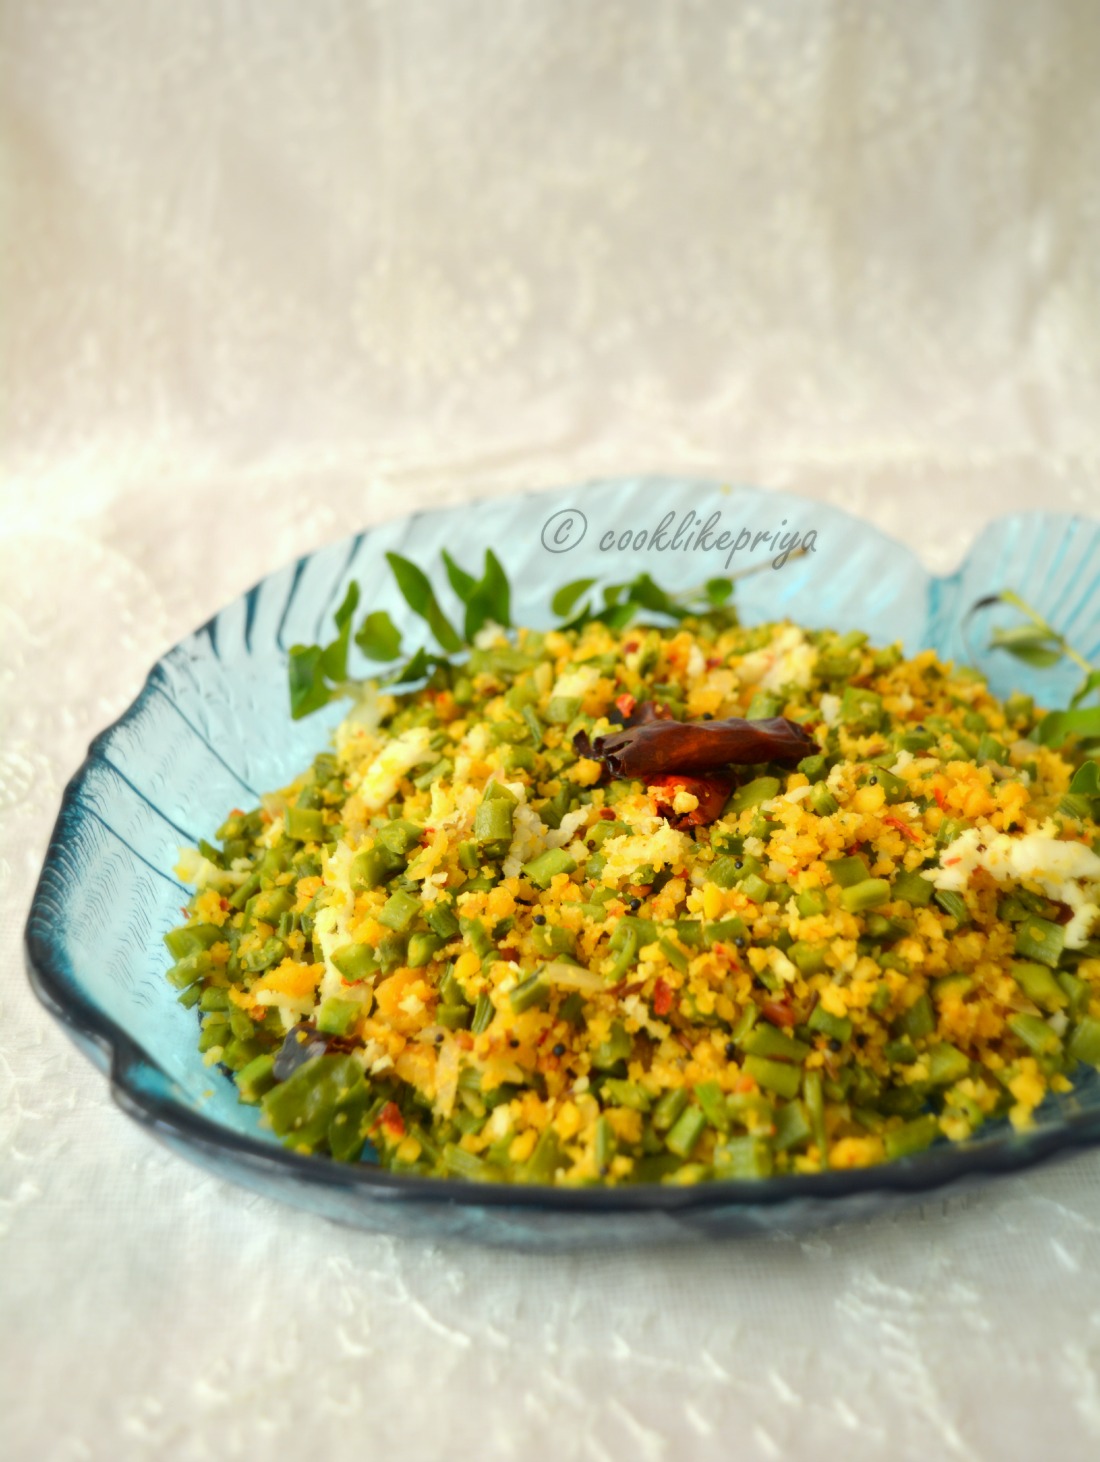
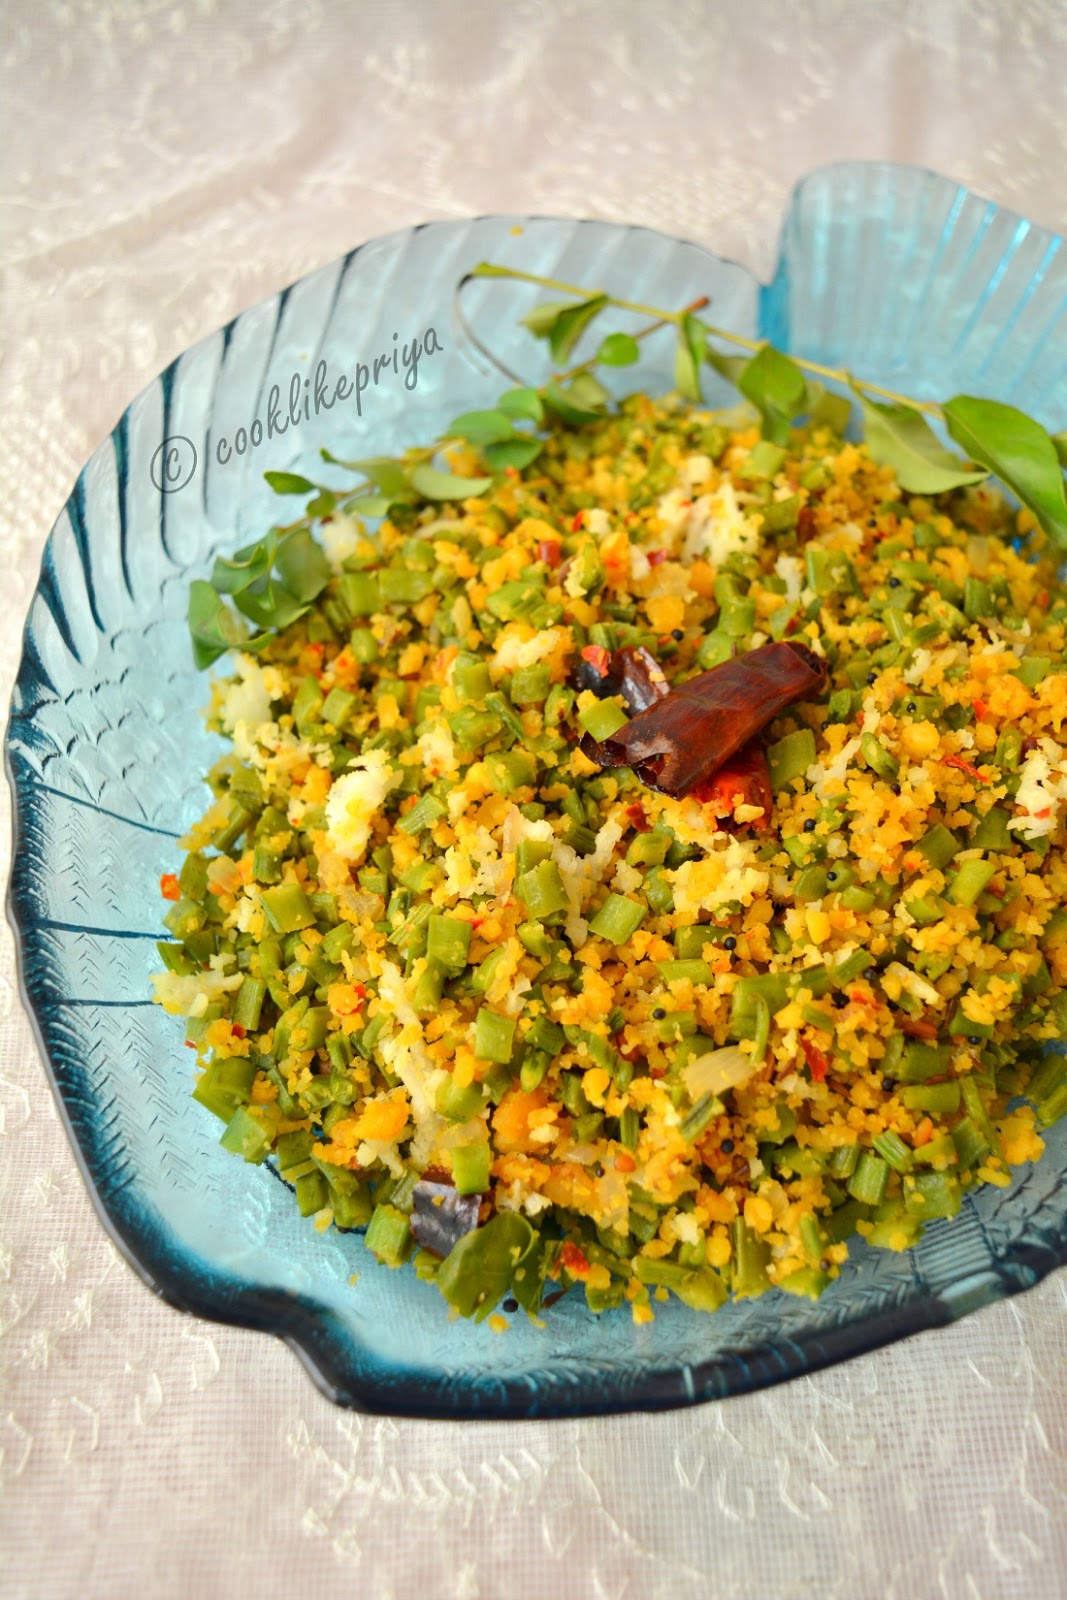
Kothavarangai Paruppu Usili

Kothavarangai (Cluster beans) usili is a popular vegetarian side dish which is a famous iyengar (brahmin) recipe. Amma did this side dish around a month back and I just found time to post this recipe. Its a delicious combination of vegetable and lentils in one dish. A perfect wholesome side to go with your rice or even roti. The usili base can be used for any vegetable side dish that you like.


How to make paruppu usili

KOTHAVARANGAI PARUPPU USILI RECIPE

Recipe Source - Amma
Serves - 3-4 people
Prep time - 10 mins (1 hr soaking time)
Cook time - 15 mins
Serving suggestion - along with any vegetarian curry and rice.

Ingredients

Cluster beans/ Kothavarangai - 30 no, ends discarded and chopped fine (1 and 1/2 cup)
Oil - 2 tsp 
Mustard seeds - 1 tsp
Urad dal - 1/2 tsp
Curry leaves - 3-4
Hing - 1 generous pinch
Turmeric powder - 1/3 tsp
Salt - to taste

To soak & grind to course powder

Toor dal - 4 tbsp
Channa dal - 3 tbsp
Red chilli (dry) - 4 no
Fennel seeds - 1 tsp

Method

1. In a bowl soak the toor dal and channa dal for 1 hour. Later discard the water completely and grind along with red chilli and fennel seeds into a course mixture. 
2. In a idly plate place this course mixture and double boil for 7 minutes until cooked.
3. Crumble this mixture and set aside.
4. In a pan heat oil. Splutter the mustard seeds, urad dal, curry leaves and add in the finely chopped cluster beans stir fry and cook covered for 5-6 minutes until cooked. You can sprinkle water for even cooking. 
5. Add in the turmeric powder, salt and the crumbled lentil mix and stir well. 
6. Check for salt and serve warm along with rice and your favourite curry. 

COOKS WISDOM

TIP 1

1. Make sure that the cluster beans are finely chopped, this helps in fast cooking of the vegetable. Some people boil the vegetable for even cooking, but I prefer steam cooking them as the nutrients are intact.

TIP 2

2. While grinding the lentils make sure there is no water and the mixture is coarsely ground.

TIP 3

3. For steam cooking the lentil you can also form balls and place them on an idly plate or just sprinkle them and stem cook. 

TIP 4

4. The same recipe can be used to make vazhaipoo usili, beans usili and so on.


RELATED RECIPES

BANANA STEM STIR FRY
BROAD BEANS STIR FRY
GARLIC POTATO STIR FRY
BITTER GOURD STIR FRY
SPINACH SHALLOTS STIR FRY
CHOW CHOW STIR FRY
RAW BANANA PAN FRY
YAM PAN FRY

Eggless Cake Recipes | Easy Eggless Cake Recipe

$
0
0
10 Easy Eggless Cake Recipes | Egg-free cake Recipes
 Easy Eggless Cake Recipes | Egg-free cake Recipes
Don't we call love easy snack cakes? I am a huge fan of light eggless cake recipes, if there is a way to skip eggs and butter to make cakes then I am all game to the idea. I have tried many eggless cake recipes which I thought would be great to share in one single post. Usually Eggless cakes are said to be dense, oily or too moist. But not really, although in the baking world people even war about eggless cakes and cakes with eggs. For special occasions I prefer to bake a sponge with eggs and for regular cake cravings I stick to cakes without eggs. If you ask me which I enjoy better? I love them both, its hard to not fall in love with a perfectly baked cake isn't it?. All these cakes are tried many times in my kitchen and loved and devoured by my loved ones. If you are a baker do you need an excuse to bake? certainly not ;-). Go ahead and enjoy baking these cakes for your loved ones. 


BEST EGGLESS CAKE RECIPES

To view the recipes, click on the individual headings/ cake recipe titles.


Masala Vada | Paruppu Vadai | South Indian Masal Vada

$
0
0
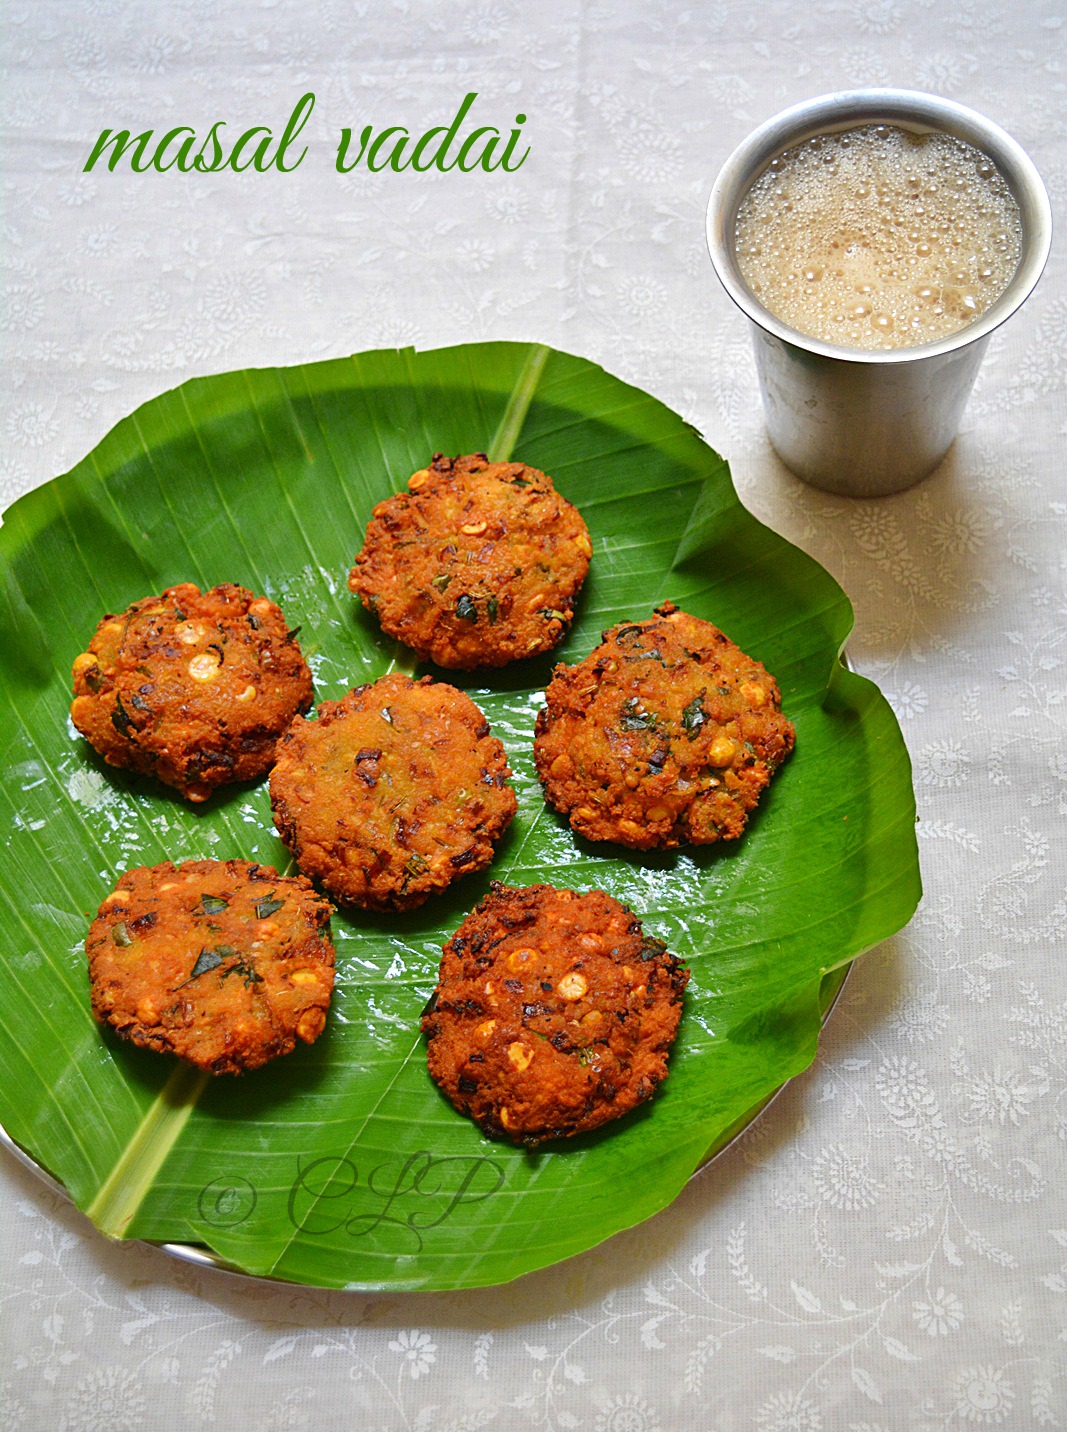
Masala Vada / Paruppu Vadai

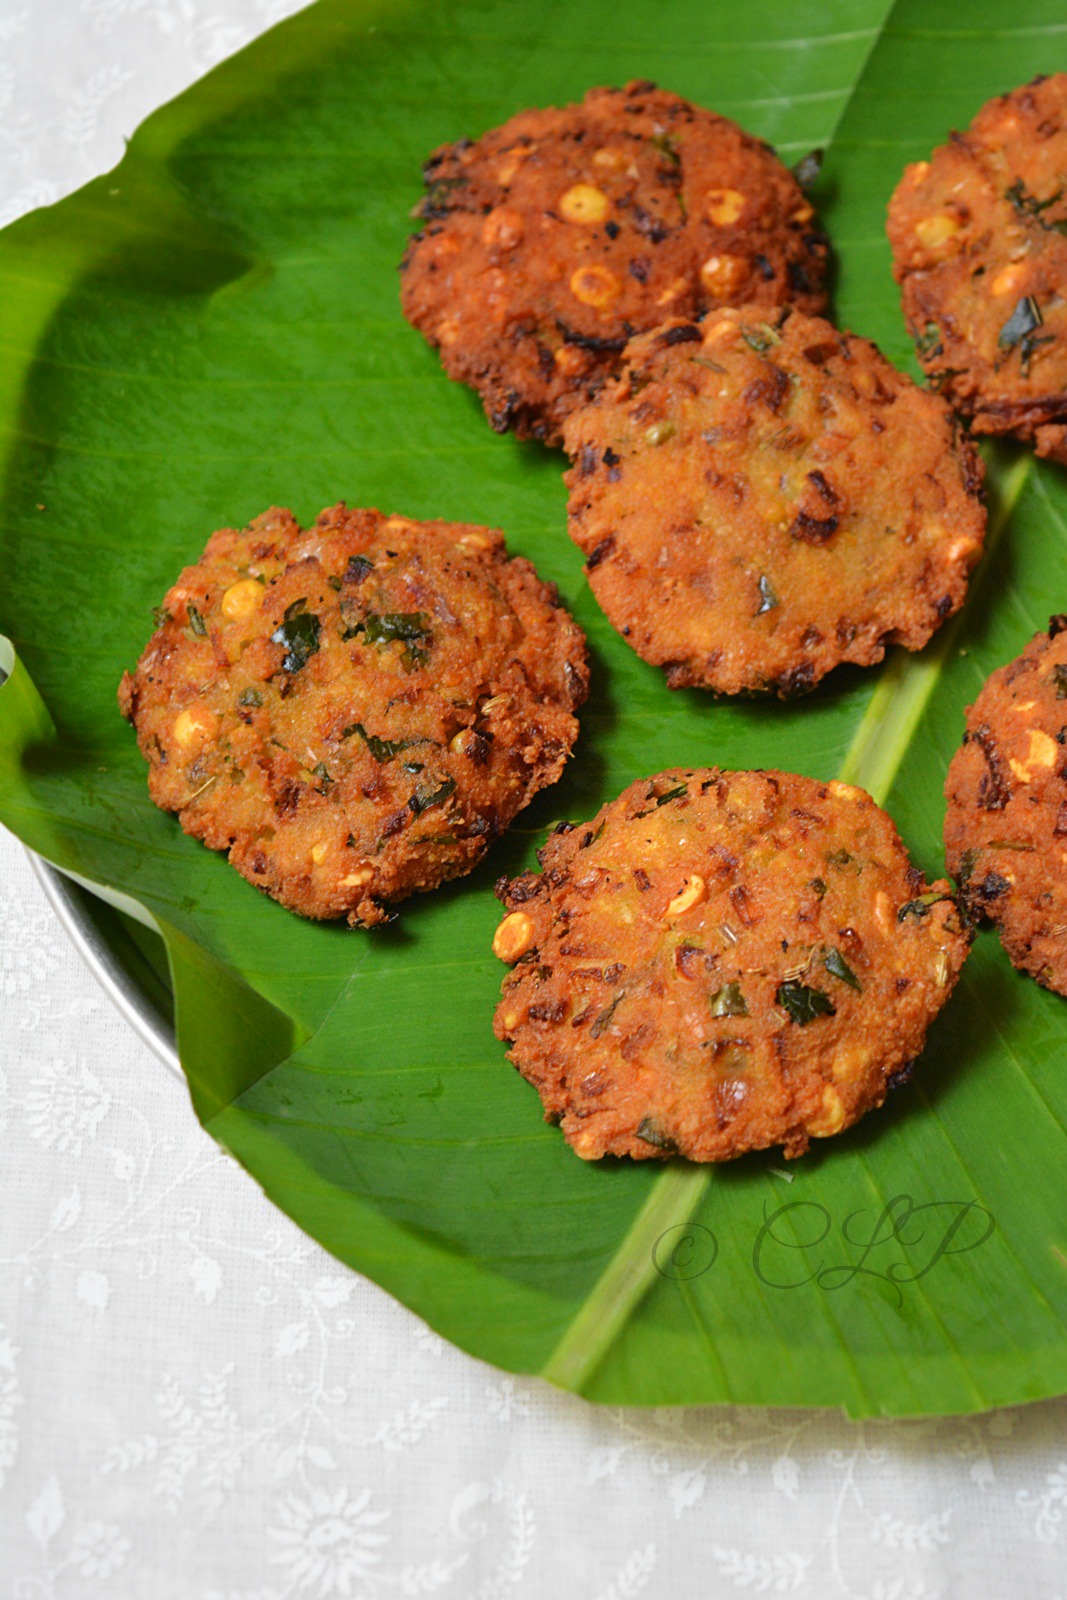
I have been missing from blogging for a while and have been busy with a house shift. Phew the whole personal life has been super busy the past few weeks and I was not able to post recipes. Thankfully today I plan to start over again with a fresh start. October being a month of celebrations and holidays I wanted to share one of our favorite tea time snacks Masala Vada. Masala Vada / Paruppu Vadai are a popular tea time snack in South India and can be found in street stalls and hotels a lot. Although I was never a huge fan of them, I can never say no to enjoy a few for tea. There is technique and practice involved in shaping the vadas and getting them in the perfect consistency. I have had some failed attempts for this one and that never puts me down in trying to make them again :-). The weather these days seems so perfect for these deep fried goodies and a cup of tea. 


Channa Dal Paruppu Vadai

Tamil snack recipe - Masala Vadai

Paruppu Vadai
Paruppu Vadai

MASALA VADA | PARUPPU VADAI RECIPE

Recipe Source - Amma


Ingredients

Channa dal - 1 cup
Onion - 1 finely chopped
Ginger - 1" inch piece chopped
Green chilli - 2-3 minced
Coriander leaves - 3-4 strands, finely chopped
Mint leaves - 10 nos
Fennel / sombu seeds - 1 tsp
Roasted channa dal - 1 tbsp
Salt - to taste
Oil - to fry

Method

1. Soak channa dal for 1 to 1 1/2 hours and drain the excess water. In a mixer coarsely grind 3/4 cup of soaked channa dal along with green chilli, ginger, coriander, mint, fennel seeds, roasted channa dal. 
2. Add this coarse mixture along with salt and the 1/4 cup of channa dal. Check for taste and spice.
3. Heat oil in a skillet/ kadai until hot, test the oil by dropping a small pinch of the coarse mix and it has to sizzle immediately. Now the oil is in correct temperature.
4. Grease / wet your palms with oil/ water and take a ball of the mixture and shape with your hands the vadas into a ball and flatten it.
5. Tip into the oil and fry until golden on all sides, make sure that the heat is in medium to low as you want the inside of the vadas to be cooked. 
6. Using a slotted spoon drain the excess oil and place on kitchen towel.
7. Serve warm with your cup of tea/ coffee and enjoy.


COOKS WISDOM 

TIP 1

1. Make sure the dal is drained of all the water and is ground into a coarse mix and not fine and smooth.

TIP 2

2. Do not use any water to grind the mix else the vadas will be too wet and not dry. Just sprinkle little water to help grind if required else skip this.

TIP 3

3. Adding roasted channa dal/ pottukadalai helps to give crisp vadas.

TIP 4

4. Add one more extra chilli if you love your vadas to be spicy. To try an innovative masala vadas try to add boiled chickpeas, it tastes amazing.

TIP 5

5. While heating oil make sure it is perfectly hot by doing a test with a little of the mix, once the vadas are added slow down the heat to medium for even cooking from inside.


Marble Cake | Butter Marble Cake Recipe

$
0
0
Butter Marble Cake Recipe
Off late I have been craving for a soft buttery cake and I was also wanting a marble one as they are my most favorite kind of cake with the best combination of chocolate and vanilla. I almost instantly jumped into baking and skipped the usual egg free cakes to do the real deal. To my surprise the cake was absolutely awesome and one of the best that I have ever had in a long time. The whole house was smelling of cake and my dad was up all night to have a piece of this cake for his late night dessert ;-). And the joy of seeing him enjoy the cake was totally worth every second. Mum on the other hand is not a cake person she is never fond of anything sweet or baked but she loved the cake too. So before I go on about all that happened let me share this amazing recipe with all of you. If you love marble cake/ snack cakes like me then this is must try recipe.


Easy Marble cake recipe


Chocolate Vanilla marble cake recipe

BUTTER MARBLE CAKE RECIPE

Recipe Source - here
Prep time - 10 mins
Bake time - 50 mins
Serves - 8-10 people
Makes - 8* cake

Ingredients

Butter (unsalted in room temperature - 1 cup
Sugar (granulated but fine) - 1 and 1/2 cup
Eggs - 3 large (room temperature)
Vanilla - 2 tsp
Flour/ maida - 1 and 1/2 cup
Salt - 1/4 tsp
Baking powder - 1 tsp
Milk - 3 tbsp
Cocoa powder - 2 tbsp (unsweetened

Method

1. Pre- heat oven to 350 F/ 180 C for 10 minutes. In a bowl add the maida/ plain flour, salt and the baking powder mix well / sieve together 2-3 times for even mixing set aside.
2. In a small bowl break the eggs and set aside. 
3. In a large mixing bowl add the room temperature butter (unsalted) and the sugar and using an electric beater beat until its light and fluffy.
4. In goes the eggs 1 at a time and beat for 2-3 minutes after each addition. And in the vanilla essence and mix until combined.
5. Add the flour+ baking powder mix in 4-5 batches to the egg mixture and beat just until combined.
6. Add the milk and mix until combined. 
7. Divide the batter into half and transfer to another bowl, add the cocoa powder to one batch and mix well. 
8. Grease and 8" cake pan with butter and using a spoon alternate the cocoa and vanilla cake batter until everything is used up.
9. Using a butter knife make swirls ( I usually make an S shape swirl) and do not over do. 
10. Place in the center of a pre-heated oven and bake for 40 minutes at 180 C or 375 F. Check the cake after 30 minutes by inserting a toothpick
11. If the toothpick comes clean your cake is done, if it is still wet bake further for 5 minutes and if it comes with few moist crumbs then bake for another 2-3 minutes.
12. You cake is done if the toothpick comes clean. Remove the cake tin from the oven and place on a cooling rack for 10 minutes.
13. After 10 minutes flip the cake and let it rest in the cooling rack until it comes to room temperature.
14. Cut into pieces and serve along with your cup of tea/ coffee.


COOKS WISDOM

TIP 1

1. Always use room temperature butter, eggs and milk to make the perfect cake. To make the butter come to room temperature faster, cube them when they are still cold and place the pieces on a bowl.

TIP 2

2. For perfect butter cakes, beating the eggs and sieving the flour are ideal. Never skip these tips.

TIP 3

3. Use a good quality cocoa powder for a perfectly chocolate marble cake.


RELATED RECIPES


Thayir Sadam Recipe | Curd Rice

$
0
0

Thayir Sadam Recipe
Thayir Sadam Recipe
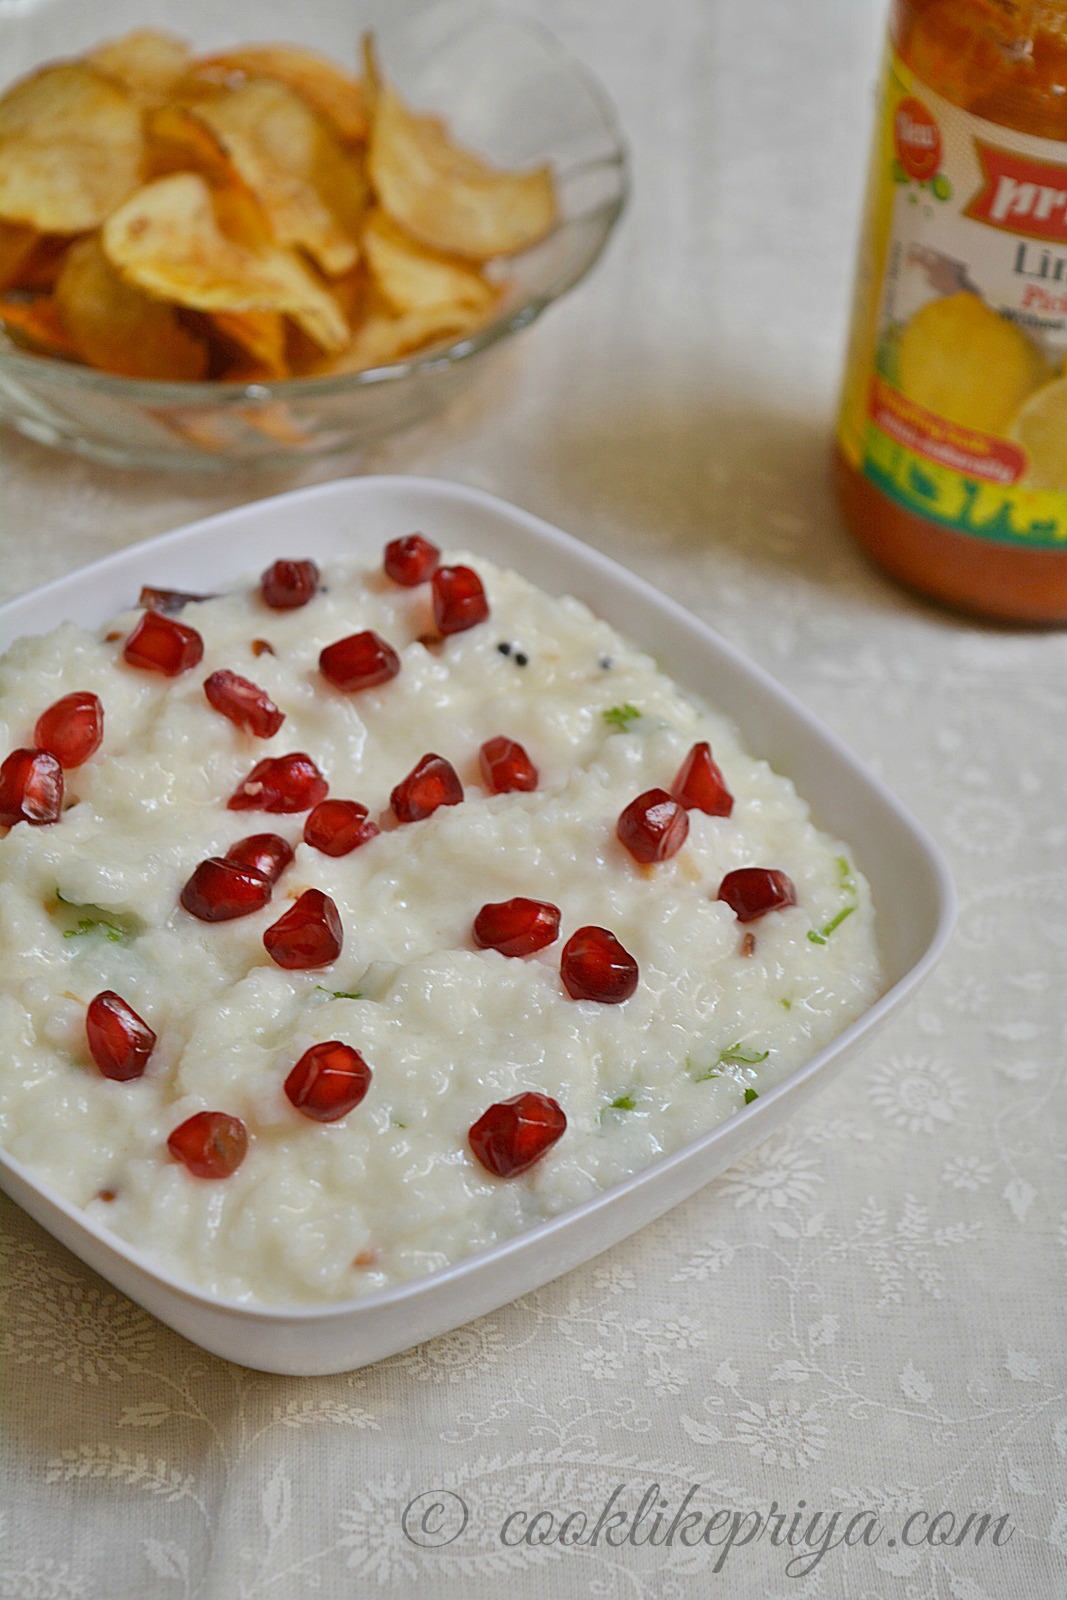
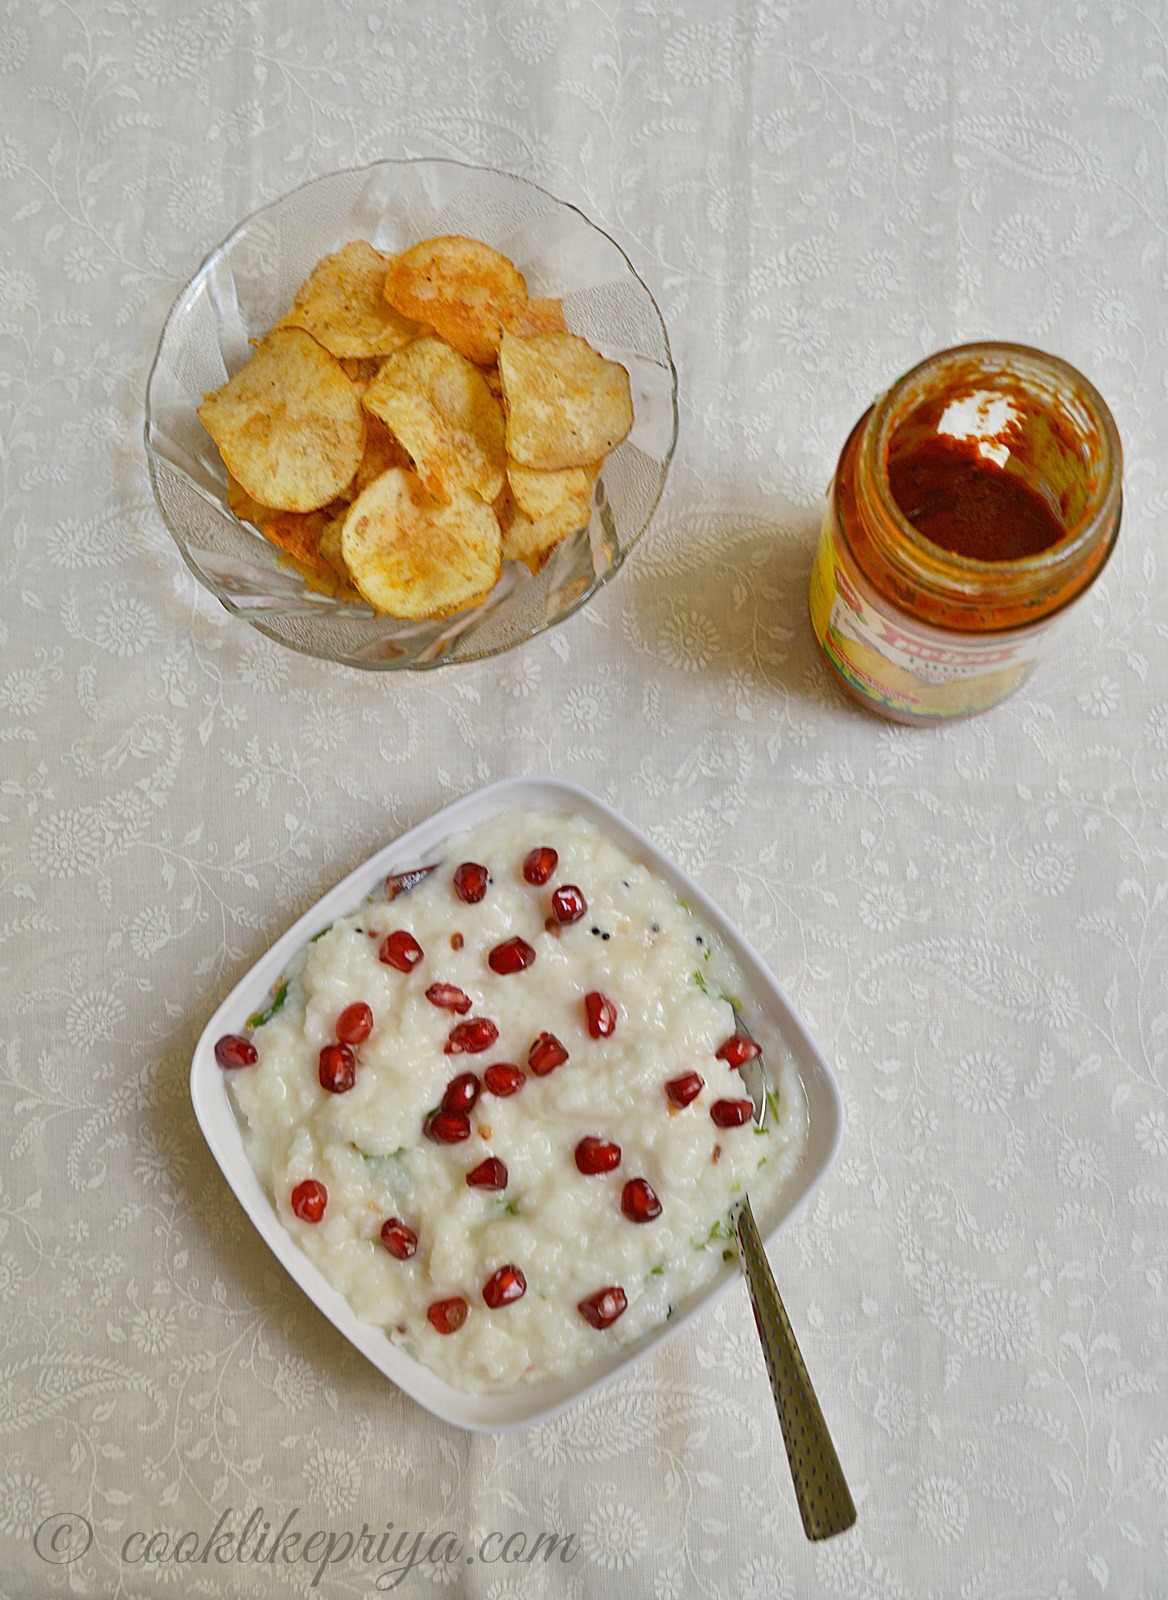
What is so great about curd rice? why post a recipe for this? might me the question for many who is seeing this post on my blog? The reason for sharing this recipe is for beginners who struggle to get the perfect taste to tempered curd rice. I have been there and gone through it, but eventually I learnt the taste and trick to getting the perfect curd rice. I can live for a week or almost daily just eating curd rice, I think it has to go with my Amma's genes as she is also someone who loves curd. There can never be a meal complete without us enjoying a spoon of curd. Its a must, I love having curd rice plain but at times I enjoy them tempered like the rice I am sharing today. Curd rice, lemon pickle, potato chips are one amazing combination. 


How to make perfect curd rice

Tamil style curd rice
THAYIR SADAM | CURD RICE RECIPE

Recipe Source - Own
Prep time - 10 mins
Serves - 2-3 generously
Serving suggestion - Lemon pickle, potato chips, potato masala / appalam

Ingredients

Cooked rice - 1/2 cup
Curd fresh - 3/4 cup
Water/ milk - 1/3 cup
Salt - to taste
Oil - 2-3 tsp
Mustard seeds - 1 tsp
Ural dal split - 1 tsp
Channa dal - 1 tsp
Curry leaves - 4-5 torn
Ginger - 1 inch finely minced
Green chilli - 2 slit and chopped fine
Mint leaves - 4-5 finely chopped
Corriander leaves - 3 strands finely chopped
Pomegranate - 3-4 tbsp (or use shredded carrots)
Cashew - 3-4 finely chopped

Method

1. In a bowl slightly mash the hot rice, add in the curd & water/ milk, salt and mix well. 
2. In a kadai add the oil and temper the mustard seeds, channa dal, urad dal, curry leaves, ginger, green chillis and give it a good stir.
3. Now add the tempering to the curd and rice mix, along with the chopped mint, corriander, cashew and mix well check for salt.
4. Garnish with pomegranate and serve immediately.


COOKS WISDOM

TIP 1

1. I usually use a little mushy rice to make curd rice, I use fresh curd and not sour one. Adding green chilli and ginger gives lots of flavor to the curd rice. 

TIP 2

2. You can add green grapes (seedless) variety instead or along with pomegranate.

TIP 3

3. If you do not like fruits in curd rice then add shredded carrots, finely chopped raw mango to the tempering and cook for 2 minutes before adding it to the curd rice.

TIP 4

4. Some restaurants add cashew and raisins to the curd rice, but its totally optional. 


RELATED RECIPES

VEGETABLE BRINJI SADAM
SOYA CHUNKS BIRYANI
VEGETABLE BIRYANI HYDERABADI STYLE
MIXED VEGETABLE PULAO
ARISIYUM PARUPPU SADAM
THINAI PARUPPU SADAM
CABBAGE RICE
CHICKPEAS PUALO
AMLA RICE
MANGO RICE
VANGI BHATH

SAMBAR SADAM


Tomato Rice | South Indian Thakkali Sadam | Tamil Variety Rice

$
0
0
Tomato Rice | Thakkai Sadam Recipe
Tomato Rice / Thakkali Sadam recipe is one of my favorite mixed rice recipe. Its so simple and easy, you can prepare this under 10 minutes and if you have left over rice you could use that to make this tomato mixed rice. Although I must admit that making perfect tomato rice requires practice and I can say that I am nearly there. Read the tips below before doing this recipe. 


Tamil Rice Recipe - Tomato Rice | Thakkai Sadam Recipe
Tamil Rice Recipe - Tomato Rice | Thakkai Sadam Recipe
THAKKALI SADAM | TOMATO MIXED RICE RECIPE

Recipe Source - Amma
Serves - 4 generously
Prep time - 10 mins
Serving suggestion - Potato chips, curd, potato masala

Ingredients

Cooked Rice - 1 1/2 cup
Oil - 1 tbsp
Mustard seeds - 1 tsp
Cumin/ Jeera seeds - 1/2 tsp
Urad dal - 3 tsp
Channa dal - 3 tsp
Garlic pods - 3 medium chopped fine
Green chilli - 2 slit and chopped 
Curry Leaves - 8 no, torn
Onion - 1 large, finely minced
Tomato - 3 large, finely chopped and mashed with hand
Kashmiri Red chilli powder - 1 tsp ( adds color & less spice)
Salt - to taste
Corriander leaves - finely chopped

Method

1. In a kadai or heavy bottom vessel, heat oil, splutter the mustard seeds, cumin, urad dal, channa dal and saute until golden. 
2. Add the garlic mince, curry leaves, green chillis and saute for 2 minutes until the raw smell of garlic goes away.
3. Tip in the onions and saute until transparent, add in a little salt to speed up the cooking.
4. Add the chopped tomatoes and mix well, add little more salt and cook covered for 3 minutes until the tomatoes are mushy.
5. Now add in the red chilli powder mix well and check for salt and spiciness. Cook covered in low flame for 2 minutes until the oil oozes out.
6. Add in the cooked rice and mix well. Garnish with corriander leaves and serve along with chips and curd.

COOKS WISDOM

TIP 1

1. Usually Amma makes the rice ahead and cools it completely. Make sure the rice grains are separate and not sticking to each other.

TIP 2

2. Adding kashmiri red chillis adds colour to the tomato rice and is medium spicy. You can add or reduce the amount of green chillis as per your spice tolerance.

TIP 3

3. For more interesting flavors you could add roasted and toasted peanuts without the skin.  

TIP 4

4. Adding corriander leaves is a must. It adds amazing flour to tomato rice.


RELATED RECIPES

VEGETABLE BRINJI SADAM
SOYA CHUNKS BIRYANI
VEGETABLE BIRYANI HYDERABADI STYLE
MIXED VEGETABLE PULAO
ARISIYUM PARUPPU SADAM
THINAI PARUPPU SADAM
CABBAGE RICE
CHICKPEAS PUALO
AMLA RICE
MANGO RICE
VANGI BHATH

SAMBAR SADAM

CURD RICE

Sabudana Vada Recipe | Javvarusi Vadai

$
0
0
Sabudana Vada Recipe
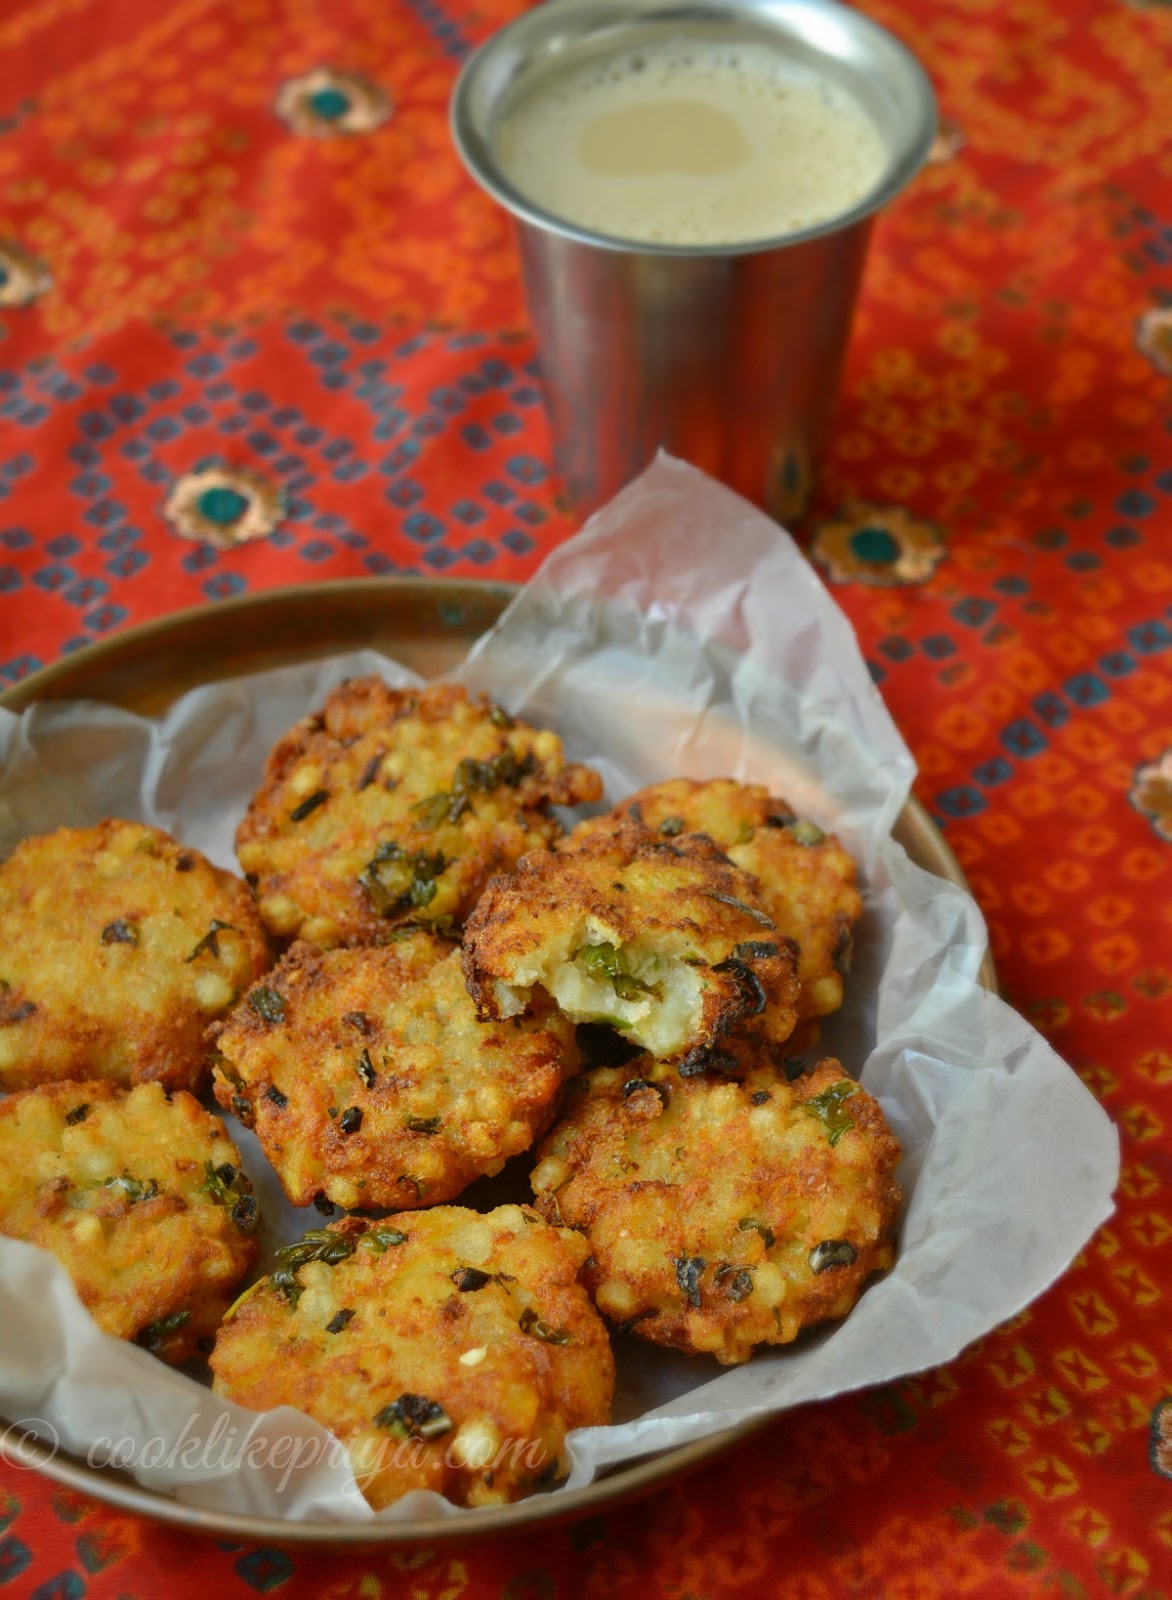
Sabudana Vada/ Javvarusi Vadai / Sago Vadai is such an interesting recipe, I totally love the whole taste of these crisp vadas. Mind you these vadas need to be enjoyed while still warm, once they turn cold they start to lose out their crispyness. Nevertheless this is a great snack for evening tea time and totally different from the usual medhu vada, sambar or curd vada and masala vadas. Although I am not a big fan of javvarusi / sago/ sabudana but I don't mind enjoying them in an occasional payasam I would never want to cook with them otherwise. I think I am changing and not acting predictable these days ;-) off late the ingredients / recipes that are not my preferences have taken over my taste buds ;-) like lemon rice, masala vada, oats and so on. 


Easy Sago Vada Recipe


Sabudana Vada Recipe
SABUDANA VADA RECIPE | JAVVARUSI VADAI 

Recipe Source - Own

Serves -  8 people
Makes - 16 vadas
Prep time - 1 hr for soaking sago & 10 minutes to prepare the base
Cook time - 20 mins the entire batch

Ingredients


Sago/ sabudana/ javvarusi - 1 cup

Potato - 2 large boiled, peeled and mashed
Green chillis - 3 finely chopped
Corriander leaves - 3 tbsp finely chopped
Ginger - 1" piece finely chopped
Lemon juice- juice of 1/2 lime/ lemon
Toasted groundnuts - 1/4 cup skinless
Salt - to taste
Oil - to deep fry

Method


How to make Sabudana Vada

1. In a bowl wash the sago seeds and soak in water until well immersed for 1-2 hours. Once the seeds swell up discard the water by straining them. Set aside in a bowl.

2. In a pressure cooker add the potatoes and enough water to immerse them, pressure cook for 3 whistles or for 10 minutes. Once the pressure settles open the lid and remove the potatoes when its easy to handle remove the skin and mash them.
3. In a kadai toast the skinless groundnuts evenly and let them cool down. Powder them coarsely for few seconds in the mixer. Set aside.
4. Add the potatoes, ginger, green chilli, corriander, groundnut powder, salt and lime juice and mix well check for salt and divide them into 16 portions. 
5. Using your palms shape them into balls and flatten them slightly. 
6. In a wide kadai/ pan heat oil once it is hot add 2-3 vadas at a time and fry them by lowering the heat to medium - low flame and flip sides after 2 minutes. 
7. Using a slotted spoon drain the oil and place on a kitchen towel.
8. Once the entire batch of vadas are fried serve hot and enjoy with your evening cuppa.


Javvarusi Recipes Indian
COOKS WISDOM

TIP 1


1. Add very little lemon juice else the lemon juice will to overpowering the vadas.


TIP 2


2. Make sure that the potatoes and the sago are completely drained of water. In case the mixture in too wet add rice flour/ more groundnut powder.


TIP 3


3. The vadas are best when served hot, once they cool down they lose their crispyness.


TIP 4


4. If you soak the sago seeds for too long they tend to break while shaping the vadas.


RELATED RECIPES


SAMBAR VADA

THAYIR VADA
MEDHU VADA
MASALA VADA
SAMOSA
JAVVARUSI BANANA PAYASAM
JAVVARUSI SEMIYA PAYASAM

Masala Paal | Spiced Turmeric Milk Recipe

$
0
0
Masala Paal / Masala Milk Recipe
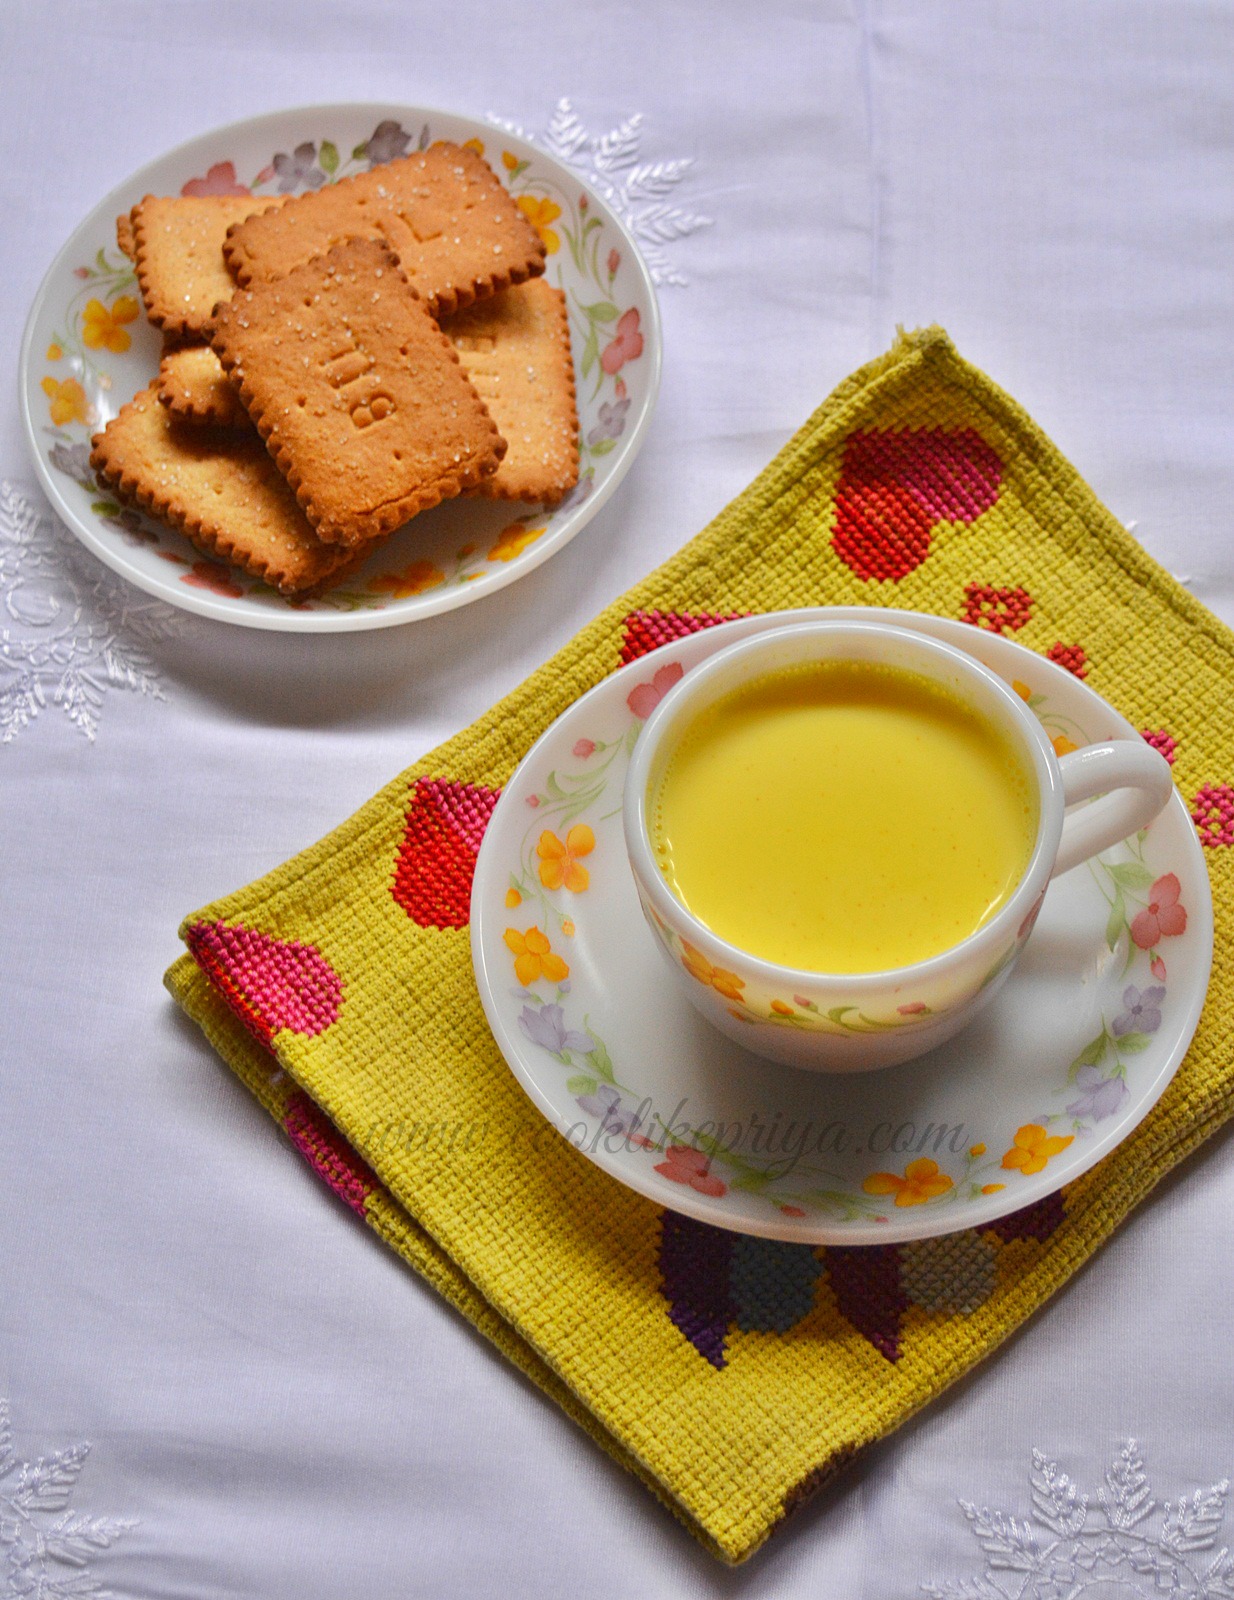
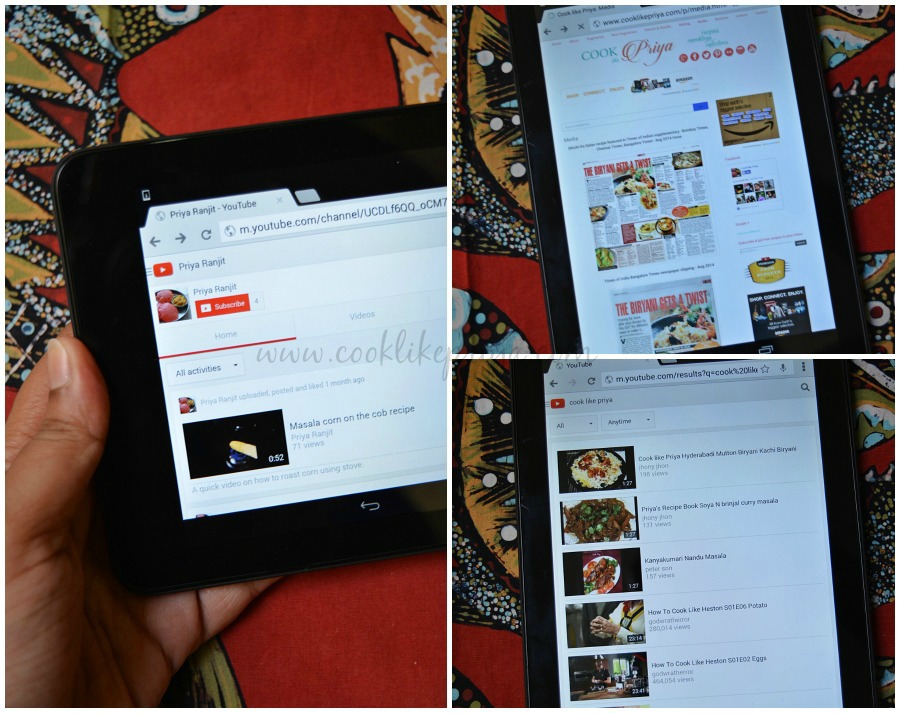
The wet raining weather and chilled climate calls for some warm comfort drink to kick start the day/ evening. I was craving for some Masala Paal (Masala Milk) and Nice biscuits. The weather makes things so comforting that all I wanted to do is roll under my sheets and this warm soothing drink just awakened my senses. And I just remembered that I was supposed to share my experiences with the Dell Venue 7 Tab. And today I will be sharing my browsing experience with this amazing 7" companion. 


Spiced Turmeric Milk Recipe

Dell Venue Tab 7 - Food Blogger Review
MASALA PAAL | SPICED MASALA MILK RECIPE

Recipe - Own
Prep time - 5 mins
Serves - 2 generously

Ingredients

Milk - 1 and 1/2 cup (use full fat)
Turmeric powder - 2 pinches
Cardamom powder/ cardamom pods - 1 tsp/ 4 pods
Cloves - 4 no
Cinnamon - 1" stick
Sugar / palm candy - as required
Nuts (pista/almonds/ cashew) - few chopped or powdered
Saffron - 3 strands

Method

In a saucepan bring the milk to boil and reduce for 5 minutes, Once it thickens add all the ingredients and let it boil further for 5 minutes. Switch off and strain the milk serve warm along with some snacks:). 

COOKS WISDOM

TIP 1

1. I love making masala paal in full fat milk but you can always use 3% milk too. It gives a lovely richness to the drink.

TIP 2

2. I did not use any nuts but adding them will give a great taste.

TIP 3

3. Do not add too much turmeric powder, a little goes a long way. Also you could add little masala chai powder for a lovely aroma and skip the use of whole spices. Dry ginger powder also gives an amazing flavor to the drink. 

TIP 4

4. For cough and cold use a little pepper ( a pinch) for 2 cups milk. It gives a soothing effect to cough cold and congestion. 

Masala Milk Recipe
Masala Milk Recipe

Dell Venue Tab 7 Review
DELL VENUE TAB 7 REVIEW

If you had been following my bog closely you must have seen my earlier review posts of the Dell Venue tab 7. Its been couple of months now with the tablet and I find myself using it a lot more these days. I find the tablet more handy than a laptop. Its light in weight, easy to carry with one hand and totally great to use when I am on bed lying down. What I do with the tablet all day is what I wanted to cover in this post. As I sip my cup of masala paal I will be sharing my experience with Dell. 

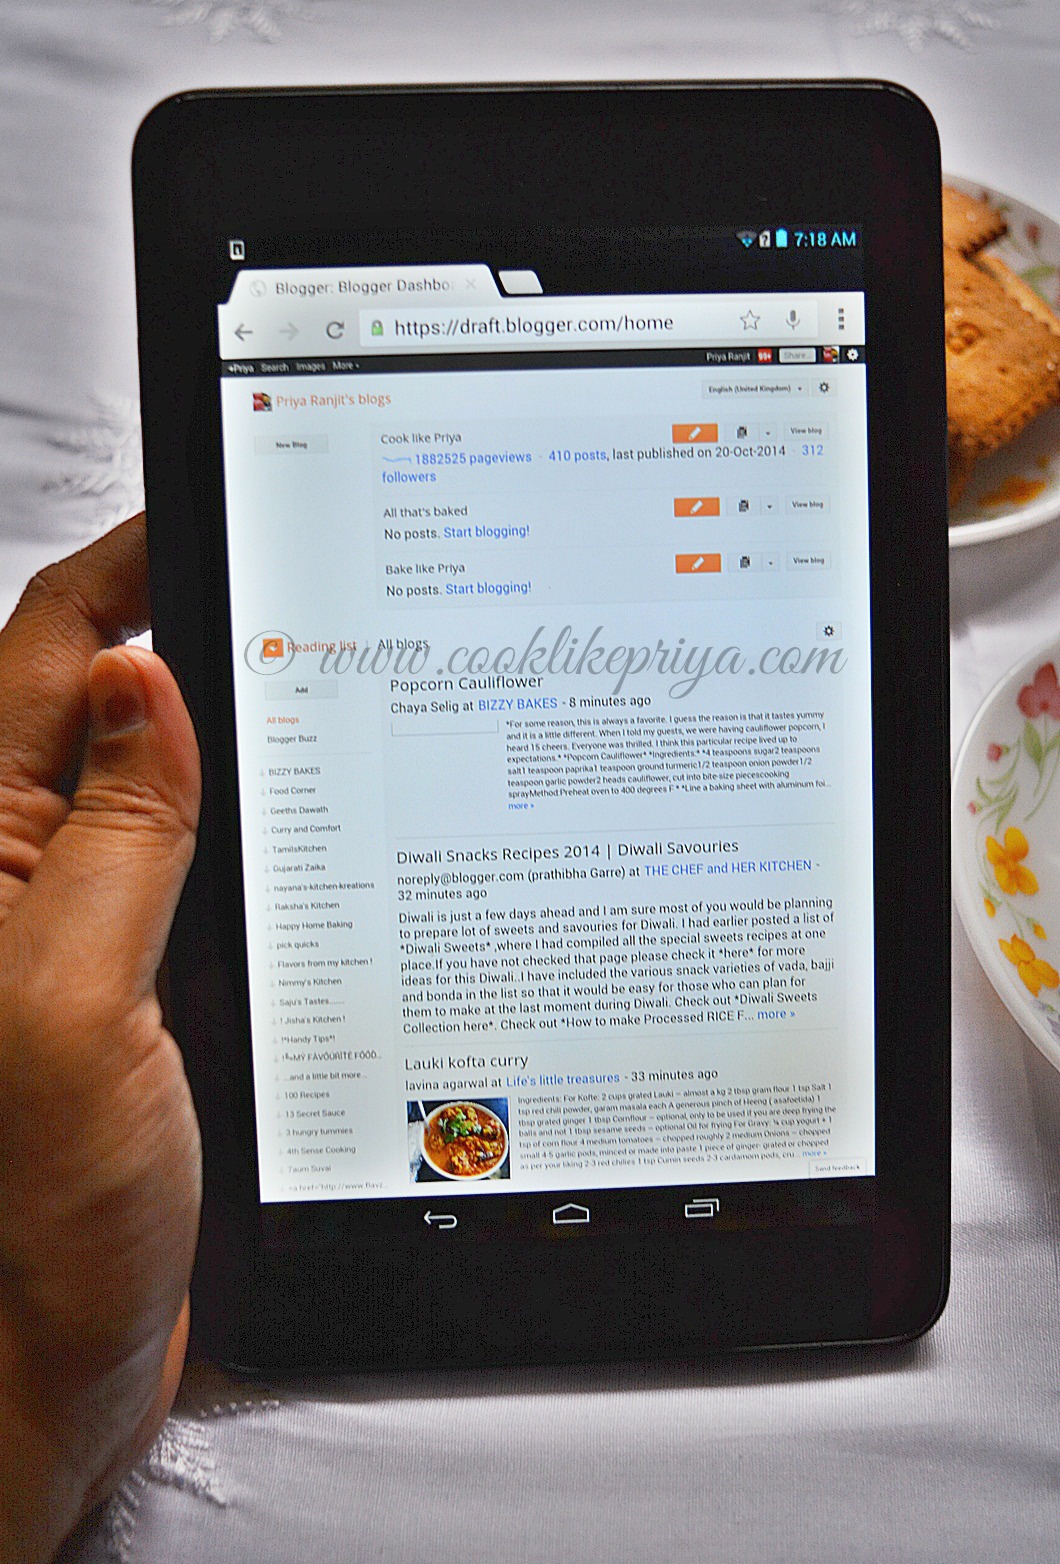
I usually click pictures for my blog with my DSLR, I prep the post with pictures and titles and save them on draft and later using my Dell tab I start typing the post and posting recipes. I also publish comments and check stats on my blogger dashboard and blog hop. 
I find Dell very user friendly similar to my nexus 7 and I guess its because of the user friendly OS. Although we do own a 10" ipad its really huge and cannot be held in one hand so find myself going to the Dell Venue tab more often.

In terms of browsing and reading I find the Dell more convenient and easy. I even gave the tablet to my mom to use and she almost easily got the whole hang of using it in less than 5 minutes. Mind you she is quite used to her ipad and she didn't have any qualms using Dell Venue

Dell's dual core Intel Atom processor lets me download many apps few of my favorite apps being - Sweet n Spicy, Whats app, Facebook, Facebook pages (CooklikePriya), Insagram, Pinterest, Twitter,Bible, YouTube, Instacollage, Flipkart, Groupon and so on. I am not a huge game fan, so you will hardly see any fame apps in my Dell Venue. The 16 GB memory space gives me ample space to download apps and store pictures, videos. 

Cook like Priya - Dell Venue Tab 7 Review (Product Review)
Cook like Priya - Dell Venue Tab 7 (Product Review)
Dell Venue 7 horizontal view lets me view my website in full screen without having to shorten the menus tab. I also use this to get a hang of how fast my website loads on an android device. Also I check the layout and design of my website which you guys know I keep changing fonts, header, designs and it helps.


Conclusions & Ratings (5 being the highest)

Browsing - 4/5
Speed - 4/5
Powerbackup - 3/5
User experience - 4/5
Storage - 5/5

My overall ratings - 4/5 

To view my other review posts on Dell click the links below

Dell Review 1
Dell Review 2
Dell Review 3


RELATED RECIPES

GINGER TEA
CARDAMOM TEA
SUKKU KAPPI
CARDAMOM MILK

Fish Finger Recipe | Restaurant style Finger fish Recipe | Seafood Starter

$
0
0
Finger fish Recipe / Fish Finger Recipe
If there is one starter that I always love and devour it would always be this humble Finger fish (fish finger), almost always we end up ordering this dish when we go to restaurants There are different versions to this and Amma perfects them so well in terms of taste and texture. I have seen restaurants just batter fry the fillets and serve along with a mayo or tomato sauce. But take this fish finger to another level by seasoning it to the perfection. Once you try this version trust me you will never order for fish fingers in a restaurant and make them at home and get tons of compliments from everyone.


How to make Finger fish at home


Finger Fish Recipe - Seafood starters Indian


Fish Finger Starter Recipe
FISH FINGER (FINGER FISH) RECIPE | RESTAURANT STYLE FISH FINGER

Recipe Souce - Own
Prep time - 15 mins
Cook time - 10 mins (entire batch)
Makes - 10 fish fingers (medium sized)

Ingredients

Fish fillet / pieces - 250 gms or 3-4 medium pieces
Salt - to taste
Turmeric powder - 1/3 tsp
Oil - to shallow fry/ deep fry
Egg - 1 large
Bread crumbs - 1 cup 
Salt - 2 pinches
Pepper powder - 2 pinches

To Grind

Green chillis - 2-3 no
Garlic - 2 pods
Ginger - 1 " piece
Small onions / pearl onions - 4 no

Method

1. In an idly plate or a wide pan add water and boil the fish pieces until cooked (3-4 minutes). Remove the fish and drain all the water and when it is easy to handle remove the skin and keep the pieces in a plate.
2. Grind all ingredients given under to grind. Add this to the cooked fish pieces along with turmeric, salt and mix well until the ground mixtures is well seasoned in the fish.
3. Now in a small bowl break the egg, pepper, salt and beat it, set aside. Keep the bread crumbs ready in a plate.
4. Now make finger shapes with the fish pieces by holding them together if the fish mix is well and does not come together add 3-4 breadcrumbs to the mix and form shapes with all the fish mix and set aside.
5. Dip each of the fish fingers in egg and roll on the breadcrumbs and set on the plate. Repeat the same for all the fish fingers.
6. Add oil to a broad kadai or vessel and heat it. Once the oil is hot add 2-3 fish fingers and reduce the flame to medium. After 30 seconds flip sides and cook evenly such that all the sides are well cooked and have an even color.
7. Using a slotted spoon remove the fish fingers draining the excess oil. 
8. Place on a kitchen towel to absorb excess oil and serve hot along with tomato ketchup or mayo sauce.


Easy Fish Finger Recipe Indian


Fish Cigars . Finger fish recipe

COOKS WISDOM

TIP 1

1. You can use any kind of big fish variety, here I have used king fish you can use salmon, shark, 

TIP 2

2. If the fish base is too wet add breadcrumbs to it to remove moisture. Do not add more than 3 tbsp else the fish will lose its taste. 

TIP 3

3. I have seasoned the egg with pepper and salt to give it taste on the outside too. You can add dried powdered herbs like oregano, thyme or rosemary to the breakcrumbs too. 

TIP 4

4. You could skip green chilis and use red chilli powder to spice up the fish fingers.

TIP 5

5. I have shallow fried the fish you can deep fry them too. Since the fish is already cooked no need to fry them for long. 


RELATED RECIPES

ANCHIOVES FISH FRY

Easy 10 minute Wheat Flour Halwa | Atta ke Halwa | Godumai Halwa

$
0
0
Wheat Flour Halwa using Jaggery
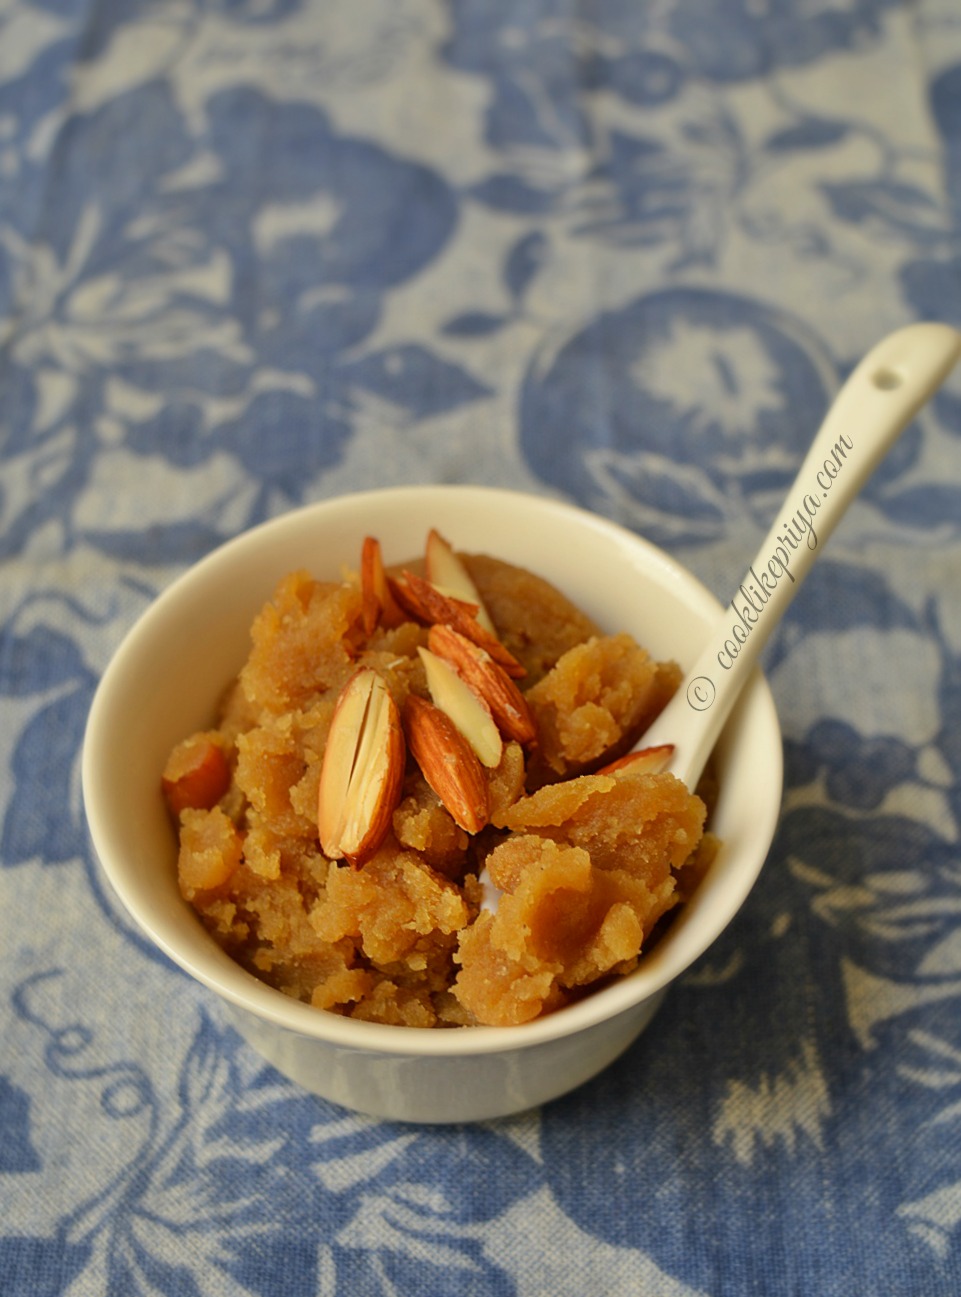
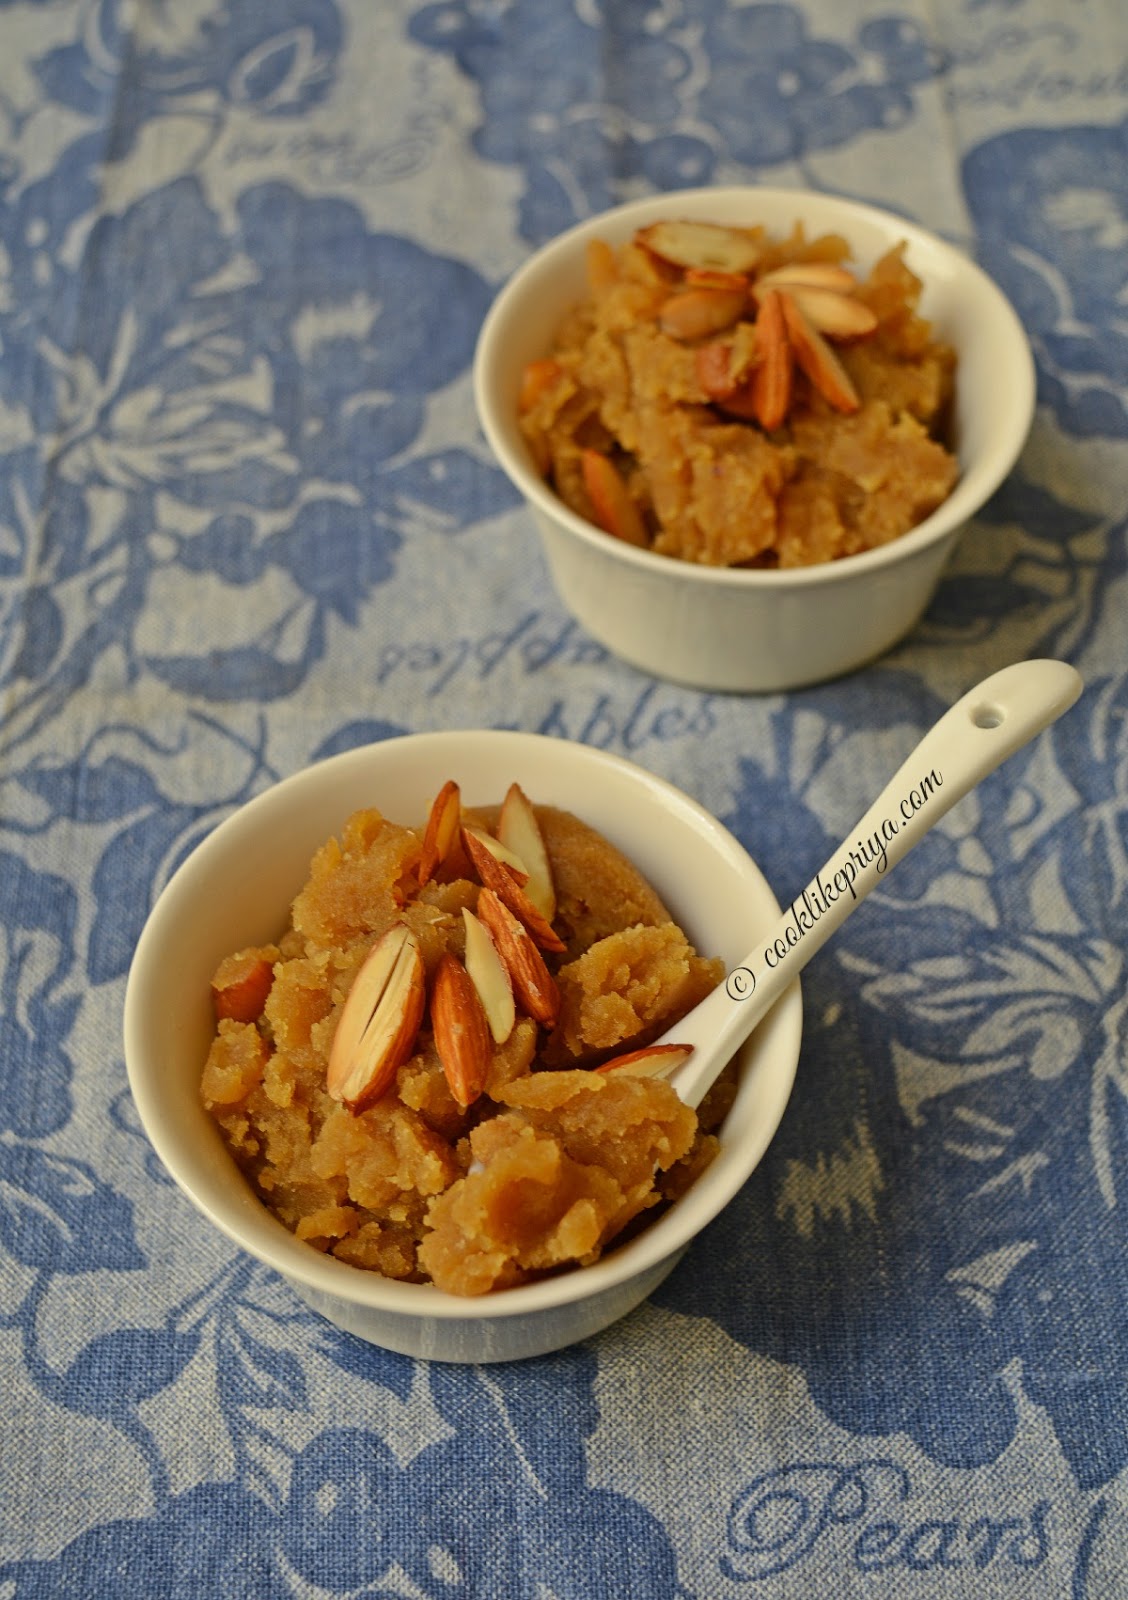
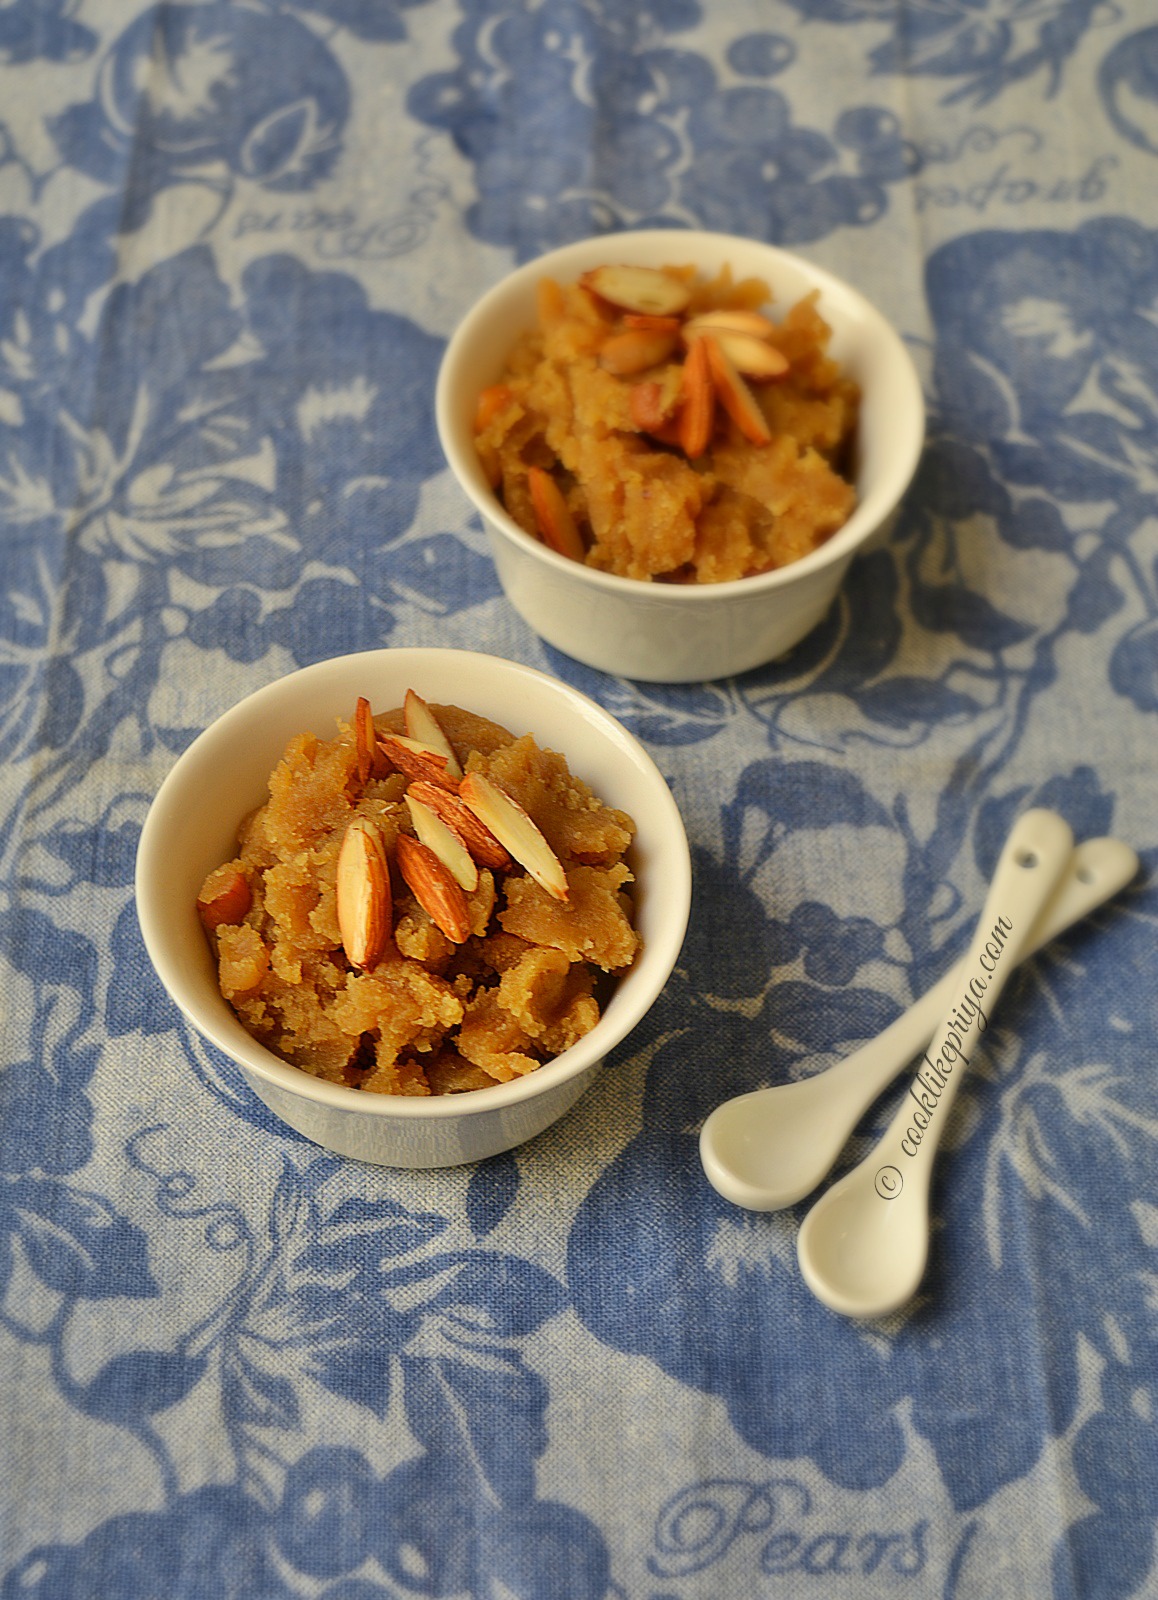
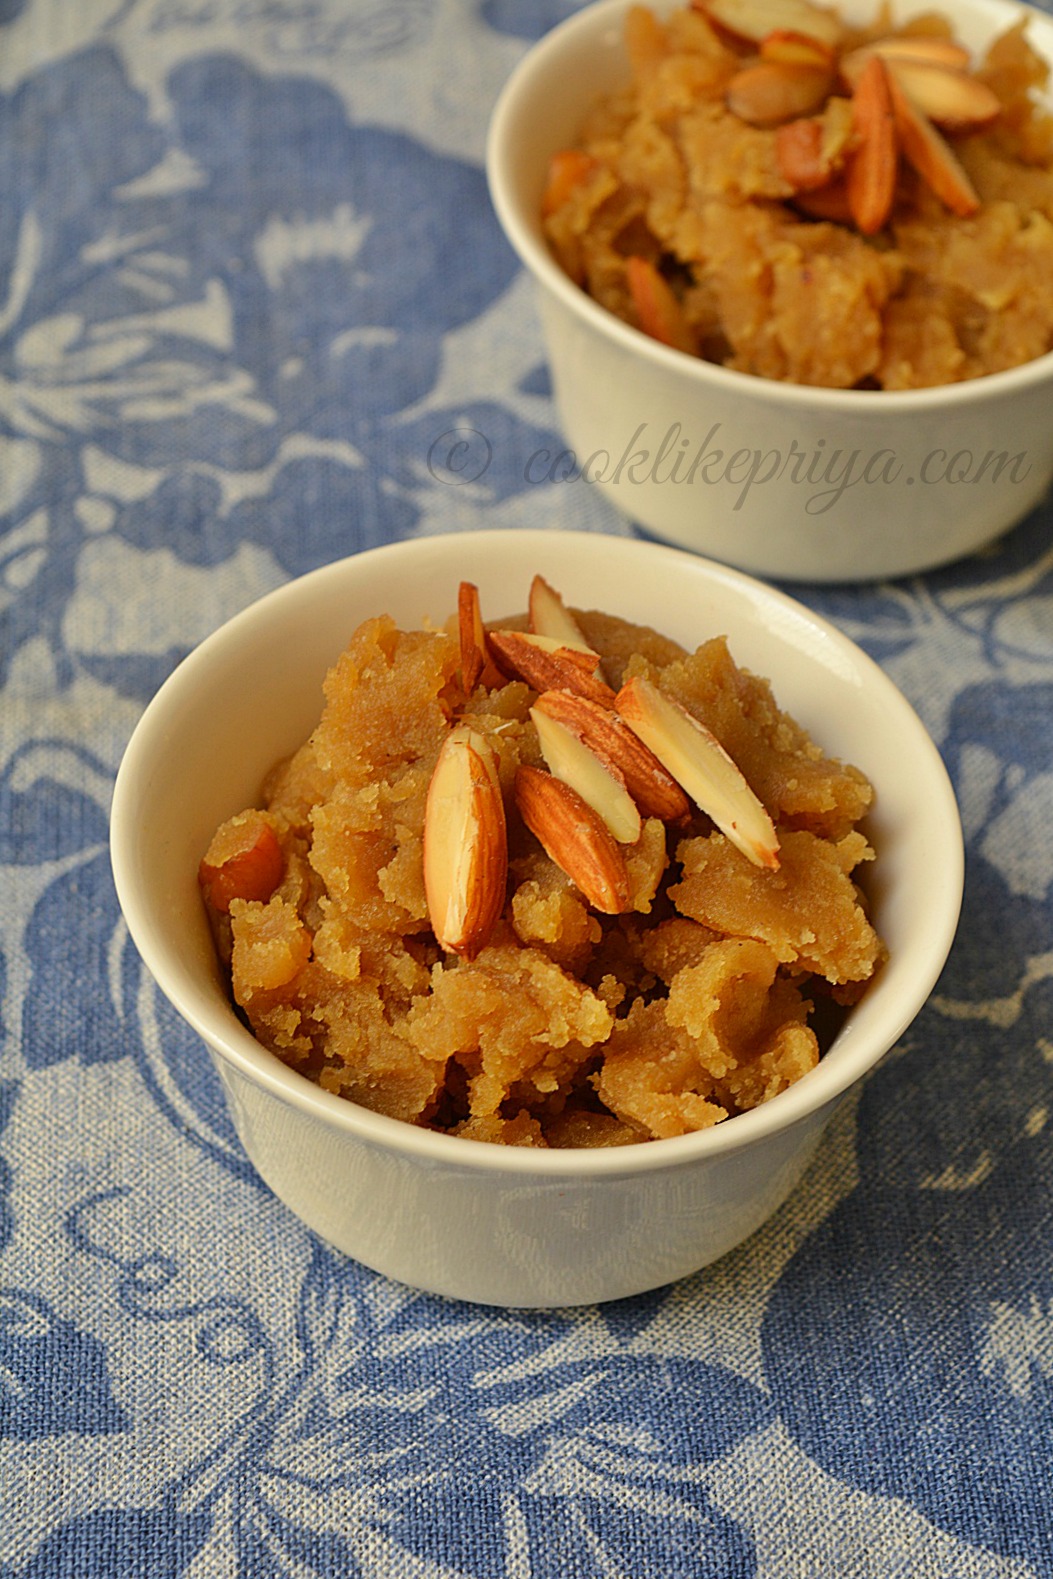
I love sweets that are light and not oily but still have no compromise in taste. Most Indian sweets call for no compromise in ingredients and proportions. The amount of ghee that goes into them really puts me off to try them also. But when it comes to occasions and demands from loved ones we end up making them although we know they are no way good for health or digestion and end of eating them too. So on my look out for some substitutes to famous Indian recipes I came up to this lovely twist to Wheat halwa using Jaggery instead of white sugar. Although there is ghee in it I still reduced the amount of ghee by a tablespoon and still it tasted amazing. The taste and texture of this halwa is soft and buttery almost like silk and I am not kidding. My parents could not even guess what this halwa was :-). I happily packed it for my cousin sister too. I would also like to tell that I made this wheat / godumai halwa using store bought ghee and homemade ghee, to be honest halwa made with homemade ghee tasted heavenly and the store bought one was not even worth another spoonful. So in case you want to try this please use homemade ghee you will keep making this one again and again. Can I say that this is definitely a 10 minute halwa and a quicker version to the long stirring process fattening halwa. 


Easy 10 minute wheat halwa recipe

Godumai halwa recipe
Godumai halwa recipe 

Quick 10 minute halwa recipe | Atte ke Halwa
GODUMAI HALWA | WHEAT FLOUR HALWA | 10 MINUTE HALWA

Recipe Source - Divine Taste
Serves - 8 people
Makes - 200 gms halwa
Total cooking time - 10 mins

Ingredients

Ghee - 3 full tbsp (homemade)
Wheat flour/ atta - 3/4 cup
Water - 1 and 1/2 cup
Jaggery powdered - 3/4 cup
Cardamom powder - 1 tsp
Nuts - 2-3 tbsp (cashew, almonds or pista)

Method

1. In a sauce pan heat the water (do not boil) in medium to low flame, add the powdered jaggery and bring the flame to low. Wait for the jaggery to be completely melted. Do not boil as we are not looking for a syrup. 
2. Once the jaggery is melted strain it to remove impurities and set aside, cover the lid to keep it warm.
3. In a wide non stick pan add 2 tbsp of ghee and once it melts add the wheat flour and roast it for 7 minutes in medium flame until the raw smell goes and the flour has changed colour to golden brown. Make sure that you do not burn it. 
4. Now add the jaggery to the roasted wheat flour and mix quickly. Take help from someone and make sure that the flour is fully dissoved in the jaggery.
5. Now add the cardamom powder and switch off. 
6. Fry the nuts in the remaining ghee and  top the halwa. 
7. Serve warm or cold. 

Enjoy the buttery smooth and silky wheat halwa :-)
Jaggery based halwa recipe
Jaggery based halwa recipe 

COOKS WISDOM

TIP 1

1. To make the best wheat halwa always use homemade ghee. You can check my recipe here how to make ghee at home.

TIP 2

2. You can sieve the flour before roasting it. But I did not do it.

TIP 3

3. Using nuts is totally optional. 

TIP 4

4. Make sure that the halwa is stored in an air tight container and refrigerated for upto 3 days.

TIP 5

5. Take care not to burn the wheat flour while roasting and using a non stick helps to reduce the amount of ghee used. You can always add more ghee for richness.


RELATED RECIPES

BADAM HALWA
BEETROOT HALWA
CARROT HALWA
CHANNA DAL HALWA

Sura Meen Kuzhambhu | Tamil Style Fish Curry Recipe

$
0
0
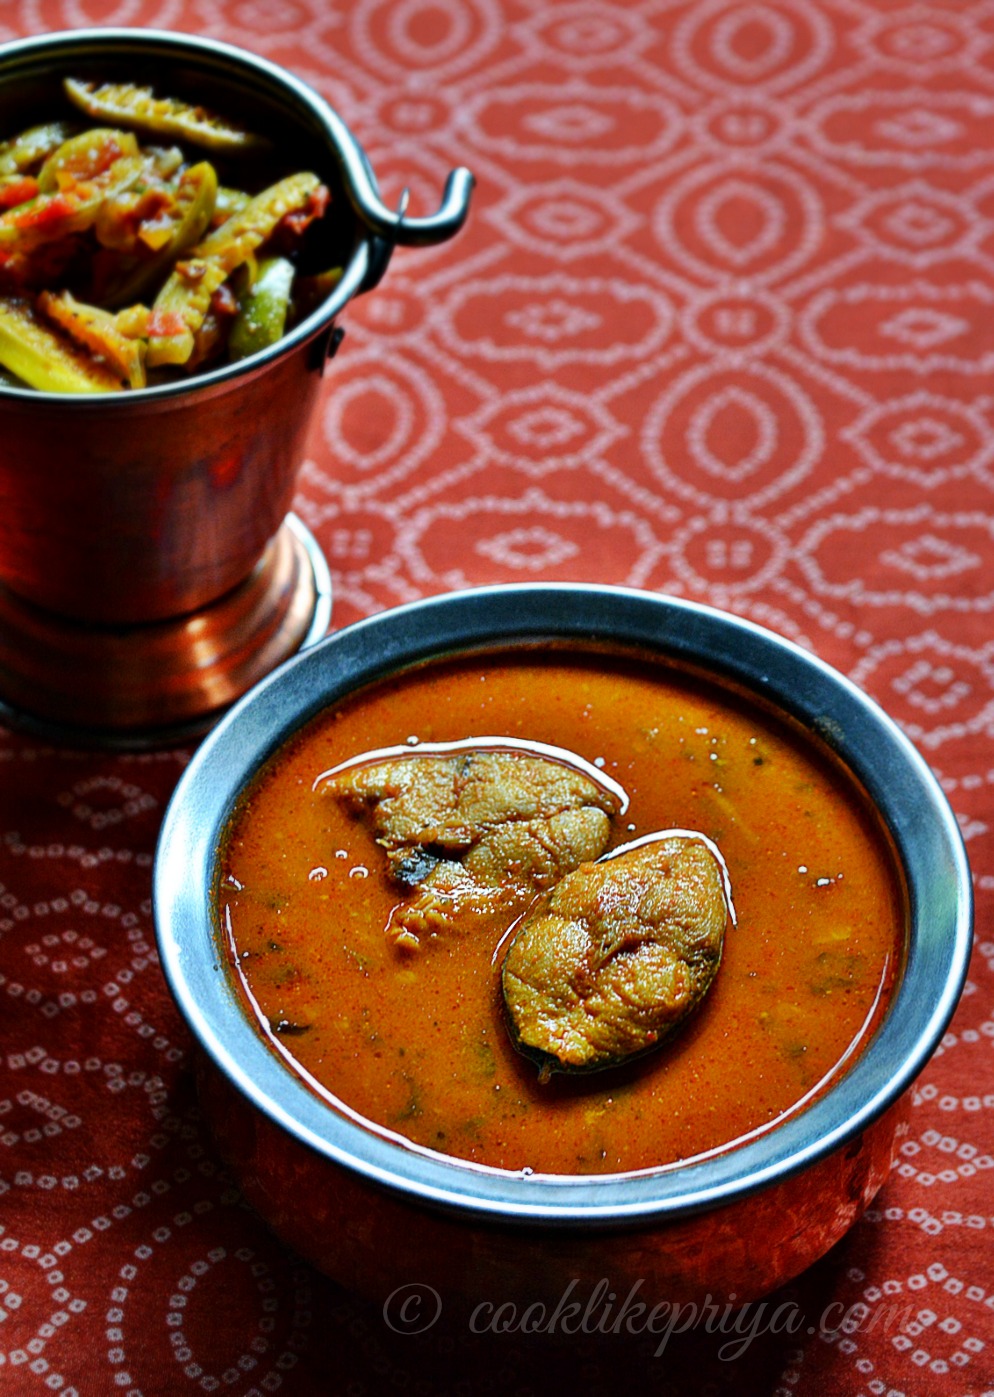
Sura Meen Kuzhambhu | Shark Fish Indian Curry Recipe

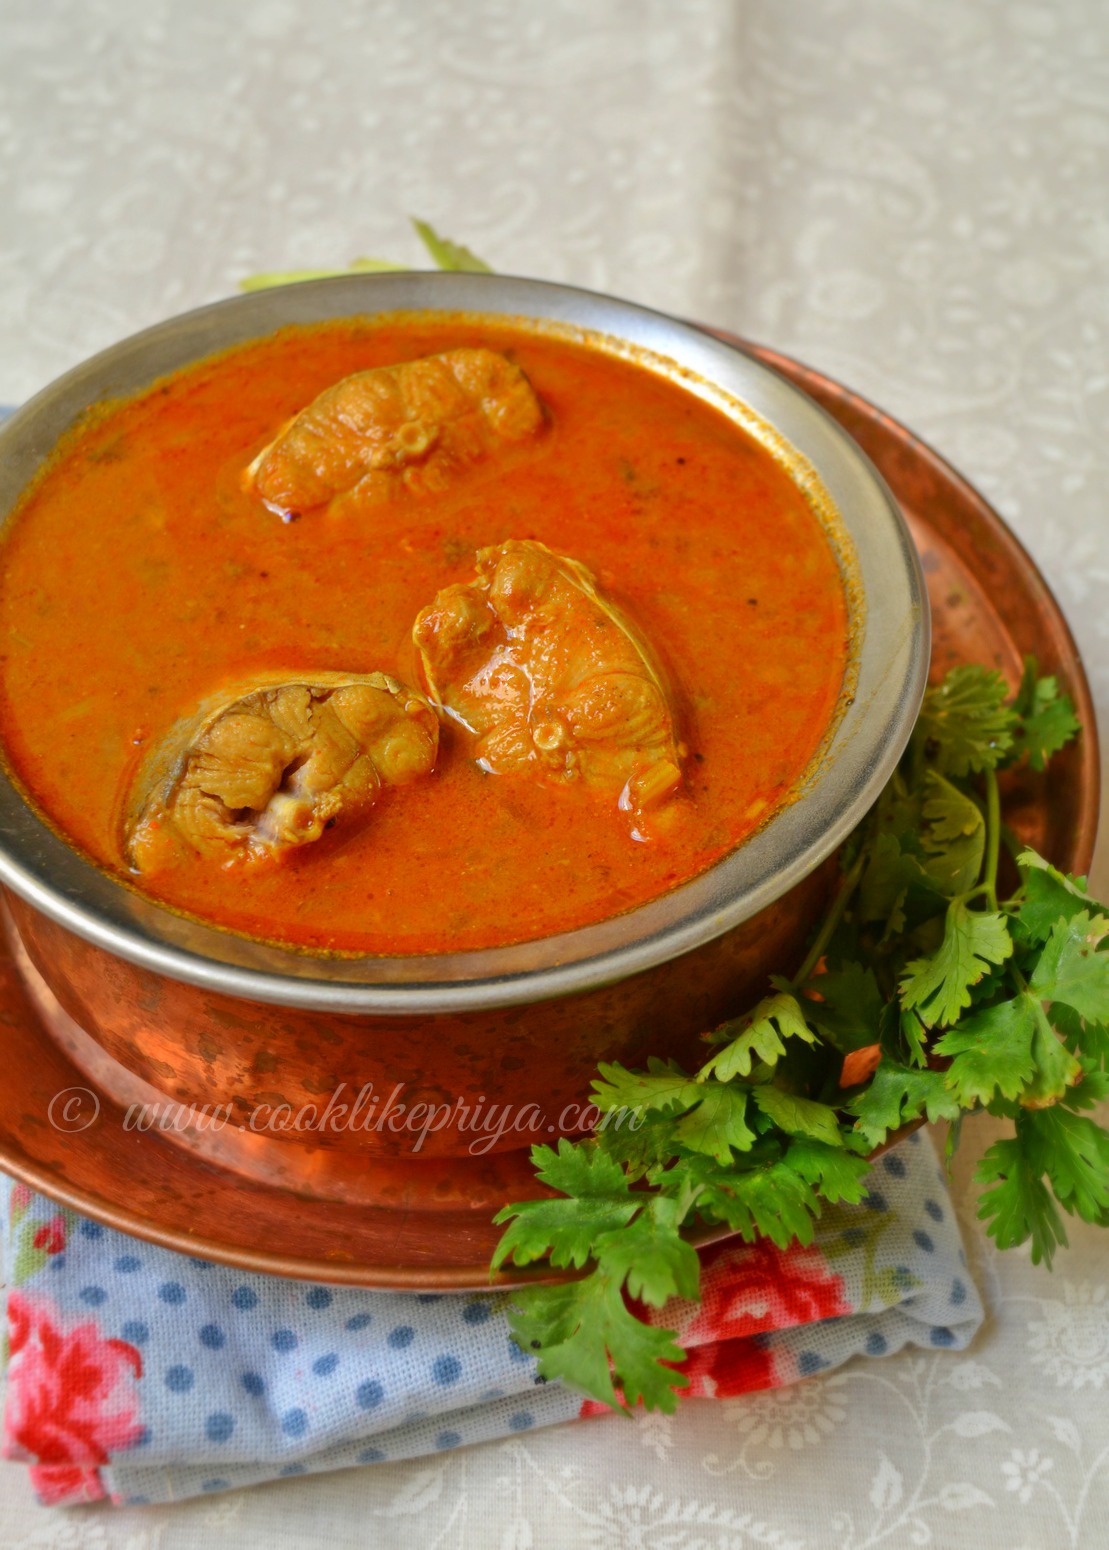
Who doesn't love hot steaming rice with spicy tangy fish curry along with a porriyal. These are memories of mid week meals for me. Amma makes the most delicious fish curries and she has perfected it so much that no matter how many times I make fish curry and hear from my husband that it tasted great I still have this 10% unsatisfied part which keeps telling me This is not like how Amma makes :). Do you hear me ;-) I think its an undeniable thought most cooks have. Although I create my own recipes, I still look make to Amma's recipes and get inspiration. I have heard many tell me that they love the tips that I give for recipes below each post :) trust me these are the ones that make a recipe a hit or a miss. Its those little tips and tricks that help you perfect any recipe that I have posted here. Now lets move on to the recipe today. 

Easy South Indian Fish Curry | Tamil Meen Kuzhambhu

SURA MEEN KUZHAMBHU RECIPE | EASY TAMIL FISH CURRY RECIPE

Recipe Source - Amma
Prep time - 10 mins
Cook time - 20-25 mins

Ingredients


Oil - 2-3 tbsp
Peppercons - 10 no
Mustard seeds - 1/2 tsp
Fenugreek seeds - 10 no
Jeera/ cumin - 1/2 tsp
Curry leaves - 5 leaves
Garlic pods - 6-7 sliced thinly
Ginger chopped - 2 tsp
Shallots - 10 chopped fine
Tomato - 3-4 tomato finely chopped (country tomato & bangalore tomato)
Salt - 1 tsp
Turmeric powder - 1/2 tsp
Corriander powder - 1 tbsp
Red chilli powder - 1 tsp
Jeera/ cumin powder - 1/2 tsp
Water - 1 cup
Tamarind water - 3/4 cup from 1 gooseberry size tamarind
Fish - 300-400 gms (5-6 medium to large pieces)
Corrinder leaves - to garnish, 2 tbsp
Pepper powder - 1/2 tsp

Method

1. In a heavy bottom wide pan heat oil and add the peppercons, mustard seeds (Wait for it to splutter), fenugreek seeds, jeera, curry leaves, ginger and garlic and saute until the seeds release aroma. 
2. Add the small onions/ shallots and saute until transparent, tip in the tomatoes and keep stirring and let it cook under medium flame for 3 minutes until mushy and the oil floats on top. 
3. Add in the salt, turmeric powder, red chilli powder, corriander powder, cumin powder and mix well. Let it cook for 3 minutes under medium flame and the oil will release. 
4. Add 1 cup water and bring this to a boil and let it cook further for 3 minutes. Add the tamarind water and mix well cook covered for 4 minutes until the curry thickens and the raw smell goes away.
5. Add the fish pieces and cook for 5 minutes covered in medium flame. Later reduce the flame to low- medium and cook further for 5-6 minutes undisturbed. The oil in the curry and fish will float on top.
6. Switch off and sprinkle the pepper powder and corriander leaves and keep covered for 10-15 minutes for the flavors to develop.

Serve warm with white rice and poriyal. 

COOKS WISDOM

TIP 1

1. Usually Fish is well washed and cleaned and marinate with turmeric and salt to remove the fishy smell. Later washed in water and then added to the curry. Sura/ shark fish is usually a little smelly and you could also boil them in water separately and discard the skin and add to the cooked curry.

TIP 2

2. Amma adds 2 kinds of oil to make fish curry - gingelly & refined. You can go with what suits you best.

TIP 3

3. Amma also uses 2 kinds of tomatoes - county tomato / ripe roma / bangalore tomato to make fish curry. It gives a tart and sweet flavor together.

TIP 4

4. No green chillis are used in this curry, if you are using it then reduce the amount of red chilli powder.

TIP 5

5. If you have homemade curry masala (without garam masala) then use 3 tbsp of that powder and skip the other spice powders.

TIP 6

6. You could also use tamarind paste mixed in warm water. 


RELATED RECIPES

ANCHIOVES FISH FRY

Ellu Kozhukattai | Black Sesame Kozhukattai Recipe

$
0
0


Ellu Kozhukattai Recipe
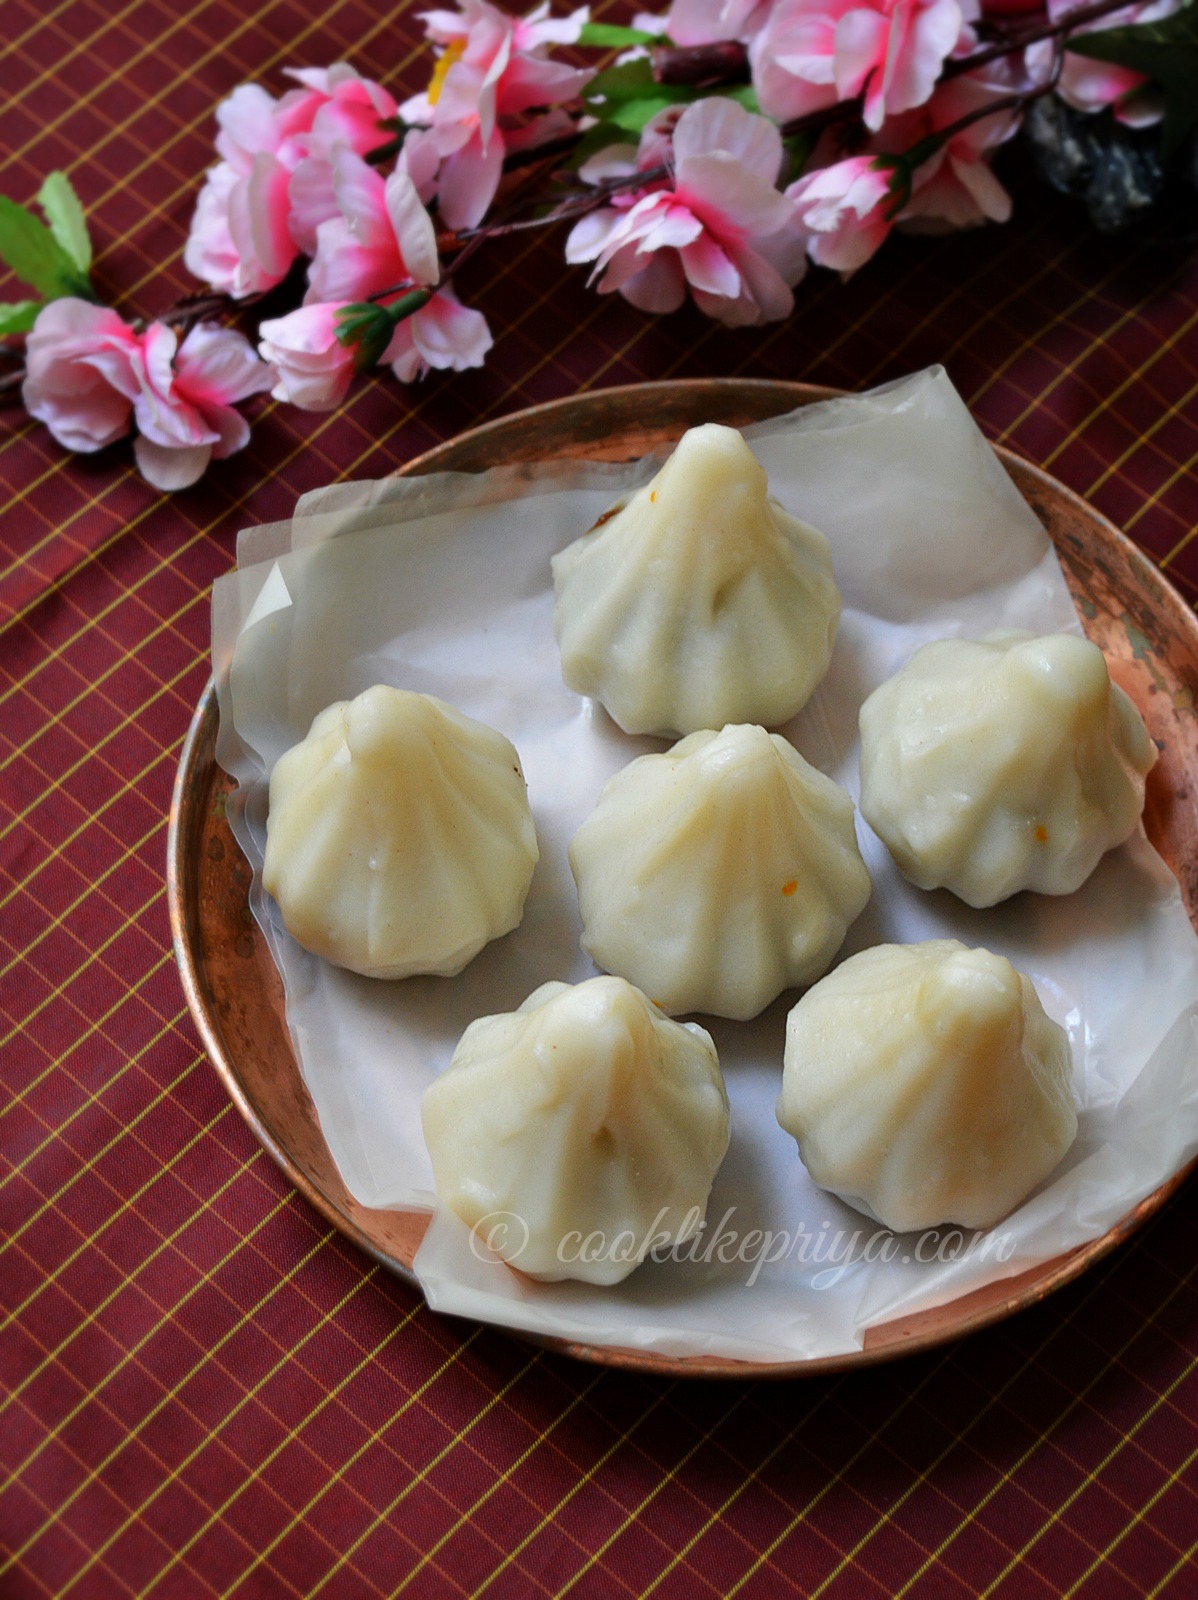
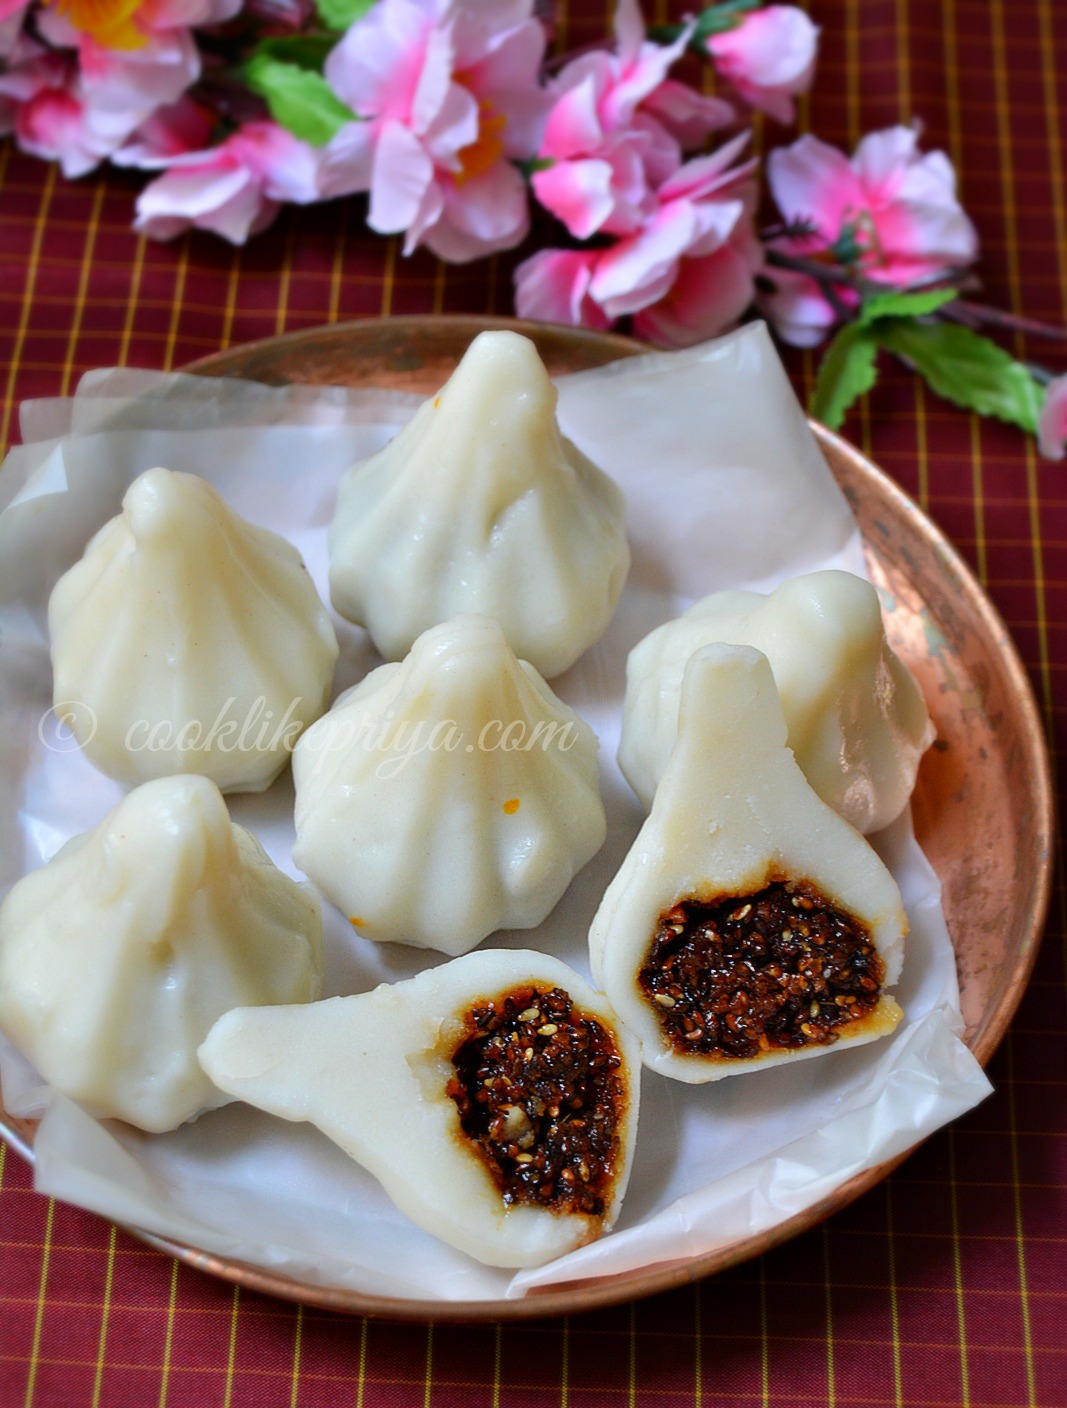
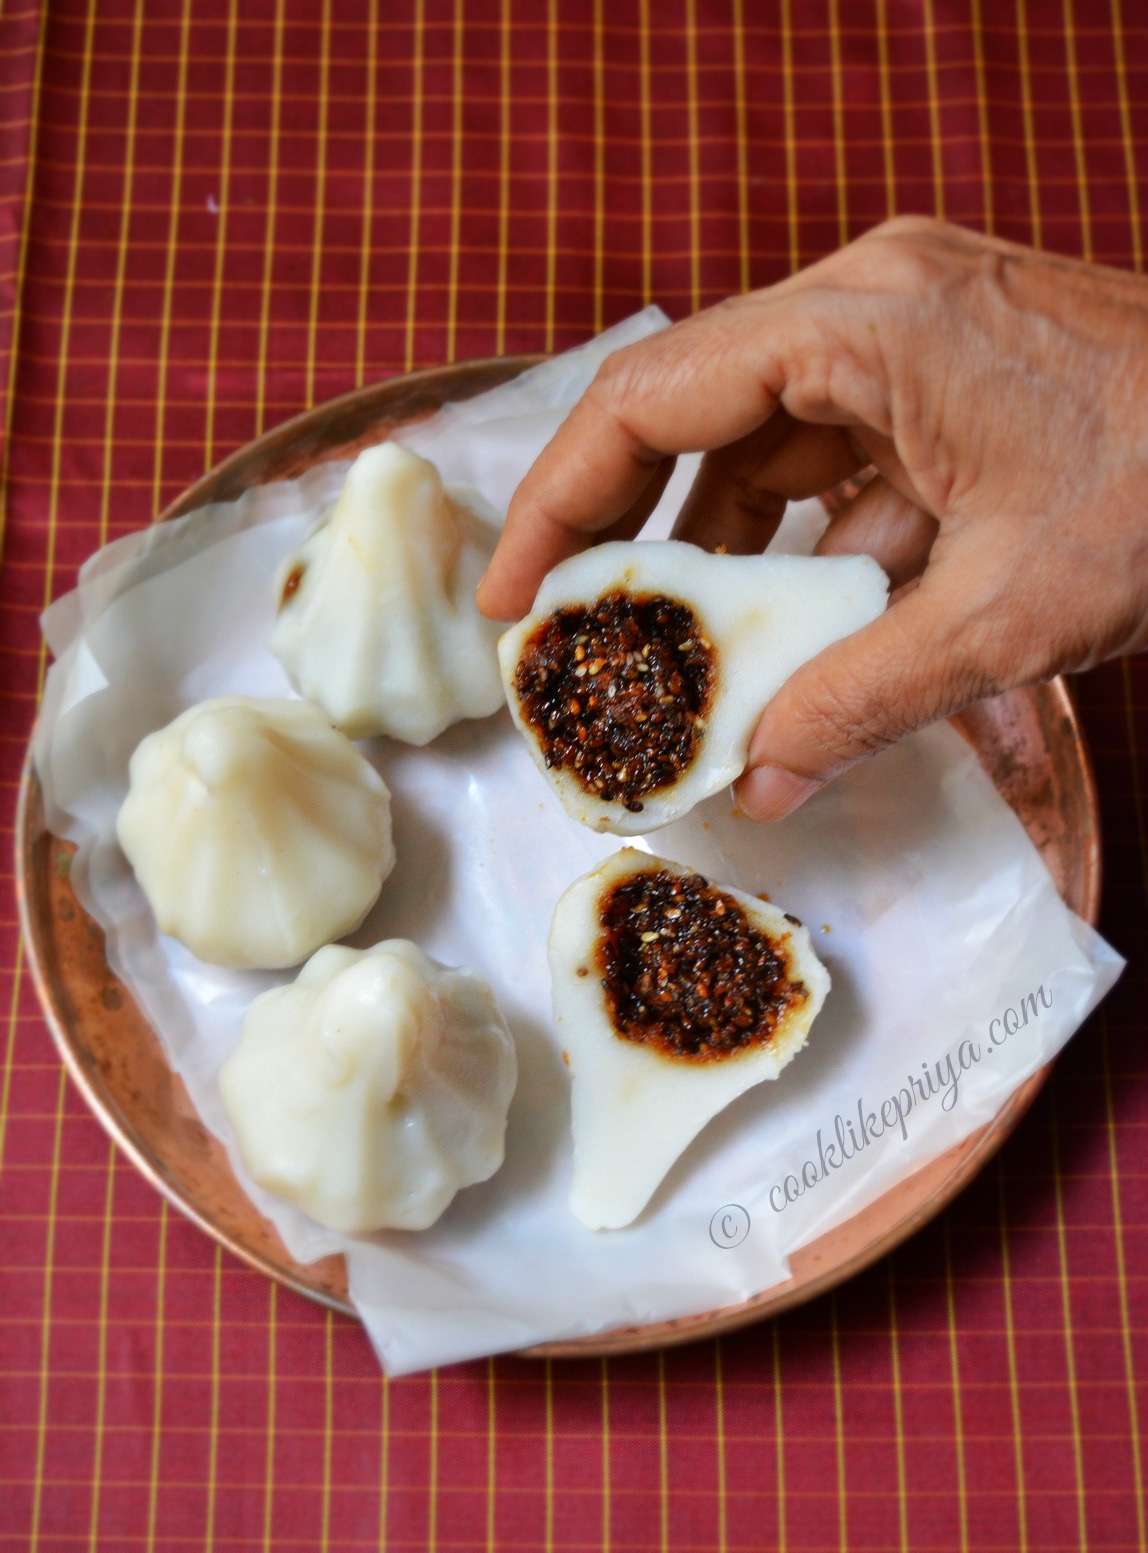
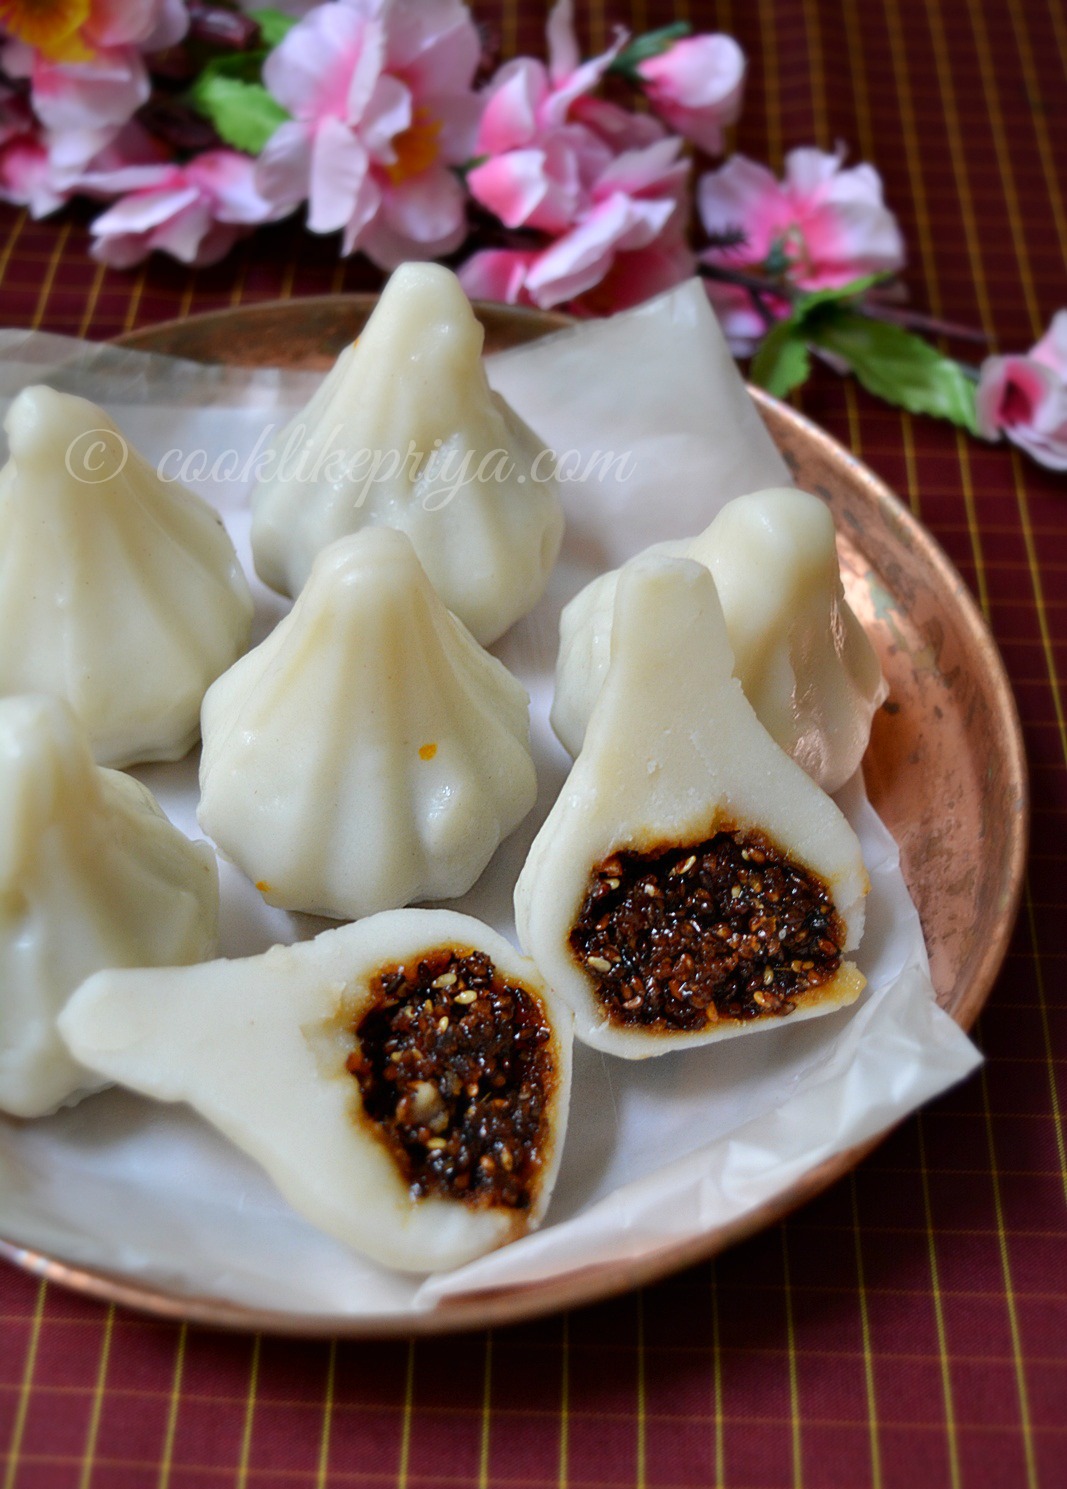
Kozhukattai / rice dumpling is a famous South Indian snack item. I used wait for the festival seasons to get these steamed beauties from the next door neighbor and immediately gobble few ;-) although Amma used to say don't be so greedy I can make you some at home. The day never happened, so this time when I was home I pulled Amma to make kozhukattai for me and I tell you this is like a childhood food wish. I was so excited during the entire process and Amma gave me the messy job of shaping the kozhukattai and I used fancy mold to get them into perfect shapes (sort of). I usually like the sweet version and especially with the black filling (ellu jaggery/ ellu pooranam). The soft outer and the sweet crunchy inner does a marriage of flavor in every bite. You really have to try this to know how good it tastes. I hope to make kozhukattais in my kitchen and properly share my success stories of different version on my blog. 


Easy Kozhukattai Recipe


Black sesame seeds kozhukattai


How to make sweet kozhukattai


ELLU KOZHUKATTAI RECIPE | BLACK SESAME KOZHUKATTAI 

Recipe Source - Own

Serves - 3-4 people 
Makes - 8 medium - large kozhukattai
Prep time - 15 mins
Cook time - 8-10 mins
Serving suggestion - as a snack

Ingredients


Rice flour - 1 cup (readymade idiyappam mix/ kozhukattai mix)
Sesame Oil - 1 tsp
Water - as required
Salt - 1/3 tsp

For the Puranam 


Ellu / black sesame seeds - 1/2 cup

Jaggery powdered - 3/4 cup
Coconut shredded  - 1/4 cup
Cardamom powder - 1/2 tsp

Method


1. Wash and soak the black sesame seeds in water for 3-4 times to remove impurities and stead them on a cloth or towel to dry for 10 minutes. 
2. Dry roast the sesame seeds in a dry pan until it starts to pop. Now add jaggery and wait for it to melt and get sticky now add in the cardamom powder and jaggery and mix well. 
3. It will all come together as a mass and start leaving the pan. Take care not to burn them. Switch off and transfer to a plate.
4. Grease your hands and when the sesame mixture is still warm divide them into balls and set aside.


5. To make the rice balls. Take enough water to a saucepan and bring it to boil. Add tsp of sesame oil to this water and it must come to rolling boil stage.
6. Add the flour & salt to a bowl, mix well and once the water comes to rolling boil start adding water little by little and gently mixing the water to the flour using a wooden spatula or spoon.
7. After the mixture is easy to handle grease you hand with oil an knead it gently to a soft dough without giving much pressure (refer notes). 
8. Divide the dough into equal parts and set aside. Keep covered with a damp cloth or a lid.
9. Grease your palms and flatten each of the balls using your thumb into a disk, keep the pooranum or filling in the center of the disk and close it using the flattened dough.
10 If using a mold place the filled kozhukattai into the mold and make a shape. Carefully remove it form the mold and place it in a plate.
11. In the meantime bring water to boil in a cooker or wide deep heavy bottom pan. Place a greased idly plate or a stand on it.
12. Repeat the same for all the kozhukattais and place them on the idly plate and cover the lid without the weight/ wistle. 
13. Let it steam cook for 8-10 minutes until the outer rice flour wrap is transparent and soft.


Ellu Kozhukattai Recipe
COOKS WISDOM

TIP 1


1. While making the rice flour dough be careful to be gentle with the flour. If you give too much pressure the kozhukattais would turn a little hard.

TIP 2


2. Make sure you use well greased hands while shaping the kozhukattai. Also I prefer more filling and less rice flour dough ;-) but you can do either ways.

TIP 3

3. My kozhukattai moulds were bit fat and hence called for more flour and the pooranum / filling was less. So check and get small moulds or simply use your hands to get perfectly shaped kozhukattai. Remember kozhukattai is not about the perfect shape but the taste and flavor. 

TIP 4

4. You can also use idiyappam mix (powder) to make kozhukattai or make homemade rice flour powder. 

TIP 5


5. Kozhukattais stay fresh for a day, consume on the same day either warm or in room temperature. 

TIP 6

6. Always cover the rice flour dough with a damp / wet cloth or a plate and never expose it fully. This helps to retain moisture in the dough and not let it dry up. If you have used less water or kept the dough open for long the kozhukattai will have cracks while shaping.


RELATED RECIPES

SAMBAR VADA
THAYIR VADA
MEDHU VADA
MASALA VADA
SAMOSA
JAVVARUSI BANANA PAYASAM
JAVVARUSI SEMIYA PAYASAM

SABUDANA VADA
KARA PANIYARAM
SWEET PANIYARAM


South Indian Lemon Rice | Nimmakaya Pulihora

$
0
0
Lemon Rice | South Indian Lunch Box recipe
Lemon Rice / Lime Rice is a tangy delicious rice that is quick and easy to do. With just left over rice this can be made in a jiffy. Although I am never a big fan for lemon rice, neither my husband I never made an effort to make lemon rice and post a recipe here. But since this is one of the most famous South Indian mixed rice recipes and also being my Dad's favorite I wanted to post it here on my blog. Usually appa loves to have lemon rice with masala vadas and appalam but you can pair it with any combination that you like.


Lime Rice | Lemon Rice | Nimmakaya Pulihora


LEMON RICE | LIME RICE | NIMMAKAYA PULIHORA RECIPE

Recipe Source - Own
Serves - 4-5 people
Prep time - 5 mins
Cook time - 5 mins

Ingredients

Cooked Rice - 2 cups
Oil - 2 tbsp
Mustard seeds - 1 tsp
Urad dal - 1 tsp
Channa dal - 3 tsp
Green chilli / dry red chilli - 2 torn
Curry leaves - 1 spring around 8 leaves
Ginger - 1/2 inch piece finely minced
Turmeric powder - 1/3 tsp
Lemon juice - from 1 medium sized lemon
Salt - to taste

Method

1. Make sure that the rice is fluffy and grains are separate, this consistency is very important you can use any long variety rice or the usual boiled rice variety. Make sure rice is in room temperature and not hot.
3. Squeeze the lemon juice and discard the seeds and add turmeric and salt to this. Mix well set aside.
2. Once the rice is ready, take a skillet and heat it up, add the oil once hot splutter the mustard seeds, urad dal, channa dal, curry leaves, green/red chilli, curry leaves, ginger and stir fry them well for 30 seconds. 
3. Switch off and add the lemon juice (make sure to remove the seeds) and turmeric powder mix. 
4. Once the base is ready pour it over the rice and mix well so that all the rice is flavored with the lemon base.
5. Garnish with corrinader leaves and serve.


COOKS WISDOM

TIP 1

1. The rice has to be fluffy and perfectly cooked. The grains need to me separate and also at room temperature.

TIP 2

2. Make sure that the lemon is fresh and not too sour.

TIP 3

3. Usually we use boiled rice but you can always use basmati rice or any long grain rice variety.

TIP 4

4. Lemon rice usually requires a little more oil than usual, it adds great flavor and taste. You can use any oil variety as per your taste. 


DELL VENUE TAB 7 REVIEW

My life with Dell venue tab has been a great journey and I have been writing to you with my experiences with Dell and all that it has to offer. Dell being a renowned company for laptops has ventured into the tablet market and delivering quality tablets to customers. I must thank Dell for giving me this opportunity to write about their product. Off late I find myself hooked on to the tablet than the laptop. I enjoy using the apps and carry it along with me where ever I go. Today I wanted to share my thoughts on the video quality and youtube experience. I am a huge youtube addict. I have subscribed to various youtube channels and I keep getting updates on recent videos, my interests are cooking, sewing, songs, music, baking and gardening. So youtube has been my go to since I don't know when. Using a tablet for my needs fits in so handy like I said browsing is a breeze through Dell and there are other features in Dell which seem a little compromised like camera, video quality and battery life. I hope Dell brings out the best in their future but if you are looking for a everyday browsing tablet then Dell offers its best. 


Checking out my youtube chanel in Dell Venue ;-)

Dell Venue Tab product details

Checking out Youtube with Dell
Dell Venue picks up 2G 3G & micro sim which a great news for people like me who love to carry a tablet along with them. Its great for navigation apps like google maps. I also find the connectivity to social apps like facebook & twitter quite good.

Conclusions & Ratings


Browsing speed - 4/5

3G Connctivity - 4/5
Video quality - 4/5
Sound quality - 3/5
Battery life - 2/5

My Overall ratings - 3 /5


To view my other review posts on Dell click the links below

Dell Review 1
Dell Review 2
Dell Review 3
Dell Review 4


RELATED RECIPES


TOMATO RICE

Aarai Keerai Masiyal | Tamil Brahmin Style Keerai Recipe

$
0
0
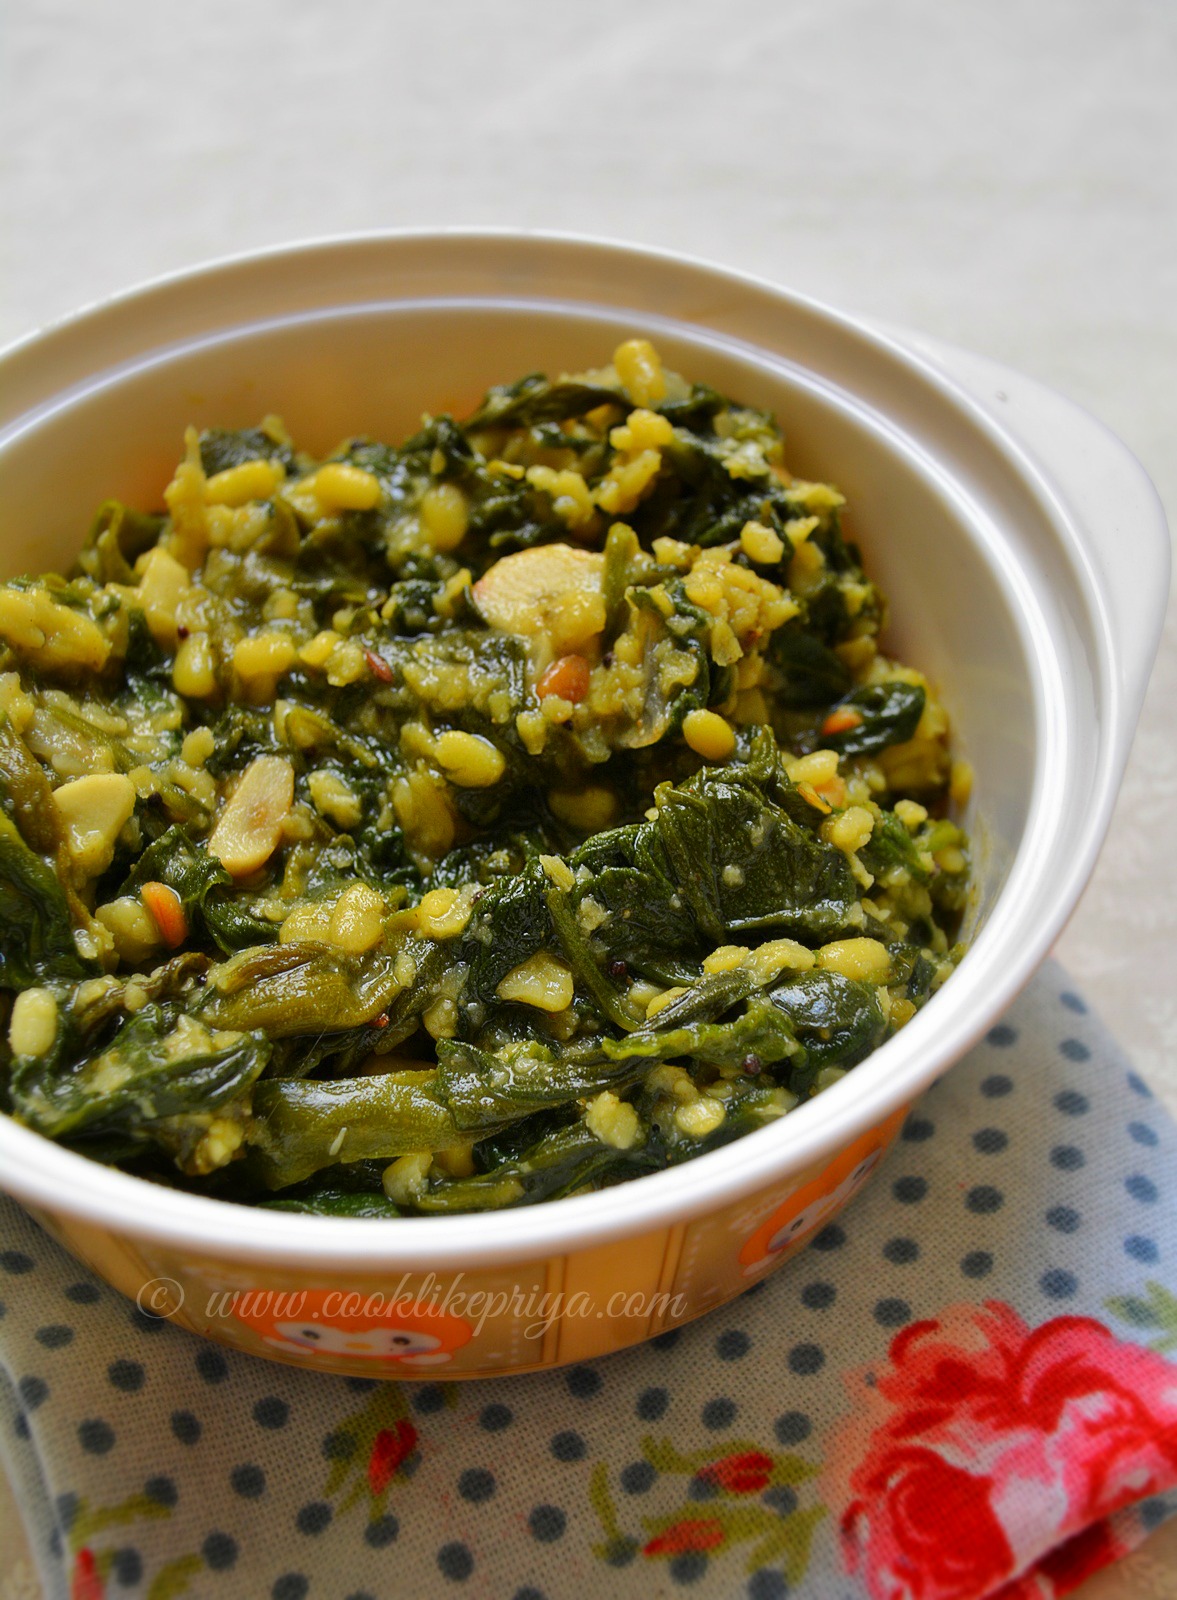
Aarai Keerai Masiyal
There can never be a day without keerai/ greens in my parents place. Amma loves vegetables and she always make sure that we get a dose of veggies as part of our everyday meals. I have picked this good habit of eating greens from her. Be it veg or non veg recipes there will always be vegetables as sides in the form of poriyals or frys. I love Amma's version of keerai she makes so many varieties that I never fail to miss out when ever I come home and also share them with all of you here. This Arai keerai masiyal is a mix of dal and greens together with a lovely flavour that it can be made as a main curry to go with white rice and sides like poryial or fry. 


Tamil Brahmin Style Keerai Recipe

AARAI KEERAI MASIYAL RECIPE | KEERAI MASIYAL RECIPE


Recipe Source -Amma

Serves - 5-6 
Prep time - 10 mins 
Cook time - 10 mins
Serving suggestion - along with white rice, appalam and any poriyal

Ingredients


To Pressure cook


Moong dal - 1/2 cup (soaked for 10 mins)

Shallots - 3-4 / 1/2 big onion chopped
Garlic cloves small - 3-4 chopped
Green chillis - 2 slit
Turmeric powder - 1/4 tsp
Jeera/ cumin - 1/2 tsp 
Tomato  - 1 large chopped

Other Ingredients


Aarai keerai - 1 bunch, chopped

Salt - to taste
Oil - 2 tsp
Mustard seeds - 1 tsp
Urad dal - 1 tsp 
Hing / asefotedia - 1 pinch
Red chilli (dry) - 2 no

Method


1. Add all ingredients mentioned under to pressure cook in a pressure cooker for 3 whistles and switch off let the pressure gradually settle. 

2. In a sauce pan add 1 cup water and add the chopped arai keerai (greens) and let it cook until it wilts. Remove the leaves and add it to the dal mix. 
3. In a kadai heat oil and temper the mustard seeds, hing, urad dal, red chilli and pour over the keerai masiyal. 
4. Mix well add salt and taste before serving. 


COOKS WISDOM


TIP 1


1. All keerai / greens can be used to make this masiyal. If using fenugreek or drumstick leaves do not chop the leaves. 


TIP 2


2. You can reduce the amount of dal as per your preference and use any dal variety to make this masiyal.


TIP 3


3. For little tanginess you 1 tsp of tamarind paste and cook the masiyal further for 3-4 minutes and switch off.


MY FINAL THOUGHTS ON DELL VENUE TAB 7

Over the past few months I have been sharing my experience with Dell Venue tab 7 and today I have to bid adieu to the tab that gave me company all these days. My journey with Dell has been mixed sometimes good and sometimes not so good. But through it all I have learned to understand all the best features that Dell offers through their 7" venue tab. I will be sharing my final thoughts like and dislikes with Dell Venue in today's post. 

KEY FEATURE OF DELL VENUE TAB 7 INCH

INTERNET - Supports Wifi, 2G & 3G network
CAMERA - 3.15 MP, 2048 x 1536 pixels
OS - Android OS, v4.2.2 (Jelly Bean)
MEMORY - 16 GB, 2 GB RAM, microSD, up to 32 GB
WEIGHT - 234 g (8.25 oz)


Dell Venue Tab 7 inch

Dell Venue blogger review

MY FINAL RATINGS 

FEATURES - 4/5
BATTERY - 2/5
ANDROID APPS & OS - 4/5
CONNECTIVITY - 4/5
USABILITY - 5/5

Overall ratings - 3/5

PROS ON DELL VENUE

- Userfriendly
- Connectivity
- 3G 2G WiFi
- Internet browsing
- 7" size, handy

CORNS ON DELL VENUE

- Batter life
- Camera 
- Sound


I hope my reviews and thoughts on Dell Venue tab has helped you get a fair idea of the tablet and if you ask me if I would recommend it to someone, definitely yes for a first time tablet user. If you use any higher end tablets like ipad / apple products what Dell venue offers may not be up to par with the leading tablets but that does not mean that the Dell is any inferior. In terms of price and user friendly experience Dell is a great tablet that must be explored. With a 7" you sure can carry it along with you everywhere. Fits into any medium sized handbag and is definitely on the go. Hope this review is of use to you and help you decide on your decision to get a tablet.


Please note - all reviews thoughts, experiences, photographs shared concerning Dell are my own, I have taken care and time to understand the tablet on my own and with no external help.


To view my other review posts on Dell click the links below

Dell Review 1
Dell Review 2
Dell Review 3
Dell Review 4

Dell Review 5

RELATED RECIPES


VENDHAYA KEERAI KARA KUZHAMBHU
VENDHAYA KEERAI SAMBAR
METHI PULAO
SPINACH COCONUT RICE
RED SPINACH MANGO CURRY
SPINACH SHALLOTS STIR FRY
LOW FAT PALAK KOFTA CURRY
PALAK DAL
SPINACH TIKKIS
SPINACH CHICKEN- CHINESE

DRUMSTICK LEAVES PORIYAL

BHRAMI LEAVES THOVAYAL

Amma's Quick & Easy Fish Curry without Coconut | South Indian Fish Curry Recipe

$
0
0

Amma's Qick & Easy South Indian fish curry
Amma's Quick & Easy South Indian fish curry 
Its been some time that I had blogged, been busy with a house shift & I am taking things slow to settle down and I wanted to post one of Amma's fish curry which has been in draft for a while now. This curry is something I long for and she has so many varieties of fish curries that I have already posted recipes - Tamarind fish curry, Coconut fish curry, Mango fish curry and today I am sharing with you a quick & easy fish curry that does not call for any coconut. This is Amma's version of a quick fish curry that is so easy to make, perfectly flavored and is relished with white rice and poriyal. This was our lunch today and I happily clicked pictures to post on my blog ;-). How I wish I lay back and someone cook recipes for my blog :P but trust me this is not the case always. When I am home I make sure to request a list of recipes from Amma so that I can enjoy them and blog them too. 


Meen Kuzhambhu Recipe | Fish curry without coconut
MEEN KUZHAMBHU RECIPE | INSTANT FISH CURRY RECIPE

Recipe Source - Amma
Serves - 4-5 people
Prep time - 10 mins 
Cook time - 10-15 mins

Ingredients

To sauté & grind

Oil - 1 tsp
Onion - 2 big chopped
Tomato - 3 big chopped
Curry leaves - 1 spring

For the curry

Oil - 2-3 tbsp
Peppercorns - 5-6 
Fenugreek seeds - 8 no
Mustard seeds - 1 tsp
Curry leaf - 1 spring, 8 no
Small onions/ Shallots - 6 no
Green chilli - 2, slit
Garlic pods - 3-4 chopped
Tamarind - 1 lemon size ball with 1/2 cup water
Turmeric - 1/4 tsp
Jeera/ cumin powder - 1 tsp
Fish masala powder - 1 tbsp
Coriander powder - 3 tsp
Red chilli powder - 1 tsp
Salt - 1 tsp
Water - 1 cup
King fish - 500 gms / 1/2 kg

Method

1. In a wide pan heat oil and sauté the onions until transparent (around 2-3 minutes) and tip in the chopped tomatoes and curry leaves. Sauté for 3 minutes until mushy and fully cooked. 
2. Let this sautéed onions and tomato rest to come to room temperature. Purée them into a thick paste.
3. Add cumin, fish masala, corriander & red chilli powder and mix well set aside.
4. In the same pan, heat oil once hot add in the peppercons, fenugreek seeds, mustard seeds and give it few seconds to splutter, now add in the curry leaves, small onions, green chillli and garlic pod and sauté for 2 minutes.
4. Add in the ground paste with spices, along with salt and let it cook until thick and oil separates from the paste. Cook for about 3-4 minutes to reach this stage in meidum flame.
5. Add one cup water and bring this to a boil, now add in the tamarind pulp cook for 3 minutes undisturbed.
6. Add the washed and cleaned fish pieces and reduce the flame to medium- low cook covered for 3- 4 minutes. 
7. check if the fish is cooked and for spices and salt.
8. Garnish with corriander leaves and keep covered for 10-15 minutes for the flavours to develop.

COOKS WISDOM

TIP 1

1. Tomato onion base can be made ahead and used for any curry as a base. This works handy and you can even spice this up and store in the refrigerator for upto 3-4 days.

TIP 2

2. Amma used king fish for this recipe, any variety of fish with less bones can be used to make this curry.

TIP 3

3. You could even add 3-4 tbsp of coconut milk or coconut paste to make this curry even rich.

TIP 4

4. Make sure to use freshly chopped garlic its one of those main ingredients to make the perfect fish curry.

RELATED RECIPES

Chickpeas Coconut milk Curry | Chapati side dish recipe

$
0
0

Chickpeas  Channa Coconut milk Curry
Chickpeas Coconut milk Curry
Somedays I am all up and cooking 3-4 dishes in a row, other days I really drag myself to cook a decent meal. But today I was full of energy and made this delicious Coconut milk chickpeas curry, if you know me you know that I love chickpeas and I cannot get enough of them. But on the otherside my husband does not like chickpeas whatsoever but that does not stop me from cooking them. Today I didn't pack lunch for him so I ended up making this curry. That said I love to soak chickpeas overnight and boil them fresh rather than the canned ones. But once in a while not bad to enjoy beans that are tinned. Nevertheless this is one easy curry to make with basic ingredients in your pantry and goes along well with soft hot chappathis and can be paired with pulao or white rice too. 


Channa Curry - Side dish recipe for chapathi
CHICKPEAS COCONUT MILK CURRY | CHANNA CURRY FOR CHAPATHI

Recipe Source - Own
Prep  time - 10 mins
Cook time - 15 mins
Serves  - 2-3 generously
Serving suggestion - Along with chapathi, roti or rice/ pulao

Ingredients

Chickpeas/ channa - 1/2 cup soaked overnight & pressure cooked for 5 hisses
Oil - 1 tbsp
Bay leaf - 1
Cardamom - 1
Clove - 1
Cinnamon stick - 1/2 " piece
Fennel seeds - 1/2 tsp
Onion - 1 large finely chopped
Tomato - 2 medium mashed
Green chilli - 2 long slit
Ginger garlic paste - 2 tsp
Turmeric powder - 1 pinch
Coriander powder - 4 tsp
Jeera/ cumin powder - 1 tsp
Garam masala - 1/4 tsp
Coconut milk - medium thickness - 1/4 cup
Salt - to taste
Coriander leaves - 1 tbsp to garnish, chopped

Method

1. In a wide pan heat oil add in the whole spices - bay leaf, cinnamon, cardamom, clove and fennel seeds, once they release aroma add in the onions and green chilli.
2 Sauté for 2-3 minutes until they are cooked and fully transparent. Add the ginger garlic paste and let it cook until the raw smell goes away (2-3 minutes)
3. Add in the mashed tomato and add 1/2 salt and cover the lid, let it cook for 2 minutes until mushy.
4. Now add all the spices, turmeric, coriander, cumin and mix well. Now the base of the curry is thick add the pressure cooked chickpeas and water (1/2 cup).
5. Cover the lid and let it cook for 3-4 minutes. Now add in the coconut milk and reduce the flame to medium-low and cook for 3 minutes covered.
6. Check for salt and spices, garnish with coriander leaves, garam masala, give it a good mix and switch off.
7. Cover with lid for 10 minutes and later serve it with rice or chappathi.


Channa / Chickepeas Curry Recipe
COOKS WISDOM

TIP 1

1. I usually soak the chickpeas overnight (12 hrs) and pressure cook them the next day with just water (1/2 cup chickpeas I add 1 cup water) for 5 hisses/ whistles. Some people add salt while pressure cooking but I don't this lets the chickpeas cook well.

TIP 2

2. You can alternately purée the tomato and add this to the curry base. 

TIP 3

3. You could add cubes potatoes to this curry if you have picky eaters who don't like chickpeas/ channa.


RELATED RECIPES

CHOLE MASALA (BHATURE SIDEDISH)
CHICKPEAS PULAO
CHICKPEAS SALAD
CHANNA KURMA

KERALA KADALA CURRY
POTATO KURMA
VEG KURMA 
BOILED EGG KURMA
PANEER KURMA

Paruppu Keerai Poriyal | Spinach Greens Stir Fry with home grown greens

$
0
0


Paruppu Keerai Poriyal Recipe

Greens (Keerai) are a staple in our house, Amma made sure that we have variety of them. I have made efforts to document all the different kinds of keerai recipes in my blog. I remember back when I was young I was never fond of greens but now with all the knowledge of how good they are for your health I have started to change my food habits and add greens to meals or salads. Taking about salads I have found this new interest to salads and dressings and make variety of salads as a dinner meal. I will soon make efforts to post salad recipes. I find myself enjoying salads more than regular food, I find them light filling and my stomach feels so relaxed the next day. Its definitely a tummy cleanser and great if you are someone looking to lose some weight. Comment below if you would love to see salad recipes on my blog :-).


Freshly harvested Spinach leaves
Amma has fond this new passion to grow vegetables and fruits and the pictures shared here of greens are home grown and we had a good harvest of greens after the rains :-) I almost saw leaves multiply. Ever since I have seen this my hands are itching to grow greens at home. I hope share my experiences with all of you. Wish me luck ;-)


PARUPPU KEERAI RECIPE

Recipe -Amma
Prep time - 5-8 mins
Cook time - under 5 mins
Serves - 2-3 people
Serving suggestion - as a side for rice and curry

Ingredients

Spinach leaves - 2 huge bunches
Oil - 2 tsp
Mustard seeds - 1 tsp
Urad dal - 1 tsp
Dry red chilli - 1
Curry leaves - 2 torn
Garlic - 2 ponds chopped
Shallots - 5 chopped
Moong dal - 2-3 tbsp soaked for 15 mins
Salt - to taste
Cumin powder - 1/2 tsp

Method

1. In a large pan heat oil and splutter the mustard seeds, urad dal, curry leave, dry red chilli and garlic sauté for 30 seconds add in the shallots and cook for few minutes until they turn transparent.
2. Now add in the spinach leaves and cover with a lid cook for 2 minutes until the leaves completely wilt and cook in their own juices.
3. Add in the soaked moong dal, cumin powder and salt, give it a good stir.

Switch off and serve as a side for rice.

Keerai poriyal Tamilian style
RELATED RECIPES
 
VENDHAYA KEERAI KARA KUZHAMBHU
AARAI KEERAI MASIYAL
VENDHAYA KEERAI SAMBAR
METHI PULAO
SPINACH COCONUT RICE
RED SPINACH MANGO CURRY
SPINACH SHALLOTS STIR FRY
LOW FAT PALAK KOFTA CURRY
PALAK DAL
SPINACH TIKKIS
SPINACH CHICKEN- CHINESE
DRUMSTICK LEAVES PORIYAL
BHRAMI LEAVES THOVAYAL
 
Viewing all 285 articles
Browse latest View live