Quantcast
Channel: Cook like Priya
Viewing all 285 articles
Browse latest View live

Chickpeas Coconut milk Curry | Chapati side dish recipe

$
0
0

Chickpeas  Channa Coconut milk Curry
Chickpeas Coconut milk Curry
Somedays I am all up and cooking 3-4 dishes in a row, other days I really drag myself to cook a decent meal. But today I was full of energy and made this delicious Coconut milk chickpeas curry, if you know me you know that I love chickpeas and I cannot get enough of them. But on the otherside my husband does not like chickpeas whatsoever but that does not stop me from cooking them. Today I didn't pack lunch for him so I ended up making this curry. That said I love to soak chickpeas overnight and boil them fresh rather than the canned ones. But once in a while not bad to enjoy beans that are tinned. Nevertheless this is one easy curry to make with basic ingredients in your pantry and goes along well with soft hot chappathis and can be paired with pulao or white rice too. 


Channa Curry - Side dish recipe for chapathi
CHICKPEAS COCONUT MILK CURRY | CHANNA CURRY FOR CHAPATHI

Recipe Source - Own
Prep  time - 10 mins
Cook time - 15 mins
Serves  - 2-3 generously
Serving suggestion - Along with chapathi, roti or rice/ pulao

Ingredients

Chickpeas/ channa - 1/2 cup soaked overnight & pressure cooked for 5 hisses
Oil - 1 tbsp
Bay leaf - 1
Cardamom - 1
Clove - 1
Cinnamon stick - 1/2 " piece
Fennel seeds - 1/2 tsp
Onion - 1 large finely chopped
Tomato - 2 medium mashed
Green chilli - 2 long slit
Ginger garlic paste - 2 tsp
Turmeric powder - 1 pinch
Coriander powder - 4 tsp
Jeera/ cumin powder - 1 tsp
Garam masala - 1/4 tsp
Coconut milk - medium thickness - 1/4 cup
Salt - to taste
Coriander leaves - 1 tbsp to garnish, chopped

Method

1. In a wide pan heat oil add in the whole spices - bay leaf, cinnamon, cardamom, clove and fennel seeds, once they release aroma add in the onions and green chilli.
2 Sauté for 2-3 minutes until they are cooked and fully transparent. Add the ginger garlic paste and let it cook until the raw smell goes away (2-3 minutes)
3. Add in the mashed tomato and add 1/2 salt and cover the lid, let it cook for 2 minutes until mushy.
4. Now add all the spices, turmeric, coriander, cumin and mix well. Now the base of the curry is thick add the pressure cooked chickpeas and water (1/2 cup).
5. Cover the lid and let it cook for 3-4 minutes. Now add in the coconut milk and reduce the flame to medium-low and cook for 3 minutes covered.
6. Check for salt and spices, garnish with coriander leaves, garam masala, give it a good mix and switch off.
7. Cover with lid for 10 minutes and later serve it with rice or chappathi.


Channa / Chickepeas Curry Recipe
COOKS WISDOM

TIP 1

1. I usually soak the chickpeas overnight (12 hrs) and pressure cook them the next day with just water (1/2 cup chickpeas I add 1 cup water) for 5 hisses/ whistles. Some people add salt while pressure cooking but I don't this lets the chickpeas cook well.

TIP 2

2. You can alternately purée the tomato and add this to the curry base. 

TIP 3

3. You could add cubes potatoes to this curry if you have picky eaters who don't like chickpeas/ channa.


RELATED RECIPES

CHOLE MASALA (BHATURE SIDEDISH)
CHICKPEAS PULAO
CHICKPEAS SALAD
CHANNA KURMA

KERALA KADALA CURRY
POTATO KURMA
VEG KURMA 
BOILED EGG KURMA
PANEER KURMA
Amma's Quick & Easy Fish Curry without Coconut | South Indian Fish Curry Recipe

$
0
0

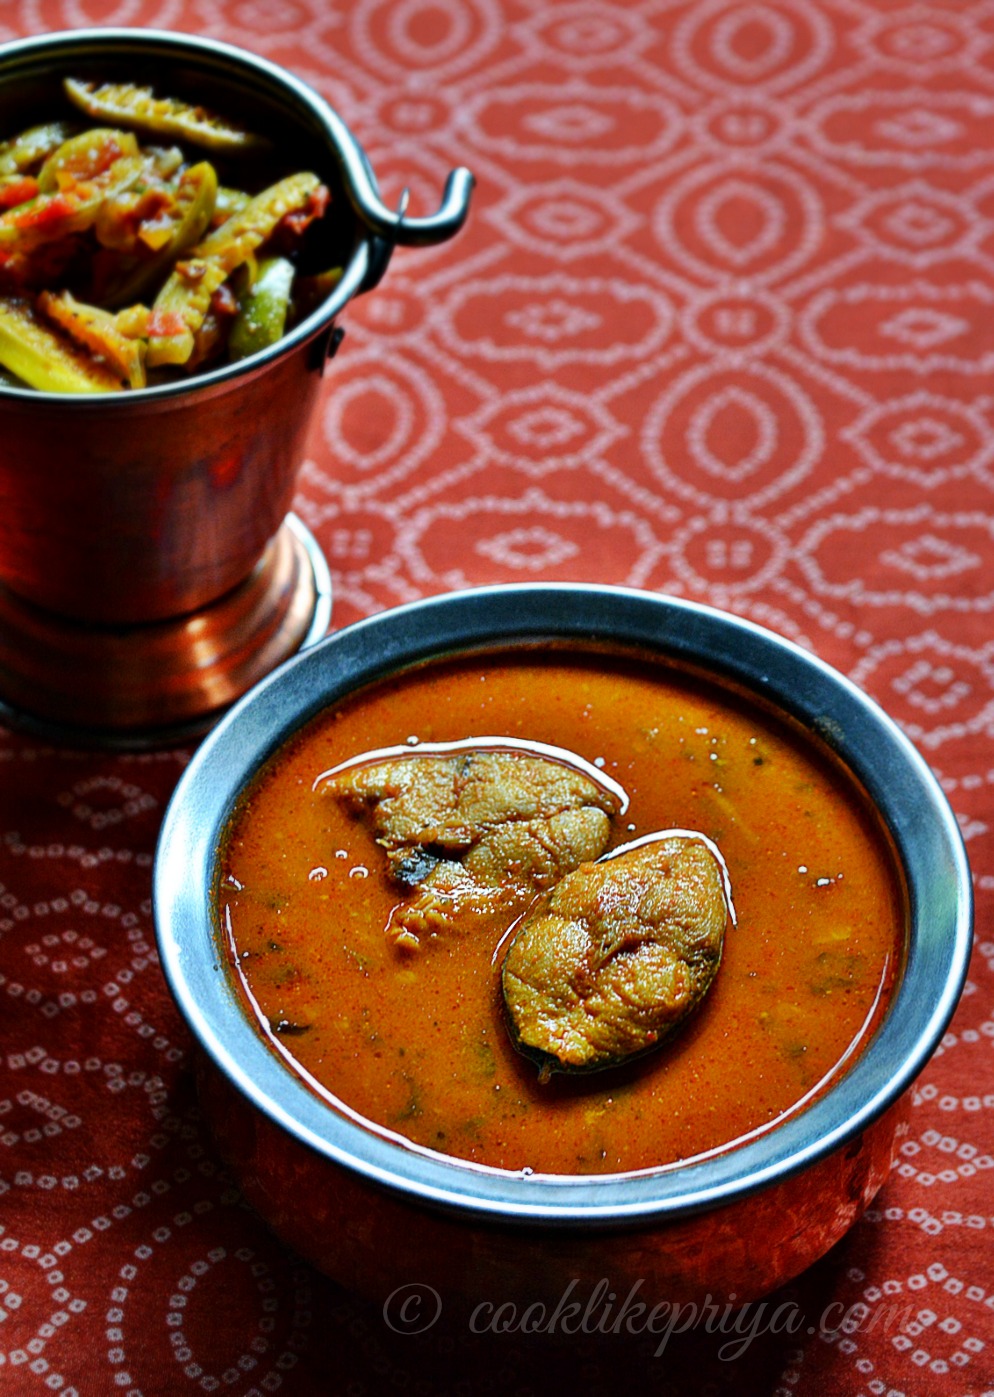
Amma's Qick & Easy South Indian fish curry
Amma's Quick & Easy South Indian fish curry 
Its been some time that I had blogged, been busy with a house shift & I am taking things slow to settle down and I wanted to post one of Amma's fish curry which has been in draft for a while now. This curry is something I long for and she has so many varieties of fish curries that I have already posted recipes - Tamarind fish curry, Coconut fish curry, Mango fish curry and today I am sharing with you a quick & easy fish curry that does not call for any coconut. This is Amma's version of a quick fish curry that is so easy to make, perfectly flavored and is relished with white rice and poriyal. This was our lunch today and I happily clicked pictures to post on my blog ;-). How I wish I lay back and someone cook recipes for my blog :P but trust me this is not the case always. When I am home I make sure to request a list of recipes from Amma so that I can enjoy them and blog them too. 


Meen Kuzhambhu Recipe | Fish curry without coconut
MEEN KUZHAMBHU RECIPE | INSTANT FISH CURRY RECIPE

Recipe Source - Amma
Serves - 4-5 people
Prep time - 10 mins 
Cook time - 10-15 mins

Ingredients

To sauté & grind

Oil - 1 tsp
Onion - 2 big chopped
Tomato - 3 big chopped
Curry leaves - 1 spring

For the curry

Oil - 2-3 tbsp
Peppercorns - 5-6 
Fenugreek seeds - 8 no
Mustard seeds - 1 tsp
Curry leaf - 1 spring, 8 no
Small onions/ Shallots - 6 no
Green chilli - 2, slit
Garlic pods - 3-4 chopped
Tamarind - 1 lemon size ball with 1/2 cup water
Turmeric - 1/4 tsp
Jeera/ cumin powder - 1 tsp
Fish masala powder - 1 tbsp
Coriander powder - 3 tsp
Red chilli powder - 1 tsp
Salt - 1 tsp
Water - 1 cup
King fish - 500 gms / 1/2 kg

Method

1. In a wide pan heat oil and sauté the onions until transparent (around 2-3 minutes) and tip in the chopped tomatoes and curry leaves. Sauté for 3 minutes until mushy and fully cooked. 
2. Let this sautéed onions and tomato rest to come to room temperature. Purée them into a thick paste.
3. Add cumin, fish masala, corriander & red chilli powder and mix well set aside.
4. In the same pan, heat oil once hot add in the peppercons, fenugreek seeds, mustard seeds and give it few seconds to splutter, now add in the curry leaves, small onions, green chillli and garlic pod and sauté for 2 minutes.
4. Add in the ground paste with spices, along with salt and let it cook until thick and oil separates from the paste. Cook for about 3-4 minutes to reach this stage in meidum flame.
5. Add one cup water and bring this to a boil, now add in the tamarind pulp cook for 3 minutes undisturbed.
6. Add the washed and cleaned fish pieces and reduce the flame to medium- low cook covered for 3- 4 minutes. 
7. check if the fish is cooked and for spices and salt.
8. Garnish with corriander leaves and keep covered for 10-15 minutes for the flavours to develop.

COOKS WISDOM

TIP 1

1. Tomato onion base can be made ahead and used for any curry as a base. This works handy and you can even spice this up and store in the refrigerator for upto 3-4 days.

TIP 2

2. Amma used king fish for this recipe, any variety of fish with less bones can be used to make this curry.

TIP 3

3. You could even add 3-4 tbsp of coconut milk or coconut paste to make this curry even rich.

TIP 4

4. Make sure to use freshly chopped garlic its one of those main ingredients to make the perfect fish curry.

RELATED RECIPES

Gobi Manchurian Dry Recipe | Cauliflower Manchurian

$
0
0

Gobi Manchurian Dry Recipe
Gobi (Cauliflower) Manchurian, when it comes to Vegetarian starters apart from Paneer the other favorite has to be Gobi manchurian. Its juicy, soft and such an appetizing starter. I love it both ways juicy and crispy be it a dry or semi dry version. A perfect dish for a party or potluck, I remember making this dish for a potluck with friends and everyone loved it so much and got over in no time. That's when I realized I had to post this recipe on my blog, so here it is. Its easy to make and in less than 40 minutes u can make this recipe (2-3 people) and may be under an hour for more number of people. i love to make recipes such as this at home rather than eating out, one good reason is homemade tastes so good and you can control the use of oil and you can pick fresh ingredients and make them at home. Secondly in restaurants they add too much food color and MSG (ajinomoto) for taste but the recipe I am sharing with you today does not have any artificial color or additives. Trust me this dish tastes much better when you make it at home, also I have not used any baking soda in the marinate used to fry the gobi. 


Restaurant Style Gobi/ Cauliflower Manchurian
Restaurant Style Gobi/ Cauliflower Manchurian 

How to make Gobi machurian
How to make Gobi manchurian

GOBI MANCHURIAN | CAULIFLOWER MANCHURIAN RECIPE 

Recipe Source - Own
Prep time - 10 mins
Cook time - 20 mins
Serves - 2-3 generously
Serving suggestion  - as a starter or side to fried rice/ pulao

Ingredients

Onion - 1 large, quartered
Green capsicum - 1/2, quartered
Spring onions - 3 tbsp chopped
Garlic - 4 pods finely chopped
Ginger - 1" piece finely chopped
Green chilli - 1 finely minced
Red chilli flakes - 2 tsp (adjust according to spice tolerance)
Soy sauce - 1 tbsp
Chilli sauce - 1 tbsp
Tomato sauce - 1 tbsp
Sugar - 1 tsp
Vinegar - 1 tbsp
Salt - as required
Oil - 1 tbsp

To marinate 

Cauliflower florets - 15-20 (partly cooked)
All purpose flour/ maida - 1/2 cup
Cornflour - 1/4 cup
Salt - 1/4 tsp
Pepper powder - 1 tsp
Soy sauce - 1 tbsp
Water - as required to make a medium thick batter 

Method

1. In a saucepan heat 4 cups water, once it comes to a boil add in the cauliflower florets and cook for 3 minutes until the florets change color and partially cooked (around 60% cooked)
2. Remove the florets using a slotted spoon and discard the water. Let the florets cool down to room temperature.
3. Prepare the marinate using all purpose flour, salt, soy sauce, pepper and mix well to a medium thick batter. Pour able consistency.
4. Heat oil in a pan for deep frying, once it is hot, add the florets to the marinate and coat them equally. 
5. Drop 4-5 pieces of the battered florets in hot oil and cook for 2-3 minutes turning sides.
6. Remove the fried florets using a slotted spoon and drain excess oil in kitchen towel.
7. Repeat the process for all cauliflower florets until done.
8. Now prepare the base for manchurian. Heat a kadi/ wok with oil add in the minced ginger and garlic give it few seconds to release aroma, don't burn them. 
9. Tip in the green chilli and onions saute until onions are half done. Now add the capsicum and saute for a minute, add in the sauces - chilli sauce, tomato sauce, soy sauce, sugar and vinegar, also the water. Mix well and cook for 2-3 minutes.
10. Add the chilli flakes and the batter fried cauliflower mix well.
11. Garnish with spring onions and serve hot.


COOKS WISDOM

TIP 1

1. Soy sauce, tomato sauce and chilli sauce all have added salt so be careful while adding salt.

TIP 2

2. Adding sugar and vinegar give a lovely taste to this recipe. So do not skip this. 

TIP 3

3. all the added sauces give color to this recipe so food color is not used.

TIP 4

4. Make sure to add minced ginger, garlic and green chilli they add amazing flavor to this recipe. Use pink onions and you can use or skip capsicum or bell pepper. 

TIP 5

5. Use flaked red chilli for additional spice. The recipe above gives a mildly spicy gobi manchurian. 

TIP 6

6. If you want the gobi manchurian to be super crispy make sure to double fry them. 


Gobi Manchurian / Cauliflower Manchurian - Easy Veg starter recipe


RELATED RECIPES

GOBI 65
VEG MOMO
BAKED SAMOSA
ROASTED MAKANA
ROASTED CORN ON THE COB
PANEER CUTLET
PANEER CIGARS
POTATO WEDGES

DHOKLA

Easy Garlic Knots | Garlic Dinner Rolls | Eggless Bread Recipe

$
0
0
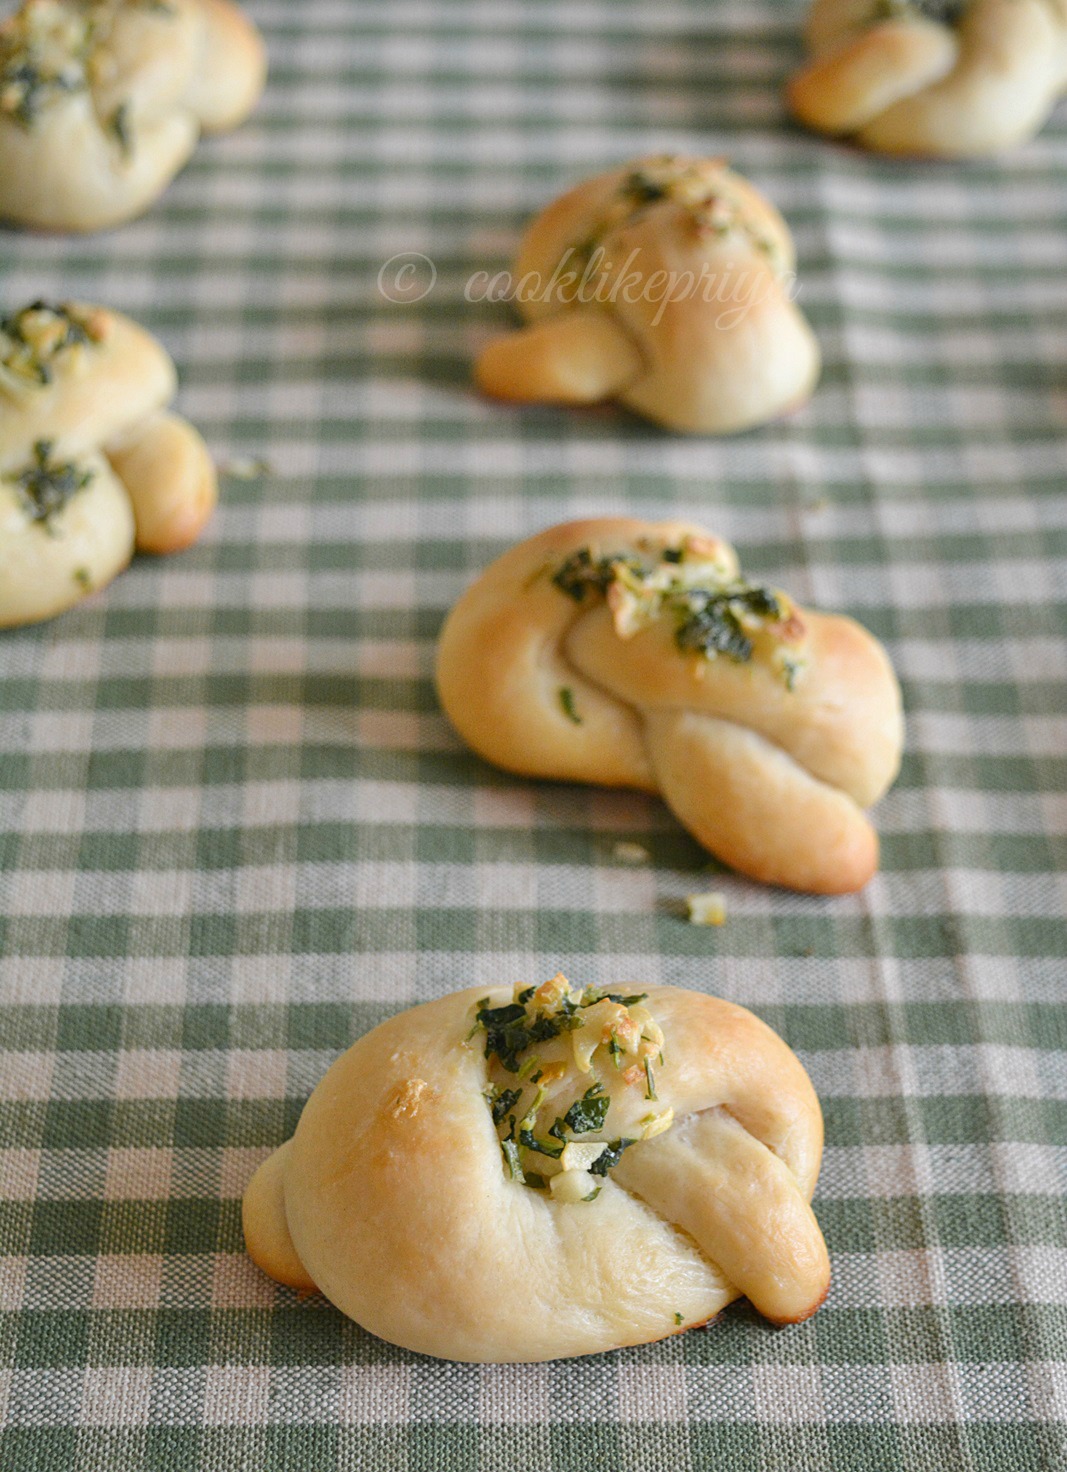
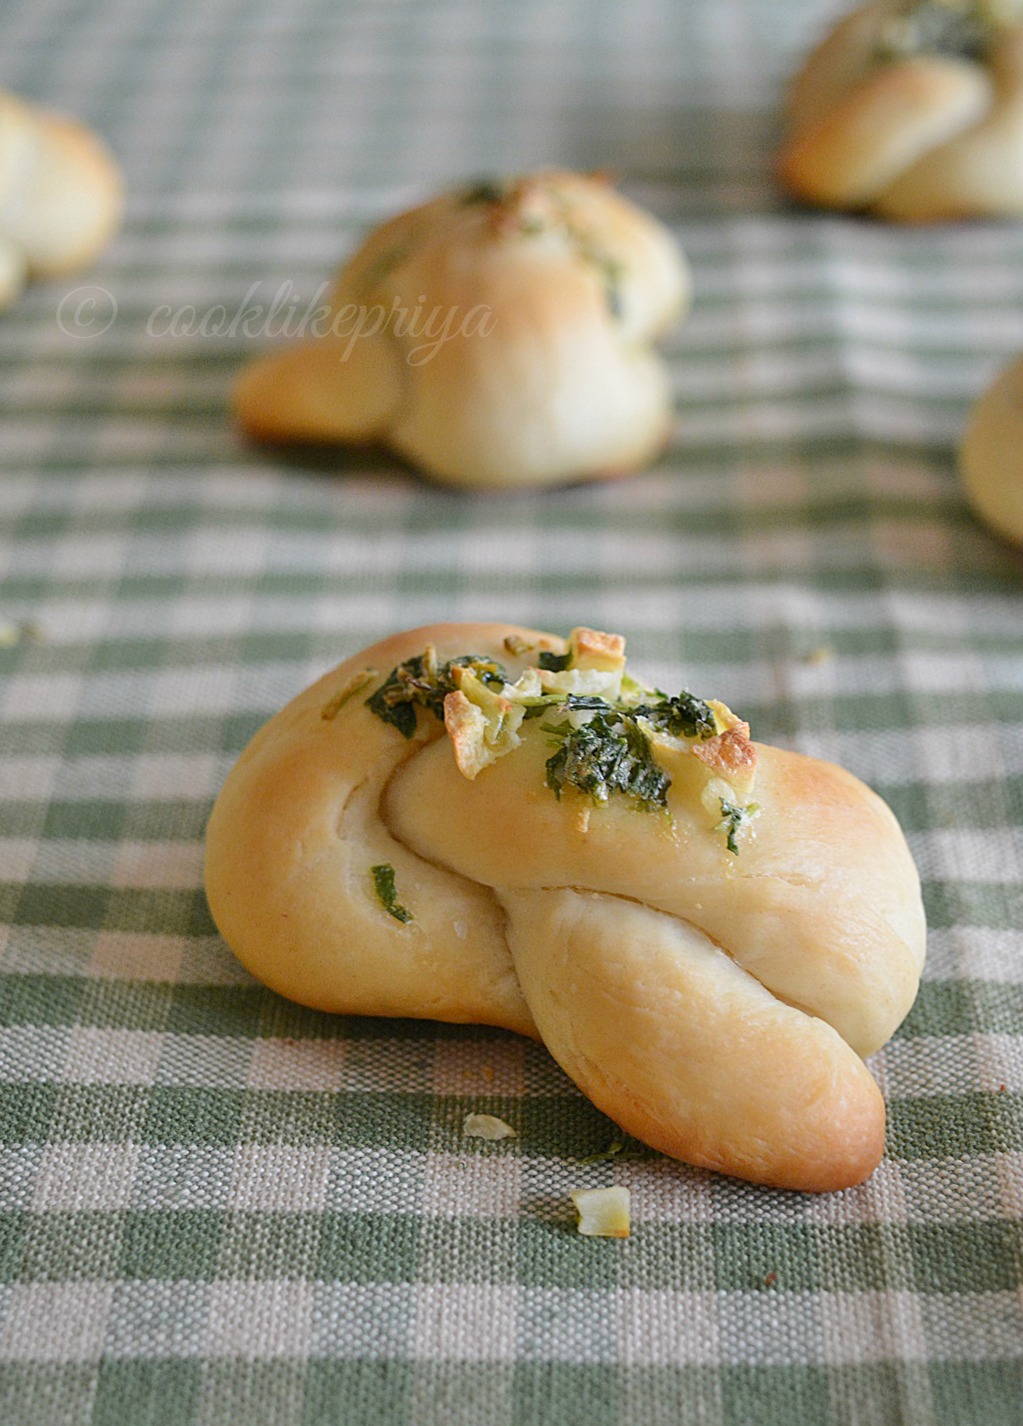
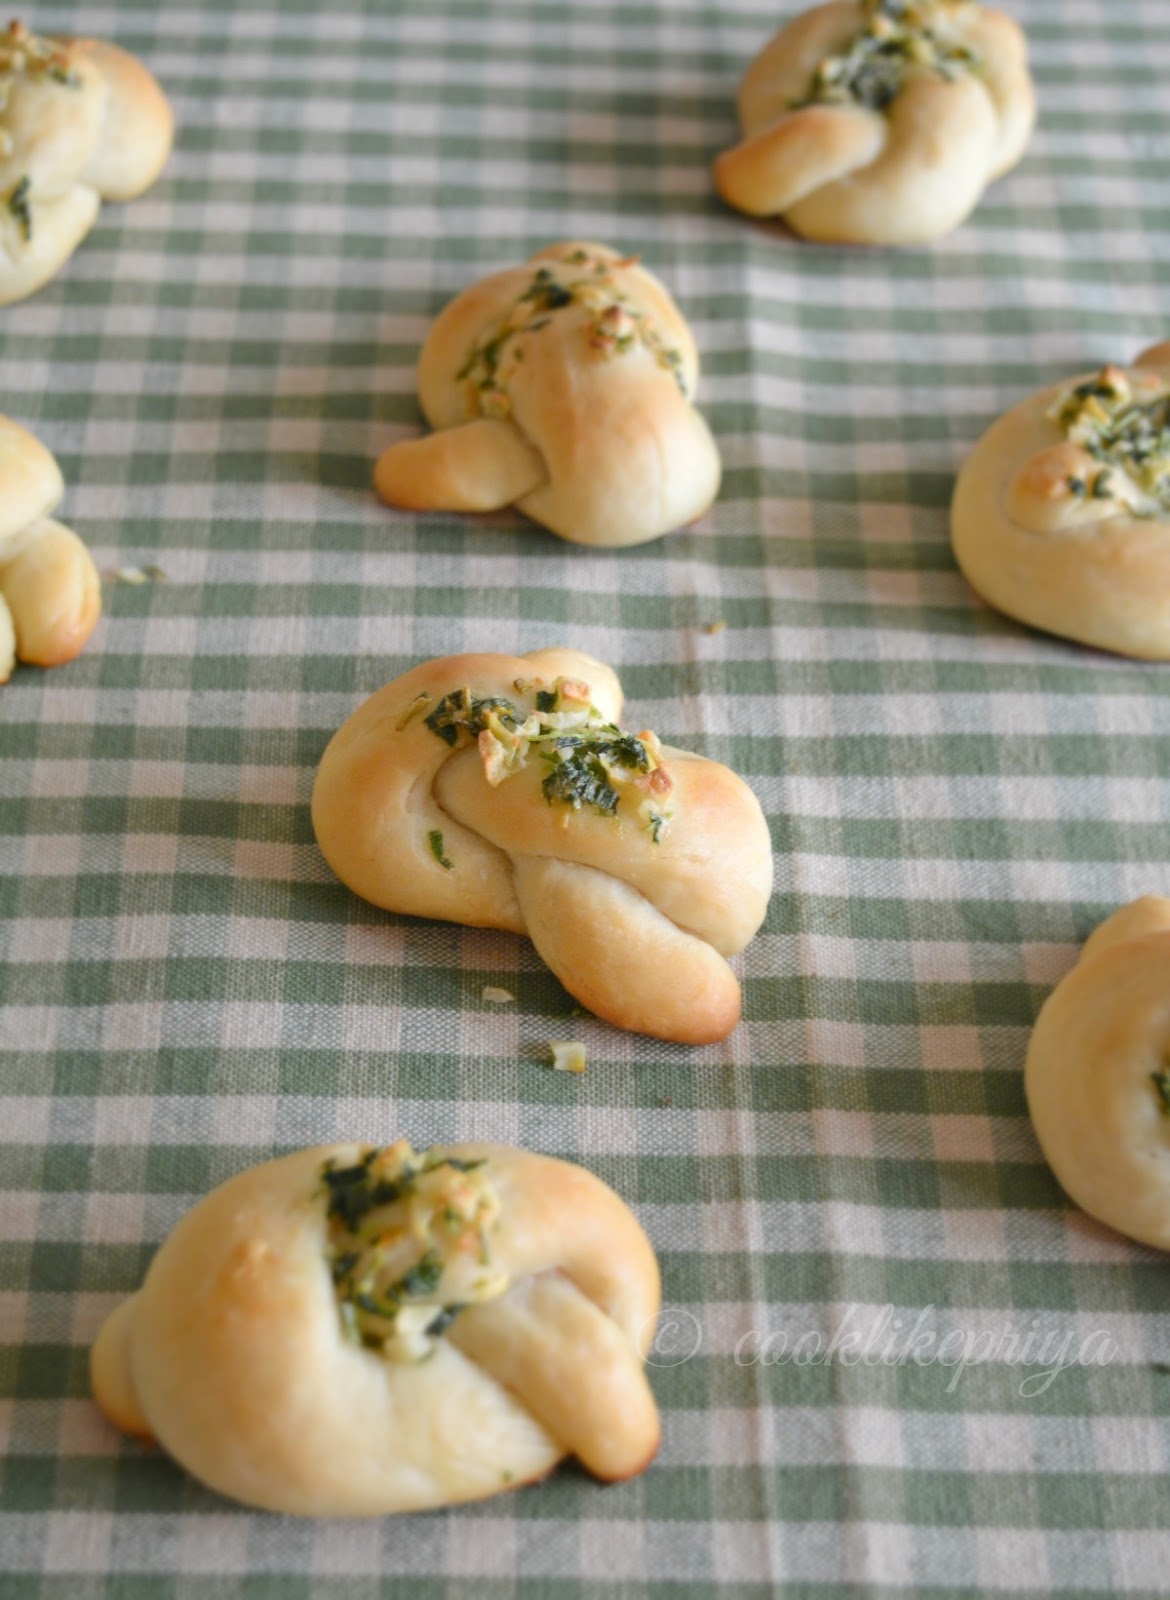
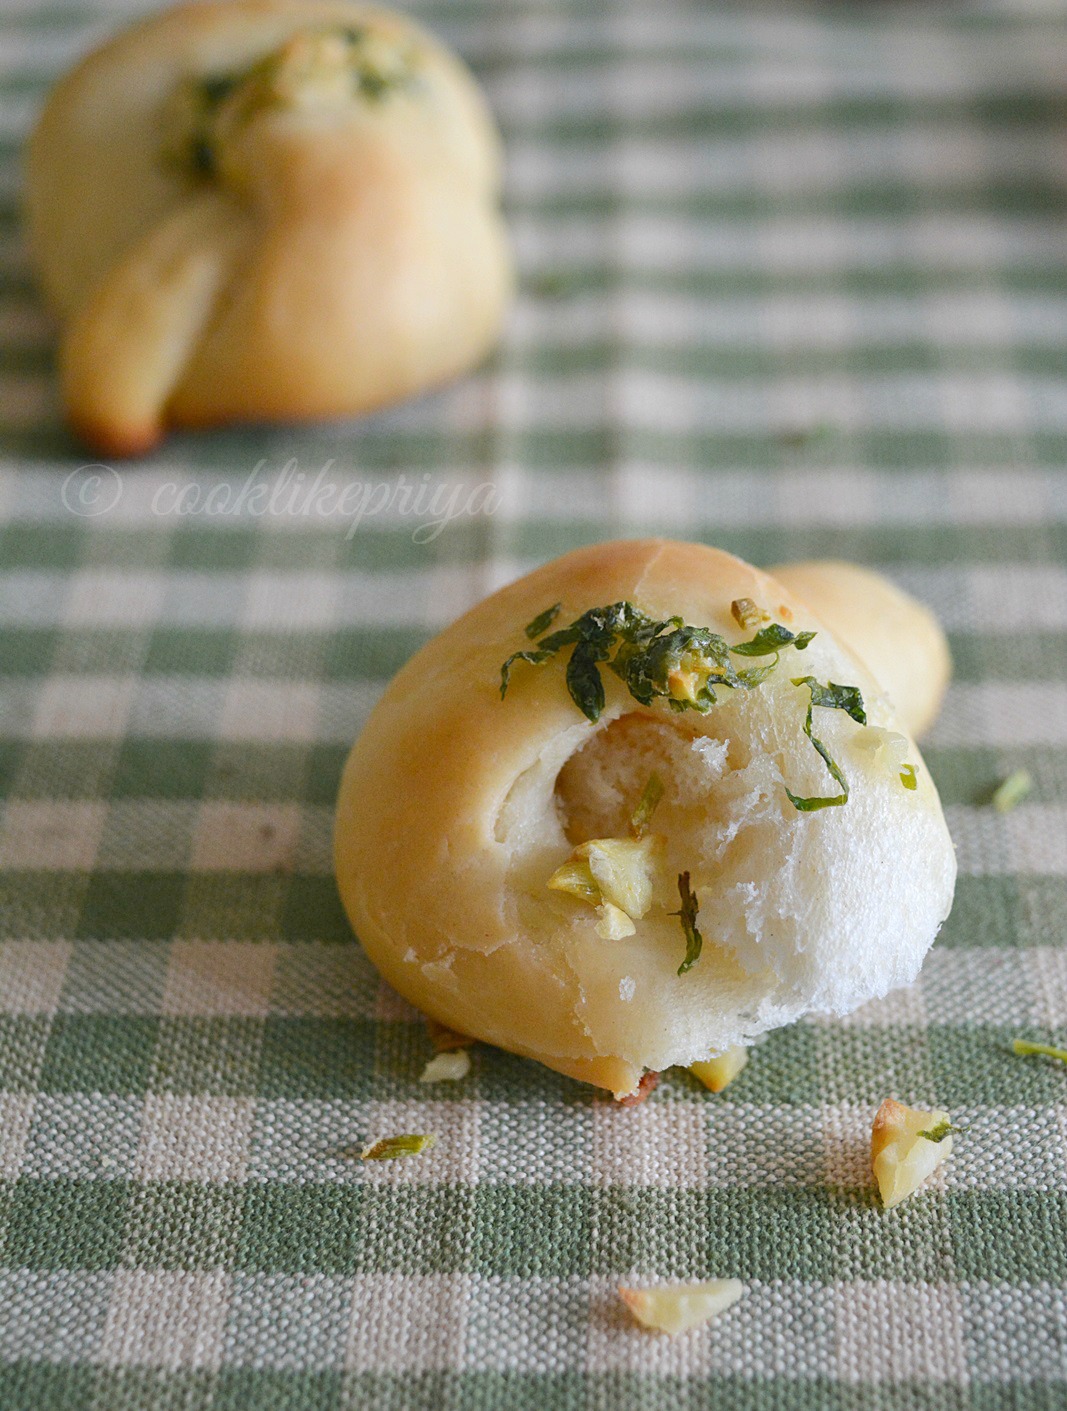
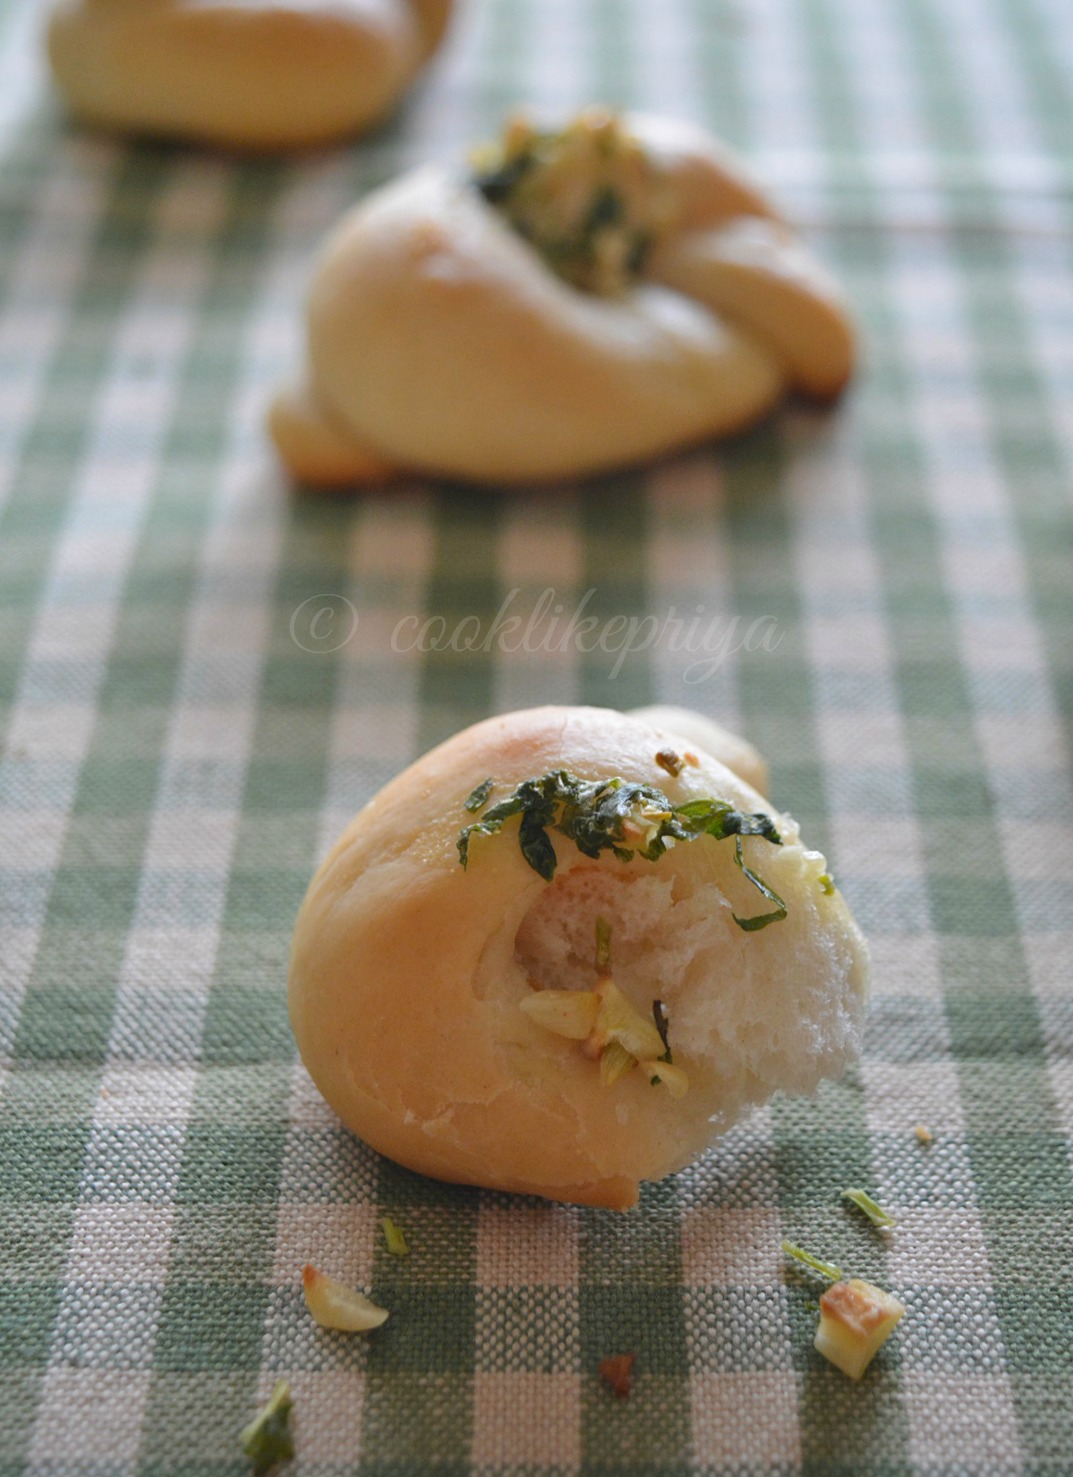
Garlic Knots Recipe
Garlic Knots Recipe 
Off late I have been baking a lot, call it stress, the cold weather or the blessing of a bigger oven, I am just loving the whole therapeutic effect of baking. I am actually loving the kneading part and i do everything with hand and there is a joy of making bread from scratch and using hands. Although I love to own one of those fancy KA ;-) but for now let me just rant my stuff with my hands and gluten dough. The other day when I posted a picture of these garlic knots on my facebook page I got a comment from someone says extra walking and extra calories, I mean being Indians we don't do bread daily but once in a while its ok. I get that it is calorie high but so are most Indian sweets, naans and don't forget those fried mixture that you sneek having with your coffee or those biscuits that are meant to be dunked with your coffee. Bring Indians we go love our gluten, carbs and our sweets don't we. So lets quit complaining have a piece of bread and go for your walk. Enough of my rant now and lets move on to the recipe.


Garlic Dinner Rolls
Garlic Dinner Rolls


Eggless Dinner Rolls Recipe


Garlic Dinner Rolls
Garlic Dinner Rolls
EASY GARLIC KNOTS | GARLIC BREAD | EGGLESS BREAD RECIPES

Recipe Source - adapted from here

Prep time - 10 mins, 1 hr for first rise & 30 mins for second rise
Bake time - 15 mins
Makes - 10-12 medium sized knots

Ingredients 


Warm water -3/4 cup

Fast active yeast - 2 tsp ( 1 satchet)
All purpose flour / maida - 1 and 3/4 cup
Salt - 1 tsp
Sugar  - 1 tsp
Olive oil - 1 tbsp 

Garlic Butter Coating


Garlic - 2 medium pods, chopped

Corriander & mint leaves - 2 tbsp finely chopped
Butter (unsalted) - 2- 3 tbsp


Method


1. In a mug add 3/4 cup water and microwave it for 10 seconds, entry the contents of the yeast sachet and sprinkle to the warm water along with the sugar, leave it for 5 minutes undisturbed.

2. After 5 mins you will find the mixture to me slightly foams mix well and set aside for 10 mins to foam up. 
3. In a large mixing bowl add in the flour, salt and olive oil, make a well in the center and add in the yeast mixture.
4. Combine the dough and mix well, drop into a floured work surface and knead the dough for a good 10-15 minutes using your hands until the dough is soft and pittable. 
5. Grease the mixing bowl with more olive oil and transfer the dough to the mixing bowl and drizzle more oil on top, cover with a cling film and leave it in a warm spot to double. 
6. I usually switch on the oven light & leave the dough to rise in the oven without the setting any temperature. But you can do it which ever method best suits you.
7. Once the dough doubles, transfer it to a work surface and knead for 5 minutes. Divide the dough into two parts and into 4-6 parts each and roll each part like a rope and tie a knot. 
8. Meanwhile prepare a baking tray by spraying some cooking spray and resting these knots on the tray give a good 2" space between the knots.
9. Once all the knots are done, spray some more cooking spray on them and cover with a damp cloth/ cling film and let them rest in a warm spot for the second rise.
10. Once they are risen, preheat the oven to 400F and remove the cling film and bake them for 12-15 minutes, removing them half way to pour the garlic butter mixture.
11. In a skillet add butter once it is melted add in the garlic and cook for 30 seconds add the chopped corriander and mint and switch off. 
12. Pour this over the half baked rolls and bake for 5 minutes. 
13. Once the rolls turn golden switch off the oven and remove the baking tray let it sit on a cooling rack for 10 minutes.

Serve warm and enjoy.


Eggless Bread Rolls Recipe


Garlic Dinner Rolls
Garlic Dinner Rolls


Eggless Garlic Knots Recipe
COOKS WISDOM

TIP 1


1. I used sugar while proofing the yeast a little change I made to the original recipe. Also I cooked the garlic in butter and added them mid way while the rolls cooked. The original recipe says to add butter garlic in the end after the rolls are baked.


TIP 2


2. To find warm spot to proof dough I usually turn the oven light on and leave the mixing bowl in the oven without the temperature until it doubles in volume. 


TIP 3


3. To proof yeast you need to warm water and sprinkle the yeast on the warm water make sure that it is not hot to tough but warm. You can test it but dipping your finger in the water and placing it on your wrist it must be warm and not burning.


TIP 4


4. I's prefer to slightly cook the garlic to avoid the raw taste. 


TIP 5


5. These garlic rolls can be stored in an air tight container on the counter top for upto 5 days, and can be warmed for 10 seconds in the microwave before serving or freeze them to be enjoyed later.


RELATED RECIPES

HOT CROSS BUNS
ZEBRA BREAD
BANANA DATE BREAD
FIG BREAD
CATERPILLAR WORM BREAD
CINNAMON ROLLS

South Indian Lemon Rice | Nimmakaya Pulihora

$
0
0
Lemon Rice | South Indian Lunch Box recipe
Lemon Rice / Lime Rice is a tangy delicious rice that is quick and easy to do. With just left over rice this can be made in a jiffy. Although I am never a big fan for lemon rice, neither my husband I never made an effort to make lemon rice and post a recipe here. But since this is one of the most famous South Indian mixed rice recipes and also being my Dad's favorite I wanted to post it here on my blog. Usually appa loves to have lemon rice with masala vadas and appalam but you can pair it with any combination that you like.


Lime Rice | Lemon Rice | Nimmakaya Pulihora


LEMON RICE | LIME RICE | NIMMAKAYA PULIHORA RECIPE

Recipe Source - Own
Serves - 4-5 people
Prep time - 5 mins
Cook time - 5 mins

Ingredients

Cooked Rice - 2 cups
Oil - 2 tbsp
Mustard seeds - 1 tsp
Urad dal - 1 tsp
Channa dal - 3 tsp
Green chilli / dry red chilli - 2 torn
Curry leaves - 1 spring around 8 leaves
Ginger - 1/2 inch piece finely minced
Turmeric powder - 1/3 tsp
Lemon juice - from 1 medium sized lemon
Salt - to taste

Method

1. Make sure that the rice is fluffy and grains are separate, this consistency is very important you can use any long variety rice or the usual boiled rice variety. Make sure rice is in room temperature and not hot.
3. Squeeze the lemon juice and discard the seeds and add turmeric and salt to this. Mix well set aside.
2. Once the rice is ready, take a skillet and heat it up, add the oil once hot splutter the mustard seeds, urad dal, channa dal, curry leaves, green/red chilli, curry leaves, ginger and stir fry them well for 30 seconds. 
3. Switch off and add the lemon juice (make sure to remove the seeds) and turmeric powder mix. 
4. Once the base is ready pour it over the rice and mix well so that all the rice is flavored with the lemon base.
5. Garnish with corrinader leaves and serve.


COOKS WISDOM

TIP 1

1. The rice has to be fluffy and perfectly cooked. The grains need to me separate and also at room temperature.

TIP 2

2. Make sure that the lemon is fresh and not too sour.

TIP 3

3. Usually we use boiled rice but you can always use basmati rice or any long grain rice variety.

TIP 4

4. Lemon rice usually requires a little more oil than usual, it adds great flavor and taste. You can use any oil variety as per your taste. 


DELL VENUE TAB 7 REVIEW

My life with Dell venue tab has been a great journey and I have been writing to you with my experiences with Dell and all that it has to offer. Dell being a renowned company for laptops has ventured into the tablet market and delivering quality tablets to customers. I must thank Dell for giving me this opportunity to write about their product. Off late I find myself hooked on to the tablet than the laptop. I enjoy using the apps and carry it along with me where ever I go. Today I wanted to share my thoughts on the video quality and youtube experience. I am a huge youtube addict. I have subscribed to various youtube channels and I keep getting updates on recent videos, my interests are cooking, sewing, songs, music, baking and gardening. So youtube has been my go to since I don't know when. Using a tablet for my needs fits in so handy like I said browsing is a breeze through Dell and there are other features in Dell which seem a little compromised like camera, video quality and battery life. I hope Dell brings out the best in their future but if you are looking for a everyday browsing tablet then Dell offers its best. 


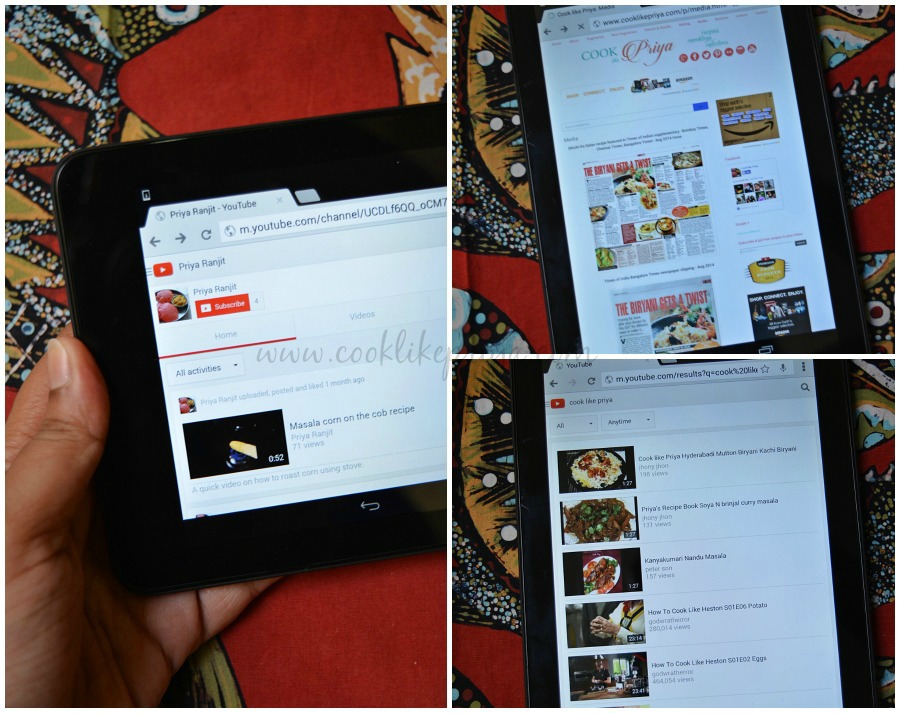
Checking out my youtube chanel in Dell Venue ;-)

Dell Venue Tab product details

Checking out Youtube with Dell
Dell Venue picks up 2G 3G & micro sim which a great news for people like me who love to carry a tablet along with them. Its great for navigation apps like google maps. I also find the connectivity to social apps like facebook & twitter quite good.

Conclusions & Ratings


Browsing speed - 4/5

3G Connctivity - 4/5
Video quality - 4/5
Sound quality - 3/5
Battery life - 2/5

My Overall ratings - 3 /5


To view my other review posts on Dell click the links below

Dell Review 1
Dell Review 2
Dell Review 3
Dell Review 4


RELATED RECIPES


TOMATO RICE

Aarai Keerai Masiyal | Tamil Brahmin Style Keerai Recipe

$
0
0
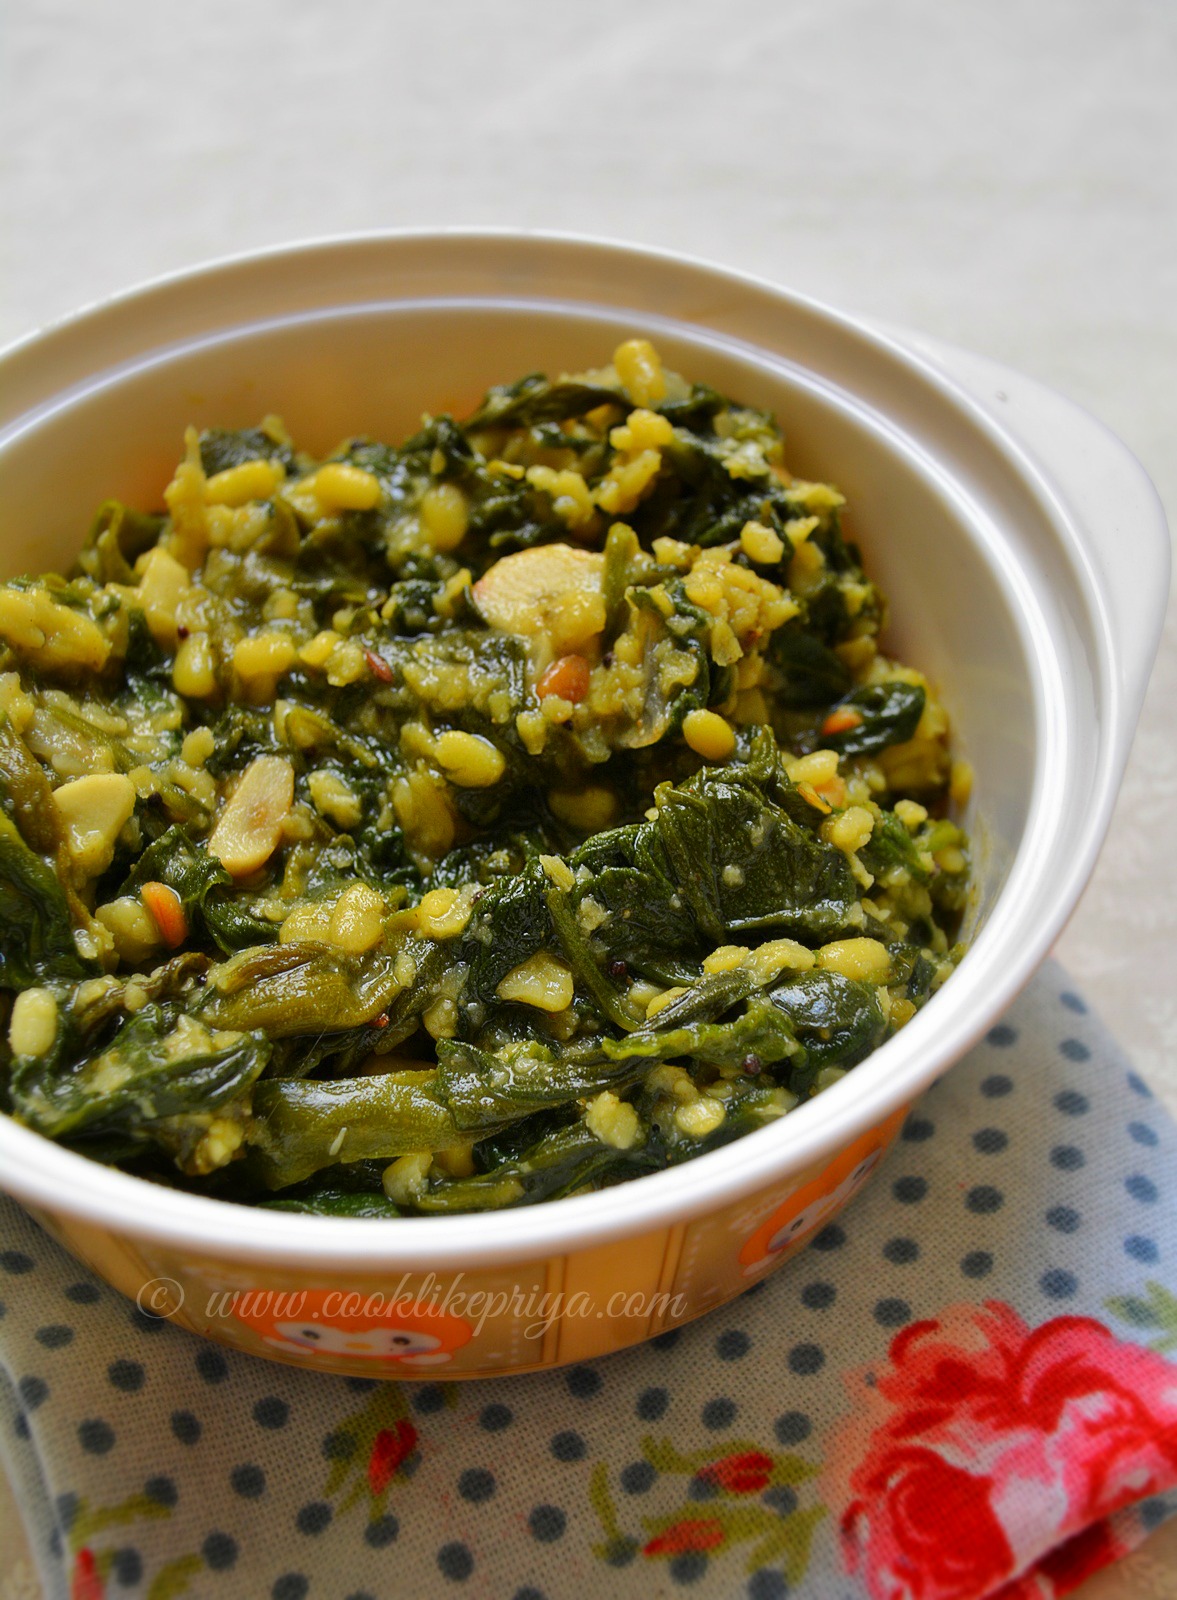
Aarai Keerai Masiyal
There can never be a day without keerai/ greens in my parents place. Amma loves vegetables and she always make sure that we get a dose of veggies as part of our everyday meals. I have picked this good habit of eating greens from her. Be it veg or non veg recipes there will always be vegetables as sides in the form of poriyals or frys. I love Amma's version of keerai she makes so many varieties that I never fail to miss out when ever I come home and also share them with all of you here. This Arai keerai masiyal is a mix of dal and greens together with a lovely flavour that it can be made as a main curry to go with white rice and sides like poryial or fry. 


Tamil Brahmin Style Keerai Recipe

AARAI KEERAI MASIYAL RECIPE | KEERAI MASIYAL RECIPE


Recipe Source -Amma

Serves - 5-6 
Prep time - 10 mins 
Cook time - 10 mins
Serving suggestion - along with white rice, appalam and any poriyal

Ingredients


To Pressure cook


Moong dal - 1/2 cup (soaked for 10 mins)

Shallots - 3-4 / 1/2 big onion chopped
Garlic cloves small - 3-4 chopped
Green chillis - 2 slit
Turmeric powder - 1/4 tsp
Jeera/ cumin - 1/2 tsp 
Tomato  - 1 large chopped

Other Ingredients


Aarai keerai - 1 bunch, chopped

Salt - to taste
Oil - 2 tsp
Mustard seeds - 1 tsp
Urad dal - 1 tsp 
Hing / asefotedia - 1 pinch
Red chilli (dry) - 2 no

Method


1. Add all ingredients mentioned under to pressure cook in a pressure cooker for 3 whistles and switch off let the pressure gradually settle. 

2. In a sauce pan add 1 cup water and add the chopped arai keerai (greens) and let it cook until it wilts. Remove the leaves and add it to the dal mix. 
3. In a kadai heat oil and temper the mustard seeds, hing, urad dal, red chilli and pour over the keerai masiyal. 
4. Mix well add salt and taste before serving. 


COOKS WISDOM


TIP 1


1. All keerai / greens can be used to make this masiyal. If using fenugreek or drumstick leaves do not chop the leaves. 


TIP 2


2. You can reduce the amount of dal as per your preference and use any dal variety to make this masiyal.


TIP 3


3. For little tanginess you 1 tsp of tamarind paste and cook the masiyal further for 3-4 minutes and switch off.


MY FINAL THOUGHTS ON DELL VENUE TAB 7

Over the past few months I have been sharing my experience with Dell Venue tab 7 and today I have to bid adieu to the tab that gave me company all these days. My journey with Dell has been mixed sometimes good and sometimes not so good. But through it all I have learned to understand all the best features that Dell offers through their 7" venue tab. I will be sharing my final thoughts like and dislikes with Dell Venue in today's post. 

KEY FEATURE OF DELL VENUE TAB 7 INCH

INTERNET - Supports Wifi, 2G & 3G network
CAMERA - 3.15 MP, 2048 x 1536 pixels
OS - Android OS, v4.2.2 (Jelly Bean)
MEMORY - 16 GB, 2 GB RAM, microSD, up to 32 GB
WEIGHT - 234 g (8.25 oz)


Dell Venue Tab 7 inch

Dell Venue blogger review

MY FINAL RATINGS 

FEATURES - 4/5
BATTERY - 2/5
ANDROID APPS & OS - 4/5
CONNECTIVITY - 4/5
USABILITY - 5/5

Overall ratings - 3/5

PROS ON DELL VENUE

- Userfriendly
- Connectivity
- 3G 2G WiFi
- Internet browsing
- 7" size, handy

CORNS ON DELL VENUE

- Batter life
- Camera 
- Sound


I hope my reviews and thoughts on Dell Venue tab has helped you get a fair idea of the tablet and if you ask me if I would recommend it to someone, definitely yes for a first time tablet user. If you use any higher end tablets like ipad / apple products what Dell venue offers may not be up to par with the leading tablets but that does not mean that the Dell is any inferior. In terms of price and user friendly experience Dell is a great tablet that must be explored. With a 7" you sure can carry it along with you everywhere. Fits into any medium sized handbag and is definitely on the go. Hope this review is of use to you and help you decide on your decision to get a tablet.


Please note - all reviews thoughts, experiences, photographs shared concerning Dell are my own, I have taken care and time to understand the tablet on my own and with no external help.


To view my other review posts on Dell click the links below

Dell Review 1
Dell Review 2
Dell Review 3
Dell Review 4

Dell Review 5

RELATED RECIPES


VENDHAYA KEERAI KARA KUZHAMBHU
VENDHAYA KEERAI SAMBAR
METHI PULAO
SPINACH COCONUT RICE
RED SPINACH MANGO CURRY
SPINACH SHALLOTS STIR FRY
LOW FAT PALAK KOFTA CURRY
PALAK DAL
SPINACH TIKKIS
SPINACH CHICKEN- CHINESE

DRUMSTICK LEAVES PORIYAL

BHRAMI LEAVES THOVAYAL

Amma's Quick & Easy Fish Curry without Coconut | South Indian Fish Curry Recipe

$
0
0

Amma's Qick & Easy South Indian fish curry
Amma's Quick & Easy South Indian fish curry 
Its been some time that I had blogged, been busy with a house shift & I am taking things slow to settle down and I wanted to post one of Amma's fish curry which has been in draft for a while now. This curry is something I long for and she has so many varieties of fish curries that I have already posted recipes - Tamarind fish curry, Coconut fish curry, Mango fish curry and today I am sharing with you a quick & easy fish curry that does not call for any coconut. This is Amma's version of a quick fish curry that is so easy to make, perfectly flavored and is relished with white rice and poriyal. This was our lunch today and I happily clicked pictures to post on my blog ;-). How I wish I lay back and someone cook recipes for my blog :P but trust me this is not the case always. When I am home I make sure to request a list of recipes from Amma so that I can enjoy them and blog them too. 


Meen Kuzhambhu Recipe | Fish curry without coconut
MEEN KUZHAMBHU RECIPE | INSTANT FISH CURRY RECIPE

Recipe Source - Amma
Serves - 4-5 people
Prep time - 10 mins 
Cook time - 10-15 mins

Ingredients

To sauté & grind

Oil - 1 tsp
Onion - 2 big chopped
Tomato - 3 big chopped
Curry leaves - 1 spring

For the curry

Oil - 2-3 tbsp
Peppercorns - 5-6 
Fenugreek seeds - 8 no
Mustard seeds - 1 tsp
Curry leaf - 1 spring, 8 no
Small onions/ Shallots - 6 no
Green chilli - 2, slit
Garlic pods - 3-4 chopped
Tamarind - 1 lemon size ball with 1/2 cup water
Turmeric - 1/4 tsp
Jeera/ cumin powder - 1 tsp
Fish masala powder - 1 tbsp
Coriander powder - 3 tsp
Red chilli powder - 1 tsp
Salt - 1 tsp
Water - 1 cup
King fish - 500 gms / 1/2 kg

Method

1. In a wide pan heat oil and sauté the onions until transparent (around 2-3 minutes) and tip in the chopped tomatoes and curry leaves. Sauté for 3 minutes until mushy and fully cooked. 
2. Let this sautéed onions and tomato rest to come to room temperature. Purée them into a thick paste.
3. Add cumin, fish masala, corriander & red chilli powder and mix well set aside.
4. In the same pan, heat oil once hot add in the peppercons, fenugreek seeds, mustard seeds and give it few seconds to splutter, now add in the curry leaves, small onions, green chillli and garlic pod and sauté for 2 minutes.
4. Add in the ground paste with spices, along with salt and let it cook until thick and oil separates from the paste. Cook for about 3-4 minutes to reach this stage in meidum flame.
5. Add one cup water and bring this to a boil, now add in the tamarind pulp cook for 3 minutes undisturbed.
6. Add the washed and cleaned fish pieces and reduce the flame to medium- low cook covered for 3- 4 minutes. 
7. check if the fish is cooked and for spices and salt.
8. Garnish with corriander leaves and keep covered for 10-15 minutes for the flavours to develop.

COOKS WISDOM

TIP 1

1. Tomato onion base can be made ahead and used for any curry as a base. This works handy and you can even spice this up and store in the refrigerator for upto 3-4 days.

TIP 2

2. Amma used king fish for this recipe, any variety of fish with less bones can be used to make this curry.

TIP 3

3. You could even add 3-4 tbsp of coconut milk or coconut paste to make this curry even rich.

TIP 4

4. Make sure to use freshly chopped garlic its one of those main ingredients to make the perfect fish curry.

RELATED RECIPES

Chickpeas Coconut milk Curry | Chapati side dish recipe

$
0
0

Chickpeas  Channa Coconut milk Curry
Chickpeas Coconut milk Curry
Somedays I am all up and cooking 3-4 dishes in a row, other days I really drag myself to cook a decent meal. But today I was full of energy and made this delicious Coconut milk chickpeas curry, if you know me you know that I love chickpeas and I cannot get enough of them. But on the otherside my husband does not like chickpeas whatsoever but that does not stop me from cooking them. Today I didn't pack lunch for him so I ended up making this curry. That said I love to soak chickpeas overnight and boil them fresh rather than the canned ones. But once in a while not bad to enjoy beans that are tinned. Nevertheless this is one easy curry to make with basic ingredients in your pantry and goes along well with soft hot chappathis and can be paired with pulao or white rice too. 


Channa Curry - Side dish recipe for chapathi
CHICKPEAS COCONUT MILK CURRY | CHANNA CURRY FOR CHAPATHI

Recipe Source - Own
Prep  time - 10 mins
Cook time - 15 mins
Serves  - 2-3 generously
Serving suggestion - Along with chapathi, roti or rice/ pulao

Ingredients

Chickpeas/ channa - 1/2 cup soaked overnight & pressure cooked for 5 hisses
Oil - 1 tbsp
Bay leaf - 1
Cardamom - 1
Clove - 1
Cinnamon stick - 1/2 " piece
Fennel seeds - 1/2 tsp
Onion - 1 large finely chopped
Tomato - 2 medium mashed
Green chilli - 2 long slit
Ginger garlic paste - 2 tsp
Turmeric powder - 1 pinch
Coriander powder - 4 tsp
Jeera/ cumin powder - 1 tsp
Garam masala - 1/4 tsp
Coconut milk - medium thickness - 1/4 cup
Salt - to taste
Coriander leaves - 1 tbsp to garnish, chopped

Method

1. In a wide pan heat oil add in the whole spices - bay leaf, cinnamon, cardamom, clove and fennel seeds, once they release aroma add in the onions and green chilli.
2 Sauté for 2-3 minutes until they are cooked and fully transparent. Add the ginger garlic paste and let it cook until the raw smell goes away (2-3 minutes)
3. Add in the mashed tomato and add 1/2 salt and cover the lid, let it cook for 2 minutes until mushy.
4. Now add all the spices, turmeric, coriander, cumin and mix well. Now the base of the curry is thick add the pressure cooked chickpeas and water (1/2 cup).
5. Cover the lid and let it cook for 3-4 minutes. Now add in the coconut milk and reduce the flame to medium-low and cook for 3 minutes covered.
6. Check for salt and spices, garnish with coriander leaves, garam masala, give it a good mix and switch off.
7. Cover with lid for 10 minutes and later serve it with rice or chappathi.


Channa / Chickepeas Curry Recipe
COOKS WISDOM

TIP 1

1. I usually soak the chickpeas overnight (12 hrs) and pressure cook them the next day with just water (1/2 cup chickpeas I add 1 cup water) for 5 hisses/ whistles. Some people add salt while pressure cooking but I don't this lets the chickpeas cook well.

TIP 2

2. You can alternately purée the tomato and add this to the curry base. 

TIP 3

3. You could add cubes potatoes to this curry if you have picky eaters who don't like chickpeas/ channa.


RELATED RECIPES

CHOLE MASALA (BHATURE SIDEDISH)
CHICKPEAS PULAO
CHICKPEAS SALAD
CHANNA KURMA

KERALA KADALA CURRY
POTATO KURMA
VEG KURMA 
BOILED EGG KURMA
PANEER KURMA

Paruppu Keerai Poriyal | Spinach Greens Stir Fry with home grown greens

$
0
0


Paruppu Keerai Poriyal Recipe

Greens (Keerai) are a staple in our house, Amma made sure that we have variety of them. I have made efforts to document all the different kinds of keerai recipes in my blog. I remember back when I was young I was never fond of greens but now with all the knowledge of how good they are for your health I have started to change my food habits and add greens to meals or salads. Taking about salads I have found this new interest to salads and dressings and make variety of salads as a dinner meal. I will soon make efforts to post salad recipes. I find myself enjoying salads more than regular food, I find them light filling and my stomach feels so relaxed the next day. Its definitely a tummy cleanser and great if you are someone looking to lose some weight. Comment below if you would love to see salad recipes on my blog :-).


Freshly harvested Spinach leaves
Amma has fond this new passion to grow vegetables and fruits and the pictures shared here of greens are home grown and we had a good harvest of greens after the rains :-) I almost saw leaves multiply. Ever since I have seen this my hands are itching to grow greens at home. I hope share my experiences with all of you. Wish me luck ;-)


PARUPPU KEERAI RECIPE

Recipe -Amma
Prep time - 5-8 mins
Cook time - under 5 mins
Serves - 2-3 people
Serving suggestion - as a side for rice and curry

Ingredients

Spinach leaves - 2 huge bunches
Oil - 2 tsp
Mustard seeds - 1 tsp
Urad dal - 1 tsp
Dry red chilli - 1
Curry leaves - 2 torn
Garlic - 2 ponds chopped
Shallots - 5 chopped
Moong dal - 2-3 tbsp soaked for 15 mins
Salt - to taste
Cumin powder - 1/2 tsp

Method

1. In a large pan heat oil and splutter the mustard seeds, urad dal, curry leave, dry red chilli and garlic sauté for 30 seconds add in the shallots and cook for few minutes until they turn transparent.
2. Now add in the spinach leaves and cover with a lid cook for 2 minutes until the leaves completely wilt and cook in their own juices.
3. Add in the soaked moong dal, cumin powder and salt, give it a good stir.

Switch off and serve as a side for rice.

Keerai poriyal Tamilian style
RELATED RECIPES
 
VENDHAYA KEERAI KARA KUZHAMBHU
AARAI KEERAI MASIYAL
VENDHAYA KEERAI SAMBAR
METHI PULAO
SPINACH COCONUT RICE
RED SPINACH MANGO CURRY
SPINACH SHALLOTS STIR FRY
LOW FAT PALAK KOFTA CURRY
PALAK DAL
SPINACH TIKKIS
SPINACH CHICKEN- CHINESE
DRUMSTICK LEAVES PORIYAL
BHRAMI LEAVES THOVAYAL
 

Tiramisu Birthday Cake for Husband | Tiramisu layer cake | Easy Tiramisu dessert cake

$
0
0
Tiramisu Dessert Cake Recipe
Birthday's are always a special day for us. Ever since childhood we have cut cakes, shared gifts and cook up a feast at home. Coming from a family that always celebrated birthdays, my husband on the other hand never remembers having a cake for his birthday. This came as a shock to me :-) during the initials days that we were getting to know each other. How can someone not celebrate their birthday without a cake? however his birthdays have never been the same ever since we got together. Every year I make sure to whip up something special for him, but over the years his expectations and ideas of a birthday cake has only become complicated. Usually I am this type who plans special cakes months ahead, since last year I have become a last minute baker. Blame it totally on my husband's expectation of a cake :P. Talking about celebration I do have to admit that my absence of blog also meant that I missed my 3'rd blog anniversary, I did even get emails from some really sweet followers who asked me about my blog anniversary which was on 25'th June 2015. I felt really guilty for not celebrating my blog anniversary and thought I'd combine my husbands birthday and make this Tiramisu cake. 

Tiramisu is an Italian dessert made with mascapone cheese, whipped cream and layered with coffee soaked lady finger biscuits. There are two versions to make the mascapone filling - one using eggs yolks and one without. Since I made the lady fingers at home (using eggs), I did not use the egg version of mascapone. 
ps. Do not mind my dark and gloomy pics, my husband cut the cake late evening and blame it on the dull weather that day. 


Tiramisu Layer cake Recipe | Tiramisu Cake Recipe

Tiramisu layer cake
Tiramisu layer cake

Lady finger recipe | Tiramisu lady fingers recipe

LADY FINGER RECIPE | HOW TO MAKE TIRAMISU LADY FINGERS

Recipe Source - JOB slightly modified
Prep time - 15 mins
Bake time - 8-9 mins
Makes - 25 ladyfingers

Ingredients

Large eggs - 5
Fine granulated white sugar - 2/3 rd cup
Vanilla extract - 1 tsp
Cake flour - 1 cup 
Salt - 1/3 tsp

Method

1. Line a cookie sheet with parchment and prepare a icing bag with a round nozzle (3 cms) and set aside.
2. Separate the egg white and yolk in two separate bowls. Cover with a cling wrap and set aside for it to come to room temperature.
3. Start beating the egg yolks with 1/3 cup sugar using a electric whisk in high speed until it turns pale yellow (8-10 mins). Tip in the vanilla and cake flour to the yellow mixture but do not mix it yet.
4. Beat the egg white with the remaining sugar in medium speed for 5 minutes until soft peeks are formed. Fold the egg white mixture to the yellow mixture gently until combined.
5. Pre-heat oven to 400F/ 200C for 10 minutes in the mean time fill the icing bag with the batter and pipe the cookie batter onto the parchment in 3 inch long strips giving 1 inch spacing between the cookies.
6. Once this is ready bake in center of oven for 8-9 minutes. You will notice the edge of the cookies turning brown. 
7. Switch off the oven and remove the baking tray, let he cookies cool for a minute and start removing them from the parchment quickly using a spatula. Do not miss this step else the cookies will get stuck to the parchment. 
8. Let all the cookies cool down completely. You can refrigerate or freeze them until use.


Tips 

- I felt the cookies had more egg taste to them, increase the vanilla extract to 2 tsp.
- Make sure that u remove the cookies from the parchment after a minute else they will get stuck and will be hard to remove.
- I freezed my cookies for 2 days before use. Do it ahead of time. These lady fingers can be used to serve icecream or make any kind of desserts.
- I did not use the cookies to layer the cake, you can use it if you want to make tiramisu as a dessert. 
- If you do not have cake flour use 1 cup plainflour minus 1 tbsp and replace the 1 tbsp with cornflour, mix the flour well. 

Tiramisu Celebration cake recipe

Tiramisu Layer cake recipe


TIRAMISU LAYER CAKE RECIPE | TIRAMISU DESSERT CAKE RECIPE

Recipe - Own
Makes - 6" tall cake with 3 layers
Prep time - 15 mins
Bake time - 
Assembly time - 30 mins

Butterless Vanilla Sponge cake recipe 

Ingredients

Eggs - 3 large (white & yolk separated)
Granulated sugar - 1 cup
Vanilla extract - 2 tsp 
All purpose flour - 1 cup
Baking powder - 1 tsp
Milk - 1/2 cup ( I used 2%)

Method

1. Grease a 6" cake pan or 8" cake pan with spray (or butter) and dust with flour roll the baking tin to spread the flour evenly and tap of the excess. Pre-heat oven at 350 F for 10 minutes.
2. Separate the egg whites and yolk into two bowls. In another bowl combine the flour and baking powder and mix well for the baking powder to have spread evenly.
3. Beat the egg whites until soft peaks in medium speed for 3-4 minutes. Gradually add sugar little by little and beat until stiff peaks form for 3-4 minutes. 
4. Now add one yolk at a time and beat for a minute for a minute or so. Add in the vanilla and combine.
5. Alternately add in the flour and milk and beat until combined after each addition. 
6. Quickly tip the cake batter in the baking tin ( do not delay as you want the airy batter), bake in center of oven for 25 mins until a skewer inserted in center of the cake comes clean.
7. Once done remove the cake from the oven and with the tin let it sit on the cooling rack for 15 minutes.
8. Once the cake in cooled down invert the pan and release the cake to cool further until it gets to room temperature.


Tiramisu cake filling recipe

Ingredients

Mascapone cheese - 1 cup 
Full fat cream - 1 and 1/2 cup
Icing sugar - 1/2 cup
Vanilla extract - 1 - 2 tsp
Coffee liquor - 2 tbsp (can be skipped)

Method

1. Whip the cream in an ice cold bowl and whisk (electric) adding icing sugar little by little until the cream is softly whipped up. 
2. Mix in the vanilla or coffee liquor into the whipped cream.
3. In another bowl whisk the mascapone cheese for a few seconds (do not overmix else it will curdle) 
4. Tip in the whipped cream little by little over the mascapone and mix until combine gently. Check for sugar. Keep it in the freezer and use when required.

Coffee Syrup 

Warm water - 1/2 cup
Instant coffee - 2 tsp 
Vanilla - 1/2 tsp
Sugar - 1 tbsp

Mix in the coffee, sugar and vanilla to the warm water and set aside to come to room temperature. 

Chocolate Ganache Recipe

Dark chocolate chopped 60% cocoa - 1/2 cup 
Heavy cream - 1/2 cup

Using double boiler method melt the chocolate and remove it from the stove. Add in the cream and mix well. Wait for it to cool down and come to room temperature.

Assembly

Sponge cake
Coffee syrup
Chocolate ganache
Cocoa powder
Chocolate shavings
Lady finger cookies
Ribbon

Steps

1. Cut the cake into 3 layers of 1/2 inch thickness. 
2. `Line the cake tin used to bake the sponge with parchment.
3.  place the first layer of the sponge. Spread with the coffee syrup evenly, just enough to wet the sponge, do not over do it.
4. Pour in 2 tbsp of the ganache and spread evenly. Keep in the freezer for 5-6 minutes to set. 
5. Layer the tiramisu cream over the sponge and let it set in the freezer for 10 minutes before going ahead with the next layer
6. Repeat step 3, 4 & 5 until all the 3 layers of sponge are set.
7. Once all layers are done Sieve cocoa powder over the top layer of tiramisu filling and top with the chocolate curls.
8. Freeze the cake for minimum 5 hours. I kept it overnight. Once the cake is fully set and cold. 
Remove the cake from the cake tin, transfer to a cake platter/ cake stand and remove the parchment. 
9. Place the lady finger cookies around the cake and tie a ribbon around it. 
10. I set the cake in the refrigerator for an hour before the cake cutting :-) 

Tiramisu Layer cake recipe

Baker's Wisdom

Tip 1

1. I made the lady finger cookies 2 days ahead and freezed them. I also freezed the cake overnight and defrosted it in the refrigerator for an hour before cake cutting.

Tip 2

2. If you live in hot temperatures I suggest that you keep the cake freezed overnight.

Tip 3

3. I did not use coffee liquor but you can use it as per your preference. Traditionally tiramisu is made with egg yolk filling, I did not want to make it will eggs since the sponge and the lady fingers had egg in them. 

Tip 4

4. Instead of the sponge the coffee soaked ladyfingers can be used in between the tiramisu filling. 


CHECK OUT MY OTHER CELEBRATION CAKES 

Butterless Tres Leches cake

Cauliflower Pizza Crust Low Carb | Cauliflower Chicken Tikka Pizza

$
0
0


Cauliflower Chicken Pizza Recipe
Hi All :) I am back again with another recipe after a long time. It feels so good to sit down and type a blog post. There has never been a day that I don't think of my blog although I did not post recipes here. It feels surreal to see so many people who never fail to comment, like and write to me. I feel so blessed to have a spot in your day. I did miss blogging so much and to tell you I just took a break to calm down my mind. Sometimes its hard to juggle and try to follow your passion. I just wanted to have this break for myself. Cooking is like second nature and that is hard to lose, so recipes kept coming from my kitchen during this break. If you follow me on Instagram you would have got a glimpse of it. I wanted to come back to share all the food favorites and the good old recipes from my mom which I have not blogged about.


Now lets move on to the recipe. Cauliflower Chicken tikka pizza is a regular at home. I make this every fortnight. Its simple, easy to put together and you can make the entire recipe under an hour :) yes you read it right. Usually pizza dough is a lot of work and requires an entire day and also gluten dense. I have done the regular pizza base at home and compared to that this cauliflower pizza crust is such a breeze. You just need the perfect recipe and you are good to go. This recipe that I am sharing today has been tried and tested again and again and it has always been a hit. 


How does it taste?


This is was the first question that caught my mind when I saw this recipe doing rounds in Pinterest. Trust me the crust is not firm but soft and tastes more like a smooth flatbread. You can never get the taste of cauliflower in it. You have to taste it to know it and you can thank me later ;)


Cauliflower pizza crust


CAULIFLOWER PIZZA CRUST | CAULIFLOWER CHICKEN TIKKA PIZZA RECIPE


Prep time - 30 mins

Bake time - total 25 mins
Serves - for 2 people, makes a medium sized 8" pizza
Serving suggestion - hot sauce, oregano, red chilli flakes to top

Ingredients

For the Cauliflower pizza crust

Cauliflower - 1/2 big cauliflower around 250 gms
Egg - 1 (a must, refer notes)
Parsley/ oregano - 2 tsp
Parmesan cheese - 1 cup (a must, refer notes)

Toppings for Pizza

Mozerella cheese - 1/4- 1/2 cup (optional refer notes)
Pizza sauce - 3 tbsp (homemade or store bought)
Capsicum (red&green) - 8-10 small cubes, around 1/4 medium capsicum
Red onion - 1 medium cubed
Mushroom - 7-8 pieces
Chicken tandoori - 10-15 pieces chopped around 150 gms

Method

1. Wash and separate cauliflower florets and pat dry with a kitchen towel, using a grater grade the florets well you need around 2 cups of shredded cauliflower. Preheat oven to 400F/ 200C In a large pan on medium heat dry roast the cauliflower for 10 minutes to strip off all the moisture this way the pizza base does not become soggy. I find this method to be the best and less of a hassle. After dry roasting the cauliflower rice for 10 minutes the mixture will look dry. Transfer it to a bowl and let it cool down, once it cools down add an egg, oregano and Parmesan cheese (a must, refer notes). Mix everything together well.


How to make cauliflower pizza base
2. In a pizza pan or cast iron skillet cut parchment paper (a must, refer notes). Once the skillet is lined with parchment transfer the cauliflower mixture to set the base. Pat gently on the mixture to form a dough like base, making sure that the base is evenly spread without gaps. Make sure the edges are little raised or thicker so that they don't look burnt around the edges when baked. Pop the skillet into the pre-heated oven to bake for 18-20 minutes until the crust looks golden. Once done remove from oven. The base will now come without sticking to the skillet but you could leave it as it is. 


How to make cauliflower pizza base


3. Now add the pizza toppings, first spread the pizza sauce with a spoon and line the toppings. You can use your favorite toppings I went with capsicum/ peppers, mushroom, onions and tandoori chicken. Sprinkle mozerella cheese or your favorite cheese as per your preference. Bake further in oven for 6 minutes until the cheese is all melted and the pizza is ready to serve.
Easy Pizza crust recipe using cauliflower florets
4. Using a pizza cutter cut pieces and devour :) Your very own cauliflower pizza is ready!


Gluten free pizza crust recipe
COOKS WISDOM 

TIP 1

1. Always use only parmesan cheese for making the cauliflower pizza base since parmesan is a hard cheese the base will be soft yet firm and hold together well. I did not add salt to the base since parmesan has salt in it. For toppings you can go with your favorite cheese topping. You will not taste the cauliflower in the base and since cauliflower is tasteless I added oregano flakes in the base as a seasoning. Egg & cheese helps in binding the crust together. I will try and share a vegan version soon and also pizza sauce recipe.

TIP 2

2. Make sure to always use parchment paper as the base of your pizza pan or skillet. The reason is it helps in removing the pizza from the skillet else the pizza tends to stick and you won't be able to move them around while serving. Also do not use a silicone baking mat, I have tried it and failed. The pizza tasted good but like I said the base tends to stick to the mat.

TIP 3

3. You can mix and match flavors and use your favorite toppings. I used chicken and mushroom but you can make it fully vegetarian too.


Homemade Chicken Pizza Recipe


Chicken Pizza homemade recipe

Oats Puttu | Oats Indian Breakfast Recipe

$
0
0


Oats Indian Breakfast recipe
Oats Puttu, a perfect light breakfast recipe that is delicious and healthy at the same time. I love eating oats in any form, yes you heard me right I love oats and always try to incorporate oats into our diet. When I saw this recipe I had to try it and I instantly fell in love with it. Although I don't have a puttu maker I did steam cook the puttu in my cooker. Nevertheless the taste was so good I could not taste the flour of oats and something about this recipe the puttu is so soft and yummy. I am sharing a sweet version today and refer notes to find a savory alternative. For more delicious oats recipes check out the end of this post :) 


Oats Puttu Recipe
Oats Puttu Recipe


Oats Indian Recipe
Oats Indian Recipe

OATS PUTTU | OATS INDIAN BREAKFAST RECIPE

Recipe Source - Preeti
Prep time - 10 mins 
Cook time - 10 mins
Serves - 2-3 generously
Serving suggestion - banana, sugar or curry

Ingredients

Rolled oats - 1 cup
Rice flour / Puttu Maavu- 1 cup
Salt - 1/4 tsp
Hot water - as required to mix puttu
Shredded coconut - 1/4-1/2 cup
Cardamom powder - 1/4 tsp
Sugar - as required (optional)
Banana - 1 (optional)

Method

1. In a pan on medium flame dry roast the rolled oats for 2-3 minutes until the oats releases a lovely fragrant toasted aroma. If using quick oats dry roast for under a minute in medium flame. Switch off cool down the oats and grind into a fine powder.
2. In a bowl combine the powdered oats, rice flour and salt, mix until combined.
3. Slowly add 2 tbsp of hot water at a time and rub into the flour mix using your hands.
4. Keep adding 2 tbsp of water until the flour in warm well mixed and moist so that when you press the flour with your palms it forms a shape.
5. Now pulse the flour in a mixie to remove lumps.
6. Mix the shredded fresh coconut into the oats mixture.
7. In a cooker boil water and place the bowl inside and cover the lid, do not use a whistle. Let the puttu steam cook for 10 minutes. Switch off and serve hot with sugar cardamom powder and banana. 


Oats Puttu
Oats Puttu
COOKS WISDOM

TIP 1

1. I served the puttu with sugar and banana. If you are diabetic or prefer to skip sugar you can serve puttu with any spicy Indian curry. Also the puttu can be made into a upma by tempering mustard seeds, channa dal, urad dal, curry leaves and green chilli. 

TIP 2

2. Original recipe calls for quick oats but I used rolled oats. The only difference is while using rolled oats dry roast the oats for 3 minutes and then powder it.

TIP 3

3. Pulsing the prepared oats puttu powder helps to remove the lumps in the puttu mix. This is a quick fix and works like a charm. 

TIP 4

4. Mix water into the flour mix little by little if you pour a lot of water the result will be a dough and not a moist powder. 

TIP 5

5. Always use freshly grated coconut for making puttu. 


RELATED RECIPES

MASALA OATS
APPLE OATS PORRIDGE
OATS LADDU
KEERAI MASALA OATS (DRUMSTICK LEAVES)
OATS COCONUT FRUIT & NUT GRANOLA BARS
OATMEAL COOKIES
CHOCOLATE OATS FLAVORED YOGURT
OATS PANCAKE
OATS GRANOLA BARS

Cumin Fennel Detox Drink | Cumin water for weightloss

$
0
0
Cumin Detox Drink | Indian Detox recipes
Cumin fennel weightloss drink was not something new to me. I have known since ages that cumin helps in digestion and many of you would have seen elders having cumin water daily. Its unless you start having it does one realize the benefits of this detox water. Detox recipes and drinks are not new to us. At one point everyone of us would have tried lemon honey warm water first thing in the morning. I have had this for years and trust me did I lose weight and give credits to lemon honey water? only God knows. Later I had green tea and this was another controversial  drink some say it helps weightloss and some say its loaded with caffeine. And I simply lost interest on both drinks to be honest. I was looking for a drink that I can have throughout the day without any fuss. And that what helped me research and come up with a recipe that is simple, easy and quick to do. I make a batch of 5 glasses of this drink and have it all throughout the day especially before every meal. With a good balanced diet and moderate exercise I did see a difference in the scale. I lost 15 lbs in a matter of 12 months, its a slow progress but still this drink did help my body well. The results in scale was a lot of effort apart from drinking this but I must tell you I didn't feel bloated nor did I have any digestion issues after having this drink. Fennel & cumin seeds help in aiding digestion, reduce bloating and help aid in weightloss. If you still don't believe me do your research on fennel and cumin seeds and you will surely try this recipe. 


I plan to post recipes that helps maintain weight in a diet series where I will be sharing more diet friendly recipes apart from regular cooking. In this day and age I think everyone is diet conscious and would love to drop few inches and look great. Besides that I did see many visiting my blog for diet recipes that I had posted earlier and I felt the need to share what works for me. Hope it helps others too. Remember that I am not a dietitian nor a doctor I am a regular housewife that loves to cook and stay healthy :) my only suggestion is do what suits you best. Don't fall for fad diets and quick fixes, nothing comes easy in life and losing weight is never easy. It requires hard work and effort and consistency. 
If you give your body what it needs and not what it wants you will surely see a difference in your health and on the scale too. 


Cumin water for weightloss


Fennel weightloss drink
CUMIN FENNEL DETOX WATER | CUMIN WATER FOR WEIGHTLOSS

Prep time -10 mins
Serves - 5 glasses
Serving suggestion - before every meal throughout the day

Ingredients

Cumin - 2 tsp
Fennel - 2 tsp
Lemon juice - 2 tbsp 

Method

Boil 5 cups water in a saucepan until rolling boil and add the cumin, fennel seeds and switch off. Immediately cover with a lid, let it sit for 10 minutes covered. Later strain the seeds and mix lemon juice and drink. You can reheat the water again and have or just have it as it is. I usually reheat it and enjoy it slightly warm. 


Natural weightloss drink | Indian weightloss recipe
COOKS WISDOM

TIP 1

1. Do not add the cumin and fennel and boil the water. Drink while still warm.

TIP 2

2. The water is fragrant, slightly sweet because of the fennel seeds.

TIP 3

3. Do not store water in fridge as you can catch a cold.


MORE HEALTHY DIET RECIPES

KOLLU/ HORSEGRAM DRINK FOR WEIGHTLOSS
MASALA BUTERMILK
CARROT BUTTERMILK
WHITE PUMPKIN JUICE FOR WEIGHTLOSS
ABC JUICE
TURMERIC MILK
GREENGRAM MANGO SALAD

Masala Pav Recipe | How to make Mumbai Masala pav

$
0
0
Masal Pav Recipe
Masal Pav Recipe
Masala Pav is a famous Mumbai street food which is the tastier version on Pav Bhaji. The Pav buns are dunk on a masala base of onions, tomato & capsicum on a hot tawa with spices and toasted with butter. With every bite you are sure to trans into a burst of flavors. Masala Pav is so easy to put together, you can make your own homemade pav buns / ladi pavor get the store bought ones. Make this for an evening snack along with chair or coke. A perfect appetizer if you are having guests over or organizing a party or potluck at home. I have used a little of the pav bhaji masala in this recipe for the base although there are variations where the pav bhaji masala is skipped, you can do it either way and the result would be awesome nevertheless. Serve masala pav with raw onions, corriander and a lemon wedge ;-) and be generous with butter as that adds the awesome flavor to masal pav. 


Mumbai Masala Pav Recipe


How to make Mumbai Masala Pav Recipe
MASALA PAV RECIPE | HOW TO MAKE MUMBAI MASALA PAV 

Prep time - 5 mins
Cook time - under 5 minutes
Serves - 2 people, makes 4 masala pav
Serving suggestion - along with chopped raw onions, minced corriander leaves, lemon wedge & butter

Ingredients

Pav buns - 4 no
Cumin - 1/2 tsp
Onion - 1 medium minced
Tomato - 1 medium minced
Capsicum / bell pepper - 1/2 large chopped
Pav bhaji masala - 2 tbsp
Salt - to taste
Butter - 3 tbsp
Garlic cloves - 3 pods
Green chilli - 2 medium
Ginger - 1/2 inch piece

Method

1. In a pan melt butter add the cumin and let it release aroma. Add the minced garlic+ ginger + green chili and saute for 30 seconds until well cooked. Now add the onions and saute further for 2 minutes until the onions are well cooked. 
2. Now add the tomato and capsicum and cook further for 2 minutes until well cooked. 
3. Now add the pav bhaji masala powder and cook covered under medium flame for 2-3 minutes until the oil oozes out. 
4. Add 2 tbsp of the pav bhaji masala and mix well.
5. Move the masala to the side of the pan heat butter and add the cut pav buns for it to get tasted golden. Now add a spoonful of filling inside the pav buns and cook on every side.
6. Repeat the same for all the other pav buns.
7. Serve hot along with pav bhaji masala and sprinkled with raw onions, corriander and lemon wedges.


How to make Mumbai Masala Pav Recipe


masala pav recipe
masala pav recipe 

COOKS WISDOM

TIP 1

1. I used store bought pav buns/ dinner rolls, you can make your own find the recipe here for pav bhaji buns/ ladi pav. 

TIP 2

2. You can skip using the pav bhaji masala but I used it for more taste, check out the recipe for pav bhaji masala recipe here.

TIP 3

3. Make sure to use freshly ground pav bhaji masala for additional taste, you can find the recipe for pav bhaji masala powder here.


RELATED RECIPES

PAV BHAJI BUNS/ LADI PAV
PAV BHAJI MASALA 
PAV BHAJI MASALA POWDER
MISAL PAV
SAMOSA
DHOKLA

Paneer Butter Masala Recipe | How to make Restaurant style Paneer Butter Masala

$
0
0

Paneer Butter Masala Recipe

Paneer Butter Masala is one of the most devoured recipe by most Indians, especially for the pure vegetarians and the non-vegetarians who want to have a vegetarian option. Like most Indians I love paneer recipes and especially Paneer butter masala. I have had so many requests to make this Paneer Butter Masala but it took me such a long time to post the recipe on my blog. The reason being I have tried so many variations but still I can say I was not satisfied with the taste to call it a restaurant style Paneer butter masala. I have played with techniques, ingredients, method of cooking and so on. But I recently discovered one technique that works great every time. So hence sharing a fail proof recipe that is sure to entice your taste-buds asking for more. The best accompaniment to Paneer Butter Masala is naan, kulcha, romali roti and jeera rice. 


How to make Restaurant style Paneer Butter Masala

How to make Restaurant style Paneer Butter Masala
Restaurant style Paneer Butter Masala


PANEER BUTTER MASALA RECIPE


Image      Paneer Butter Masala is a rich flavorful curry that goes well
      with Indian flat bread like naan, roti or rice. Try out this             flavorful curry at home with the restaurant taste.

     Author : Priya Ranjit

     Recipe Source : Own


Category

Indian
Prep Time

15 mins
Cook Time

15 mins
Total Time

30 mins
Serves

2 people

Serve with

roti or naan


     Ingredients

     To Saute & Grind


     Butter - 1 tbsp

     Oil - 1 tbsp
     Bay leaf - 1 
     Cinnamon sticks - 1, 2" piece
     Cardamom pods - 3 
     Cloves - 3 
     Cumin seeds - 1/2 tsp
     Kashmiri red chilli whole - 2 
     Poppy seeds / khus khus - 1 tbsp (or use cashew pieces 1 tbsp)
     Onion - 1 large chopped
     Tomato - 2 large chopped

     For the curry

     
     Paneer - 250 gms cut into cubes
     Butter - 2 tbsp 
     Cumin seeds - 1/2 tsp
     Ground masala base (from the saute & grind)
     Red chilli powder - 1/2 tsp
     Turmeric powder - 1/4 tsp
     Tomato Ketchup - 1 and 1/2 tbsp (or use sugar 1/2 tsp)
     Kashturi Methi - 2 tsp heaped crushed
     Salt  - to taste
     Fresh cream - 2 tbsp
 
      Method
  1. In a large wide pan melt butter, oil and add the whole spices - bay leaf, cinnamon, cardamom, cloves, cumin, kashmiri red chilli, poppy seeds and saute for few seconds until the aroma comes. Add in the onions and saute for 3-4 minutes until well cooked and transparent. You can cover the pan with a lid for it to cook faster. Tip in the tomatoes and cook covered for 3-4 minutes until mushy.
  2. Switch off and let the saute onion base cool down. Grind into a smooth fine paste.
  3. In the same pan add the remaining butter and once melted add cumin seeds once they sizzle, tip in the ground base and along with 1 cup water. Add the spices - turmeric, red chilli powder and cook covered for 4-5 minutes.
  4. Now the curry should thicken and now add in the tomato ketchup/ sugar and mix into the curry.
  5. Add the paneer cubes and reduce the place to medium low and let it cook for 3 minutes undisturbed. 
  6. Now you will find the oil separating from the curry switch off add the kasturi methi. 
  7. While serving add in the cream or mix the cream in the pan itself. 

      Cooks Wisdom

      Tip 1
  1. I used poppy seeds, you can use cashews or both for a richer curry. Ketchup adds to the color and taste of the curry if you don't want to use ketchup use sugar instead, it cuts the spiciness of the dish.     
      Tip 2

      2. Use kashmiri chilli or kashmiri red chilli powder for a good color to the curry. In 
          restaurants they use food color to make the dish look more colorful this can be             skipped.

       Tip 3

      3. There is no need to fry the panner, just adding raw paneer to the curry and                     letting it boil will make the paneer get cooked evenly. Sometimes frying the 
          paneer makes it break and get hardened.


RELATED RECIPES

PANEER CUTLET
PANEER KOFTA
PANEER KOFTA PALAK CURRY
PANEER CIGAR ROLLS
PANEER TAWA MASALA
PANEER MUSHROOM KURMA
PANEER TIKKA
KARAHI PANEER 
ACHARI PANEER STUFFED PARATHA


Black Forest Cheesecake Cake | Birthday Cake Recipe for Husband

$
0
0

Black Forest Cheesecake Cake Recipe
Black Forest Cheesecake cake sound so fancy right. This what happens when my husband is gifted with a wife who is a food blogger ;-). Food blogging has made his expectations of me go soaring high, each year I bake two fancy cakes one for our anniversary and one for his birthday, so I get a little carried away planning what cake I need to bake for these occasions in our life. Last year I baked for him a Tiramisu Cake , this year I promise, it was a last minute affair I decided on this cake only 2 days before and got the ingredients and baked it all in one day. In fact I did the frosting of the cake only the next day morning that was his birthday. So for compensation he had to do a little cake modelling for me :P. I love taking risks in the kitchen, I did not have a springfoam pan and yet I pulled off doing a cheesecake recipe. All thanks to God for He always answers my prayer ;0). We both love black forest cake and off late have been die hard fans of cheesecake, so combined both and thought of this and voila I saw a recipe for this so went ahead without any second thoughts. We love dessert cakes too and this recipe is such a keeper, a really rich one so save and plan it for your special occasions. Lets move on to the recipe and its a long post alert... 


Black Forest Cheesecake Cake Recipe

Birthday Cake for Husband

Blackforest cheesecake

Blackforest cheesecake

Blackforest cheesecake recipe

Blackforest Dessert Cake Recipe

Blackforest Dessert Cake Recipe


BACK FOREST CHEESECAKE CAKE


Image     A beautiful decadent 3 layered Blackforest Cake with a layer 
     of Cheesecake in the center. 

     Author : Priya Ranjit

     Recipe Source : Barbara Bakes


Category
Dessert
Prep Time
20 mins
Bake Time
1.5 hrs
Total Time
under 2 hrs
Yields
2- 9" cake

Serves
8-9 people


     Ingredients
     
    Cheesecake layer:
  •     2 (8-ounce) packages cream cheese, room temperature
  •     1/2 cup granulated white sugar
  •     Pinch of salt
  •     2 large eggs, room temperature
  •     1/3 cup sour cream
  •     1 teaspoon vanilla extract
  •     1 cup cherry pie filling
  •     
  •     Chocolate Cake Layers:
  •     1 3/4 cups plus 2 tablespoons sugar
  •     1 3/4 cups all-purpose flour
  •     3/4 cup Hershey’s cocoa
  •     1 1/4 teaspoons baking powder
  •     1 1/4 teaspoons baking soda
  •     1 teaspoon salt
  •     2 large eggs
  •     1 cup plus 2 tablespoons milk
  •     1/2 cup canola oil
  •     2 teaspoons vanilla extract
  •     1 cup boiling water

  •     Cream Cheese Frosting:
  •     2 (8-ounce) packages cream cheese, room temperature
  •     1/2 cup unsalted butter, room temperature
  •     1 tablespoon vanilla extract
  •     2 1/2 cups powdered sugar
  •     1 cup cherry pie filling
  •     Dark chocolate grated 
     
    Butter cream Frosting
    1/2 stick butter at room temperature
    Icing sugar 2 cups
    Vanilla 1 tsp
     

      Method

      Cheese cake layer 

      1. Pre-heat oven to 325F / 160 C, prep the 9" springfoam pan with butter and line 
       with parchment paper. 

       2. With a stand mixer or hand mixer beat the cream cheese for few seconds, add 
       in the sugar salt and beat until mixed well. Now add in the egg one at a time, 
       beat until combined. Add in the sour cream and vanilla beat until combined. 
       Pour in the batter to the prepared cake tin. Tip dollops of the cherry filling 
       alternatively. Using a knife push the cheeries into the batter and do random 
       swirls on the batter. 

       3. In the oven place the pan in the center of the oven, also place a square/ 
       rectangle pan below the cheesecake pan and pour in boiling water. Bake for 45-55 
       minutes until done. You will notice the cheesecake get firm and not jiggly. 

       4. Keep the cheesecake on the pan on top of a cooling rack for 15 minutes. Using a 
       knife losen the cheesecake from the pan by running the knife around the pan. 

       5. After an hour of cooling place the cheesecake in the freezer to set for few hours 
       (minimum 3 hrs or overnight).

       
       Chocolate cake layer 

       1. Preheat the oven to 350 F/ 180 C, prepare twp 9" cake pan by spraying oil/ 
        butter and lining with parchment paper around the pan and on the base set aside.

        2. Sift together flour, cocoa powder, baking powder, baking soda, sugar and salt               set aside. In another bowl whisk together egg, oil, vanilla and milk beat for 2 
        minutes in medium flame. Now tip in the flour and mix into the batter in batches.

       3. Add the boiling water to the batter and mix well, tip the batter in the pan and 
       bake for 30- 35 minutes. until a toothpick inserted comes clean. 

       4. Remove the pan from the oven and let it cool on the cooling rack for 1 hour. 

       
       Cream cheese frosting

       1.  In a large bowl beat the cream cheese, butter, sugar, vanilla until well         
       combined and smooth.
     
      Butter cream frosting (refer notes)

      1. In a bowl whisk together butter, icing sugar and vanilla until well combined. 

      Cake Assembly

      1. First place the chocolate cake layer and then keep the cream cheese layer and 
      top it with another chocolate cake layer. 
      2. do the crumb coating with cream cheese and refrigerate for 30 minutes to set. 
      3. Once the crumb coating is set now add another layer of cream cheese frosting. 
      4. Add the chocolate shavings to the side of the cake and refrigerate for 20 minutes 
      to set. 
      5. Now pipe the buttercream frosting on top and sides of the cake.
      6. Tip the cherry filling on the center and carefully spread it on top. 
      7. Refrigerate overnight or to set for atleast an hour. 
      
      Cooks Wisdom

      Tip 1
  1. I halved the proportions and made a 6 inch cake, but I have shared the actual recipe for two 9" cake layers and one 9" cheesecake layer.     
      Tip 2

      2. I used buttercream frosting to get perfect designs since cream cheese frosting 
      tends to not give sharp edges but you can do either way.


RELATED RECIPES

TRES LECHES CAKE
CHOCOLATE CAKE WITH CHOCOLATE CREAM CHEESE
TIRAMISU CAKE
PINEAPPLE GATEAU
ROSE CAKE
ROSETTE CAKE

Batata Vada Recipe | Mumbai style Batata Vada

$
0
0


Batata Vada Recipe
Batata Vada Recipe
Batata Vada Mumbai Style is a spicy potato based snack that goes as a patty for Vada Pav. Its spicy and delicious snack that can be had by itself along with green chutney, sweet chutney or tomato ketchup. Vada pav is like out Indian version of Veg burger. I first tried this snack during my college days at the chaat shop. They are quite filling and yummy at the same time. Its such a easy to put together and can be made so easily for an evening snack with ingredients from your pantry. I love how the spiciness from the vada goes well with the sweet tangy and hot chutney base. Do give it a try and you will love it. Batata Vada is similar to our aloo bonda or potato bonda in South India


Mumbai Batata Vada for Vada Pav

Mumbai Batata Vada for Vada Pav


Mumbai Batata Vada for Vada Pav


Batata Vada Recipe
Batata Vada Recipe


BATATA VADA MUMBAI STYLE RECIPE


Image      Batata Vada is a potato based bhajji that is flavorful and a 
      perfect snack. This Vada is also served as the stuffing for      
      Vada Pav. 

     Author : Priya Ranjit

     Recipe Source : Own


Category
Snacks
Prep Time
15 mins
Cook Time
15 mins
Total Time
30 mins
Yields
8-10

Serve with
chutney/sauce 


     Ingredient

     For the potato stuffing

     Potato - 2 large
     Oil - 2 tsp
     Mustard seeds - 2 tsp
     4 Green chilli + 1 garlic + 1" piece ginger paste - 2 tbsp
     Turmeric powder - 1/4 tsp
     Lemon juice - 1 tbsp
     Salt - to taste

     For the Batata covering

     Gram flour - 3/4 cup
     Red chilli powder - 1/3 tsp
     Hing - 1 pinch
     Baking soda - 1 pinch
     Chaat masala - 2 pinches (optional)
     Salt - to taste
     Water -  as required to make the batter
     Oil - for frying
    
      Method

     1. Cut the potato in half and pressure cook the potato until soft (approx 2 whistles). 

      Let it cool down peel the skin and mash until the lumps are gone. Set aside.

      2. In a pan heat oil, crackle the mustard seeds and cook the green chilli paste for a 

      minute until the raw smell goes away. Add in the turmeric, salt and the mashed #    
      potato. Mix well until well cooked, check for salt, add lemon juice and let this cool 
      down completely. 

      3. Once the potato filling is cooled. Divide into 8-10 parts and roll into balls, flatten 

      and set aside on a plate. Heat the oil for frying, mix the batter - gram flour, salt, 
      red chilli, hing, chaat masala, baking soda, water ( as required) similar to dosa 
      batter thickness and set aside.

      4. Now dip the potato balls into the gram flour mix and fry in oil. Let all the sides of 

      the vada get cooked well, Using a slotted spoon remove from oil and place on a 
      kitchen tissue to drain excess oil. 

      5. Serve as vadas along with green chutney or sweet chutney or ketchup. Or keep 

      them aside to make vada pav ;-)


      Cooks Wisdom

      Tip 1
  1. Make sure that the potato stuffing is completely dry and has less moisture. Do not add water while making the stuffing.     
      Tip 2

      2. Make sure the oil is in medium to high flame for the vadas to be evenly cooked. 
      Adjust spiciness for the stuffing as per your taste and preference. 


I will soon be posting recipe for Vada Pav stay tuned ;-)
RELATED RECIPES


PAV BHAJI BUNS/ LADI PAV

PAV BHAJI MASALA 
PAV BHAJI MASALA POWDER
MASALA PAV
MISAL PAV
SAMOSA
DHOKLA

Vada Pav Recipe | Mumbai Style Vada Pav with Spicy Garlic Coconut Chutney

$
0
0
Vada Pav Recipe | Mumbai Style Vada Pav
Vada Pav Mumbai style recipe is such a simple and easy recipe to put together, spicy batata vadas sandwiched between a pillowy soft ladi pav drizzled with garlic coconut chutney and dipped alongside spicy green chutney or tamarind chutney. Its the marriage of sweet, sour, spicy flavors in your mouth. I remember enjoying this yummy vada pav during my college days but never knew this is such an easy recipe to put together. Its even more tasty when made at home. You can go the full way and make ladi pav, garlic coconut chutney, tamarind chutney and green chilli chutney at home or make a quick version by making the batata vadas at home and using store bought pav buns and chutneys. Either way these vada pav's are to be devoured. Make this for a family get together or a party everyone is sure to love you ;-). People, places and memories sure revolve around food and its needless to say that everyone you love will love you extra special when you do such good yummy recipes at home. Last week I made this for lunch, yes you are right ;-) I just went with my tummy voice and my husband had no complains whatsoever. 


Vada Pav Recipe | Mumbai Style Vada Pav

Vada Pav Recipe | Mumbai Style Vada Pav

Vada Pav Recipe | Mumbai Style Vada Pav

Spicy Garlic Coconut Chutney for Vada Pav

Vada Pav Recipe | Mumbai Style Vada Pav with Spicy Garlic Coconut Chutney


Image      Vada Pav is a spicy tangy veg burger that is a famous snack 
      recipe from Mumbai.
     
      Author : Priya Ranjit
      Recipe : Own
      Prep Time : 10 mins
      Total Time : 15 mins
      Yields : 8 - 10 vada pav
      Serve with : Green chutney, Tamarind Chutney, 
      Ketchup or Spicy Garlic coconut chutney


     Ingredients

     Ladi Pav buns - 8-10
     Batata Vadas - 8-10
     Ketchup/ tamarind chutney - 4 tbsp
     Green chutney - 4 tbsp
     Spicy coconut garlic chutney - 6 tbsp
     Fried whole green chillis - 8-10 as required

     For the Green chutney

     Ginger - 1 inch
     Green chilli - 3 
     Corriander - 10 stalks
     Mint - handful
     Black salt - as needed
    
     For the Spicy Coconut chutney
     
     Desiccated coconut - 3/4 cup 
     Red chilli powder - 2 tsp
     Garlic - 4 pods
     Coconut oil - 1 tsp
     Hing - 2 pinches
     Sesame seeds - 2 tbsp
     Salt - as required
 
      Method

     1. Grind all ingredients mentioned under green chutney to a smooth paste using 2 
     tbsp of water - ginger, green chilli, corriander, mint and black salt. Set aside.

     2. Dry roast all ingredients mentioned under spicy coconut chutney for 2 minutes 
     using coconut oil - desiccated coconut, red chili powder, garlic, hing, sesame seeds. 
     Switch off let this cool down and pulse it into a course powder, set aside.

     3. Take one Ladi pav bun, spread one side of the pav with green chutney the other 
     side with sweet ketchup or tamarind chutney and sprinkle with garlic coconut 
     chutney. keep the batata vada and repeat the same for all pav buns.

     Serve along with fried green chillis :-) 


RELATED RECIPES

BATATA VADA
PAV BHAJI BUNS/ LADI PAV
PAV BHAJI MASALA 
PAV BHAJI MASALA POWDER
MASALA PAV
MISAL PAV
SAMOSA
DHOKLA

Tomato Coriander Soup | Easy Indian Weightloss Soup Recipe

$
0
0
Tomato coriander weightloss soup recipe
Tomato Coriander Soup is an excellent soup for blasting belly fat. The ingredients in this soup like tomato, coriander/ cilantro, curry leaves, ginger, garlic, peppercons, turmeric aid weightloss naturally. Tomatoes are found to reduce inflammation and water retention in the body along with leptin resistance. Leptin is a type of protein which helps to regulate metabolism. This Tomato soup recipe was shared by Amma when I was on the look out for easy fat burner recipes. Try this and you will enjoy this soup so much, its comforting for this season and also easy to make unlike regular soups that call for butter (fat), sauteing, preparing broth and cooking vegetables, none of this lengthy procedures are involved in this recipe. You can make this recipe under 10 minutes alongside your meal preparations. I remember my personal trainer many years ago suggested I have tomato juice before workout. It used to help me workout better and I never had overeating issues after workout. Tomatoes also help clear your skin and give a natural glow, also taking tomatoes regularly also helps you skin prevent itself from getting tanned. No wonder most natural skin care routines call for tomato juice in them. Its all in all a superfood and easily available in your pantry. I was happy to see the good response to my earlier post Cumin Fennel detox water , I will be sharing more weight loss recipes on my blog, I know most of you love to lose weight like me. Enjoy this tomato soup and stick to your diet for faster results. 


Weightloss Indian diet Recipe - Tomato Soup

Weightloss Indian diet Recipe - Tomato Soup


TOMATO CORIANDER WEIGHTLOSS SOUP


Image      A light & flavorful tomato soup that has ingredients to help 
      you battle the bulge effectively. Have this twice a day 
      before your regular meals and regular balanced diet.

     Author : Priya Ranjit

     Prep Time : 3 mins
     Cook time : 5 mins
     Total Time : under 10 mins
     Serves : 2 people


     Ingredients

     To Grind

     Tomato - 3 medium sized cubed
     Ginger - 1" piece
     Garlic pods - 3 medium pods
     Curry leaves - 1 spring
     Coriander leaves - 5-6 stalks
     Cumin - 1/2 tsp
     Peppercons - 8 no

     For the soup base

     Turmeric powder - 1/4 tsp
     Himalayan salt/ regular salt - as required
     Lemon juice - 1 tbsp
 
      Method
  1. In a mixer or blender grind - tomato, ginger, garlic, curry leaves, coriander, cumin and peppercons into a smooth paste.
  2. Add this ground paste to a pan and add 1 cup water, bring it to boil under medium flame. Add turmeric and salt once the tomato soup changes colour and the raw smell goes away switch off and add the lemon juice. Mix well serve hot.

      Cooks Wisdom

      Tip 1
  1. This soup must be had before 1/2 hour before lunch and dinner. You can make a big batch of this and save it in the refrigerator for upto 3-4 days but I love doing this fresh daily alongside my regular cooking. Follow a balanced diet of protein, carbs and fiber for better results. 
      Tip 2

      2. The heat from the ginger, garlic and peppercorns give it a little spicy flavor, you 
      can skip, add or reduce ingredients to this recipe which suits your taste. 


MORE DIET FRIENDLY RECIPES BELOW

CUMIN FENNEL DETOX WATER
KOLLU/ HORSEGRAM DRINK FOR WEIGHTLOSS
MASALA BUTERMILK
CARROT BUTTERMILK
WHITE PUMPKIN JUICE FOR WEIGHTLOSS
ABC JUICE
TURMERIC MILK
GREENGRAM MANGO SALAD

Eggless Vanilla Icecream Recipe without Icecream Maker | Best Vanilla Icecream Recipe

$
0
0


Eggless Vanilla Icecream Recipe
Eggless Vanilla Ice cream is so easy to make at home. It calls only for 3 ingredients and a 10 minute process, let the ice cream set overnight or for 4 hours and you are good to go. Make this delicious icecream for your weekend dessert. You can even do this icecream recipe along with your kids, let them also have fun making such a simple dessert. You can add any kind of fruit puree to this recipe to make it into a fruit icecream like starwberry, mango, lychee, papaya, chikku and so on. This vanilla icecream does not call for a icecream maker or churning method. Its quick, simple and easy and the results are simple melt in mouth, creamy and soft just like how you get in a good icecream parlor or a store bought icecream tub but even better. Store bought icecream these days have loads of preservatives, chemicals and artificial flavors. When you make icecream at home you can use organic and natural ingredients that your family loves and enjoy. Although I love eating icecreams and kulfi, I do not make them that often at home. You can check out my kesar kulfi recipe which is another personal favorite :-) 


Eggless Vanilla Icecream Recipe without Icecream Maker


EGGLESS VANILLA ICECREAM


Image      Eggless Vanilla Ice cream is a simple & quick method of 
      making ice cream with simple 3 ingredients. No churn 
      method and no need for a ice cream maker, a simple hand 
      blender is more than enough. 

     Author : Priya Ranjit

     Prep Method : 10 mins
     Setting Time : minimum 4 hrs - overnight
     Makes : 28 oz or 3.5 cup
     Serves : 5-6 generously


     Ingredients

    Heavy whipping cream - 2 cups

     Condensed milk 400 gms - 3/4 tin 
     Vanilla extract natural - 2 tsp
 
      Method

      1. Chill the whisk attachments and the mixing bowl in the freezer for 15 minutes. 

      make sure the whipping cream is chilled overnight.
      2. In the bowl add in the heavy cream and whisk on medium speed for 3-4 minutes 
      until the cream is thick and then becomes stiff peaks. 
      3. Gently fold in the condensed milk to the whipped cream with a spatula and add 
      the vanilla. (add the fruit puree now if using)
      4. Pour the icecream batter into a 1 ltr freezer safe bowl or a loaf pan and over 
      with a lid or cling film and let it sit in a cold freezer for minimum 4 hours or 
      overnight. The setting all depends on the weather and how good our freezer is. 
      Mine set really well by 4 hours. 
      5. Remove the tub from the freezer and using a ice cream scoop serve the icecream 
      and enjoy. Use toppings as per your preference.

      Cooks Wisdom

      Tip 1
  1. Make sure that the heavy cream, the mixing bowl and whisk are well chilled before beating the heavy cream. I used organic cream, natural vanilla extract.     
      Tip 2

      2. You can make different favored icecream using this recipe as base. Like 
      strawberry, chocolate (melted & cooled), mango. Also add toppings like caramel, 
      nuts, tutti frutti, chocolate chips, waffers, gems.

      Tip 3

      3. Despite adding only 3/4'th of the condensed milk, I did find the icecream to be 
      on the sweeter side, you can reduce may be 1-2 tbsp of the condensed milk. Also 
      remember that when the icecream is chilled it will be even sweeter, so go by your 
      taste preference. 


RELATED RECIPE

KEASAR KULFI

Viewing all 285 articles
Browse latest View live