Quantcast
Channel: Cook like Priya
Viewing all 285 articles
Browse latest View live

VadaKari | South Indian breakfast Special

$
0
0

Vadakari and Idly is one of Appa's favorite breakfast and like him I also have inherited the taste for this yummy and satisfying combination. Mind you this will make you full and may be your might have a late lunch ;-) Although this breakfast is available in most restaurants and tiffen centers in Tamil Nadu I still love only the one done at home. Amma makes the best vadakari according to me, if its poori's and masala dosa I agree that eating out is fine but for this particular recipe it has to be one made at home. Usually done with left over masala vadas, the taste is quite exquisite, but need to make a confession here Amma makes them with fresh vadas. Come on how can there be left over vadas in the first place ? :P


VADAKARI RECIPE

Recipe Source ~ Amma
Serves ~ 3 generously
Cook & Prep time ~ 40 mins
Serving Suggestion ~ Idly, Dosa, Appam

Ingredients

Onion - 1 large - chopped fine
Tomato - 2 large - chopped
Green chili - 2-3 (Adjust according to spice tolerance)
Ginger garlic paste - 1 tbsp
Red chili powder - 1 tsp
Coriander powder - 2 tsp
Jeera powder - 1/2 tsp
Turmeric powder - 1/2 tsp
Salt - to taste
Coriander / mint leaves - few chopped, to garnish

To Temper 

Oil - 2 tbsp/ left over oil after frying vadas
Cinnamon - 1" piece
Bay leaf - 1-2
Cardamom - 3-4
Cloves - 3-4 
Curry leaves - 1 spring

To Grind

Channa dal - 1 cup (soak for 1 hour) 
Sombu - 1 and 1/2 tsp
Red chilies - 2 large
Salt - to taste


Method
  • Grind all ingredients under to grind without any water. Check for salt, set aside
  • Keep a pan on stove shallow fry vadas with less oil. You don't have to do the traditional big big vadas small mini ones will do. Once they are fully cooked, remove them using a slotted spoon and drain excess oil on tissue paper.
  • Keep the same pan and in the left over oil do the seasoning.
  • Add onions and fry till they turn transparent. Add the tomatoes and the green chillies and cook for another 2 to 3 mts.
  • Add the masala powders  and mix well. Add 1 cup of water and cook.
  • When it boils well add the vadas and let it simmer for 2 minutes
Serve hot along with idlies, dosa or appam


Cooks Wisdom

- You can follow the same recipe with left over masals vadas, although amma and me love to do them with freshly done vadas
- Make sure the vadas are coarsely mashed or torn and then added to the curry. 
- Adding mint leaves at the end gives additional flavor.

Vanilla Bean Sponge with Strawberry Buttercream {Pressure Cooker Cake} ~ Celebrating 1 Yr of Blogging

$
0
0

As I look back on my journey in food blogging I have a huge smile and a content heart. I am humbled by my little space turning 1 today, call it Blog birthday or an anniversary, I still cannot fathom a year has passed since I started this little space. My first post was Caramel Custard and I still remember clicking the photographs in our little apartment with lights on :P and my husband did not know that what he saw that day of his wife capturing a sweet companion behind the lens will be her day to day activity :D. I still consider myself novice when it comes to blogging although I learnt it all from scratch did not know who to ask or what to even search in google. I have never made efforts to upload a template or get help from a professional for my blog. All that you see today is what I learnt and what I experimented in terms of layout, design, header, recipes and indexing. Back then everyday as my husband left for work I would log into my blog and keep exploring what I can do next and little did I know that I would be hooked with it all day. Blogging did make me learn the art of baking a cake, bread and try new recipes. Everyone asks me if I have learnt baking or cooking from someone, I have to tell you all that I did it all on my own. I started to cook only after marriage and still there is a long way to go in my culinary journey.Blogging has added many friends in my life who still keep in touch with me on a daily basis. Little did I know that the people I used to visit would be my close friends. I consider myself fortunate to be friends with them. Everyone thinks that the virtual world is so unreal but it became real to me I have met few great bloggers in real life. Today CLP has crossed over 2 lakh 83 thousand views, over 700 + facebook page likes, 240 + google friend connects... This sure is a proud moment for me.

First of all I want to thank God for His grace that enabled me to do all that I did. 
Thanks to my husband, 
readers, friends and family 
who have been with me in this 1 year journey. 
Its been so much fun to share my kitchen success with you. 


No occasion is complete for me without a cake, since I have never posted a pressure cooker cake I thought this is the right time to do one. Really whether you believe it or not I used a pressure cooker to bake this cake and did not use an electric whisk while doing the sponge and frosting. Its not rocket science to bake a cake and if you really lack an oven don't be worried use a pressure cooker. Mind you that you need a good recipe which is a must to get the perfect cake. Besides that my personal opinion is not to bake often in a pressure cooker there are two reasons for that - one is that you would use lot of gas as the cake would need atleast an hour to bake and the second is that the life of the pressure cooker will diminish as you don't use water. Ok let this not stop you from baking a cake ;-). Btw recently my dslr brokedown and I am so in awe with my point and shoot magic. All the clicks in this post are taken with my humble p n s cam :D


VANILLA BEAN SPONGE RECIPE

Recipe Source - Adapted from Tarla Dalal & Nags
Prep time - 15 mins
Bake time - 1 hour approx
Makes - 6 " cake
Serves - 8 people

Ingredients

1 cup + 2 tbsp of plain flour / maida
1/2 cup of powdered sugar 
1 cup of milk powder ( I used Nestle sweetened milk powder)
1 cup of milk ( I used skimmed milk)
3/4 cup of unsalted butter, at room temperature
1 vanilla bean
1/2 tsp of salt

Method


  • Take 2 medium bowls in one sieve flour and salt together, set aside. 
  • In the other bowl cream together butter and sugar until light and fluffy, I used a hand whisk to do so. Now add the milk powder and combine. The mixture can be curdly don't worry not slowly add the milk and mix well. 
  • Now split the vanilla bean and scrap the caviar with the back of your knife. Make sure you use every bit of it as vanilla beans are precious.
  • Now add the dry ingredients to the wet ingredients and combine well. Pour into a greased pan 
  • Prepare the pressure cooker by placing a steel plate. stand on it. Do not use any water, and remove the rubber beading from the cooker lid, no need for cooker weight. Heat the cooker on high flame of 5 mins ( this is similar to pre-heating an oven) 
  • Using a vessel holder place the cake tin on the stand inside the cooker, this is to avoid yourself from burning. Make sure that the cake tin fits inside the cooker. Close the lid without rubber ring and weight. After 3-4 minutes reduce the flame to medium and bake for approx an hour.
  • You can start checking the doneness of the cake after 30 mins by inserting your knife in center of the cake tin, If it  comes clean the cake is done else bake for some more time
  • Once done using a vessel holder remove the cake tin from the cooker and let the cake cool in the pan for 10 minutes on a wire rack. Later invert the tin to remove the cake. It will take around 1 hr for the cake to come to room temperature.


STRAWBERRY BUTTERCREAM FROSTING RECIPE

Unsalted Butter - 1/2 cup ( in room temprature)
Icing sugar - 1 and 1/2 cup
Strawberry Flavoring - 1 tsp
Pink food color - few drops
Sugar sprinklers - to decorate

Cream the butter for a few minutes then slowly combine the icing sugar little but little and add the flavoring and food color. Combine well.

Assembly

Using an offset spatula spread the buttercream on the sponge and decorate with the sugar sprinklers. Set in refrigerator for 5 minutes to set.


Cooks Wisdom

- Make sure while baking cake to use an aluminum cooker, it heats up fast and withstands long cooking without water in the pan. 
- using a stand to keep the cake tin is essential if you don't have the stand that comes with your cooker make sure you use any aluminum plate 
- Never use a weight for the cooker cake and rubber beading on the cooker lid
- Do not add water or sand to bake the cake
- If you want to bake the cake in an oven pre-heat oven to 180C/350F and bake for 30-35 mins until a toothpick inserted in center comes clean

Parruppu Rasam | South Indian Rasam | Lentil Rasam Recipe

$
0
0

Paruppu Rasam / Dal Rasam is sure comfort food to me. There is a story that I heard long back from a chef on the origin of the rasam. He said that one day a great cook was making dal and rasam in the kitchen and by mistake he added cooked dal to the rasam, later he was greatly praised by everyone who tried it. I have also heard another version of the story that the cook did not have much tamarind pulp hence he added the dal water to the rasam and hence its origin. Which ever story you want to believe I just want to tell you that this is really one awesome tangy curry, very different in its taste compared to the usual basic rasam recipe. I simply love to have this with any vegetable stir fry and appalam. Every Tamilian home has their version of rasam, I learnt to make this from my dear Amma, and it sure makes constant appearances at home. To make matters simple I make Paruppu Rasam along with Sambar :-) 


DAL RASAM RECIPE

Recipe Source - Amma
Cook & Prep time - 20 mins
Serves - 4 generously
Serving suggestions - White rice, veg/non veg side & appalam

Ingredients

Ripe Tomatoes - 2
Tamarind Pulp - 1 lime size ball diluted in 1 cup warm water
Cooked Toor Dal - 1/2 cup (you can reduce the quantity depending on how thick or thin you want the rasam)
Corriander powder - 1 tsp
Chili powder - 1 tsp
Turmeric powder - 1/2 tsp
Coriander leaves chopped

To Temper

Ghee/ Oil - 3 tsp
Mustard seeds - 1/2 tsp
Peppercons - 1 tsp
Dry red chilli - 2
Curry Leaves - 1 spring with stem

To Pound

Jeera - 1 tsp
Mustard seeds - 1 tsp
Dry red chilli - 2
Garlic - 4 pearls
Curry leaves - few


Method

  • Boil the tomatoes in 2 cups of water for about 5 to 8 minutes, the skin will split at this stage. Remove from stove and after it is cooled, remove the skin and mash to form a puree.
  • To this add all the spice powders, pound masala, salt, curry leaves and coriander stems. Mix well, now add the cooked dal with water. Check for spice and salt. You can also add store bought rasam powder instead of the other spice powders.
  • Now add the tamarind water discarding the pulps and bring to a single boil. As the rasam foams and comes up, remove from stove and sprinkle some water on the rasam.
  • Do the tampering in the order given and pour it into the rasam. Mix well, garnish with coriander leaves and cover with lid.


Cooks Wisdom

- Tampering with ghee gives a special flavor to the rasam. For vegan version skip using ghee.
- Adding the coriander stems & curry leaf stem enhances the flavor to the rasam.
- Tempering at the end brings out great flavor
- Never over boil the rasam after adding the tamarind water, this will give a bitter taste to the rasam

Crab Fry | Simply Crab Curry | Seafood Recipe

$
0
0


Today is a special day, we a group of blogger buddies planned to celebrate a virtual Birthday of our dear and lovely friend Divya Pramil who blogs at youtoocancook. She is one of my closest buds when it comes to blogging, cooking and also she is a younger sister to me. I have had the privilege to meet her in person few months ago and she is as beautiful as her personality. I really want to thank God for giving me such a lovely person in my life and also for my blogging platform without which I am not sure how we would have met. Divya is a wonderful and most famous blogger whom I am sure you would know and needs no introduction. She is fantastic in all that she does, although she is younger to me I admire her a lot as a blogger and as well as an individual. She is way to humble to accept compliments and there are very few friends who really stay with you. Divya is one of those who has helped me in my blog journey and also a sister with whom i share loads, apart from blogging too. 

As I said we wanted to celebrate Divya's Birthday by cooking, clicking and posting one of her famous recipe and publishing it together. I have lagged back in the publishing part since I was not keeping to well. But somehow I wanted to post the recipe on her special day. Divya sis hope you are having a wonderful day and this is a good surprise for you. Hugs and wishing you many many more happy returns of the day.


CRAB FRY RECIPE

Recipe Source ~ Divya
Cook & Prep time ~ 25 mins
Serves ~ 3-4
Serving Suggestion ~ white rice, rasam/sambar

Ingredients

Crab - 10 (I used small sized crabs)
Large onion - 1 (finely chopped)
Large Tomato - 1 (finely chopped)
Lemon - 1 tablespoon 
Red Chili Powder - 1 and 1/2 tsp
Kashmiri Red chili powder - 1 tsp (for color)
Turmeric powder - 1/2 tsp
Curry leaves - 1 spring
Salt - As per taste
Mustard - 1/4 tsp
Ginger garlic paste - 1 tbsp
Oil - 2 tbsp

Method
  • Wash the crab pieces with salt and water well. If need you can add turmeric also to clean. I bought the crab cleaned and cut but if you intend to clean the crab remove the hard shell and clean it.
  • Place a wide pan on the stove once its hot add oil once the oil heats up add the mustard seeds and wait for them to splutter. Now add the curry leaves and chopped onions and saute well until the raw smell goes and onions are cooked well and turn brown. 
  • Now add the ginger-garlic paste and let it cook well until raw smell goes, this will take 2-3 minutes. Add the chopped tomatoes and let it cook covered for 3 minutes.
  • Add the spices - turmeric, red chili powder, kashmiri red chili and salt. Cook until the oil separates from the masala. This is very important
  • Once oil separates add the washed crab and mix well until all the crab are well coated with the masala. Now add 1-2 cup water and cook with a covered lid on medium flame for 5-7 minutes.
  • Remove from flame and add the lemon juice
Serve hot along with white rice, rasam and sambar


Cooks Wisdom

- Make sure the crab is well cooked. I used blue shell crab so as it cooks it turns orange, this is a good indication that the crab is cooked well
- This is a light curry and can be had with rice itself.
- I altered the recipe by adding curry leaves and kashmiri red chili powder for extra flavor and color
- I made the curry mild in spice by reducing the red chilli powder unlike the original recipe, you can add more spice if required

Vangi Bhath | Brinjal Rice Recipe | Lunch box recipe

$
0
0

If there is one vegetable that I really love it would be Brinjal, the irony is I don't have much recipes featuring this vegetable in my blog. Hopefully before completing another year I post few of my favorite dishes using brinjal. When I was home a month back Amma prepared Vangi Bath something which is very famous in Karnataka and Andhra, for me it was the very first time that I ever tried it. Now you know what would have happened I totally fell in love with it, simply because it had Amma's magic touch ;-) and also that it had brinjals.
I am part of Vegan Thursday a group hosted by Priya Suresh aks where we post Vegan recipes every first and last thursday in a month. This recipe was intended to be posted last week but I missed to post it last week.


VANGI BHATH RECIPE

Serves ~ 3-4 generously
Cook & Prep time ~ 30 mins
Recipe Source ~ Amma
Serving suggestion ~ with curd, appalam

Ingredients

Cooked rice - 2 cups
Brinjal (violet variety) - 3 medium
Potato - 1 large
Onions - 2 medium sliced
Garlic - 2 pods crushed
Ginger - 1 and 1/2 inch chopped
Lemon juice - 2 tsp
Turmeric powder - 1/2 tsp
Salt - to taste

To powder 
(dry roast all ingredients one by one, once cooled down grind to a powder)

Coriander whole - 1 tbsp
Red chili - 4 large
Chana dal - 1 tbsp
Whole Jeera - 1 tsp
Peppercorns - 10
Cloves - 2
Coconut shavings - 2 tbsp
White sesame seeds - 1 tbsp
Groundnuts - 1 tbsp

To Season 

Oil - 2 tbsp
Mustard seeds - 1 tsp
Jeera - 1 tsp
Hing - a generous pinch
Curry leaves - 1 spring


Method

  • Cut the brinjals into this stripes and put them in water mixed with some turmeric powder and salt. (This will keep the brinjals from turning black). Cut the potato into thin stripes. In a pan heat 1 tsp of oil and saute them well till they are crushed.
  • Heat oil in a broad pan. Add the mustard and jeera. When they splutter add the hing and curry leaves. Add the onions and saute well till they turn transparent. Add the ginger and garlic and brinjals. Saute for 2 or 3 minutes till the brinjals are nearly done. Add the potato pieces, fry for 1 or 2 minutes or until it is well cooked.
  • Add the turmeric powder, ground masala powder, salt and saute well. Add the cooked rice, mix gently. Add the lemon juice, mix well and check for salt and spice. Let it cook on low flame for 2 to 3 minutes.  add the sesame and groundnut powder and coriander leaves. mix well and remove from fire.                                                                  


Cooks Wisdom 

- You can add cashewnuts for more additional flavor
- Adding roasted groundnut powder enhances the taste 
- Make sure that the rice grains are separate and not too mushy


Classic Black Forest Cake ~ Chit chat with Vineetha Susheeb of Malabar Ruchi

$
0
0

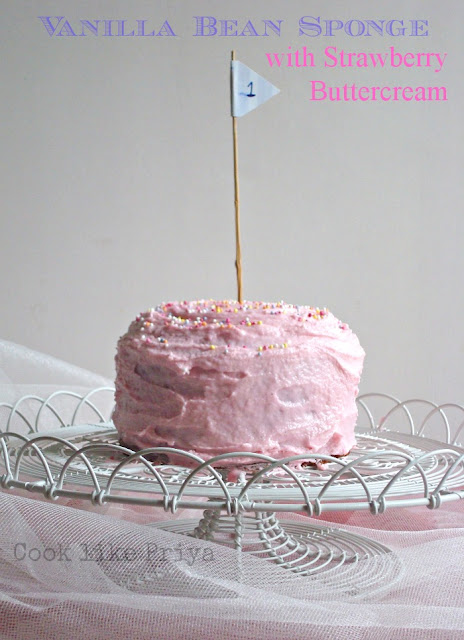
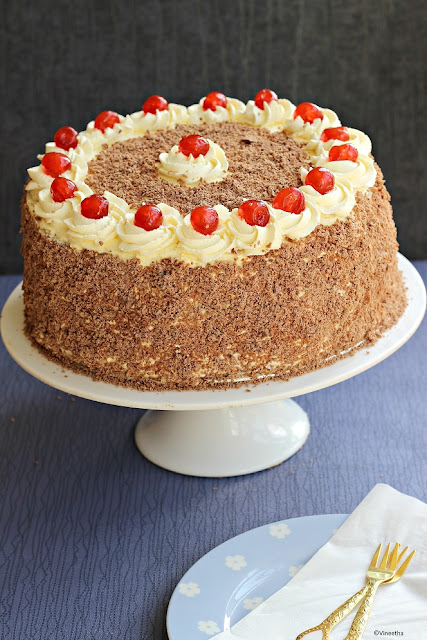
Its really a pure joy for me to share my little blog with some of my wonderful friends who are bloggers too. Today I have a special friend who has amazed me with her bakes and Indian recipes so much that I almost seem to drool over her creations every single time. She is one charming person who is so friendly, caring and someone who is a pure joy to be around with, I am sure you must have guested who is it by just looking at the cake above ;-) its none other than Vineetha Susheeb who blogs at Malabar Ruchi. Vinee as I call her is one of the bloggers whom I have meet in real life too. She is an excellent baker and surely has an eye for detail to all her recipes. Vinee you already know this I not only admire your recipes but also your lovely photography skills that simply bring out all your luscious creations. 

So few months back I had reserved a spot for Vinee for a guest post in my blog and she so greatly accepted to do one almost instantly. To be honest the anticipation of what she will make or bake was too much of a torture to me. And to keep the excitement sure enough Vinee told me she had baked a Black Forest Cake just for the guest post. Now tell me how can I not be excited when my lovely friend baked my favorite cake just for me. Vinee honestly today seems like my birthday for sure :P thanks a lot hon for the lovely cake, simply drooling over it...

I have few of my favorites which I would love to try from Vinee's blog - Strawberry jam, Eggless Cinnamom rolls, Malabar Chicken Biryani, Pirate pizza, Coconut cupcake, Carrot cupcakes and many more. What I really love about her blog is that she not only has recipes from her hometown Kerala but almost seems to have versatility in her recipes right from Biryani, Suchi, Cake, desserts and so on.

Vinee so happy to share my space with you today and thanks a lot for taking time to do the chitchat really enjoyed doing this post with you.... hugs


CHIT CHAT WITH VINEETHA

1. Let us know a brief about yourself and your education background?

That’s quite tough,well..people who know me tells me often that I am a naive person and kind of push over. I am friendly by nature and treasure my friendship a lot. I forgive and forget things quickly so I don’t have any enemies. Regarding my qualification I did a masters in Pharmaceutical chemistry but now I think will excel better in cooking and baking than my subject 

2. What inspired you to start a food blog?

It was hubby who inspired me to start a blog, he used to appreciate my cooking a lot even during my initial days of my cooking which gave me all the confidence to try new things and to even start a blog.

3. Who got you interested in cooking? And whose cooking style is your biggest influence? 

I think I had that interest deep inside me which I discovered only after marriage with my hubby's help. My cooking was influenced mostly from my mum during the initial days but now it is from the internet and talented blogger friends around me .


4.Which cuisine according to you seems more challenging to cook up?


Honestly I don’t have an answer for that, since I cook Indian food everyday its not challenging for me but if I try something new from any other cuisine I find it challenging and keep my fingers crossed till I taste it.


5. You have a lil adorable son and what are his favorites from your blog? Being a mom you must face challenges to feed your little one how do you overcome them on a daily basis?


Thank good my little one is not a picky eater, he eats everything and is willing to try anything new, So I call myself as lucky mum when it comes to feeding my kid, he eats by himself without any complaint unless its spicy ,so I always make sure that food is not spicy for him or make it mild by mixing with yogurt.


6. You have a great collection of recipes in your blog, and most of your bakes are exceptional, are these recipes a result of demand from hungry tummies at home? or is it a personal interest to try new recipes?


Ha ha..No,it’s not at because of the demand from hungry tummies, it’s just because I get bored of eating the same thing. It also works as a remedy when I get too lazy to cook,so if I have to try anything new, I will be of full energy and don’t mind cooking or standing in the kitchen longer and in the end we get to eat something new too.


7. Being an awesome baker that you are, you must be having few baking legends as your inspiration to bake, do name a few for us?


Oh no don’t call me an awesome baker, I am still learning and there is a long way to go before I call myself a good baker. But my inspiration to bake is from Nigella Lawson, Rachel Allen, Merry Berry and last but not least fellow bloggers 


8. From a wife, to a mom, to a food blogger... how has your life shaped so far and what are your other passions apart from cooking?


The role of a wife was quite easy but after being a mum I had to say good bye to to my careless attitude and become more responsible. I think being a  food blogger is much easier than the wife and mum role, but finding time for blogging is quite challenging.

I had many passions before I got into blogging, I was so into arts and crafts and I have done quite a few glass paintings, metal embossing, nib painting, ceramic modelling, fabric painting, flower making and all but now after cooking, blogging and household chores, I don’t find time for my other hobbies.


9. Being a food blogger we all get into the habit of prop collection, food photography and also writing interesting intros to posts. What is your favorite aspect of blogging and how do you manage to tick the cards with the above?


Now I am so much into collecting props (read junk) in the name of blogging but I love my props which is making blogging more interesting these days and photography is something which I working on now and I have to say the props have inspired me a lot improve my pictures. I also like to scribble something before goingto recipe which I believe brings some life to the post .


10. You are too good in fondant cakes, how did you learn to make them? is there a basic recipe or a start up recipe from your blog to guide us in making fondant cakes?


I am self taught when it comes to cake decoration and I still believe that my cakes have lots of room to improve and I am still learning. I am not a perfectionist and lose patience easily, so by the time my decoration is almost half done I lose my patience which reflects on rest of the decoration. These days I have started posting few step by step clicks on how I made figurines and all but in future I will try and do post some basics which  might help newbies .


Over to Vinee....

Priya and I share a special friendship and I was really lucky to meet her in person when she came for Bloggers buzz in London. Ever since we have been catching up every now and then through phone calls and mails and the real bummer was when she has moved back to India. I really wish she still lived here. She is a talented blogger and I really like her  South Indian specials as well as the  classic bakes. I myself have tried her Raw mango rice and we all loved it.


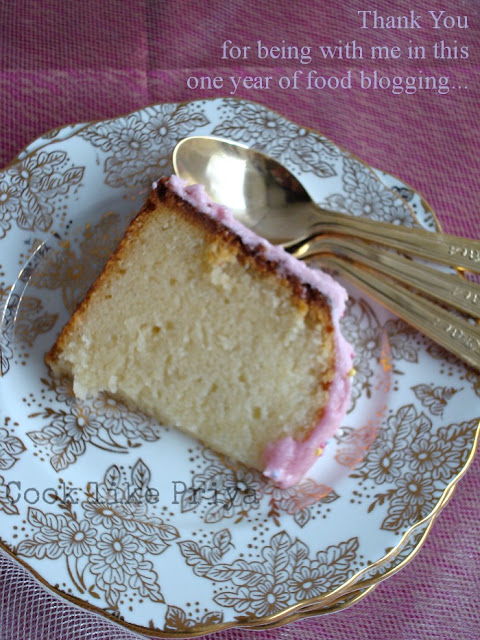
Talking about Black forest cake, I have tried black forest cake quite a few times and expect one time, all the  other time cake came out so well and it was a real treat. So if you are planning to make this I would advise you to be a bit careful with folding because if you over do the folding you might end up with a bread like cake due to the formation of gluten, especially while making a genoise sponge ( the one I made for this recipe ), it is better to under fold it and if you get it right I assure you that it will be an amazing cake and one of the best black forest cake you can make. I can assure you  this because I have tried few other black forest recipes and have even posted 2 different recipes for black forest cake  in my blog but those two were not as delicious as this one. 

BLACK FOREST CAKE RECIPE

Recipe Source ~ Joy of Baking
Serves ~10 generously
Makes ~ 9 " cake (I had tripled the recipe to serve 25)
Prep time in total ~ 30 mins
Bake time ~ 30 mins
Cooling time ~ 2 hours

Ingredients

For genoise sponge

Unsalted butter – 42gm/ 3 tbs (melted )
Cake flour – ½ cup / 60 gm
Cocoa powder – 1/3 cup/ 30 gm
Sugar – 2/3  cup / 135 gm
Eggs (large ) – 4 no
Vanilla extract – 1 tsp
Salt – ¼ tsp

For sugar syrup

Sugar-1/2cup
Water - 1 cup
Brandy - 2 tbs

For filling

Doublecream – 600 ml ( 2 ½ cup)
Powdered sugar- 5tbs or according to your sweetness
Glaced cherries - 200 gm

For decoration
Grated chocolate/ chocolate strands
Cherries


Method

  • Sift cake flour, cocoa powder, salt and keep it aside.
  • In a heat proof bowl break 4 eggs and add sugar. Whisk them  over a simmering pan of water for about 5 minutes, transfer it into the bowl of an  electric mixer and beat on high speed for about 5 minutes. The batter will fall like thick ribbons.
  • Add vanilla extract and beat.
  • Add 1/3 rd of the sifted flour to the egg mixture and gently fold in.
  • Add the other 1/3 rd flour and  gently fold in and finally add rest of  flour and gently fold in. Do not over fold.
  • Take 1 cup of the batter and gently fold it with melted butter (melted butter is not added directly to the whole of the batter to keep the  lightness of the batter)
  • Pour the butter flour mixture to the remaining batter and gently fold in.
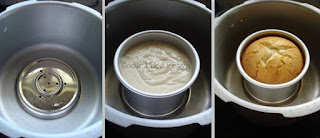
  • Pour the batter into  a greased 8 inch or 9 inch cake and bake in a preheated oven at 180 degree celsius for 20-25 minutes or until a tooth pick inserted comes out clean. Cool on a wire rack before removing from pan.

Making the sugar syrup
  • In a saucepan add water, sugar and brandy and place over the flame until sugar has dissolved. Let it cool down.


Making  Whipped cream frosting
  • In a  big bowl pour the cream, add powdered sugar, vanilla extract and beat until stiff peaks are formed.


Assembling the cake
  • Using a sharp knife cut the cake into two layers. Turn over the cake to make the top of the cake facing bottom.
  • Take one layer of cake and place them on a cake stand /board and with a tooth pick gently pierce  the sponge. With a small spoon pour the sugar syrup on the sponge.
  • Once its soaked spread the whipped cream evenly and also spread some cherries above the cream.
  • Place the second layer on top of it and repeat the same process of moistening the cake with sugar syrup.
  • Cover the whole cake with rest of whipped cream  and  decorate as u like with grated chocolate, cherries and cream.

Wheat Ladoo | Palm Jaggery Indian sweet recipe | No ghee Ladoo

$
0
0

Wheat Ladoo was another recipe that I picked up from Divya Pramil's space for her virtual birthday party due to some other commitments I took time to post this recipe in my blog. So here it is a lovely perfectly sweet and totally guilt free ladoos without any ghee / fattening ingredient. Although I bought palm jaggery long back in the idea of using it I never really used it up and was wondering what to do with it, that's when I saw this recipe in Div's space and thought I will give it a try. I tried it right after lunch on a Saturday evening wondering how to satisfy the sweet tooth and this sure did satisfy my craving for something sweet. 

Verdict - We both really loved these guilt free ladoos :-) they are mild in sweetness and taste great.


Recipe Source ~ Youtoocancook
Makes ~ 10 ladoos (medium to small)
Cook & Prep time ~ under 15 minutes

Ingredients

Wheat Flour - 1 cup / 100 gms
Palm Jaggery/ Karupatti - nearly 1 cup / 100 gms
Elaichi Powder/ Cardamom powder - 1/4 tsp
Water - 1/4 cup / 10 tsp

Method
  • Take a wide pan, put the wheat flour on it and place on the stove on medium-low flame. Dry roast for 2-3 minutes until a fragrant aroma comes. Remove from flame and set aside
  • In another pan heat the water, add the broken pieces of palm jaggery / karupatti along with the cardamom powder. In medium flame bring it to a boil until all the jaggery is fully dissolved. Remove from flame and strain it.
  • Now add the jaggery water to the roasted flour while it is still hot. Slowly using your hands combine to form firm balls. Remember it should not be too soggy or wet but dry.
  • Hold each ball of flour firmly by pressing it a little. Place on a serving tray.
Serve as a dessert or quick snack


Cooks Wisdom 

- Make sure that you add the wheat flour to a dry pan and then place it on the flame on medium-low heat
- You can alternate palm jaggery by using regular jaggery although the taste would differ.
- Its good to strain the jaggery syrup since it will have some particles in them

Chicken Ghee Roast | Spicy Chicken Side Recipe | Mangalorean Chicken Recipe

$
0
0

Its been a while since I posted a Chicken Recipe in my blog. Not like I am not including Chicken into my diet, its just that sometimes I am not into a blog mood to plate and capture what I cook, does this happen to you? So after a long halt I am back with one finger licking chicken recipe that was a super hit at home over the weekend. The aroma of ghee and the freshly ground spices gives a natural lift in flavor. Don't panic when you hear the word ghee in this recipe, well that's the main ingredient for this one so may be you can adjust the amount of ghee to the recipe but still you are sure to fall in love with the flavors. Also one important thing to note is that this recipe does not call for any onions and tomato, can you believe that? well you sure have to... I made this curry to go with the usual South Indian staples Sambar and Rasam. Although I surely recommend to make it along with Jeera rice or any kind of Pulao or Rice recipe.

Chicken Ghee Roast is a famous chicken side from Mangalore. Its spicy and tangy, although you can adjust the spice level to suit you. Another important thing to note is that I used dry red chilli and mind you the color of the dish does really vary depending on the kind of red chilli you use. In case you are someone who does not like too much spice to the dish just reduce the number of dry red chilli and add 1 tsp of kashmiri red chilli powder, it gives a lovely color and the spice is moderate too.


CHICKEN GHEE ROAST RECIPE 

Recipe Source ~ Cherie
Prep & Cook time ~ 25 mins
Serves ~ 3 generously 
Serving Suggestion ~ Appam, Dosa, Idly, or any rice variety

Ingredients

To Marinate (min 4 hrs/ overnight)

Chicken - 1/2 kg cut into medium pieces
Curd - 3 tbsp
Lemon juice - 1/2 lemon
Salt - 1 tsp

To Grind

Dry red chilli - 15 nos
Corriander seeds - 2 tsp
Cumin - 1 tsp
Peppercons - 2 tsp
Fenugreek seeds - few
Garlic pods - 10-12
Tamarind paste - 2 tsp

For the Roast 

Ghee - 4 tbsp
Kashimir Red chili powder - 1 tsp (optional) - use only if you are reducing no of red chilli in recipe
Curry leaves - 1 spring

Method
  • Marinate the chicken with the ingredients mentioned under 'to marinate' and set in the refrigerator for 4 hours. Later take it 30 mins prior to preparing the ghee roast so that it comes to room temperature
  • In a dry wide pan once hot add one ingredient at a time (except garlic & tamarind) under to grind and dry roast until aroma comes, set on a plate to cool down and grind along with garlic and tamarind paste to a paste. You can add little water to help grind if required
  • In the same wide pan heat 2 tbsp of ghee and add chicken which is in room temperature  Let it cook upto 80% in the ghee. Once done remove from stove and place on a bowl separating the masala water from the chicken
  • In the same pan add the remaining ghee and the ground paste let it cook for 5-6 minutes until the raw smell goes. Now add the curry leaves and the chicken pieces. Coat all the chicken pieces with the masala paste and let it cook for 3 minutes
  • Now add the chicken water and more water if required, add salt. Cover the pan with a lid and let it cook under medium flame for another 5-6 minutes. 
  • If you want it semi gravy you can switch off at this stage or you want to to be dry cook further with open lid
  • Once done serve with your favorite main and enjoy

Cooks Wisdom

- You can add 2 varieties of red chilli for this recipe the ordinary ones along with Kashmiri red chilli
- The curry that I made was bit spicy you can reduce the number of red chilli and add Kashmiri red chilli powder to get the color
- Make sure that you do not over roast/ burn the spices else the curry will taste bitter
- You can soak a blueberry sized tamarind in 2 tbsps of water to form a paste in case you don't have tamarind paste
- You can also garnish with coriander leaves.


Sweet Corn Soup | Light and Healthy Soup Recipe | Vegan Soup

$
0
0

We a group of  blogger buddies wanted to celebrate the Birthday of Vardhini Koushik who blogs at Cooks Joy. We all wanted to celebrate her birthday by doing virtual recipe treats all picked from her lovely space. Vardhini to me is a lovely friend and a fantastic blogger, I started to visit her blog right from Dec-12 and her recipes never cease to stun me. She has a great eye for photography and I love her usage of colors in pictures and simple yet elegant plating. I am so happy to pick one of her own creations Sweet Corn Soup. I really loved it so much although I am not a soup person. 

 Happy Birthday Vardhini and wishing you all the best that life has to offer... Have one fantastic day!

Verdict - I loved how simple the recipe was and it was very filling, not spicy yet soothing 


SWEET CORN SOUP RECIPE

Recipe Source ~ Cooks Joy
Serves ~ 2 generously
Cook & Prep time ~ 20 mins

Ingredients

Sweet corn - 1 cup (cooked)
Onion - 1 small chopped
Carrot - 1 medium grated
Cabbage - 1/2 cup grated
Salt- to taste
Olive oil - 2 tsp
Pepper - as required

Method

  • Blend the cooked sweet corn along with 1 and 1/2 cup water, strain and discard the grainy bits
  • Heat oil in a pan add onions saute for 2 minutes, add the carrots and cabbage saute for 2 minutes, do not overcook as you want them to be crunchy
  • Now add the sweet corn puree and let it boil for 2-3 minutes, Add salt and pepper and serve hot
Cooks Wisdom

- Original recipe does not include onions but I added for more flavor, you can skip if you do not like onions in soup
- I grated the vegetables you can chop them fine 
- Do not overcook the vegetable as the soup tastes great when the veggies are crunchy


Quick Idly Dosa Batter Recipe | How to make soft Idlies | Step by Step

$
0
0

A South Indian can never be without Idlies... Isn't this so true? Idly, Dosa, Vada, Sambar are common names down South and almost every household will have a version of their own rice batter. Right from babies to adults everyone seem to enjoy this traditional breakfast recipe equally. After marriage one of the challenges I had was to make idly batter and it took me a while to get the right proportion to make the perfect soft idlies. I somehow prefer the homemade idlies compared to the ones we get in tiffen centers. To my knowledge I have come across dozens of recipes and tried to test how it works. Although Amma has her traditional recipe of soaking urad dal and dly rice separately to grind into a smooth batter. I somehow consider this one recipe which is quick and easy, my go-to recipe most days. Thanks to Jeyashri for this lovely quick recipe that results in soft idlies and perfect crisp dosas.

What I really love about this recipe is the simplicity of soaking all ingredients together for 4 hours and grinding it to a smooth batter and letting it ferment overnight. And the result is soft soft idlies like spongy pillows. Try it for yourself and see how much your family will love you for this perfect breakfast.
IDLY DOSA BATTER RECIPE (QUICK METHOD)

Recipe Souce ~ Jeyashri
Prep time ~ 5 mins
Grind time ~ 30-40 mins
Ferment time ~ overnight
Batter Quantity ~ serves idlies and dosas for a week (family of 2)

Ingredients 

Urad Dal - 1 cup
Idly Rice - 4 cups
Aval/ Poha - handful
Water - as required to grind batter
Salt - to taste

Method
  • Wash the urad dal, rice and poha in water 3-4 times and soak them with some more water for 4 hours.
  • Turn on the grinder, set timer for 30 minutes. Now slowly add the soaked ingredients in the grinder, you can keep the excess water to be used later
  • Now slowly as the batter is grinding add water little at a time and do this is small batches (approx 15 mins once) you need not use up the entire water.


  • Check the consistency of the batter it has to be smooth and without grains of rice and it has to be thick and not too liquid
  • Once it is done trasfer to a large stainless steel vessel and add salt, mix well and cover the lid. Keep aside overnight.
  • Next day you will find the batter raised so its perfectly done, now using a laddle mix down the batter

  • Now grease the idly platter with little oil and add water to the vessel, as it comes to a boil pour the batter to the idly moulds and keep it on the steamer vessel. Cover the lid and let it cook for 10-12 minutes. 
  • You can check the doness of the idlies by inseting a knife in the center and when it comes clean the idlies are done
  • Now using a flat wide spoon scoop the idlies from the mold and store in a hot pack to be served later


Serve hot with your favorite side or chutney.

Cooks Wisdom

- Always use good quality urad dal as it makes a huge difference in the taste and softness of idlies
- I have not add pictures of dosas here in this post but the same batter can be used to make crisp dosas
- I usually soak the ingredients by 12 noon and grind batter by 4 pm and let it sit to rise overnight
- The temperature and climate also plays a huge role for the batter to rise
- Also make sure you do not keep the batter in the grinder next to the hot motor for long
- Do not add more poha it will result in flat idlies 
- If making dosas add little more water to the batter to make it loose

Mango Fish Curry | Mango Meen Kuzhambhu | Coconut Mango Fish Curry

$
0
0

Few months back when I posting a fish curry recipe, I was talking about this Mango fish curry that Amma makes and guess what when I was home I got to try it :-) Infact I demanded her to make this fish curry as we were in the peek of mangoes everywhere. I still see vegetable vendors and super stores selling mangoes and I am not complaining one bit ;-). Wait wait I gotto tell you that I love to have this curry cold the next day with warm rice or may be even curd rice. Weird right? :P well that's my taste.


Mango Fish curry is a mild spicy curry that is fragrant and has cut raw mango pieces, the tartness from the mangoes along with the does of coconut in the curry and the aroma of fish all combines to form that perfect curry. Mango Fish curry is actually a recipe born from Kerala, each household has their own version and this is Amma's perfect signature dish. I have seen some recipes where instead of coconut paste coconut milk is used. She uses a particular variety of fish called Mathi / Chaala / Sardine. There is something about this fish that goes so good in this curry. Mathi is a small tender fish that is oily, they are usually inexpensive and easily available. Although if you are someone who does not like Mathi you can replace with your favorite fish nevertheless the end result is absolute bliss. I think I have said enough now lets move on with the recipe 

MANGO FISH CURRY RECIPE

Recipe Source ~ Amma
Serves ~ 4 generously
Cook & Prep time ~ 30 mins
Serving Suggestions ~ White Rice and appalam

Ingredients

Mathi Fish/ your favorite fish - 8 nos
Tomatoes (ripe) chopped - 2
Raw mango (large) - 1 chopped into cubes
Coriander powder - 1 tbsp
Red chili powder - 1 - 2 tsp (depending on heat tolerance)
Turmeric powder - 1/2 tsp
Cumin powder - 1/2 tsp
Salt to taste


To Grind

Shredded coconut - 1/2 cup 
Shallots - 8-10 nos
Green chili - 4 nos
Garlic - 4 pods
Ginger - 1/2 inch piece
Cumin - 1/2 tsp
Curry leaves - 5-6

To Season

Coconut oil - 1 -2 tbsp
Mustard seeds - 1/2 tsp
Cumin whole - 1/2 tsp
Dry red chili - 1 no
Curry leaves - 1 spring


Method
  • Clean and cut the fish into two. rub the fish with salt and lime juice. (juice of 1/2 lime & 1/2 tsp salt)
  • In a vessel, put all ingredients except the fish. Add the ground masala paste. Add enough water (about 2 cups). Mix well with hand.
  • Now keep the vessel on stove and let the gravy simmer on medium flame and thicken. Stir gently and check for salt and spice.
  • Now add the fish pieces. After 5 mts. a nice aroma will come. Now remove from the stove.
  • Do the seasoning in the order given and pour into the gravy. Mix well and keep aside for sometime (30 mins) for all the flavors to mingle
Serve hot with white rice and appalam


Cooks Wisdom

- Any variety of small fish or prawns can be used.
- Coconut oil gives additional flavour to this curry but if you are not a fan of coconut oil use your preferred oil
- Make sure that the raw mango that you use is bit sour and not sweet
- You can add coconut milk instead of coconut paste for a thin curry

Carrot Halwa | Gajjar ka Halwa | Carrot Halwa with Khoya to celebrate a 1000 fans!!!

$
0
0

Carrot Halwa is my most favorite dessert, I love to have it warm along with a scoop of Vanilla Ice cream that's my kind of dessert ;-) have you tried this combination? In most South Indian weddings this combination is served as a dessert during the wedding feast. The orange color and the topping of fried nuts and raisins does give a magical color to this yumilicious dessert. Although we call it carrot 'Halwa' the texture is soft and does not hold a shape like most Indian halwas, the soft juicy taste of carrots and melt in mouth taste of khoya makes this a dessert to die for, Oh not literally :P. Ok ask me why such a special dessert out of the blue? well if you are someone who follows me in facebook you would have known that my little FB page crossed 1000 likes and I felt it was time for a little celebration and hence posting this delicious and most loved dessert here. 

Thanks to all my facebook fans - you all inspire me to cook a lot :-)

My version of this dessert is to top with khoya although if you are someone who does not like Khoya in Carrot halwa you can skip it. Cooking the shredded carrots in milk until well cooked does do magic to this dessert so do not do it when you are in a hurry. Make sure you also do a big batch since its sure to get over fast ;-). Now lets move on to the recipe


CARROT HALWA RECIPE

Prep time ~ 20 mins
Cook time ~ around an hour
Serves ~ 4 generously
Serving suggestion ~ warm along with vanilla ice cream

Ingredients

Carrots - 20 nos / around 2 kg - 4 cups of grated carrot
Boiled milk - 2 cups
Sugar - 1/4 cup or more
Khoya - 1/2 cup
Ghee - 2-3 tsp
Nuts & raisins - 3-4 tbsp, chop the nuts
Cardamom powder - 1/2 tsp (optional, I have not used it)

Method

  • Add ghee to a heavy bottom wide non-stick pan, once it melts add the nuts and raisins fry them until golden. Using a slotted spoon remove them from the pan and set aside
  • In the same pan add the grated carrots and saute until the ghee is well coated on the carrots
  • Now add the boiled milk to the grated carrots. Bring it to a boil and then simmer to medium-low flame and let it cook until all the milk evaporates.
  • Once all the milk evaporates fully and the carrots are cooked completely add sugar and mix well. Within 2-3 minutes the sugar melts and combines well.
  • Now add shredded khoya to this mixture and give it a good mix.
Serve warm along with cold vanilla ice cream ;-)


Cooks Wisdom 

- I shredded the carrots to medium size, this helps it to remain the shape once cooked. If its too fine then it will get mashed 
- I used store bought khoya, you can make your homemade version 
- Adding cardamom powder is totally optional, personally i do not add cardamom powder but you can add if you want it
- Alternately you can also add saffron strands, I have not added it for this recipe
- Always add sugar only after the carrots are fully cooked
- Carrots in general are sweet so adjust the sweetness accordingly
- During the cooking process of carrots make sure the flame is medium-low so that you don't burn them

Adai Dosa | Dosa with lentils | Protein rich breakfast | South Indian Breakfast Recipe

$
0
0

Adai dosa or orange dosa as I call it is a healthy breakfast recipe from the South. Adai is a combination of rice with a range of colorful lentils all soaked together and ground to form a thick batter and later spiced up. Usually Adai is served with Aviyal, I really wonder who made that pairing, it seems to work really well, but you can also make coconut chutney or any kind of chutney to go with this spicy dosa. My version of making this adai is more like dosa as I don't love to eat a very thick dosa but something that is light and filling. You can easily mix and match with the dals and still you will get a great tasting adai. Mind you the dry red chilis in this recipe might be a lot but it adds color to the dosa and also it totally depends on what kind of red chilis you use. Usually everyone says you can grind the batter using a mixer but I always prefer to grind in the table top grinder as it does the job well and I save some life to my mixer.

Adai dosas are usually thick and can be filled with chopped onions, green chillis, coriander and drumstick leaves but I went the simple way to make them plane. Although they look similar to dosas still there is a unique taste of lentils in these dosas and they are so filling too. Oh did I tell you that this is one recipe that does not require fermentation of batter? you can almost use the batter after it is ground by spicing it. Ok lets move on to the recipe


ADAI DOSA RECIPE

Recipe Source ~ Own
Makes ~ 20 adai
Prep time ~ 20 mins
Grind time ~ 30 mins
Serving Suggestion ~ along with Aviyal or coconut chutney

Ingredients

Oil  - to make adai
Salt - to taste
Turmeric powder - 1/4 tsp
Chopped onions to garnish (optional)
Chopped coriander to garnish (optional)
Chopped green chili (optional)

To grind batter -

Raw rice - 1 cup
Idly rice - 1 cup
Chana Dal - 1/2 cup
Toor dal - 1/4 cup
Masoor dal - 1/4 cup
Urad dal - 1/4 cup
Moong dal - 1/4 cup

To grind spice -

Dry red chilli - 20 nos
Fennel seeds - 1 tbsp
Hing - 1 tsp
Ginger - 1" piece minced
Garlic - 3 pods


Method

  • Take all ingredients mentioned under to grind batter in a large bowl wash it with water 2-3 times and soak in water for 3-4 hours
  • Drain the excess water and grind the ingredients for 20-30 minutes until it reaches dosa batter consistency.
  • Meanwhile grind all the ingredients under to grind paste and add to the batter along with salt, turmeric powder, mix well and set aside for 20 mins
  • Heat a skillet and drizzle oil/ghee now take a laddle full of the batter and make thick pancakes/ dosas, drizzle with more oil/ ghee
Serve hot along with aviyal or coconut chutney


Cooks Wisdom 

- Adding ghee adds more flavor to the adai but if you want an healthy alternative go for gingerly oil
- You can add 1/4 cup grated coconut to the batter if you want more coconut flavor 
- Add more colorful lentils this adds more color to the adai and also you can adjust the no of red chili to the recipe, although I used a lot of them still the adai was not that spicy. if you are worried if it would be too hot just use kashmiri red chilli powder a tsp for the color
- adding ginger and garlic gives and extra punch you can always avoid if you have satvic taste.

Pavakkai Pitlai | Bitter Gourd Coconut Curry | No onion no tomato no garlic recipe

$
0
0

Today's lunch is today's post ;-) call me crazy and that is me. First time I try a curry and it tasted awesome and guess what I just could not resist clicked pictures and vola its on the blog. How I wish my everyday cooking recipes makes an appearance here sigh! If you are someone who has been following me you would very well know that I used to be this Pavakkai hater who turned to be someone who thought ok lets try to cook with pavakkai to someone who loved this bitter veg. I have had few recipes up in this space using pavakkai/ karela/ bitter gourd - like the Pavakkai puli Kuzhambu, Pavakkai Fry and Pavakkai stir fry. Today was one of those days husband was home for lunch and I had pavakkai sitting in the fridge for almost a week and I was ready to explore a new recipe and I stumbled upon Tarla Dalal site and saw this Pavakkai Pitlai recipe. Without a picture my imagination went wild but later thanks to a google search I got a fair idea of how the curry looked.

Pavakkai Pitlai is a recipe from South India I am not sure from which state it makes its origin. The combination of Thoor dal and coconut paste gives it a feel like a south Indian kootu but trust me the flavors are so unique and this is much more than a simple kootu recipe. If you have people in the household who don't like pavakkai this is a recipe to test and try with them ;-) they will end up loving the recipe just like me. It has a tangy, coconutty flavor with the unique taste of pavakkai not the bitter taste. A great company to white rice, today I had paired this curry with kovakkai poriyal and masala chips.


And not to forget another good reason to post this recipe is beacause its Vegan Thursday a lovely event hosted by my dear Priya Suresh aks, since I missed to post a recipe last week thought will do it today without any excuses. So lets move on to the recipe


PAVAKKAI PITALI RECIPE

Recipe Source ~ Tarla Dalal
Serves ~ 4 generously
Cook time ~ 20 mins
Prep time ~ 20 mins
Serving Suggestion ~ White rice, poriyal and pappad/chips

Ingredients

Toor dal - 1 cup
Water - 2 cups to pressure cook dal
Tamarind pulp - 1 cup (from 1 lemon size ball)
Jaggery - 1/2 inch piece
Turmeric powder - 1/2 tsp
Pavakkai/ Karela - 4 medium chopped and quartered
Salt to taste

To Roast & Grind

Oil - 2 tsp
Chana dal - 2 tbsp
Red chili (dry) - 8-10
Curry leaves - 2 spring
Green chili - 4 small
Grated coconut - 1/2 cup

To Season 

Oil - 2 tbsp
Mustard seeds - 1 tsp
Dry red chili - 2 
Curry leaves - 1 spring


Method

  • Pressure cook thoor dal with water and set aside. Soak the tamarind in warm water to estract thick pulp, drain the pulp and set aside
  • In a non stick pan add oil and dry roast all the ingredients one by one starting with chana dal, red chili, curry leaves, green chilli and shredded coconut. Let it cool down and grind it to a paste


  • Chop the pavakkai and quater them soak in salty water for 10 mins. Drain the water and fry them with 2-3 tsp oil until they wilt and the edges turn brown, transfer to a plate to use later
  • In another pan add the tamarind water, stir fried pavakkai, turmeric powder, salt and jaggery and bring it to a boil. Let it cook for 5-6 minutes until the raw smell disappears
  • Now add the pressure cooked dal and mix well, and also add the coconut paste and stir well. Bring it to a boil and let it cook in medium heat for 5 minutes
Serve hot with white rice and pappad

Cooks Wisdom 

- Make sure that the dal is well cooked, I pressure cook my dal for 4 whistles and then mash it with a wooden laddle
- Soaking cut pavakkai in salt water helps to take away the bitterness from the veg
- I had modified the recipe by adding green chilis to add to the heat of the curry
- You can reduce the amount of coconut/ toor dal if you want the curry to be more thin but I prefer it to be medium thick

Linking this tasty Pavakka Pitla to our wonderful event Vegan Thursdays hosted by Priya Akka.

Kanyakumari Nandu Masala | Crab Masala South Indian Recipe | Seafood Indian Recipes- My 200'th Post :-)

$
0
0

My husband and me we both love crab, but I don't make it quite often. Did you know that crab can increase your immunity? this was something new to me, there are also other foods that help to increase immunity like curd, black tea, oats, fish and so on. So if you are someone who suffers low immunity you are sure to try these food stuffs. From the time I started to cook crab there is one thing I have learnt that is to clean crab properly, if you are a first timer in making crab curry please make sure you do it the right way. Today I wanted to try a different crab curry so went online and I found this lovely recipe by Chef Dhamu, he is a well known person down south. I found his recipe so basic just like the usual south Indian kurma but to my amazement the end result was a fingerlicking curry. I have posted few crab curries earlier in my blog like - Amma's Crab curry and Spicy crab fry but somehow this recipe by Chef really stool my heart. 

What really intregued me about this recipe is the name Kanyakumari Nandu Masala. This is a lovely place that I have been to in my childhood and I have visited the famous beach and the sunset point. I have had fond memories of those times, it was during my school vacation leave. Being the border of Kerala and Tamil Nadu their recipes are a fusion of both cuisines and I really wanted to try my hand at it. I think I have said enough now lets move on to the recipe :-) Today being my 200'th post I wanted to share a super hit recipe with all of you...


KANYAKUMARI NANDU MASALA RECIPE

Recipe Source ~ Chef Dhamu
Serves ~ 3 generously
Cook & Prep time ~ 30 mins
Serving Suggestion ~ White Rice, rasam and appalam

Ingredients

Blue shell crab / fresh water crab - 1/2 kg
Onion - 2 medium
Tomato - 2 medium
Curry leaf - 1 spring
Bay leaf - 1
Cinnamon - 1" piece
Cardamom - 4 nos
Fennel seeds/ Sombu - 2 tsp
Turmeric powder - 1/2 tsp
Red chili powder - 2 tsp
Corriander powder - 2 tsp
Pepper powder - 1/4 tsp
Oil - 3 tbsp
Salt - to taste

To Grind

Shredded coconut - 1/2 cup
Fennel seeds/ Sombu - 2 tsp
Curry leaves - 1 spring
Green chili - 4-5 nos

Method
  • Wash the crab and remove the hard shell, scales and rib like segments in running water. Clean thoroughly so that there is no traces of sand in it. Keep aside
  • In a wide pan heat oil, add the whole spices - bay leaf, cardamom, cinnamon and fennel seeds. Once they start to sizzle add the curry leaves, onions and saute until they turn transparent and lose their raw smell.
  • Now add the ginger garlic paste and saute till they lose their raw smell. Now add mashed tomato pieces and mix well, let it cooked under a cover lid until mushy.
  • Now add the spice powders - turmeric, red chili, pepper, coriander powder and salt. Mix well and cover the lid and let it cook to ooze out oil
  • Add the cut crab pieces and mix well until the all the masala is well coated in the crab. I sprinkled some water at this stage, but chef does not add water and lets the crab cook under a covered lid.
  • In the mean time grind coconut, curry leaf, fennel seeds, green chili to a smooth paste
  • Once the crab changes its color to orange, this takes about 5-6 minutes. Add the coconut paste and mix well, let this cook for another 5 minutes in medium with a covered lid. 
  • Once its done check for salt. Garnish with more curry leaves
Serve hot along with white rice


Cooks Wisdom

- Amma always says to add pepper powder to crab curry as it helps to fight stomach upsets, since crab generally causes body heat, Chef does not use pepper powder but I have used in this recipe.
- If you want the masala to be thin you can add water while adding the spice powders
- Make sure you clean the crab really well before making the curry, it usually has traces of sand in them, so clean in running water one piece at a time


Cardamom Cake | Bakery style cake | Basic Sponge snack cake | Tea Kadai Cake

$
0
0

I love cakes and all the simple kind. A perfect spongy simple snack cake with a cup of coffee or tea is my kind of snack. I have tried many such snack cakes and posted in my blog like - Custard marble cake, Vanilla marble cake, Eggless butterless sponge cake, Dates and nuts cake and so on. When my dear friend Sangeetha Priya posted this recipe of Cardamom cake / Tea kadai cake that too using a pressure cooker, I was so excited and wanted to try it. And me being me somehow kept postponing the idea so today as Sangeetha celebrates her birthday, a group of us bloggers planned to do a virtual treat for her by doing a recipe from her space and posting it on her birthday in our blogs. She is a lovely friend and blogger who is to me like a child although she has 2 cute kids. Very caring, friendly and although we have not conversed frequently I can say she is a lovely person to talk to.So you can guess what I made, her very own Cardamom cake :-) it was simply fabulous, on the flip side I used an oven instead of the pressure cooker and the result was it was a super moist cake filled with the lovely cardamom flavor. What was even more pleasing was the aroma of cardamom all over the kitchen as the cake was getting baked. Today being a Saturday husband was home and we both cut the warm cake and gulped 2 pieces :-P don't ever be like us ok wait till it cools down to enjoy. The cake tastes even more superb when its completely cooled.


Happy Birthday Sangeetha wishing you lots of health and happiness throughout the yr :-)


Verdict - Super moist and flavorful cake, I felt the cake was so soft like sponge ball :-) thanks Sangeetha we really enjoyed this cake, this recipe is sure a keeper


CARDAMOM FLAVORED SPONGE CAKE RECIPE

Recipe Source ~ Nitha's Kitchen

Ingredients

All Purpose Flour - 2 cups
Eggs - 3
Unsalted butter - 3/4'th cup or 12 tbsp in room temperature
Whole Cardamom - 5 nos
Powdered sugar - 1 cup
Milk - 3/4'th cup
Vanilla extract - 2 tsp
Baking powder - 2 tsp
Salt - a pinch

Method
  • Dry roast cardamom in a dry pan for 2 minutes, discard the skin and grind it with 1/4 cup sugar to a fine powder, set aside
  • Separate egg white and yolk, set aside. Sift maida or all purpose flour, baking powder, salt and cardamom powder together, set aside.
  • Cream butter and sugar together, to this add one yolk at a time and combine well. Now add the vanilla extract and combine well.
  • Add the dry ingredients and milk alternately to the creamed butter sugar, starting with flour and ending with milk.
  • Now whisk the egg whites until frothy in a separate bowl. now combine it with the cake batter and gently fold.
  • Add to a greased cake tin and place in center of pre-heated oven. Bake at 350 F or 180 C for 50 mintues until a toothpick inseared in center comes clean
  • Remove the cake tin from the oven and set it on cooling rack with the pan for 15 minutes and later remove the cake from the pan, wait until it comes to room temprature and cut into pieces to enjoy
Serve along with coffee/ tea as a snack

Cooks Wisdom

- You can even add rose essence for a unique flavor to the cake batter 
- If you like to pressure cook this cake then place in a pressure cooker 40 minutes do not use any water or sand or cooker weight. Just place a plate inside the cooker and place the cake tin in the center cover with cooker lid and cook in medium- low flame
- To separate egg white from yolk make sure it is refrigerated it is easier to separate them

Kesar Malai Lassi | Saffron Lassi | Indian Summer Drinks

$
0
0

I am a huge fan of lassi's both milk and curd based ones. In this part of the world summer seems to be the ever present season and I have no excuses to prepare lassi's at home. When my dear friend Manjula Bharath posted her Rajastani Thali recipe for SNC challenge, I wanted to prepare this Keasar Lassi recipe almost the same day and somehow a month later I realised it was too late to post the challenge recipe and honestly speaking taking about friendship day that just passed, hmmm I am too bad a friend. So keeping behind the guilt I thought I will try few of her recipes from the challenge and then post it as I find time in my blog. Honestly I have never tried Rajastani cuisine and I am really intrigued by their list of vegetarian recipes that I want to give it a try in my kitchen. So that said I gave this Kesar lassi recipe a go and trust me its one of the best Lassi recipes I have ever tried. It was so flavorful, filling and refreshing. Thanks Manju for this super duper recipe, I am sure will make this quite often. I hope to participate in SNC's upcoming challenged, keeping my fingers crossed ;-)


Recipe Source ~ Desi Fiesta
Makes ~ 2 medium glasses of Kesar lassi
Prep time ~ 5 mins

Ingredients

2 cups chilled milk
1/4 cup cream
sugar as required
Kesar extract - few drops/ saffron soaked in milk - 2 tbsp

Method

Combine all ingredients in a mixer and blend them for a minute until foamy. Serve immediately 

Cooks Wisdom

- Incase your lassi does not have the yellow tint from the saffron u can add a pinch of yellow food color but its not a healthy addition.
- Make sure the milk and nice and chill, if you are using full fat milk you can skip the cream

My other Related Recipes
- Mango Lassi
- Saffron Coconut Burfi

Mushroom & Paneer mixed vegetable Curry | Vegetable Coconut Milk Kurma | Vegetarian sides for roti/chappati

$
0
0

My husband loves Mushroom and I on the other hand love Paneer. We always have these arguments as to you never cook with mushroom / you never let me cook with paneer... does this happen in your house too? grrr. I have always found mushroom to be bland and tasteless, needs a load of other spices and ingredients to boost the dish. I know there are few of you who will say even paneer is almost tasteless, hmmm. Ok lets reserve this debate to another day!. So the other day I decided to do a curry with mushroom and paneer with a load of other vegetables like carrots and beans which we both love along with coconut milk, the result was a great tasting curry to go with almost any recipe like idly, dosa, chappati or even pulao. The curry is very mild in spice, fragrant and flavorful. Husband was happy and so was I ;-)


MUSHROOM & PANEER MIXED VEGETABLE KURMA RECIPE

Recipe Source ~ Own
Serves ~ 4 generously
Prep time ~ 10 mins
Cook time ~ 20 mins
Serving Suggestion ~ Chapathi, roti, pulao, idly, dosa and poori

Ingredients

Button Mushrooms - 4 pieces
Paneer - 15 small cubes
Carrots - 2 mediuem quatered & chopped
Beans - 10, chopped 
Onion - 1 large, chopped
Tomato - 1 large, chopped
Ginger garlic paste - 2 tsp
Turmeric powder - 1/2 tsp
Red chili powder - 1 tsp
Coriander powder - 1 and 1/2 tsp
Garam masala - 1/2 tsp
Salt - to taste
Oil - 2 tbsp
Coconut milk - 1 cup
Milk - 1/2 cup

Method
  • Chop all vegetables, mushroom and paneer set aside. In a large non stick pan heat oil. Add the onions and saute until transparent, add ginger garlic paste to it and saute until the raw smell goes, now add the tomatoes and let it cook under covered lid for 3 minutes until mushy.
  • Now add the spice powders - turmeric, red chili, coriander and garam masala, mix well and add 1/2 cup milk to this. Add the vegetables - carrots, beans, mushroom. 
  • As it comes to a boil prepare the coconut milk (check notes) and once the curry cooking well add the paneer.
  • Now add the coconut milk and let the curry cook further for 5 minutes until well combined
Serve hot with your favorite main

Cooks Wisdom

- Make sure you add paneer towards the end so that they hold their shape
- While making coconut milk add cold water to the mixer about 1 cup and blend for 2 minutes. Using a strainer extract the coconut milk
- To clean mushrooms add them to a bowl of warm water and let it sit for a minute then rub the bulb part of the mushroom with your figner tips and then chop them as you desire
- I added one cup milk to lighten the curry you can go ahead and add 2 cups coconut milk for a rich fragrant curry

Watermelon Agua fresca | Watermelon Cooler Drink | Summer drinks

$
0
0

Watermelon to me is one gorgeous fruit, although not attractive on the outside, I love the color the pinkish red color fruit inside. When I was a kid I used to imagine the inside to be like the Beetle insect :P what do you think? the red fruit base and black dot seeds. I get really excited when I see watermelon during the summer times. Usually we enjoy this fruit cut or just blend it with some sugar as a chilled drink. I always love to try different refreshing fruit drink recipes and tried this Watermelon Agua Fresca and it was superb. This drink is from Mexico and very commonly sold by the street vendors, usually made with less sugar but I have used sugar for a sweet taste. I love the tangy taste of lemon in the drink and the frizzy taste from the soda. Its a perfect drink to welcome guests or enjoy with your family at home.


WATERMELON AGUA FRESCA RECIPE

Serves ~ 4 glasses
Prep time ~ 5 mins

Ingredients

Watermelon - 2 cups chopped
Water - 1 cup (chilled)
Sugar - 2 tbsp or as required
Lemon juice - juice from 1 lemon
Soda - 1 cup

Method

Blend the watermelon with water and sugar in two batches, strain through a medium sieve to remove pulp and seeds. Add lemon juice and mix well. Just before serving add soda to the drink.

Cooks Wisdom

- Add soda water only before serving for the frizzy taste.

Chow Chow Kootu | Kootu with Moong Dal | Simple Vegetarian Curry

$
0
0

Chow Chow Kootu is my all time favorite, Amma makes this every fortnight along with a tangy curry like Kara Kuzhambhu or Pavakkai Puli Kuzhambhu. I love to mix this along with rice and snack with some papad. A rich and filling kootu with loads of vegetables and a good dose of coconut makes this a satisfying dish. R never used to like Kootu and he used to keep a long face but not anymore, since I have done the honors to bring some good tasting food into his life :p well I can say so right?. This chow chow kootu was clicked back home when Amma made it, somehow her consistency and the taste of the dish really varies from how I make it. Hmm I think it does take experience to get the perfect taste.


CHOW CHOW KOOTU RECIPE

Recipe Source ~ Amma
Serves ~ 3 generously
Cook & Prep time ~ 30 mins
Serving suggestion ~ white rice, papad and tangy spicy curry

Ingredients

Chow Chow - 1 cup chopped into squares
Moong dal - 3/4 cup, pressure cooked
Shallots - 5 sliced thinly
Tomato -  1 chopped
Turmeric powder - 1/2 tsp
Salt to taste

For Seasoning

Coconut Oil - 2 tsp
Mustard seeds - 1/2 tsp
Urad dal - 1/2 tsp
Curry leaves - 1 spring
Jeera - 1/2 tsp
Dry red chili - 1 

To Grind

Shallots - 5
Shredded coconut - 3 tbsp
Green chili - 3
Red chili - 3 (adjust as per spice tolerance)
Jeera -1/2 tsp
Garlic - 3 pods
Curry leaf - few

Method

Pressure cook the dal with turmeric powder in 1 cup of water for 3 whistles. Add the chow chow, shallots and tomato and cook till the chow chow is cooked 
well. Add the ground paste and mix well, now add salt and cook till the raw smell goes. Check for salt and spice. Do the seasoning in a small
pan and add to the kootu and stir well. Remove from fire. This kootu must be thick.

Cooks Wisdom

- Adding ghee will enhance flavor but its totally optional, the coconut oil in the recipe gives great flavor

- I love to have this dal thick, this kootu is more of a side dish for rice and any tangy curry
Viewing all 285 articles
Browse latest View live


Latest Images